Professional housekeepers do not work harder than you; they clean with calibrated systems that cut physical effort in half. Adopting these field-tested trade secrets transforms exhausting weekend chores into streamlined, predictable routines.
When you master how professionals stage tools, lift grime, and prevent cross-contamination, you stop repeating tasks that waste precious energy. You will achieve spotless surfaces without scrubbing until your arms ache.
These twelve practical housekeeping tricks protect your fixtures, eliminate wasted motion, and keep every room cleaner between deep-clean sessions.
01 Work in an Unbroken Circle: Top-to-Bottom, Left-to-Right
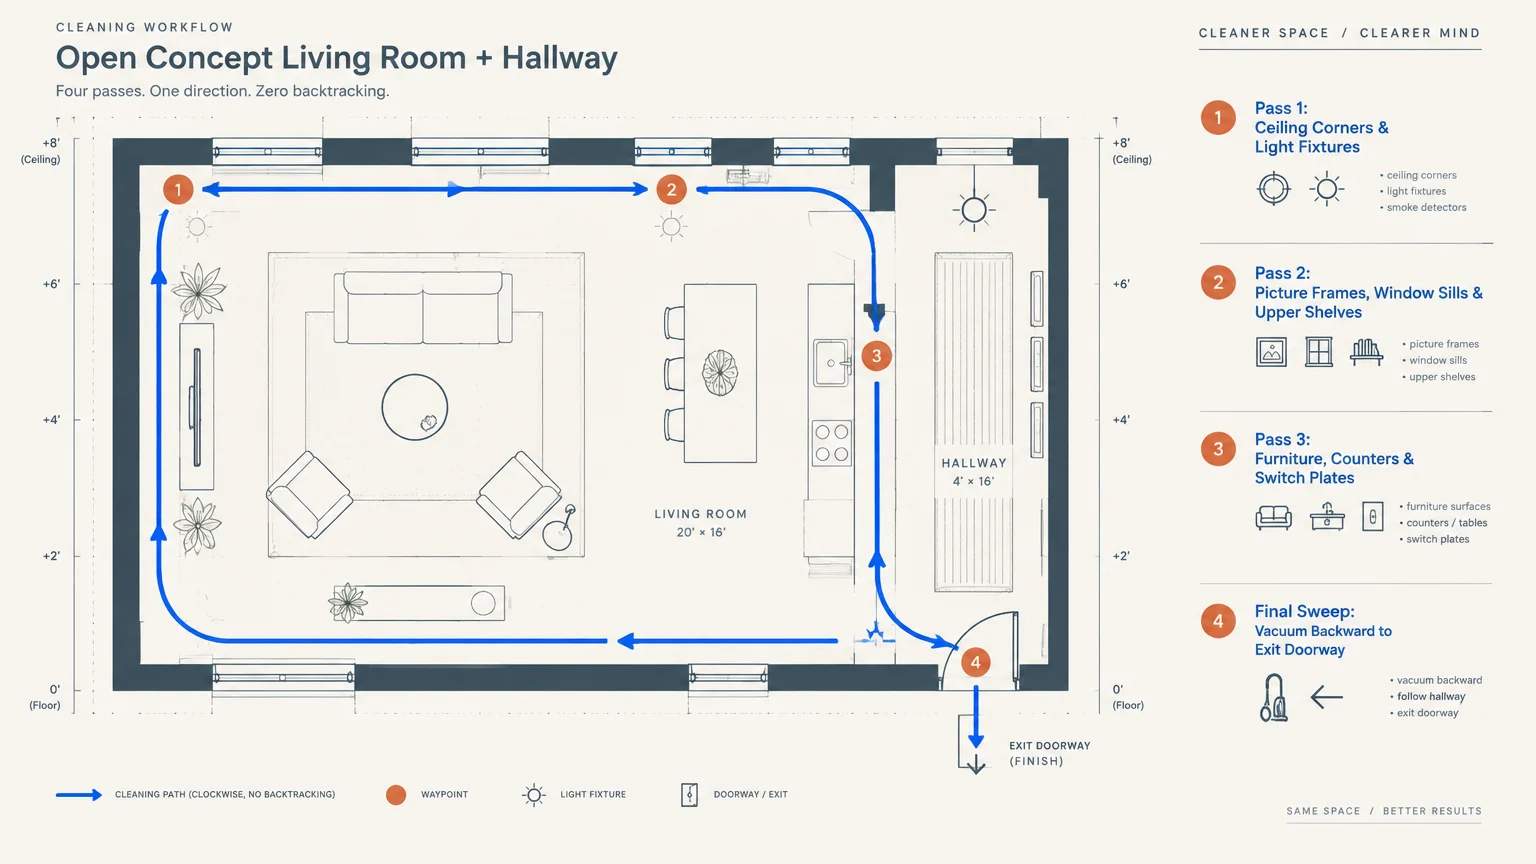
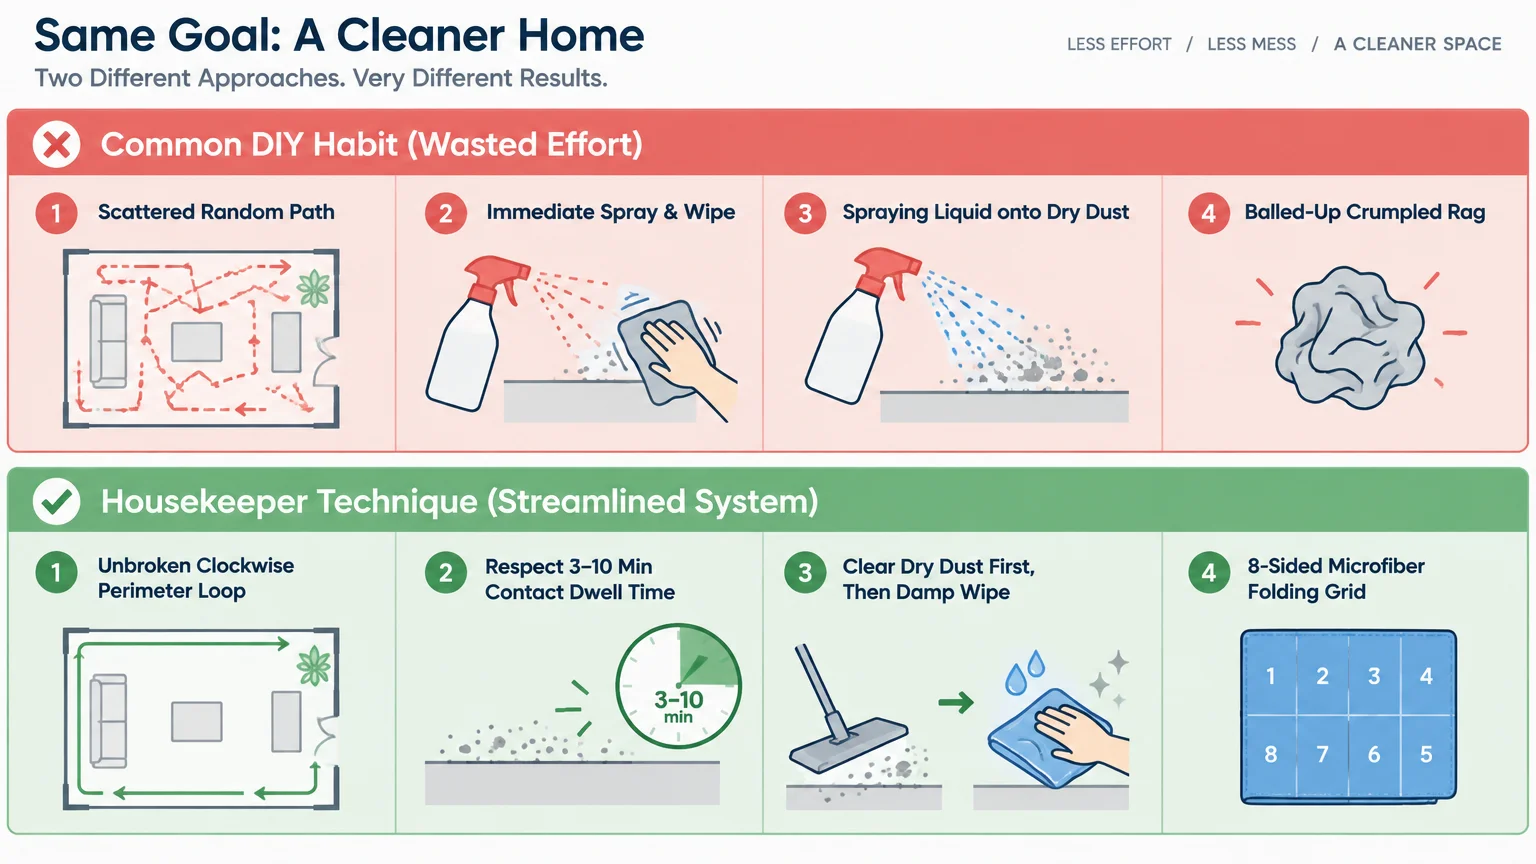
Dusting before vacuuming seems obvious, yet many people clean rooms in a scattered, chaotic pattern. Housekeepers follow a strict perimeter circle to ensure no surface gets touched twice.
Always start at the highest point in the room, such as crown molding, ceiling corners, or upper door frames. Work clockwise around the perimeter, steadily moving airborne dust down toward baseboards.
- Clear ceiling corners and light fixtures first using an extendable duster.
- Wipe picture frames, window sills, and upper shelves on your second pass.
- Clean low furniture, switch plates, and counters on your third pass.
- Finish your sweep in the center of the room by vacuuming backward toward the exit doorway.
This unbroken path eliminates backtracking. You will never drag vacuum cords over cleaned rugs or drop dirt onto freshly polished furniture.
02 Respect Contact Time to Let Cleaners Do the Heavy Lifting
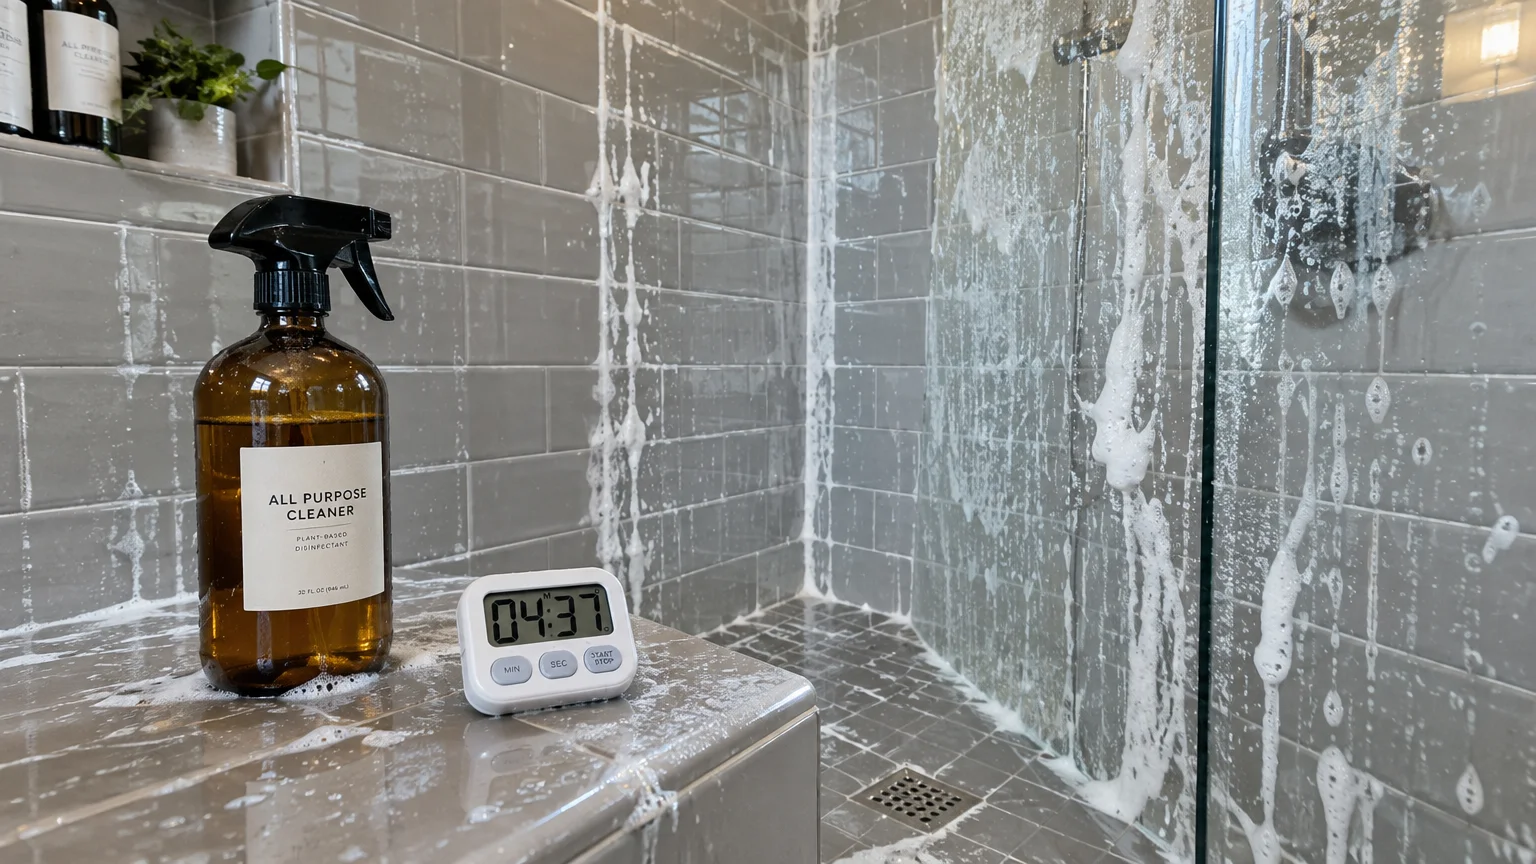
Most homeowners spray a cleaning agent and immediately wipe it away. Spraying and instantly wiping only spreads soil around and fails to sanitize the surface.
Disinfectants and degreasers need dwell time to dissolve bond layers and neutralize pathogens. The Centers for Disease Control and Prevention emphasizes that surface disinfectants require specific contact times to destroy bacteria and viruses effectively.
Read the back label of your cleaner to find its verified contact time. Most household disinfectants require between three and ten minutes of continuous moisture to work properly.
Spray shower walls, kitchen counters, or toilets first before doing any other work in the room. By the time you wipe the surface, the chemistry has broken down the grime for you.
03 Fold Microfiber Cloths into an Eight-Sided Cleaning Grid
Crumpling a rag into a loose ball is one of the most common cleaning mistakes. A balled-up rag traps dirt against itself and quickly smears grit back onto clean surfaces.
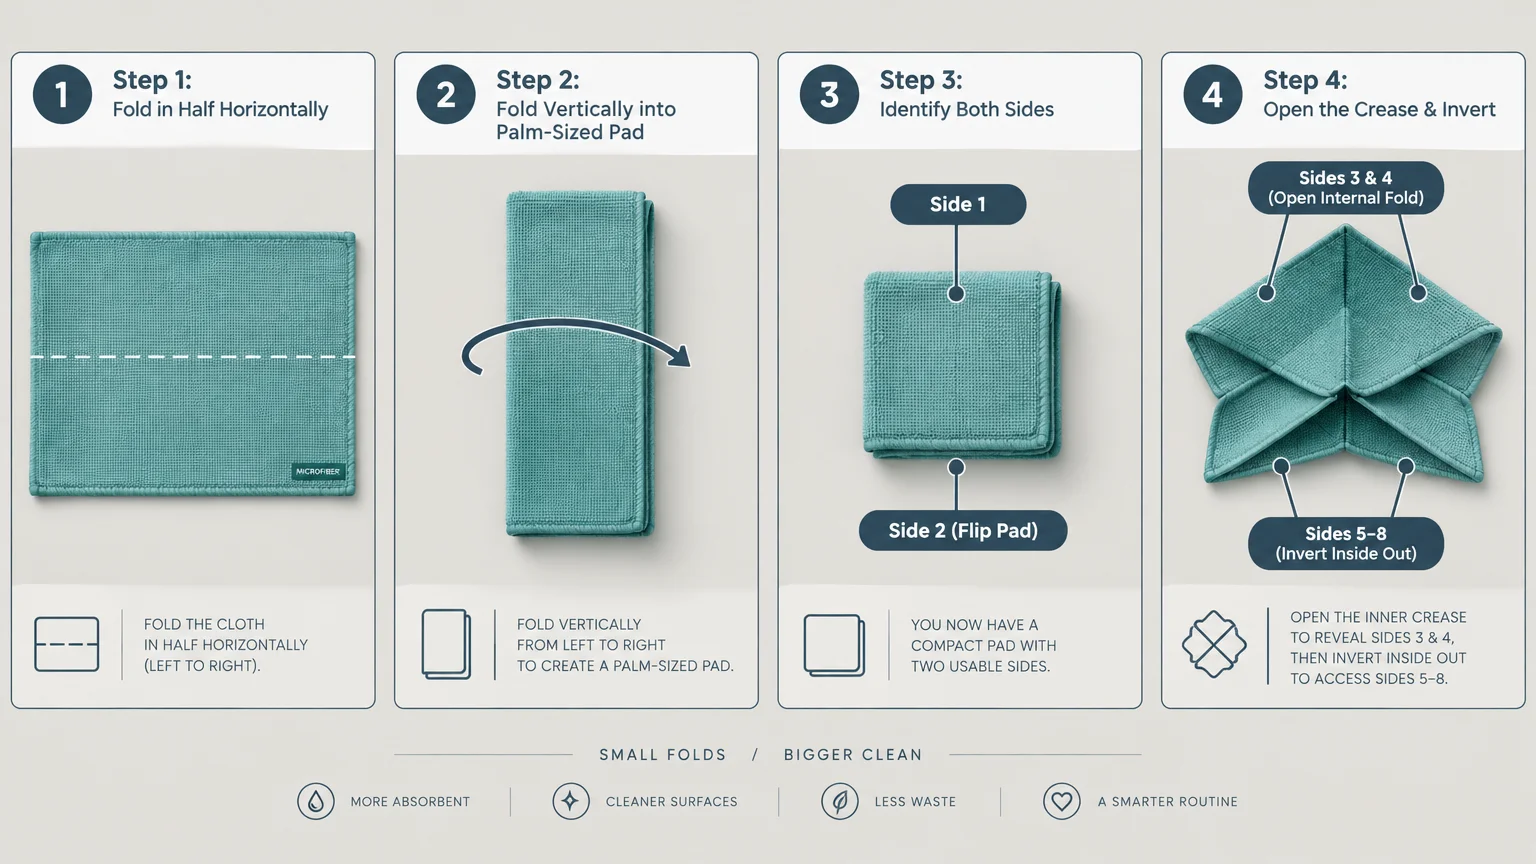
Housekeepers maximize every cloth by folding it into an eight-sided cleaning pad. This technique guarantees a fresh, sterile surface for each pass without requiring you to switch towels constantly.
- Lay your microfiber flat on a counter and fold it in half horizontally.
- Fold the towel in half vertically to create a compact palm-sized rectangle.
- Use side one for your first wipe, then flip the pad over to side two.
- Open the internal fold to reveal sides three and four, then refold inside-out for sides five through eight.
High-grade microfiber traps microscopic particles between its split fibers. According to guidance from the U.S. Environmental Protection Agency, proper surface preparation and mechanical wiping remove significant soil loads before disinfection even occurs.
04 Clear Dry Dust Completely Before Introducing Liquid Sprays
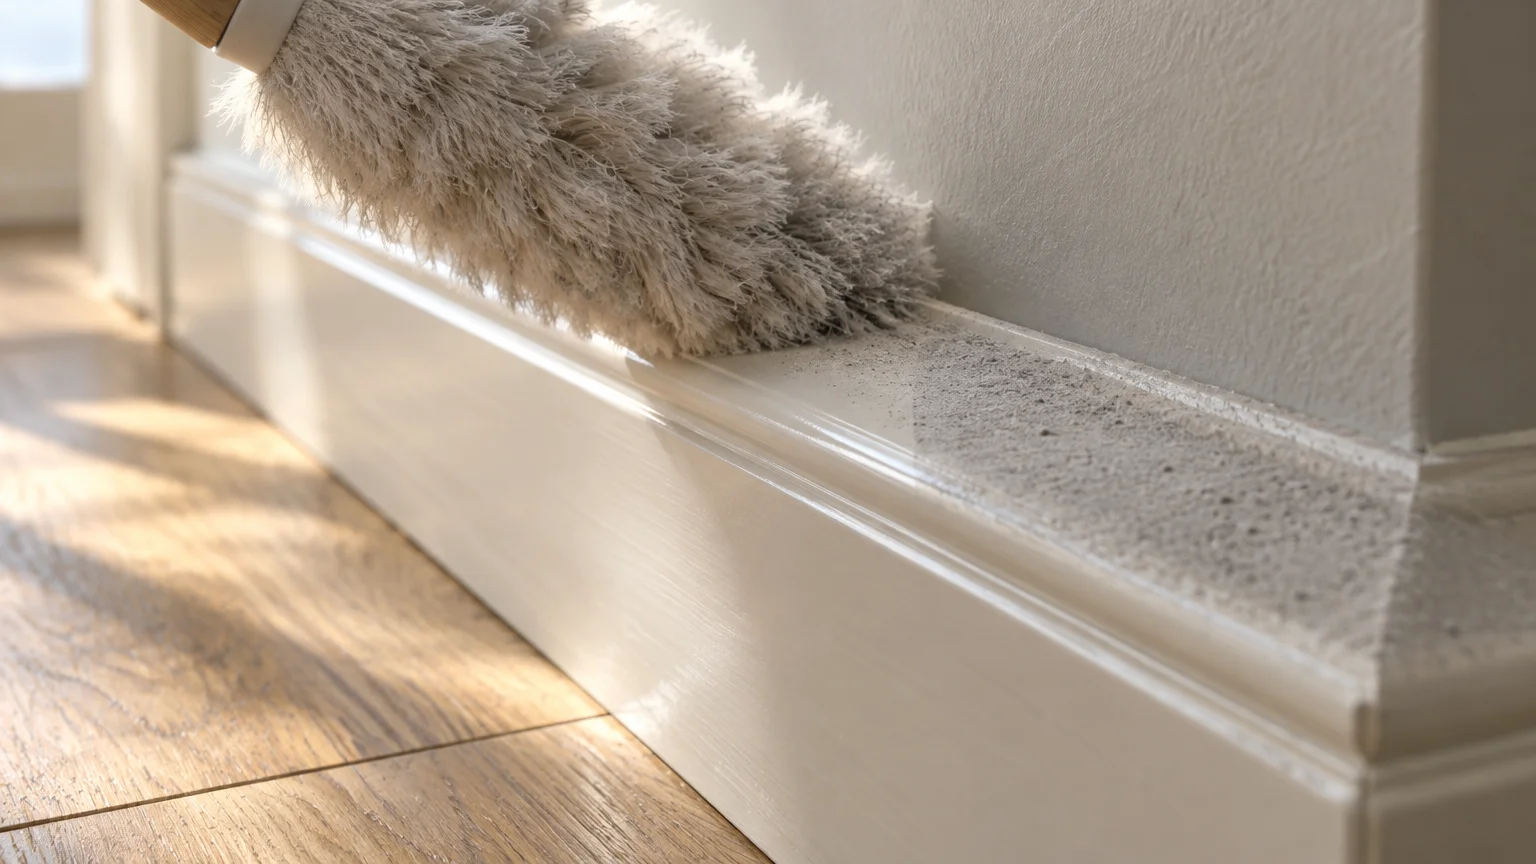
Spraying liquid cleaner directly onto dusty baseboards or blinds creates an abrasive mud. That sticky sludge settles into corners, requiring ten times more elbow grease to wipe away.
Housekeepers remove every trace of loose, dry debris before introducing any wet spray. A dry microfiber cloth or a horsehair vacuum attachment lifts particles without smearing them.
- Vacuum your window sills and door moldings before wiping them down with wet cleaner.
- Run a dry static duster across blinds and lampshades to pull away pet hair and lint.
- Sweep or dry-mop hard surface floors to remove grit before running a damp mop.
This single dry-cleaning step prolongs the life of your mopping water and keeps your microfiber cloths usable for much longer stretches.
05 Detail Fixture Edges with a Soft Brush and Wooden Skewer
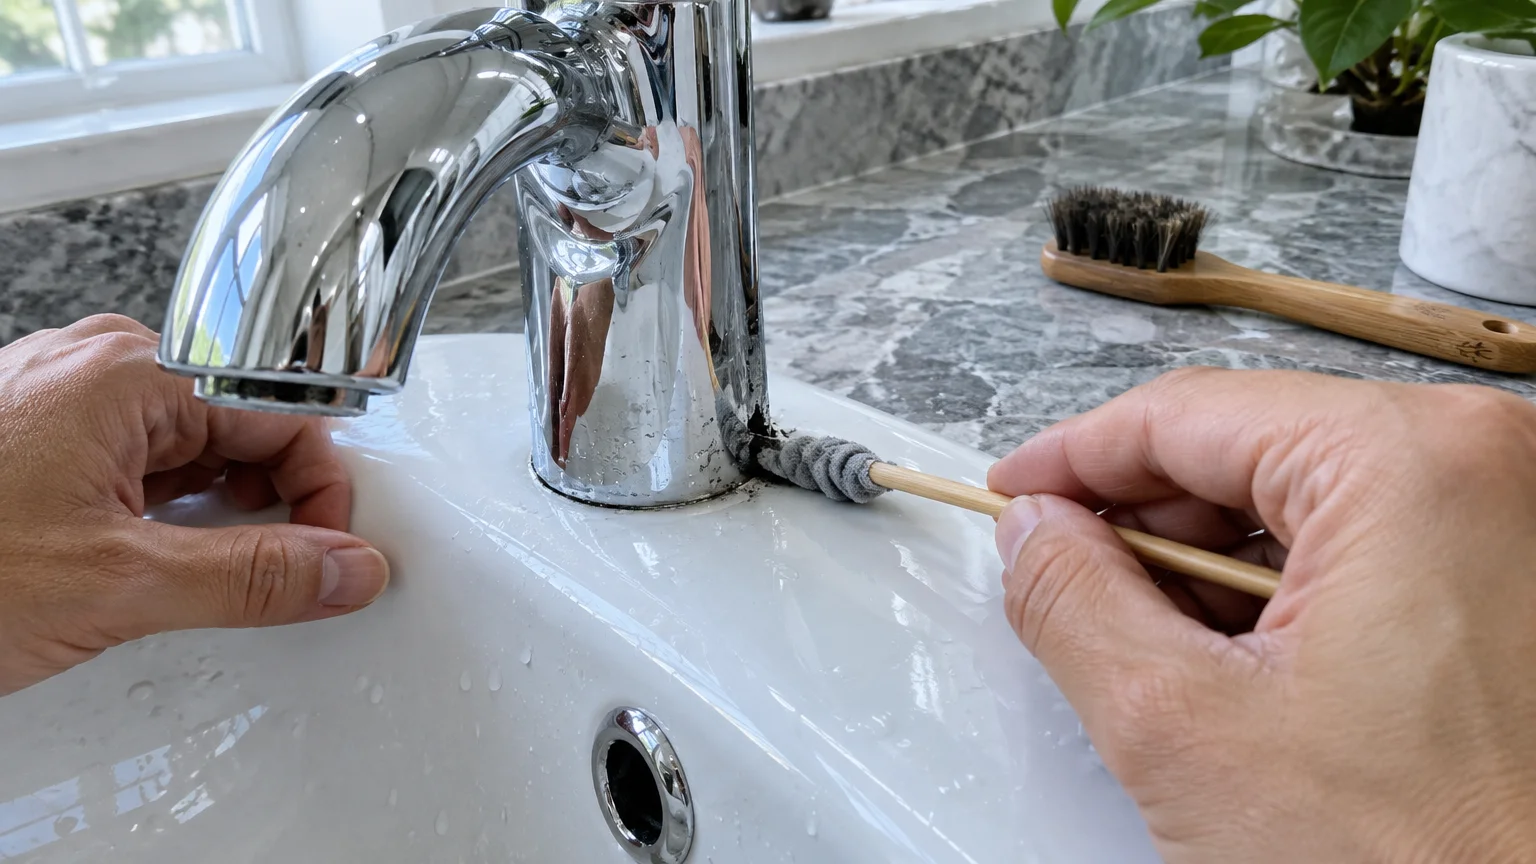
Mineral crust and dried soap scum collect tightly around the seams of faucet handles, drain rings, and toilet hinge caps. A standard sponge is too thick to reach these narrow crevices.
Keep a soft nylon toothbrush and a few wooden bamboo skewers in your cleaning kit. Wood is softer than chrome, ceramic, and porcelain, meaning it scrapes away lime scale without scratching delicate finishes.
Dip the toothbrush into a mild detergent solution to scrub around the perimeter of faucet bases. Use the tapered tip of the wooden skewer wrapped in a damp cloth to scrape grime from recessed seams.
Rinse the loosened debris with clear water and buff the metal immediately with a dry cloth. Removing these hidden crust rings makes fixtures gleam like brand new installations.
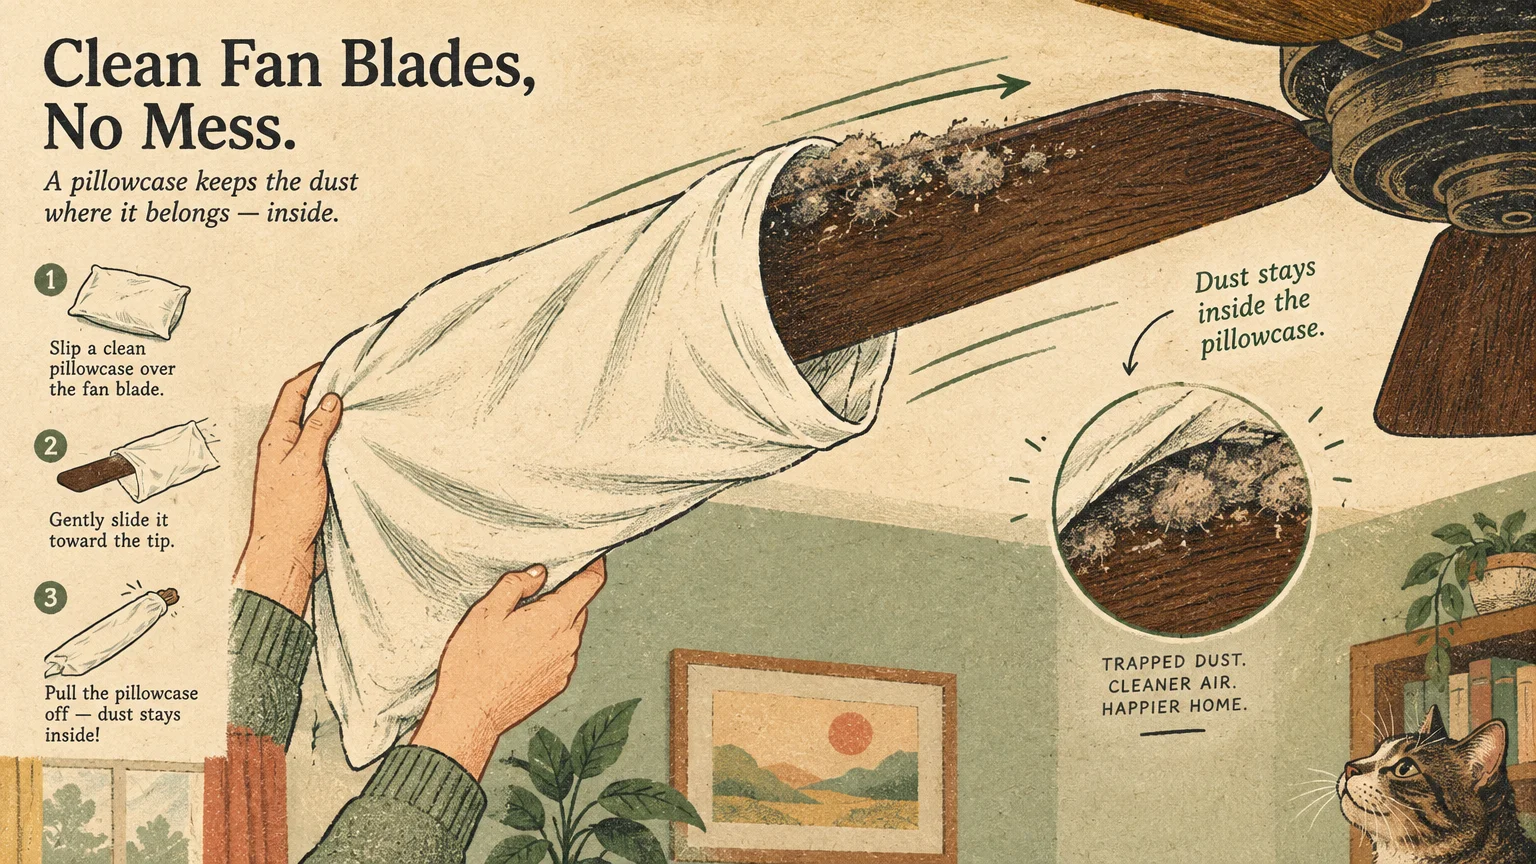
06 Trap Ceiling Fan Dust Inside an Old Pillowcase
Standard feather dusters knock overhead dust directly onto beds, sofas, and carpets below. Professional cleaners avoid this mess by encasing the blade inside an old pillowcase.
Slide the pillowcase over the entire length of the ceiling fan blade like a sleeve. Press your hands against both sides of the blade and pull the fabric toward you.
- The pillowcase fabric pulls dust and static pet hair off the top and bottom of the blade simultaneously.
- All falling debris remains trapped securely inside the interior pocket of the pillowcase.
- Work your way around all fan blades before carrying the pillowcase straight to the washing machine.
You can lightly mist the inside of the pillowcase with water or an all-purpose cleaner before starting. This moisture prevents loose lint from escaping into the room as you slide the case off.
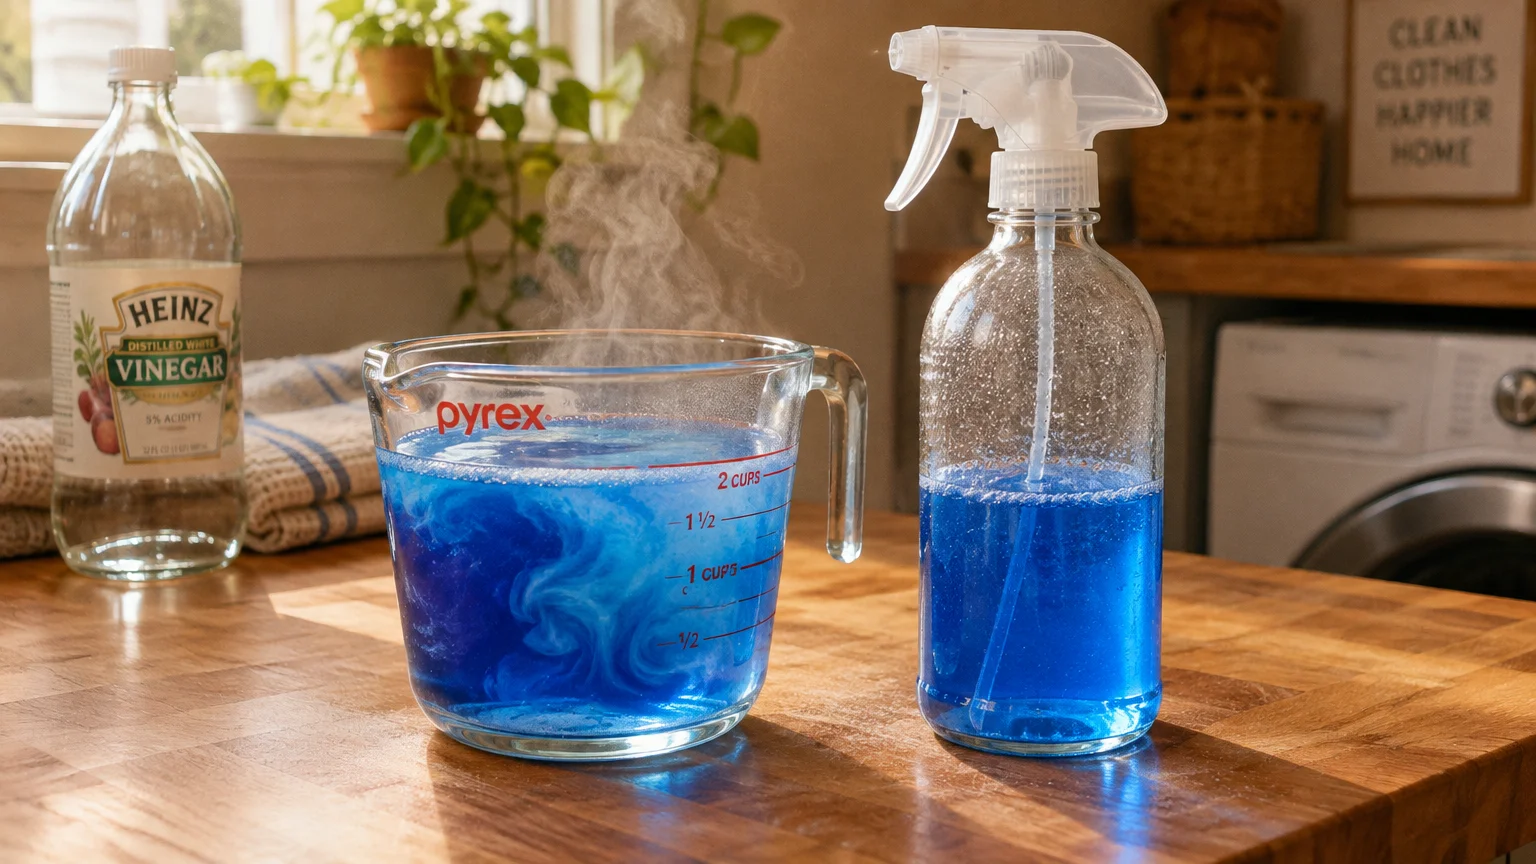
07 Dissolve Soap Scum with Warm Vinegar and Concentrated Dish Soap
Commercial bathroom cleaners often rely on harsh bleach formulas that irritate the lungs without dissolving mineral scum. Housekeepers tackle heavy shower glass buildup with a concentrated acidic detergent mixture.
Combine equal parts distilled white vinegar and liquid dish detergent in a microwave-safe bowl. Heat the vinegar slightly before mixing so the viscous dish soap blends smoothly into the solution.
The acetic acid in white vinegar dissolves calcium carbonate and mineral scales. At the same time, the concentrated surfactants in dish soap bind to skin oils and body wash residues.
Spray the warm solution across glass shower doors and fiberglass surrounds, letting it sit for fifteen minutes. Scrub lightly with a non-scratch sponge and rinse thoroughly with warm water.
Never apply vinegar solutions to natural stone surfaces like marble, granite, or travertine. Acid etches natural calcium-based stones permanently; use pH-neutral stone cleaners on these delicate materials instead.
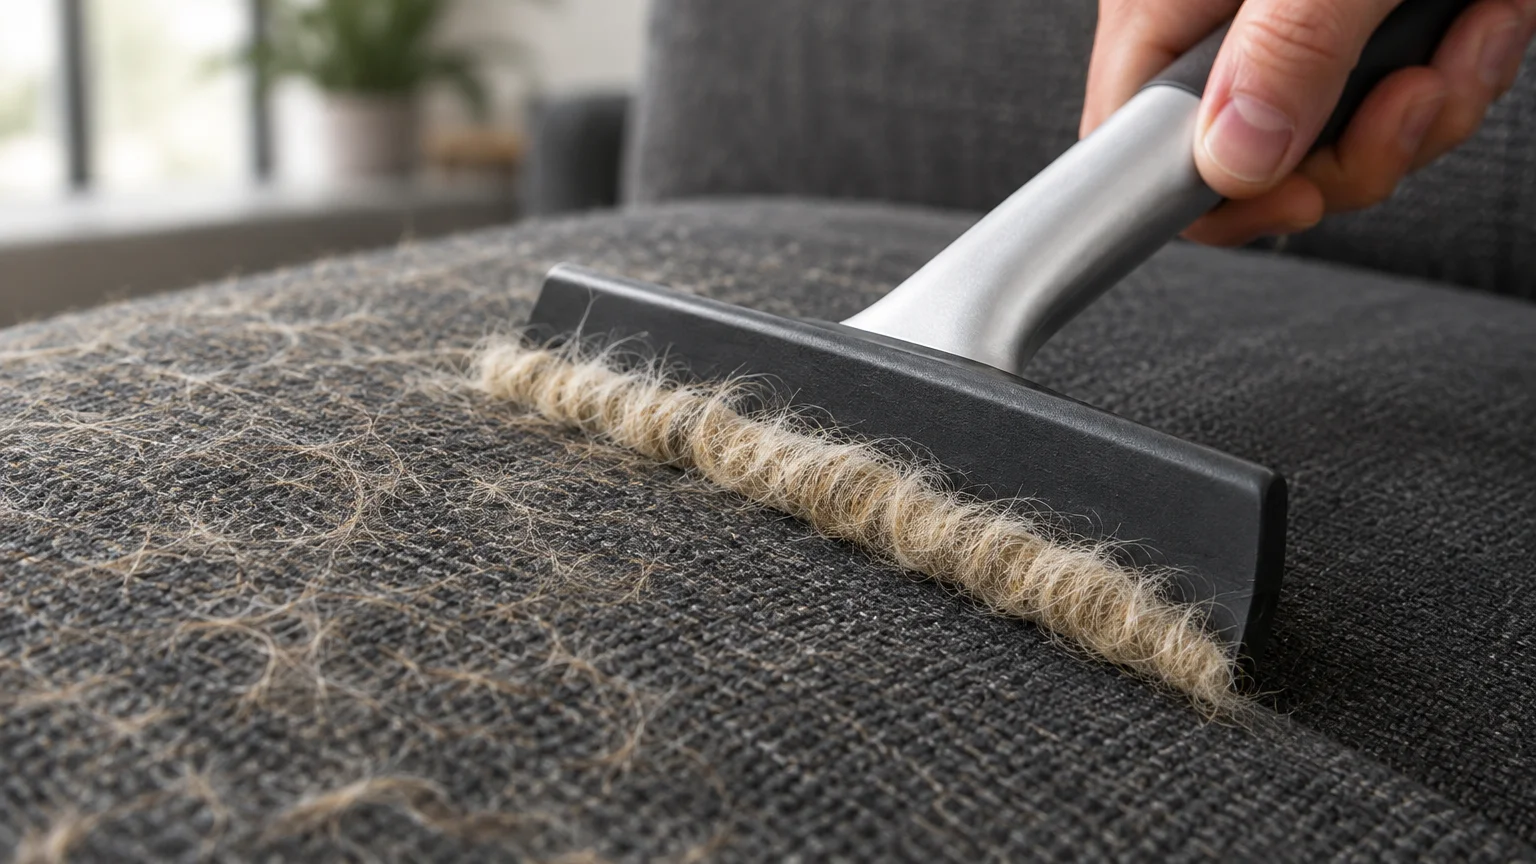
08 Extract Buried Pet Hair with a Handheld Rubber Squeegee
Upright vacuums frequently roll right over pet fur that has worked deep into carpet fibers. The brush roll loses suction against dense pile, leaving mats of fur behind.
A simple handheld rubber window squeegee pulls deeply embedded hair out of carpets with zero electrical power. Rubber creates natural friction and static electricity that grabs stubborn animal fur instantly.
- Hold the squeegee handle firmly and pull the rubber blade toward you in short, firm strokes.
- Watch as the rubber edge gathers pet hair into neat, rolled bundles along carpet stairs and upholstery.
- Collect the hair clumps by hand and discard them directly into the trash before vacuuming the area.
This technique is especially effective on carpeted stairs, car floor mats, and velvet furniture corners. It restores crushed carpet pile while pulling out dander that triggers household allergies.
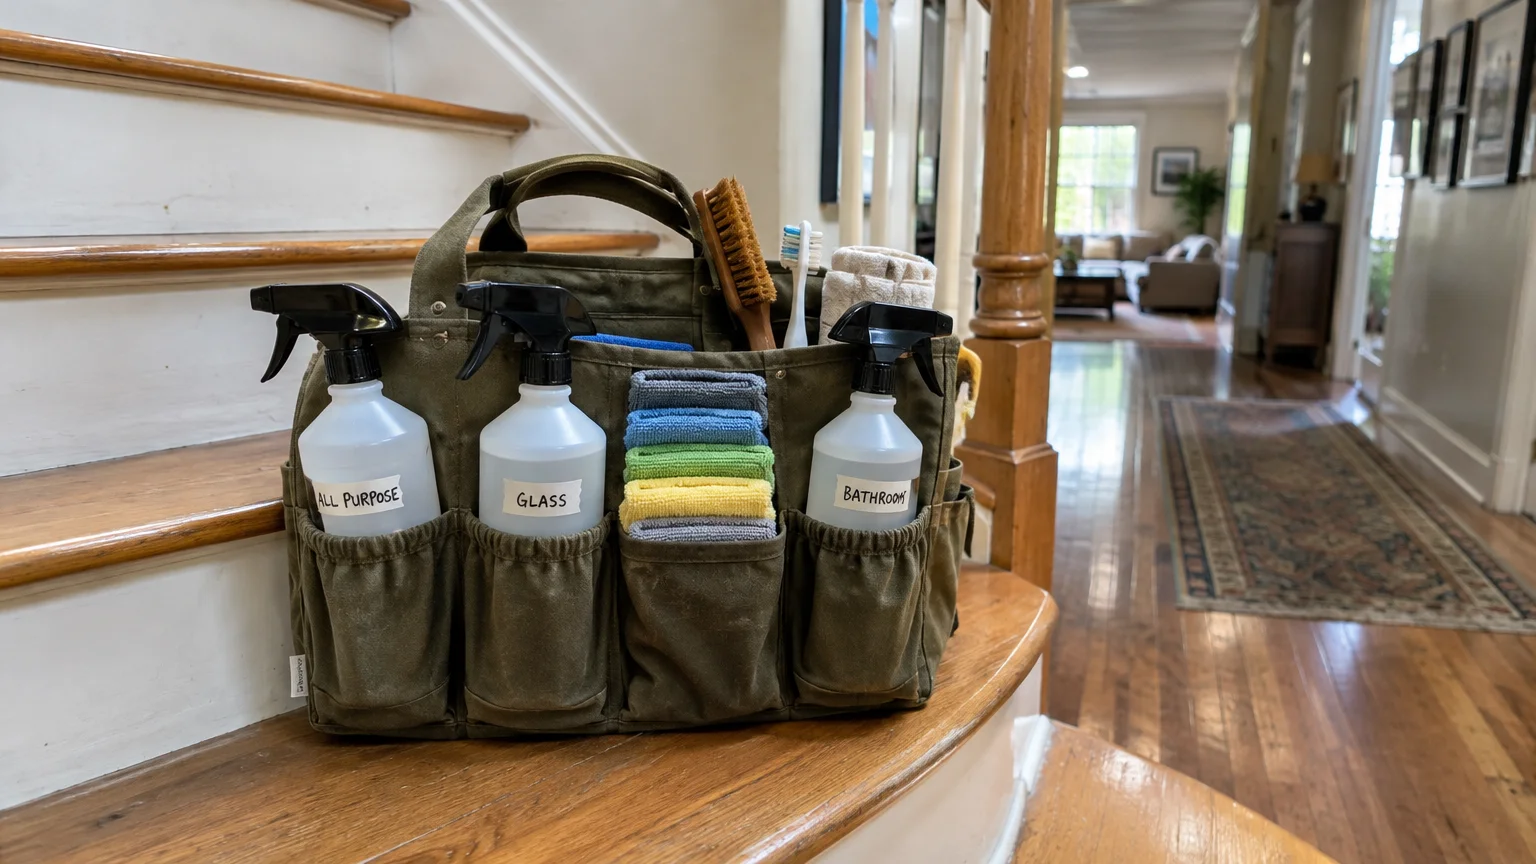
09 Stock a Mobile Cleaning Caddy to Eliminate Wasted Steps
Walking back and forth to supply closets drains your physical stamina and drags out cleaning sessions. Housekeepers carry everything they need in a single portable caddy or divided bucket.
Keep your cleaning arsenal streamlined to a few versatile, professional-grade supplies rather than dozens of specialty bottles. Limiting your kit makes the caddy light enough to carry comfortably from room to room.
- One neutral pH all-purpose cleaner for daily hard surfaces.
- One mild acidic cleaner or diluted vinegar spray for scale and glass.
- One dedicated disinfectant for biological targets like toilets and food zones.
- Four folded microfiber towels color-coded for bathrooms, glass, and general surfaces.
- A soft-bristled toothbrush and a non-abrasive scrubbing pad.
- A small roll of plastic trash liners to empty wastebaskets as you move.
Restock your caddy at the end of every cleaning session so it sits ready for your next sweep. You will never lose twenty minutes searching for misplaced spray bottles or rags again.

10 Lift Mineral Scale with Effervescent Oxygen Tablets
Narrow glass vases, insulated travel mugs, and porcelain toilet bowls often develop dark mineral stains in spots brushes cannot reach. Scrubbing these narrow recesses with wire bristles scratches the protective glaze.
Housekeepers drop effervescent oxygen tablets or denture cleaning tablets into standing water to lift these stubborn rings. The bubbling oxidation breaks apart mineral deposits without mechanical scraping.
Fill the stained container or toilet bowl with warm water and drop two effervescent tablets directly into the basin. Allow the tablets to fizz and soak undisturbed for at least thirty minutes or overnight.
The foaming action lifts tannins, coffee stains, and hard water scale away from the vessel walls. Give the area a light wipe with a damp cloth and rinse clean with fresh water.
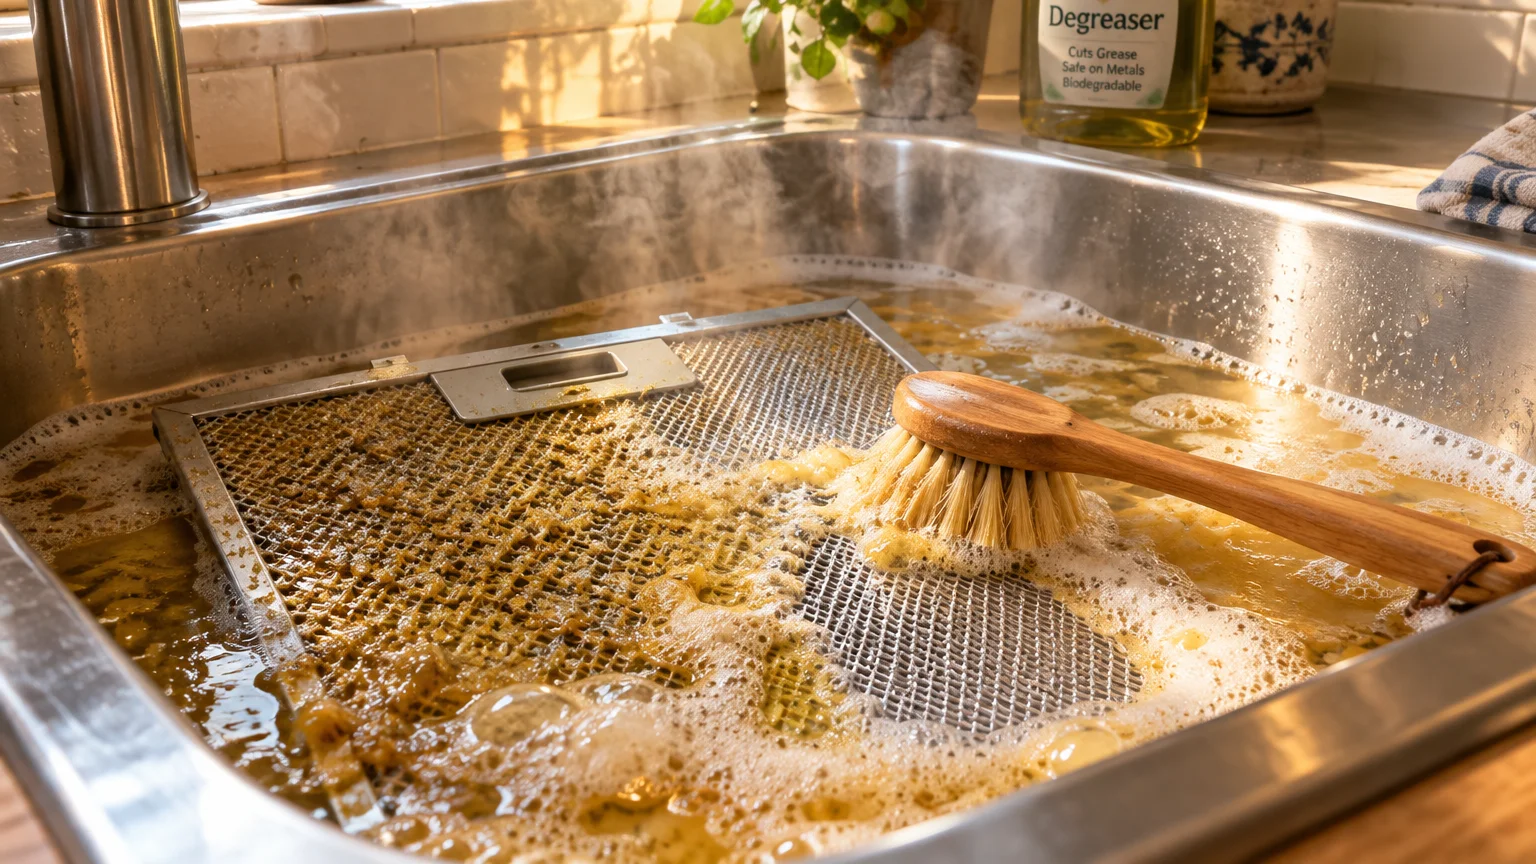
11 Emulsify Kitchen Grease Deposits with Boiling Water and Surfactants
Exhaust hood filters, stovetop grates, and range surrounds collect aerosolized cooking oils that turn gummy over time. Cold water and ordinary counter sprays only smear this sticky film across surfaces.
Commercial cleaners use high heat to liquefy hardened fats before applying cleaning chemistry. Boiling water instantly melts greasy binding layers, allowing degreasing agents to lift the residue completely.
- Remove metal range hood mesh filters and place them flat inside a metal roasting pan or sink basin.
- Sprinkle a generous layer of baking soda across the mesh surfaces.
- Pour boiling water directly over the filters until they are fully submerged.
- Add a few squirts of concentrated degreasing dish soap to emulsify the floating oils.
Let the filters soak for ten minutes while the bubbling water separates the grease from the wire mesh. Rinse with hot tap water and let them air-dry completely before reinstalling them.
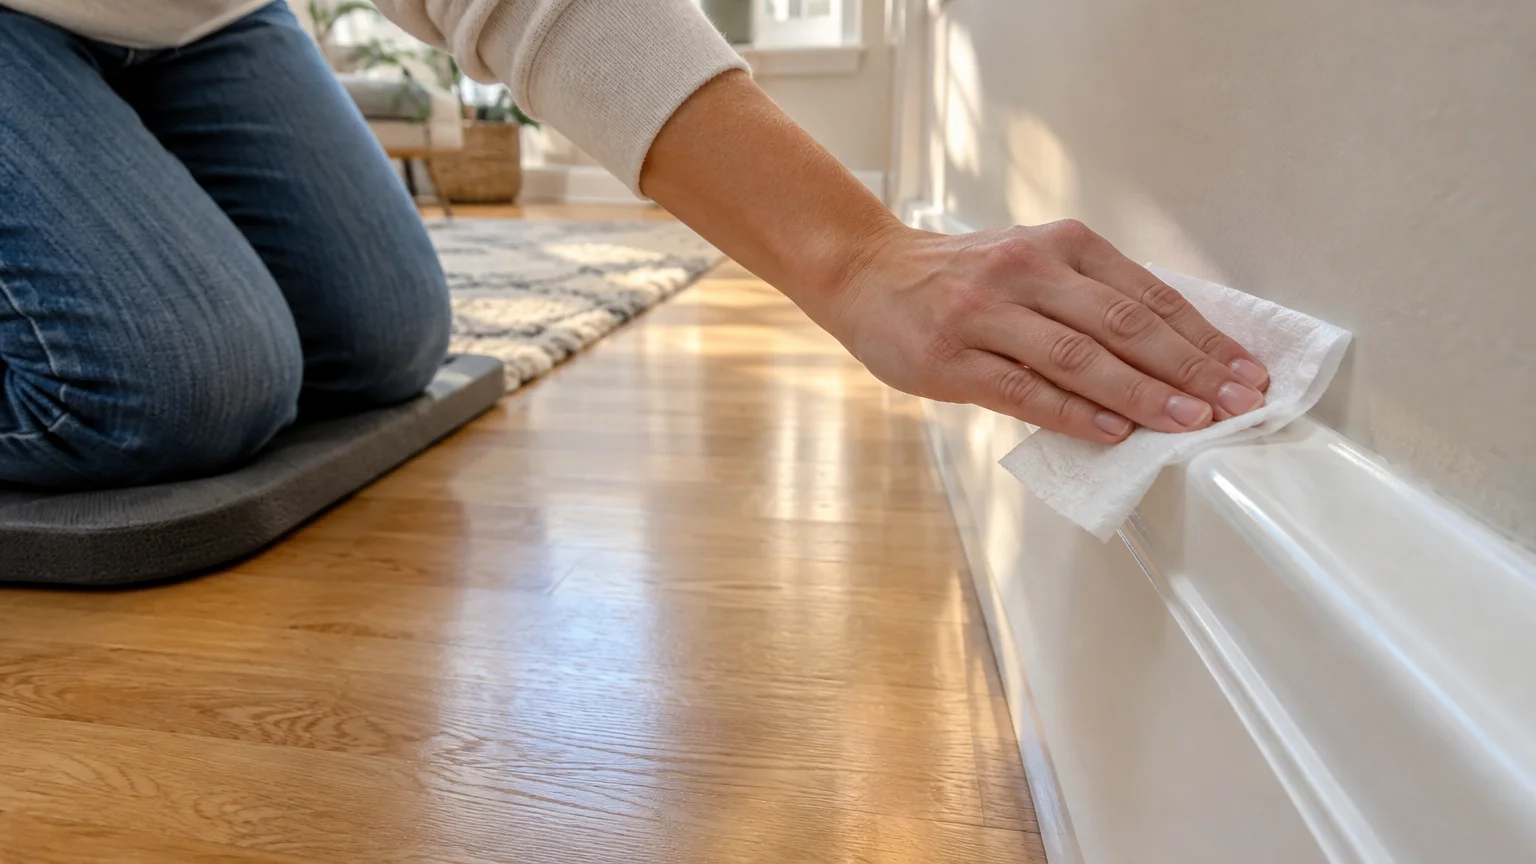
12 Buff Baseboards with Anti-Static Dryer Sheets
Baseboards gather dust rapidly because vacuum exhaust vents and household air currents blow loose pet hair along floor perimeters. Traditional wet dusting leaves an invisible residue that attracts new debris within days.
After wiping your baseboards clean, buff the painted wood with a clean dryer sheet. The softening compounds on the sheet leave behind an invisible anti-static barrier that repels airborne dust.
You can wrap a dryer sheet around the head of a flat sweeper mop to avoid bending down on your hands and knees. Glide the mop head along your hallway trim to coat dozens of feet of baseboard in minutes.
This barrier prevents pet fur and lint from sticking to trim for weeks at a time. The room stays fresher, and your regular maintenance passes take a fraction of the time.
Housekeeper Techniques vs. Common DIY Habits
Compare the professional methods used by cleaning teams against traditional cleaning habits. Small adjustments in your tools and timing yield dramatically cleaner surfaces with significantly less physical strain.
| Target Area | Common DIY Habit | Housekeeper Secret Technique | Primary Advantage |
|---|---|---|---|
| Ceiling Fan Blades | Feather duster waving dust down | Pillowcase sliding sleeve | Captures 100% of debris inside fabric |
| Countertop Sanitizing | Spray and immediate wipe-down | Full disinfectant contact dwell time | Neutralizes bacteria and viruses completely |
| Bathroom Soap Scum | Bleach spray and abrasive pads | Warm vinegar and dish soap soak | Dissolves mineral deposits without scratching |
| Baseboard Dusting | Damp paper towels | Anti-static dryer sheet buffing | Repels dust buildup for weeks |
| Embedded Pet Hair | Repeated vacuum roller passes | Rubber window squeegee pull | Extracts deeply woven fur and lifts carpet pile |
| Tight Fixture Seams | Heavy scrub sponges | Soft toothbrush and bamboo skewer | Cleans scale without damaging chrome plating |
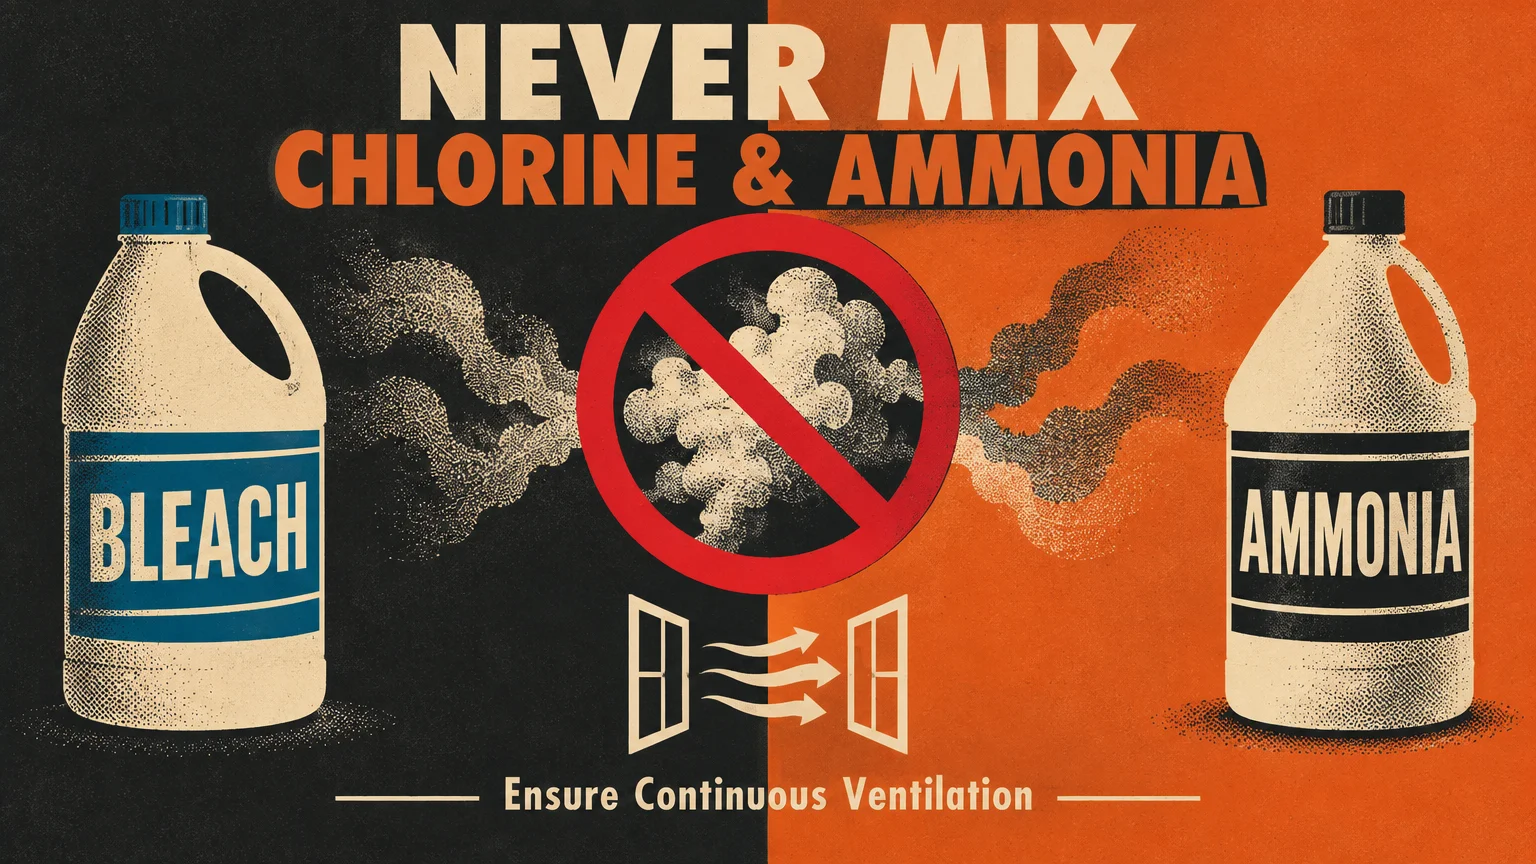
Essential Chemical Safety Rules for Home Cleaners
Professional housekeepers understand that mixing household chemicals never improves cleaning power; it creates deadly hazards. Always read manufacturer labels and maintain good ventilation when using cleaning solutions.
Never combine bleach with ammonia, vinegar, or acidic cleaners under any circumstances. According to the CDC Bleach Safety Guidelines, mixing bleach with acids produces toxic chlorine gas, while mixing bleach with ammonia creates dangerous chloramine vapor.
Store your cleaners in clearly labeled containers and never transfer chemicals into unmarked food or beverage bottles. The American Cleaning Institute advises keeping products in their original packaging to ensure you always have emergency first-aid instructions on hand.
- Work with windows open or exhaust fans running to circulate fresh indoor air.
- Wear protective rubber gloves when handling acidic descalers or concentrated detergents.
- Rinse surfaces thoroughly with clean water before switching from one cleaner to another.
Following basic safety practices protects your respiratory health, prevents chemical burns, and preserves the structural integrity of your home fixtures.

Put These Housekeeping Tricks into Practice
Do not attempt to overhaul your entire cleaning routine in a single weekend. Pick two or three of these trade secrets—such as the eight-fold microfiber fold or the pillowcase fan trick—during your next sweep.
Assemble your core mobile caddy, set a timer, and follow a strict top-to-bottom perimeter circle in one room today. Once you experience how much time and energy these professional tricks save, you will never return to random, exhausting cleaning habits again.