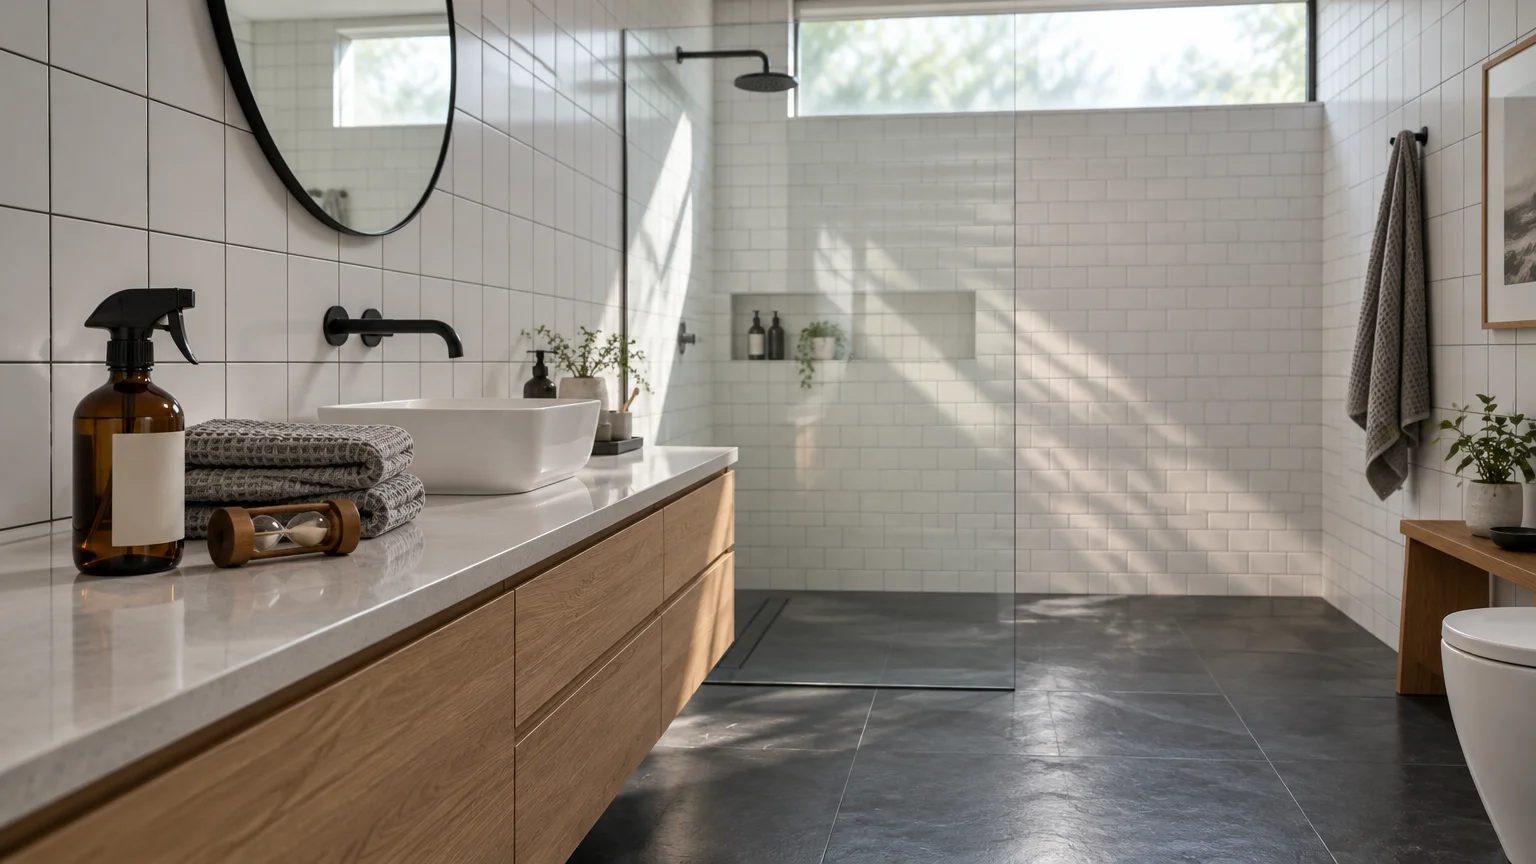
A sparkling bathroom does not always mean a hygienic one; invisible microbes linger on surfaces long after the scent of lemon cleaner fades. You can transform your space into a genuinely germ-free bathroom by rethinking your daily habits and cleaning sequences.
Harsh chemicals and endless scrubbing are unnecessary when you know where pathogens hide and how sanitizers actually work. Smart bathroom hygiene comes down to targeted technique, proper timing, and deliberate moisture control.
These ten expert-backed bathroom cleaning tips will streamline your chores while eliminating bacteria, mold, and cross-contamination across every high-touch fixture.
01 Respect Dwell Time to Truly Disinfect Bathroom Surfaces
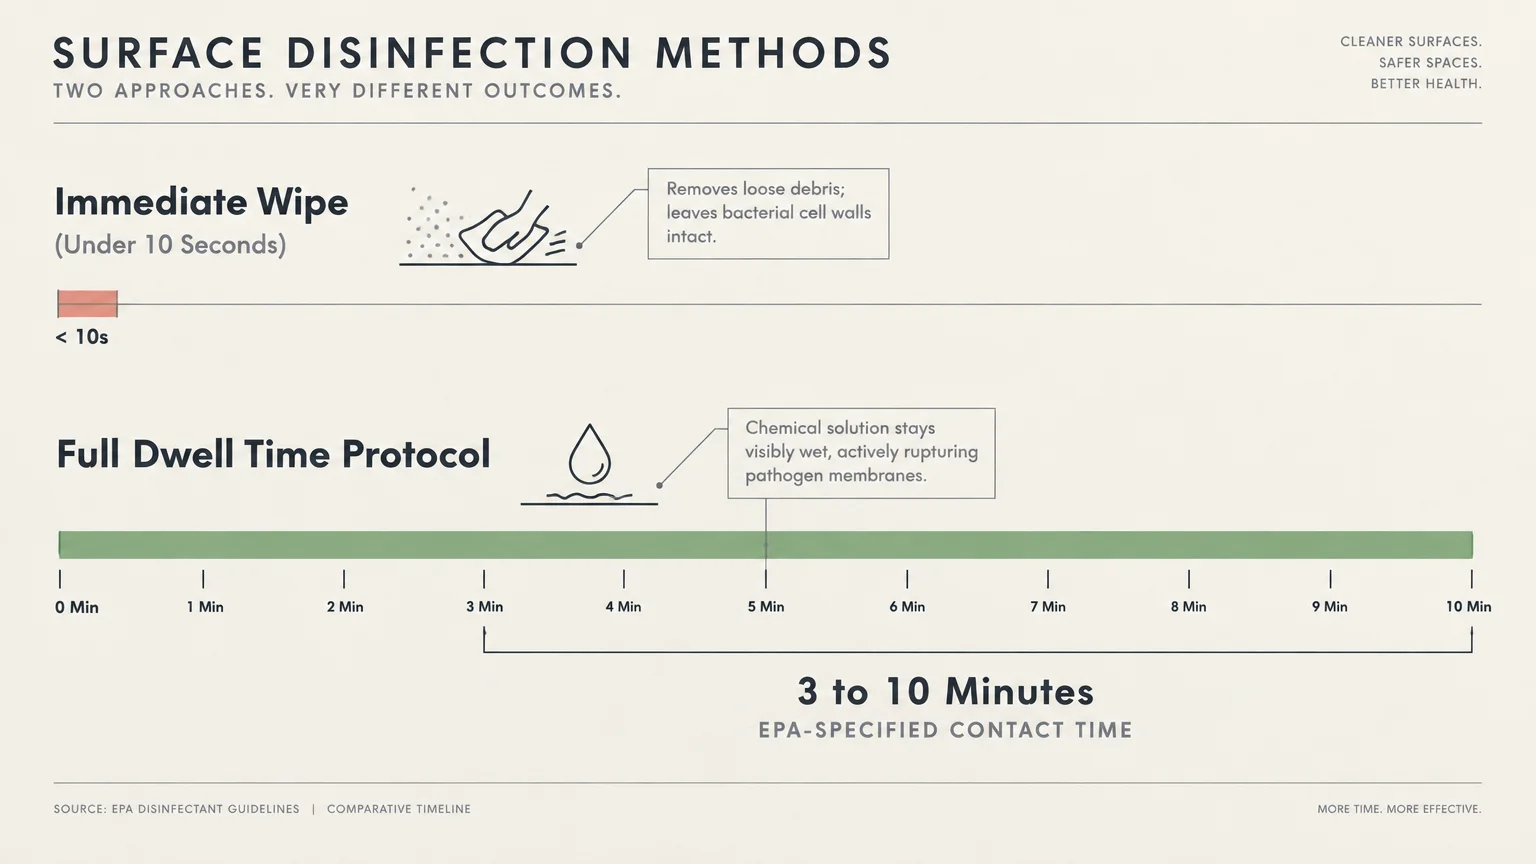
Most people spray a surface and immediately wipe it away with a dry rag. This common habit removes loose dust but leaves the vast majority of bathroom germs alive and thriving.
To actually disinfect bathroom fixtures, you must allow chemical solutions to remain visibly wet on the target area for a specified period. Sanitization experts call this critical window the dwell time or contact time.
Every household disinfectant relies on dwell time to rupture bacterial cell walls and deactivate stubborn viruses. Skipping this waiting period renders active antimicrobial ingredients largely ineffective.
Check the product label on your cleaner to find its required contact duration. Most commercial disinfectant sprays demand between three and ten minutes of uninterrupted wet contact to achieve full germ elimination.
According to the U.S. Environmental Protection Agency (EPA), adhering to manufacturer contact times ensures the chemical destroys designated pathogens reliably.
If your bathroom air is warm and the solution begins evaporating too quickly, reapply the spray. Keeping surfaces visibly glistening guarantees continuous chemical exposure and complete sanitization.
02 Shut the Toilet Lid Before Every Flush
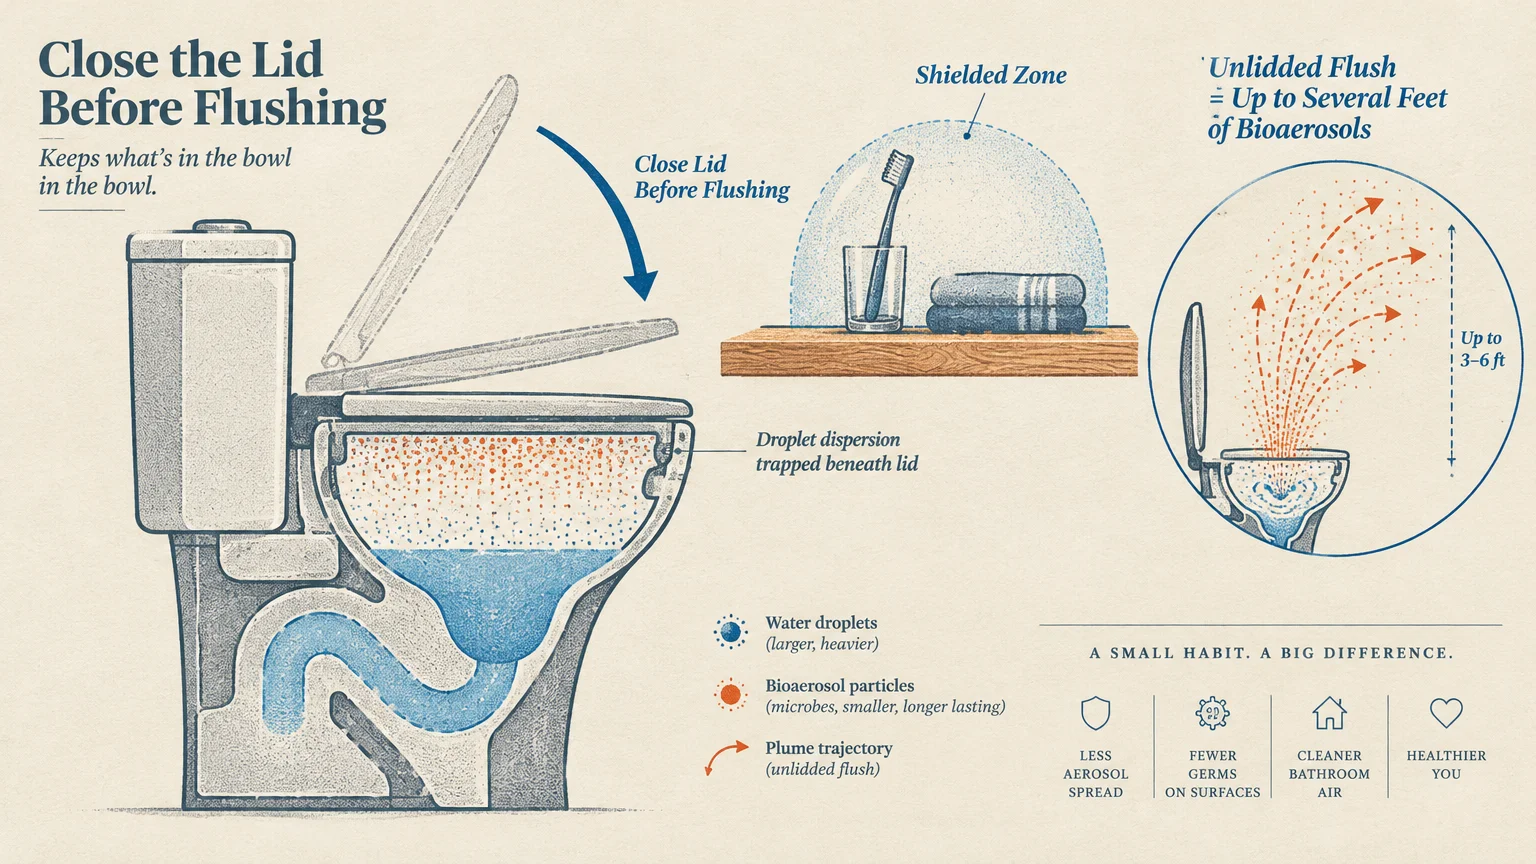
Every time you flush a toilet with an open lid, turbulent water violently disperses microscopic droplets into the surrounding air. Environmental scientists refer to this airborne microbial eruption as the toilet plume effect.
These bioaerosols can settle on nearby surfaces several feet away within seconds. Toilet plume droplets frequently land on exposed bath towels, countertop soaps, and nearby toothbrushes.
Cultured samples from unlidded flushes regularly reveal widespread distribution of enteric bacteria like Escherichia coli. Simply closing the lid before depressing the handle creates an effective physical barrier that traps these aerosolized particles.
Make this simple mechanical habit non-negotiable for every member of your household. Establishing this rule prevents biological contaminants from circulating throughout your ambient bathroom air.
Wipe down the underside of the toilet lid weekly during your regular sanitizing routine. Because the lid catches the upward force of the plume, it collects significant bacterial residue over time.
03 Target Overlooked High-Touch Contact Zones
Homeowners often scrub the toilet bowl diligently while ignoring the small objects their hands touch daily. These frequent contact points harbor massive microbial colonies that transfer directly onto your skin.
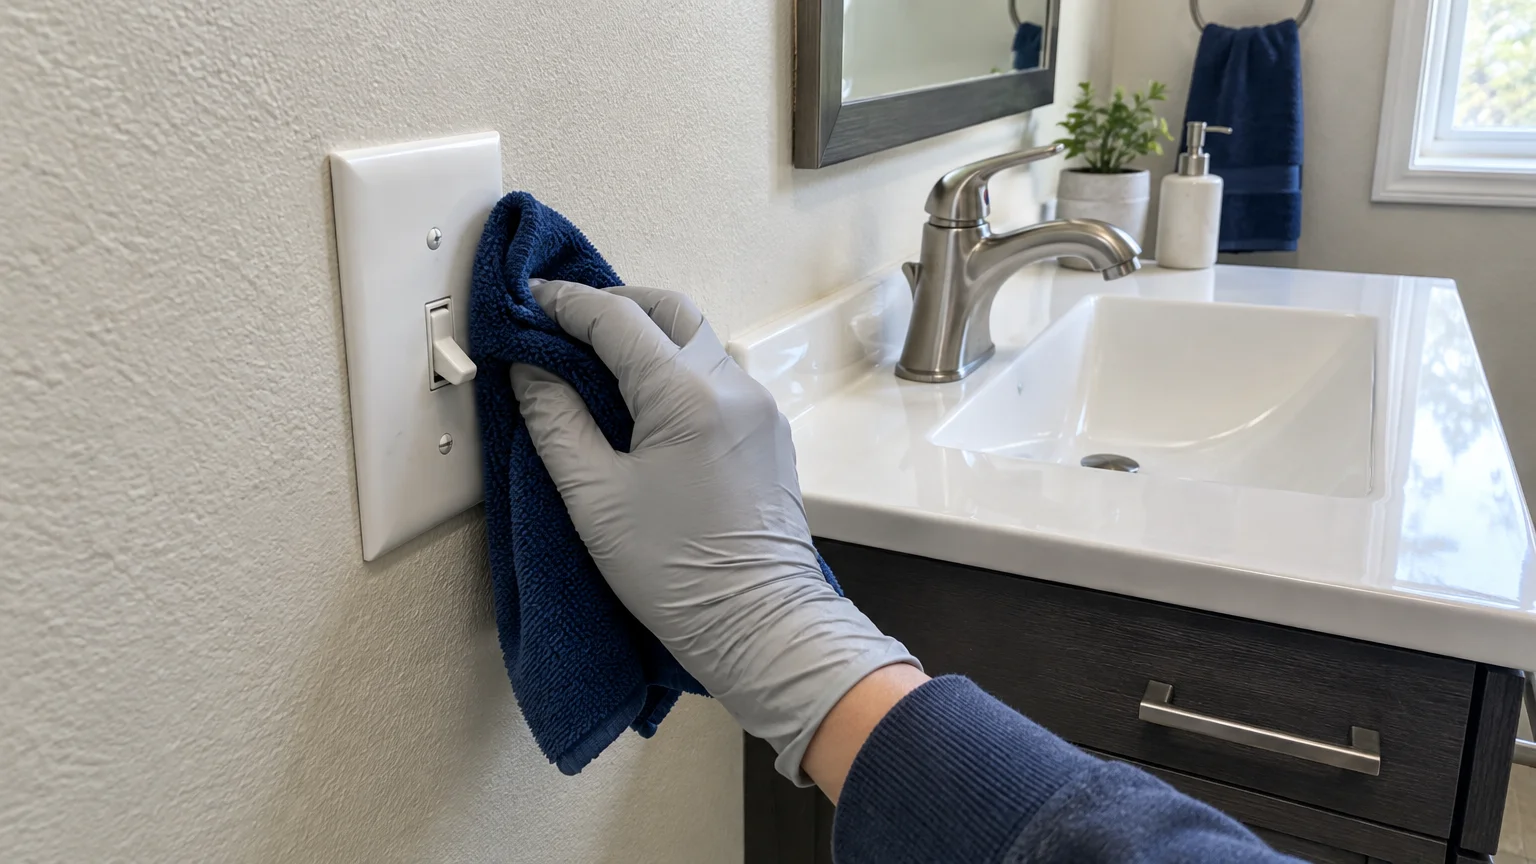
High-touch zones include faucet levers, vanity cabinet pulls, light switch wall plates, and the exterior toilet flush handle. Shower stall latches and towel ring mounts also accumulate heavy bacterial residues.
Clean these areas before tackling larger sanitary fixtures so your tools remain uncontaminated. Wipe them with a disinfectant wipe or a microfiber cloth dampened with an EPA-registered disinfectant spray.
Pay careful attention to the crevices where dirt and skin oils collect around switches and handles. These organic residues create protective barriers that shield bacteria from light and ambient air.
The Centers for Disease Control and Prevention (CDC) emphasizes frequent cleaning of high-touch surfaces to curb household illness transmission.
A quick sixty-second sanitizing pass over these touchpoints every couple of days prevents substantial germ buildup between weekly deep cleanings.
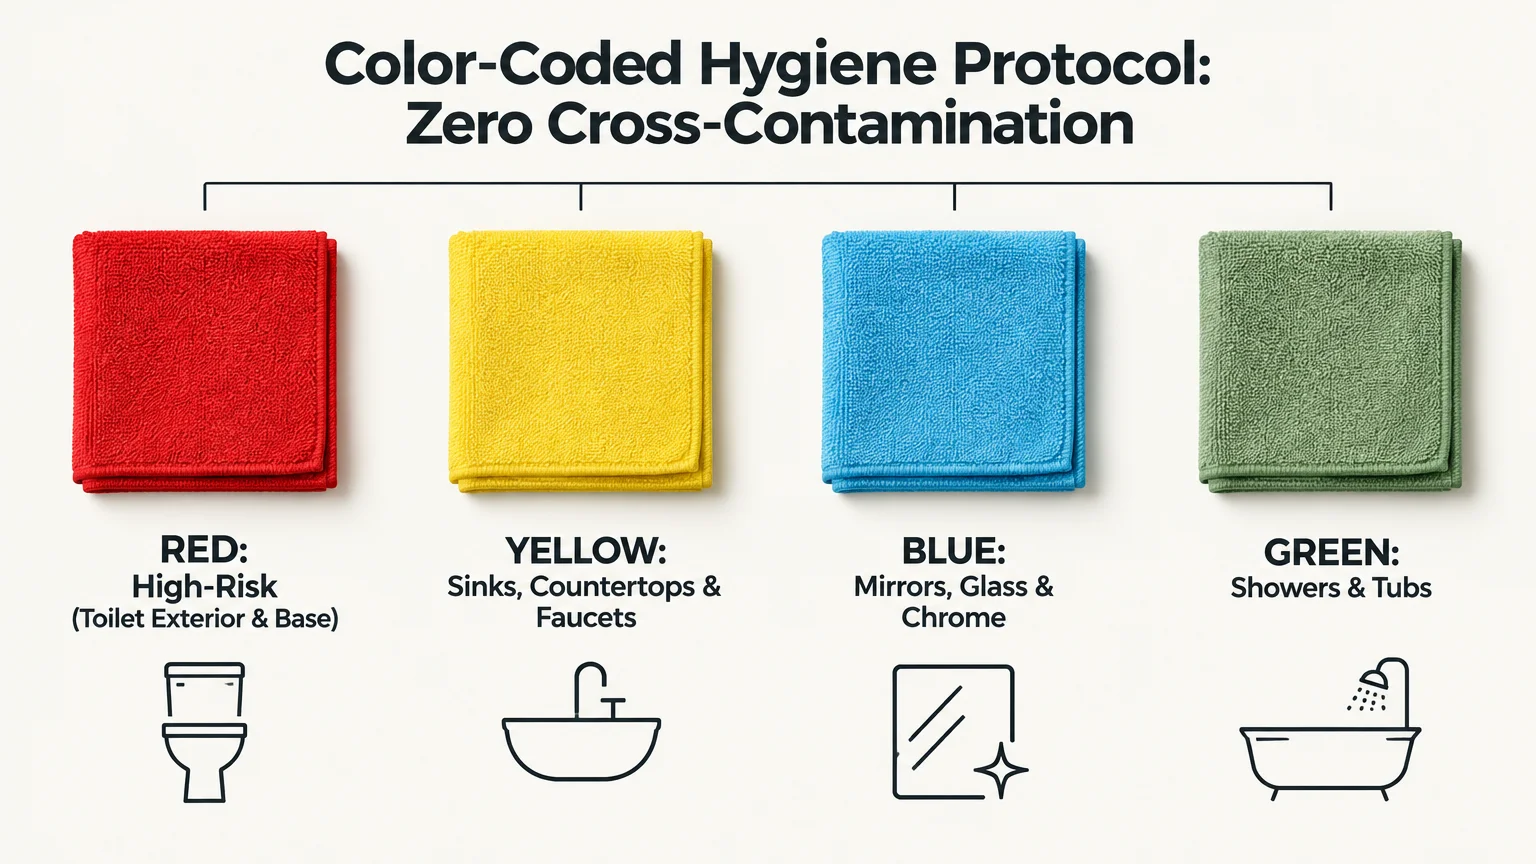
04 Stop Cross-Contamination with Color-Coded Microfiber Cloths
Using the same rag to wipe your toilet and then your sink basin spreads dangerous fecal bacteria straight to your washing area. Cross-contamination is one of the most widespread cleaning errors in modern homes.
Solve this hazard permanently by instituting a strict color-coded cleaning cloth system. Assigning distinct colors to specific zones prevents accidental pathogen transfer between different fixtures.
Reserve red cloths exclusively for high-risk zones like the toilet bowl exterior, base, and seat. Use yellow cloths for the sink, vanity countertops, and grooming areas.
Dedicate blue cloths to glass surfaces, mirrors, and polished chrome fixtures to prevent lint and streaking. Assign green cloths to the bathtub, shower stall tiles, and acrylic basins.
Choose high-density split microfiber cloths over cotton rags or disposable paper towels. Split microfibers feature microscopic channels that mechanically trap bacteria rather than merely pushing residue across smooth surfaces.
Launder your microfiber cloths separately in hot water without fabric softeners. Softeners coat synthetic fibers with silicone oils, destroying their ability to capture fine dust and microbes.
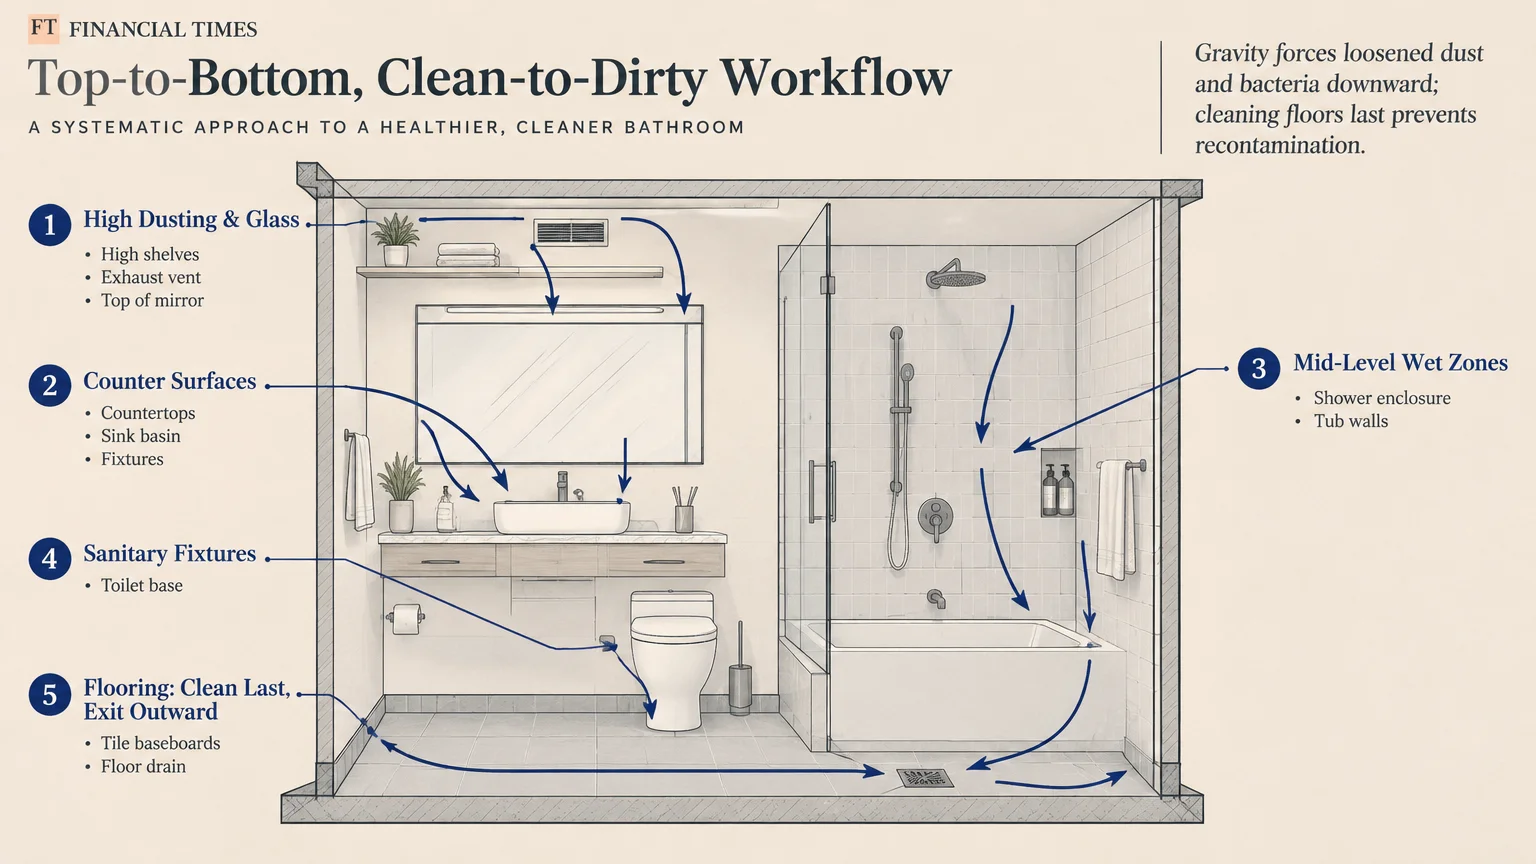
05 Follow a Directional Cleaning Workflow
An illogical cleaning sequence forces you to clean the same areas twice while tracking dirt onto freshly sanitized fixtures. Organizing your routine into a structured directional workflow maximizes efficiency and hygiene.
Always work from the highest physical point downward toward the floor. Dust, hair, and dirty chemical droplets inevitably drift downward due to gravity as you scrub.
Begin by dusting ceiling corners, exhaust fan grates, and high wall light sconces. Move down to mirrors, medicine cabinets, and countertop surfaces before touching shower walls or the bathtub.
Similarly, arrange your room sequence from the cleanest zone to the dirtiest zone. Clean the shower enclosure, vanity counter, and sinks before you begin scrubbing the toilet.
Always clean the bathroom floor dead last. This ensures that you wipe away any stray hair, dust, or cleaning chemicals that dropped during the rest of your routine.
Back your way out of the bathroom as you mop the floor to avoid walking across damp tiles. This sequential approach cuts cleaning time while guaranteeing a systematically sanitized room.
06 Control Moisture to Starve Mold and Mildew
Bacteria and fungal mold spores require sustained moisture and warmth to multiply across tile grout and caulking. Denying microbes this essential moisture halts mold growth before it starts.
Turn on your bathroom exhaust fan before stepping into the shower. Leave the exhaust fan running continuously for at least twenty to thirty minutes after finishing your shower.
This extended run time extracts lingering water vapor from drywall, grout lines, and ceiling paint before condensation occurs. If your bathroom lacks a mechanical exhaust fan, open a window several inches during showers.
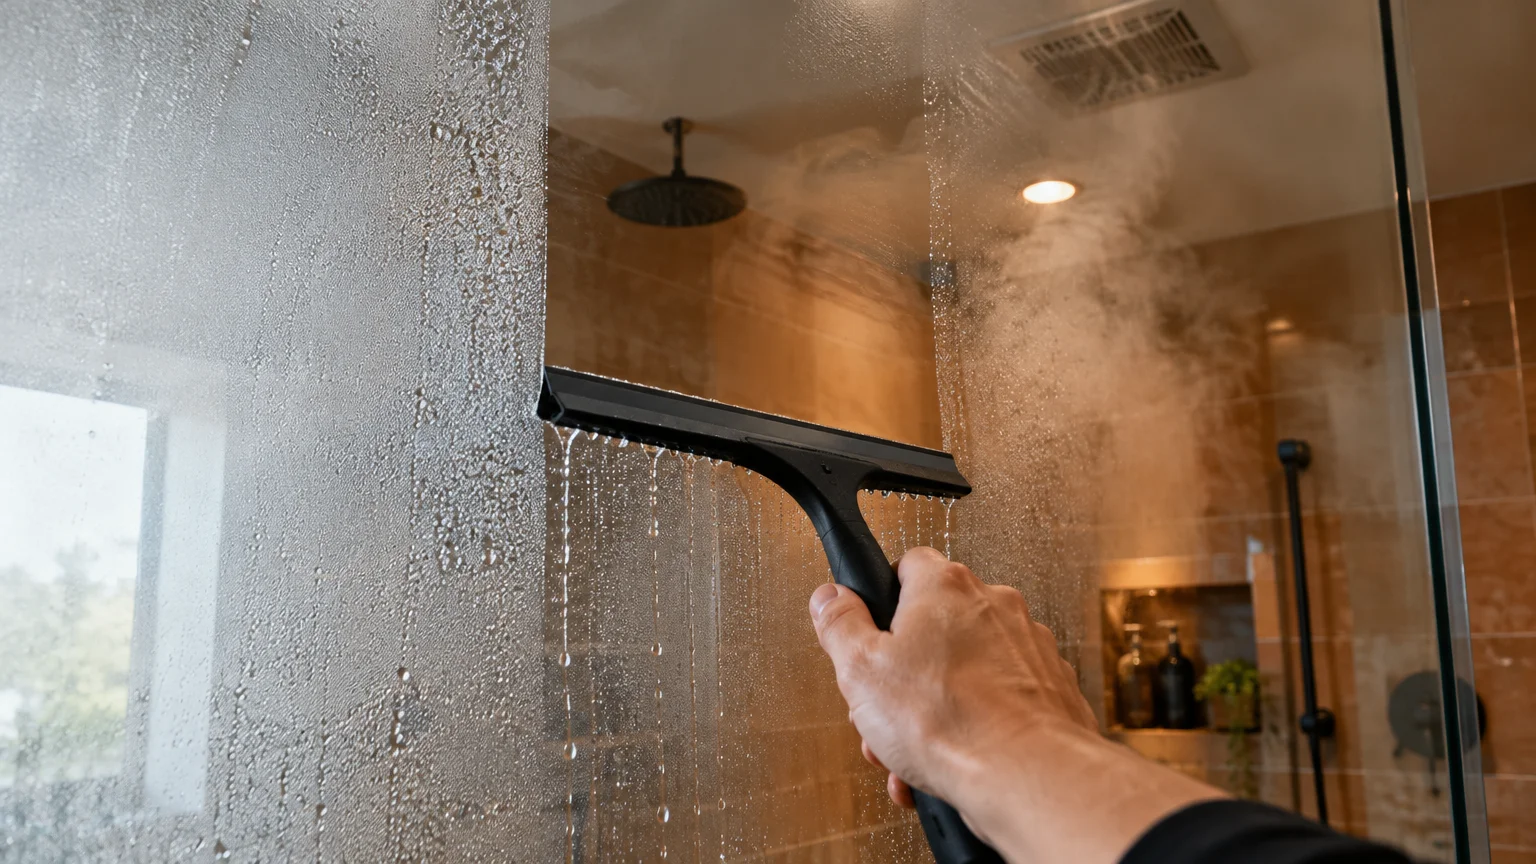
Keep a small rubber squeegee hanging inside your shower stall. Spending thirty seconds squeegeeing shower walls and glass panels after each use removes the majority of standing water immediately.
According to the CDC mold cleanup guidelines, controlling indoor moisture is the single most critical factor in halting mold colonization.
Spread bath mats and wet towels flat across drying racks rather than leaving them balled up on the floor. Damp fabric bundles create ideal breeding incubators for foul-smelling mildew and fungal spores.
07 Disinfect and Air-Dry Your Cleaning Tools
A cleaning tool can only clean as effectively as it is clean itself. Using a contaminated sponge, mop, or brush simply redistributes old bacteria across your fixtures.
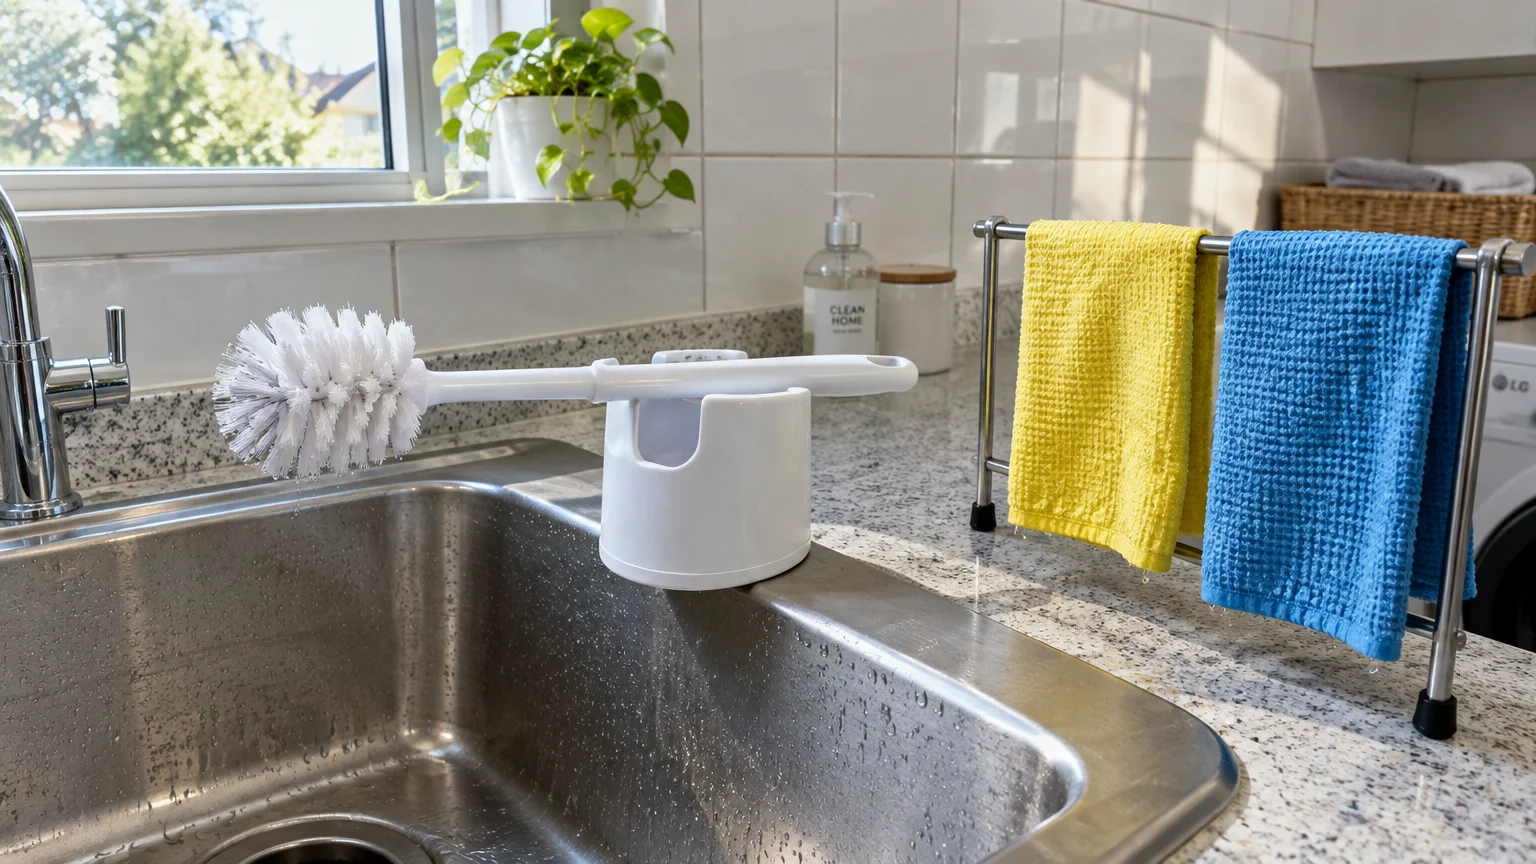
The toilet brush holder is frequently the dirtiest item in an entire home. Placing a wet brush directly back into its holder allows foul water to pool, creating a stagnant bacterial soup.
Sanitize your toilet brush by resting its handle horizontally between the porcelain rim and the lowered toilet seat. Let the wet brush head drip dry directly over the bowl for twenty minutes before storage.
Pour a splash of hydrogen peroxide or disinfectant spray directly into the base of the brush canister. This chemical layer neutralizes any residual moisture that drips down between uses.
Wash reusable mop pads and scrubbing sponges in your washing machine on a sanitizing cycle with hot water. Replace plastic bristle brushes every few months, or whenever their bristles begin splaying and softening.
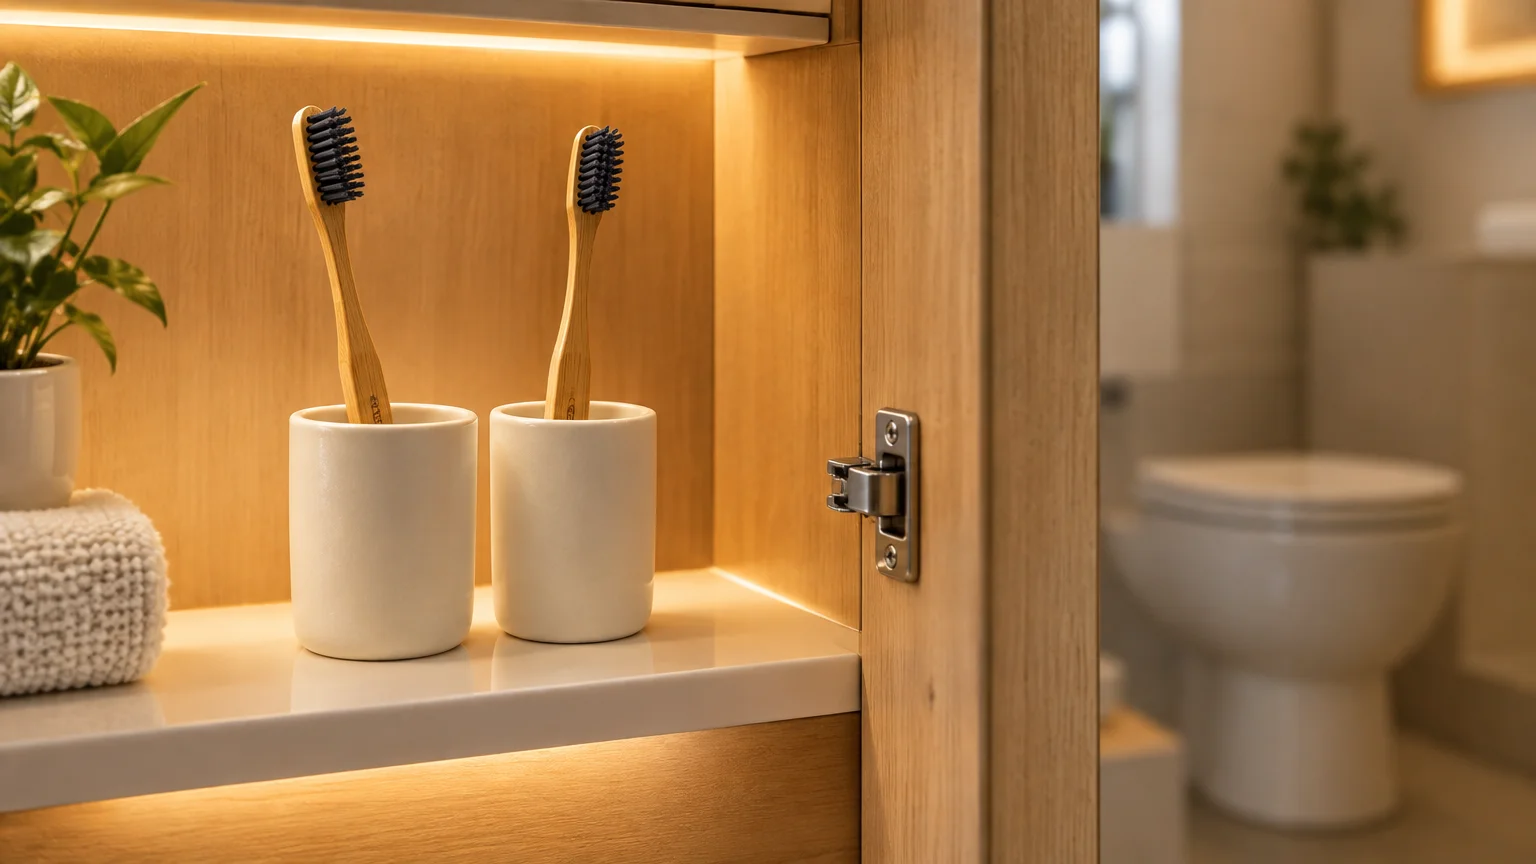
08 Shield Toothbrushes from Ambient Bathroom Germs
Your toothbrush comes into direct contact with your oral mucous membranes every single morning and night. Leaving it exposed on an open vanity counter near the toilet poses serious hygiene risks.
Store toothbrushes upright inside a closed, well-ventilated medicine cabinet. This physical enclosure shields bristles from circulating bathroom germs and ambient dust while allowing the head to air-dry naturally.
Never store damp toothbrushes inside completely sealed plastic travel caps or airtight cases. Dark, damp, enclosed spaces foster rapid anaerobic bacterial growth on nylon bristles.
Wash your countertop toothbrush holders and rinsing cups once a week in hot, soapy water. Alternatively, place dishwasher-safe ceramic and heavy glass holders directly into your dishwasher for sanitization.
Do not let multiple toothbrushes touch bristle-to-bristle in a single shared cup. Direct contact between brush heads allows viruses and oral pathogens to transfer easily between family members.
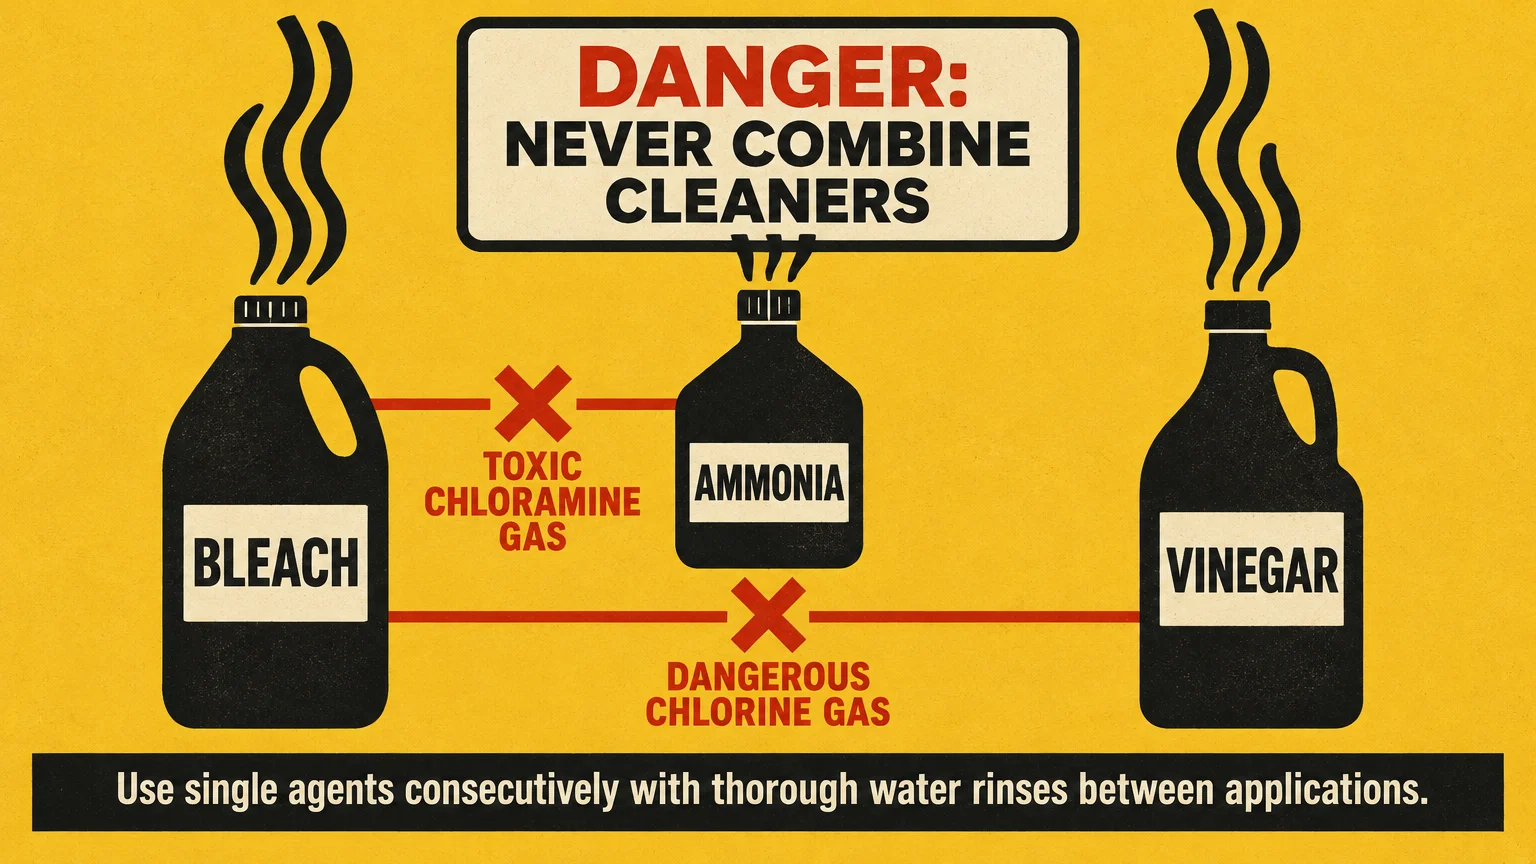
09 Never Mix Chemical Cleaning Agents
Many homeowners mistakenly believe combining multiple commercial cleaners creates a more potent solution. In reality, mixing common household cleaning chemicals can generate lethal toxic gases instantly.
Never mix products containing chlorine bleach with ammonia, vinegar, or acidic toilet bowl cleaners. Combining bleach and ammonia creates volatile chloramine vapors that cause severe respiratory damage and chemical burns.
Similarly, mixing chlorine bleach with acidic solutions like white vinegar produces chlorine gas. Even brief inhalation of chlorine gas can trigger intense coughing, lung inflammation, and chronic respiratory distress.
The CDC chemical safety guidelines explicitly warn against combining bleach with any household cleaner other than clean water.
Stick to one dedicated cleaning product per task. Always flush porcelain or tile thoroughly with water before introducing a secondary cleaning chemical to the same surface.
Maintain vigorous airflow whenever using chemical cleaners by opening windows and running the ventilation fan. Proper air exchange protects your lungs from accumulating chemical vapors.
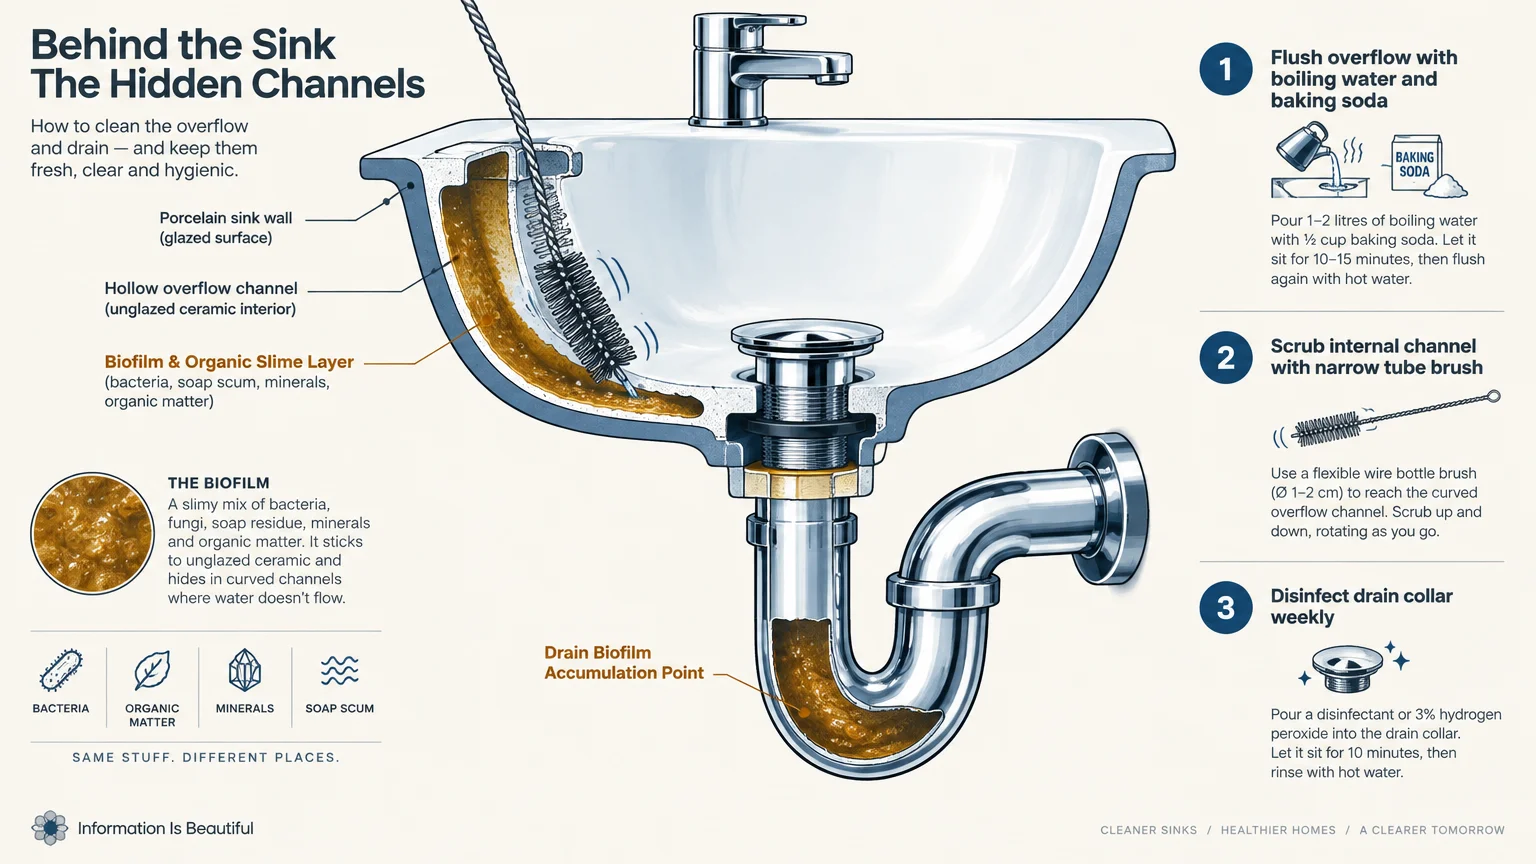
10 Clear Hidden Biofilms from Drains and Basin Overflows
Unpleasant bathroom odors frequently persist even after you scrub every visible fixture thoroughly. These lingering smells usually originate from hidden microbial biofilms thriving inside sink and tub drains.
Sink overflow channels—the small safety holes near the basin rim—are prime reservoirs for mold and bacteria. Water splashes into them, but they rarely receive direct scrubbing or sanitizing flushes.
Clean overflow channels by inserting a narrow, flexible bottle brush coated with a foaming bathroom cleaner. Scrub inside the channel thoroughly, then flush it by pouring hot water directly down the opening.
Shower and bathtub drains accumulate tangled hair, soap scum, and dead skin cells over weeks of daily use. This organic slurry feeds black slime bacteria, known scientifically as Serratia marcescens.
Remove the drain grate monthly to extract trapped hair clogs with an inexpensive plastic drain snake. Pour a cup of baking soda followed by hot vinegar down the drain to break down greasy buildup.
Finish by flushing the drain with boiling water to sweep away dislodged debris and eliminate odors at their source.
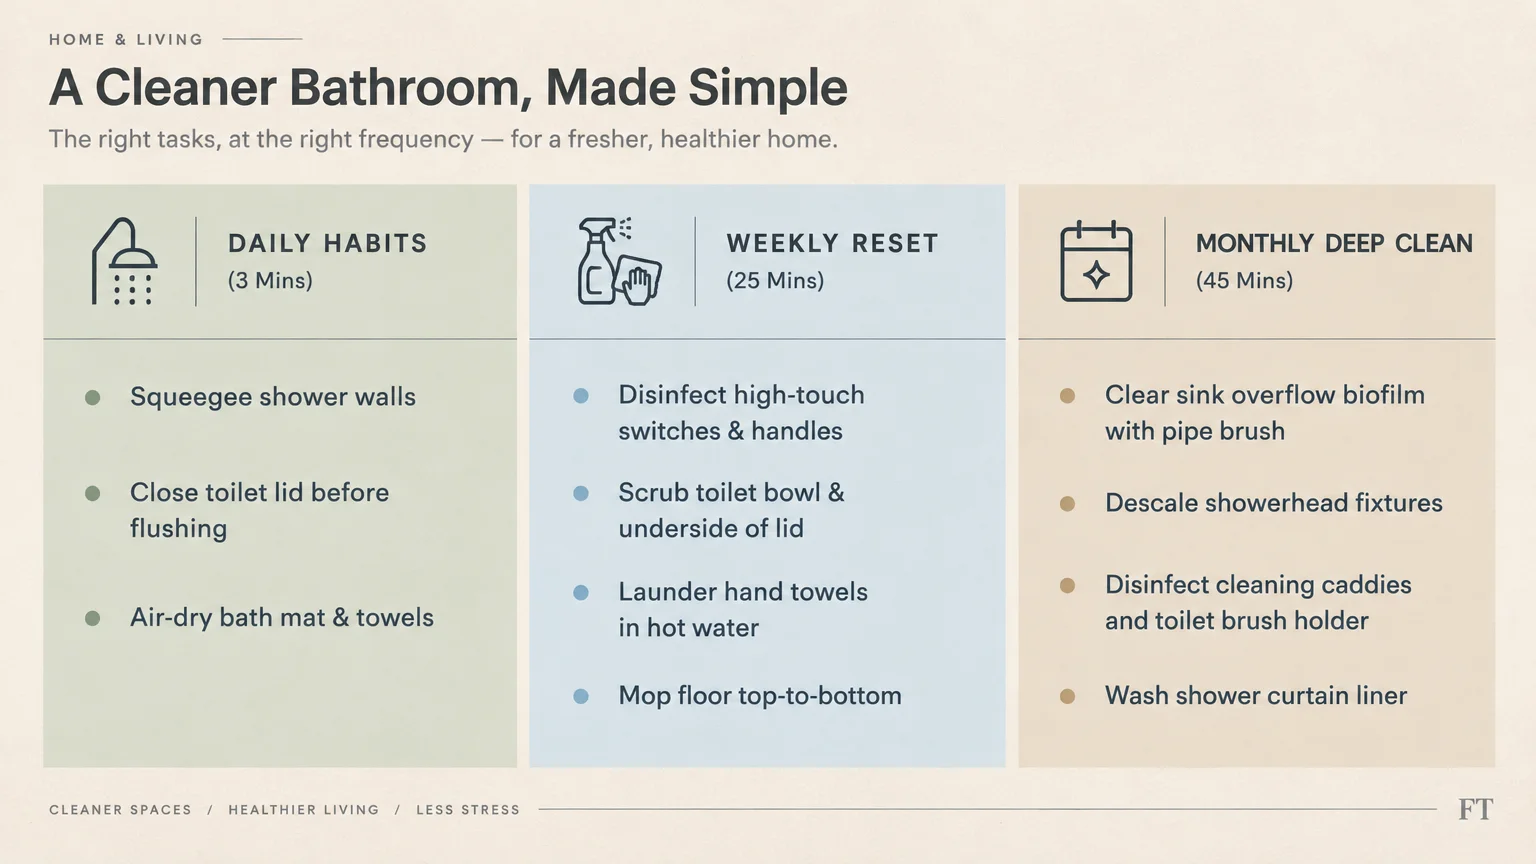
Comprehensive Bathroom Sanitation Schedule
A predictable cleaning schedule breaks large chores into manageable mini-tasks that fit easily into busy days. Establishing consistent routines prevents dirt accumulation and eliminates the need for grueling marathon scrubbing sessions.
Follow this structured timetable to maintain superior bathroom hygiene without sacrificing your free weekends.
| Frequency | Target Zone | Recommended Action | Hygiene Objective |
|---|---|---|---|
| Daily | Shower walls and glass | Squeegee excess water and run exhaust fan for 20 minutes | Starve mold spores and stop mineral etching |
| Daily | Toilet lid and handle | Close lid prior to flushing; wipe handle with sanitizing wipe | Block aerosolized plume and limit contact germs |
| Twice Weekly | High-touch fixtures | Disinfect sink faucets, light switches, and cabinet pulls | Interrupt bacterial transfer pathways |
| Weekly | Vanity and washbasin | Wipe down counter with yellow microfiber and disinfectant | Eliminate spit droplets and soap residue |
| Weekly | Toilet exterior and bowl | Apply bowl sanitizer and scrub; sanitize exterior with red cloth | Destroy enteric bacteria and dissolve uric scale |
| Weekly | Linens and mats | Launder towels and washable floor rugs in hot water | Eradicate damp odor-causing bacterial colonies |
| Monthly | Drains and overflows | Clear hair clogs and scrub overflow port with a bottle brush | Eliminate hidden anaerobic microbial biofilms |
| Monthly | Cleaning accessories | Sanitize toilet brush canister and machine-wash mop heads | Ensure tools do not cross-contaminate rooms |
Adhering to this routine keeps sanitization manageable while preventing heavy calcium deposits and stubborn bacterial colonies from embedding into your grout.
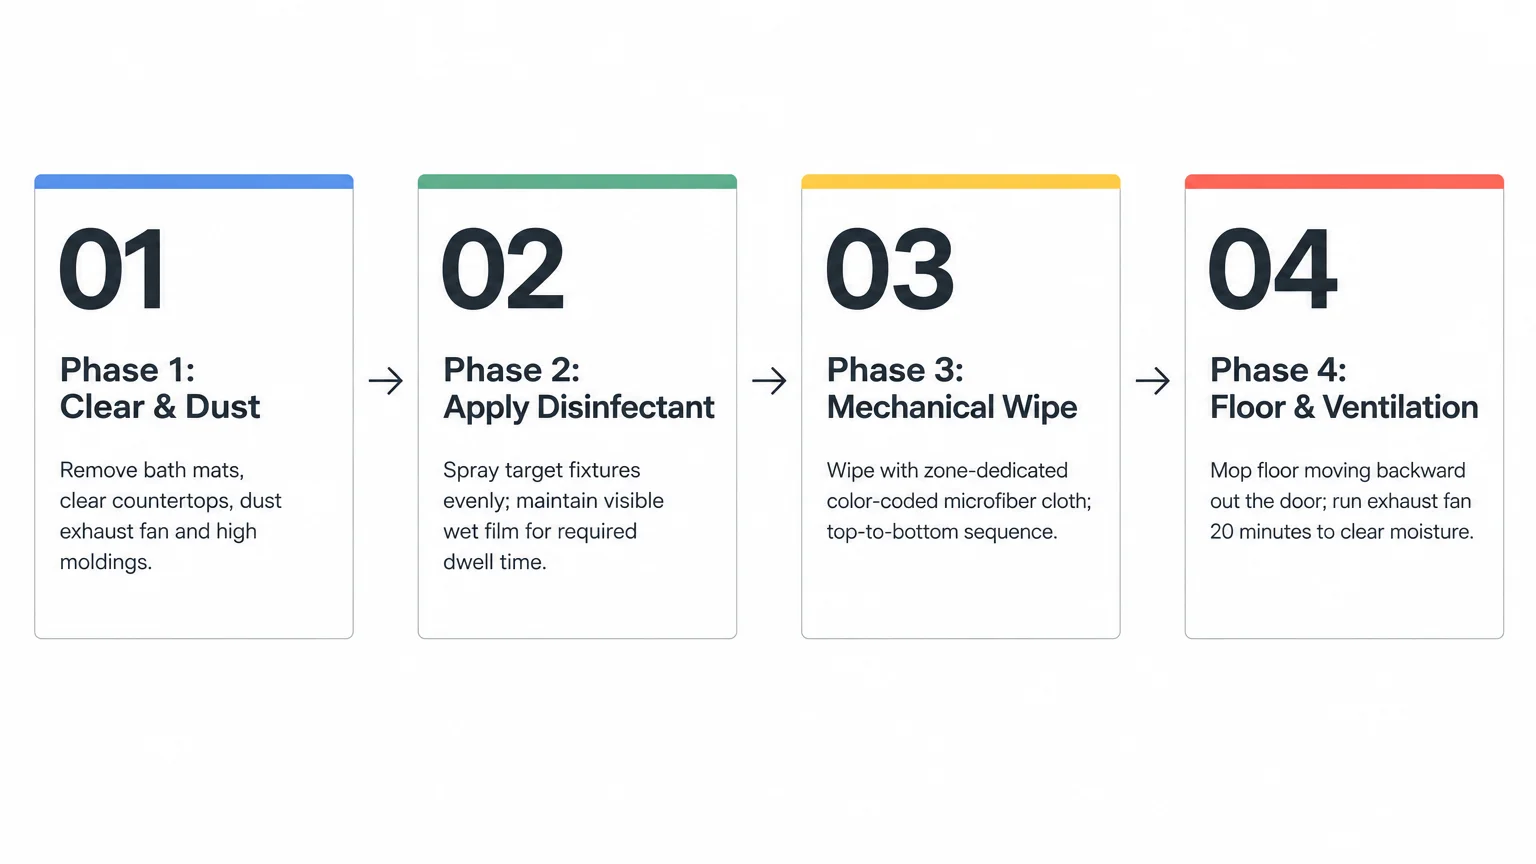
Step-by-Step Protocol for Deep Bathroom Disinfection
Executing a deep clean requires a methodical approach that preserves surface materials while destroying pathogens. Follow this sequential step-by-step workflow whenever you perform your monthly deep clean.
- Remove all rugs, wastebaskets, and countertop items to clear every surface completely.
- Dust high light fixtures, exhaust fan vents, and door frames using an extendable duster.
- Apply specialty tub and tile cleaner to shower walls, bathtub basins, and grout lines.
- Coat the interior toilet bowl with an acidic bowl cleaner to dissolve mineral rings.
- Allow your applied cleaning solutions to dwell undisturbed for their full recommended contact times.
- Scrub shower walls with a stiff-bristle brush, rinse thoroughly with warm water, and squeegee dry.
- Disinfect bathroom countertops, sinks, and faucet handles using your dedicated yellow microfiber cloth.
- Scrub the toilet bowl with your toilet brush, then disinfect the exterior tank, lid, and base.
- Sweep or vacuum the dry floor to lift loose hair and particulate matter before mopping.
- Mop your way out of the room using hot water and a flat microfiber mop pad.
Allowing each cleaning product sufficient dwell time during this sequence ensures maximum germ reduction with minimal physical scrubbing effort.
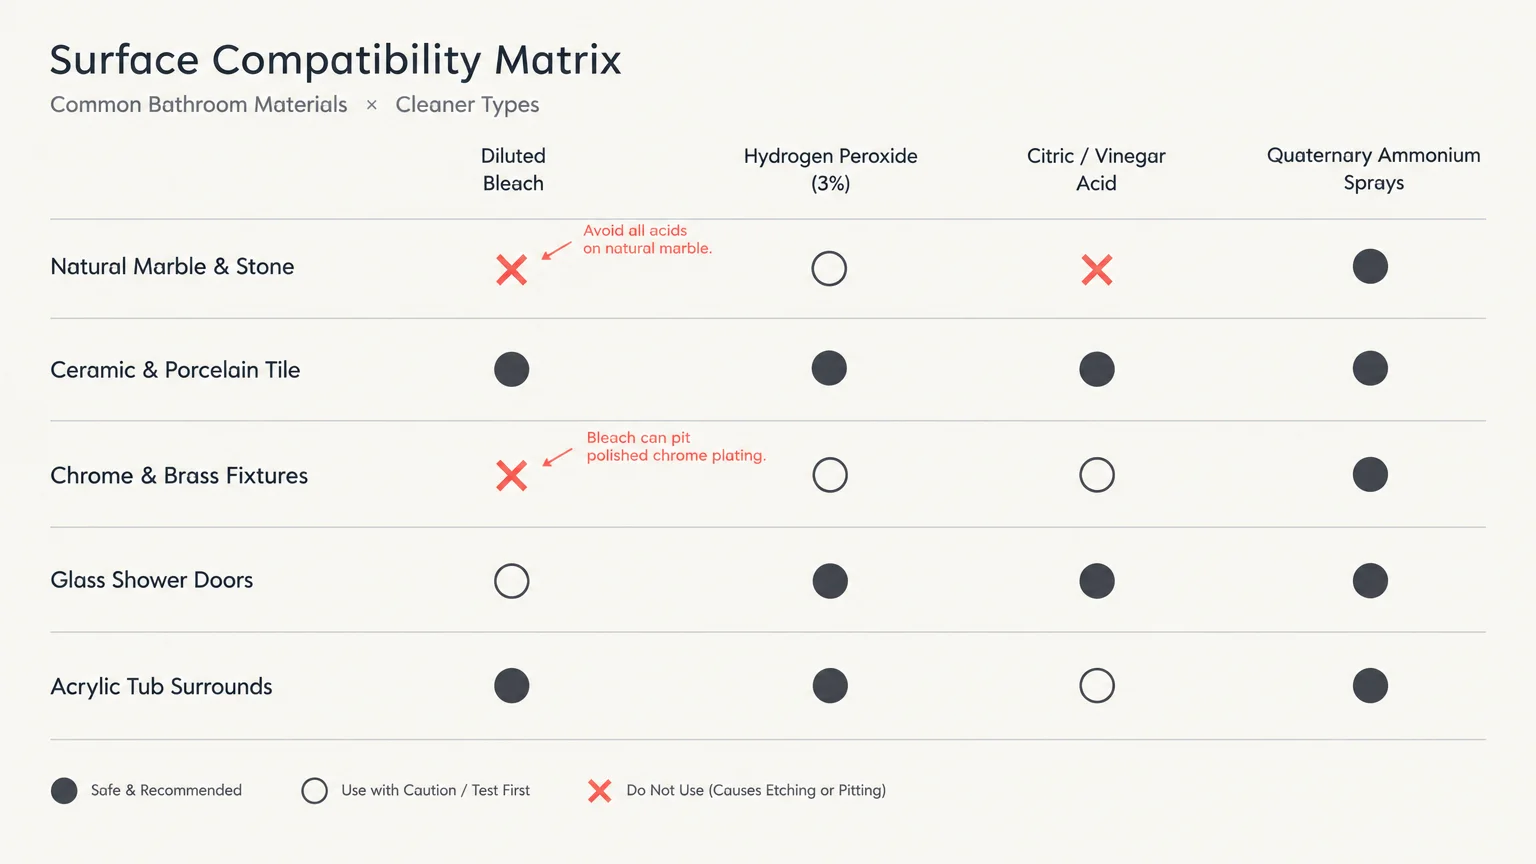
Selecting Safe Disinfectants for Different Bathroom Materials
Not all disinfectants perform equally on every surface material found in modern bathrooms. Using the wrong chemical formulation can permanently etch natural stone, strip chrome plating, or dull acrylic finishes.
Identify your bathroom surfaces before purchasing cleaning chemicals. Marble, travertine, and granite countertops require pH-neutral cleaners because acidic formulas like vinegar immediately etch porous stone.
For ceramic tile and porcelain fixtures, hydrogen peroxide-based formulas provide safe, effective sanitization without the harsh fumes of chlorine bleach. Hydrogen peroxide breaks down into harmless water and oxygen molecules.
Quaternary ammonium compounds—commonly known as quats—serve as the active antibacterial agents in many hospital-grade surface wipes. Quats work exceptionally well on hard, non-porous vanity counters and synthetic shower surrounds.
Always read product warnings regarding compatibility with glazed ceramics and clear acrylic panels. Testing any new disinfectant on a small, hidden corner prevents costly surface discoloration and damage.
Simple Daily Habits for Effortless Upkeep
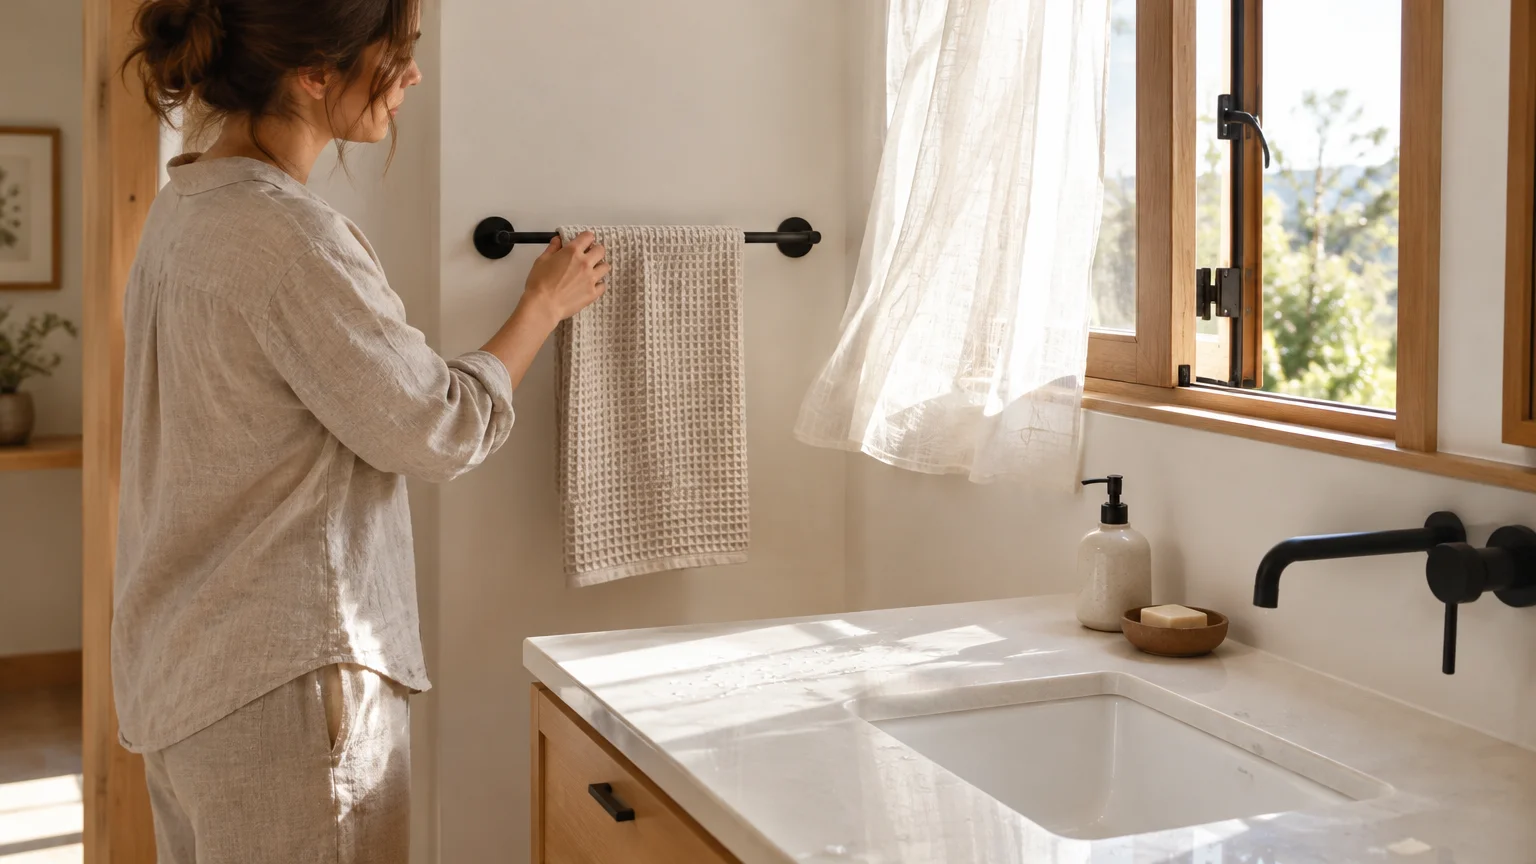
Maintaining a germ-free bathroom requires consistent micro-habits rather than occasional deep-cleaning marathons. Adopting a few thirty-second rituals keeps your space calm, fresh, and perpetually hygienic.
Keep a pack of surface wipes inside your vanity cabinet for immediate cleanups. Wiping stray water splashes and toothpaste flecks from the sink rim takes five seconds and prevents stubborn encrustations.
Hang damp towels immediately after bathing so air circulates freely through the fabric folds. When bath towels dry quickly, bacteria cannot generate the musty odor characteristic of stagnant moisture.
Encourage family members to leave the bathroom door open after showering if an exhaust fan is unavailable. Restoring normal room humidity levels protects ceiling paint, prevents wallpaper peeling, and starves mildew.
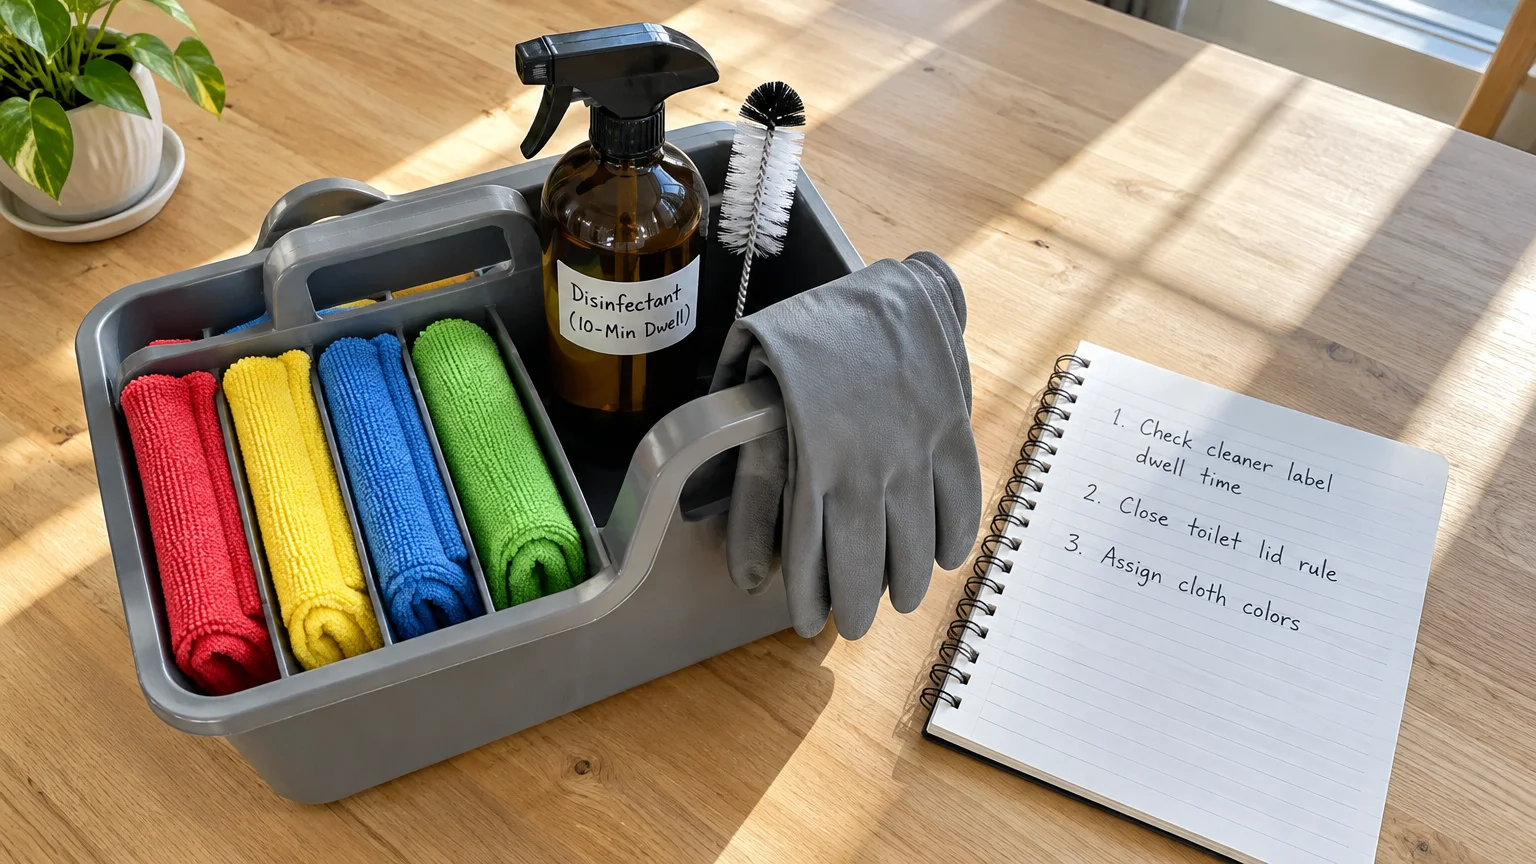
Your Practical Next Step
Pick one high-touch zone in your bathroom right now—such as your faucet handles or toilet flush lever—and disinfect it properly. Ensure you let the disinfectant stay wet for its complete labeled dwell time before wiping.
Once you see how quick and effective proper contact time is, implement the color-coded cloth system for your next weekly cleaning session.