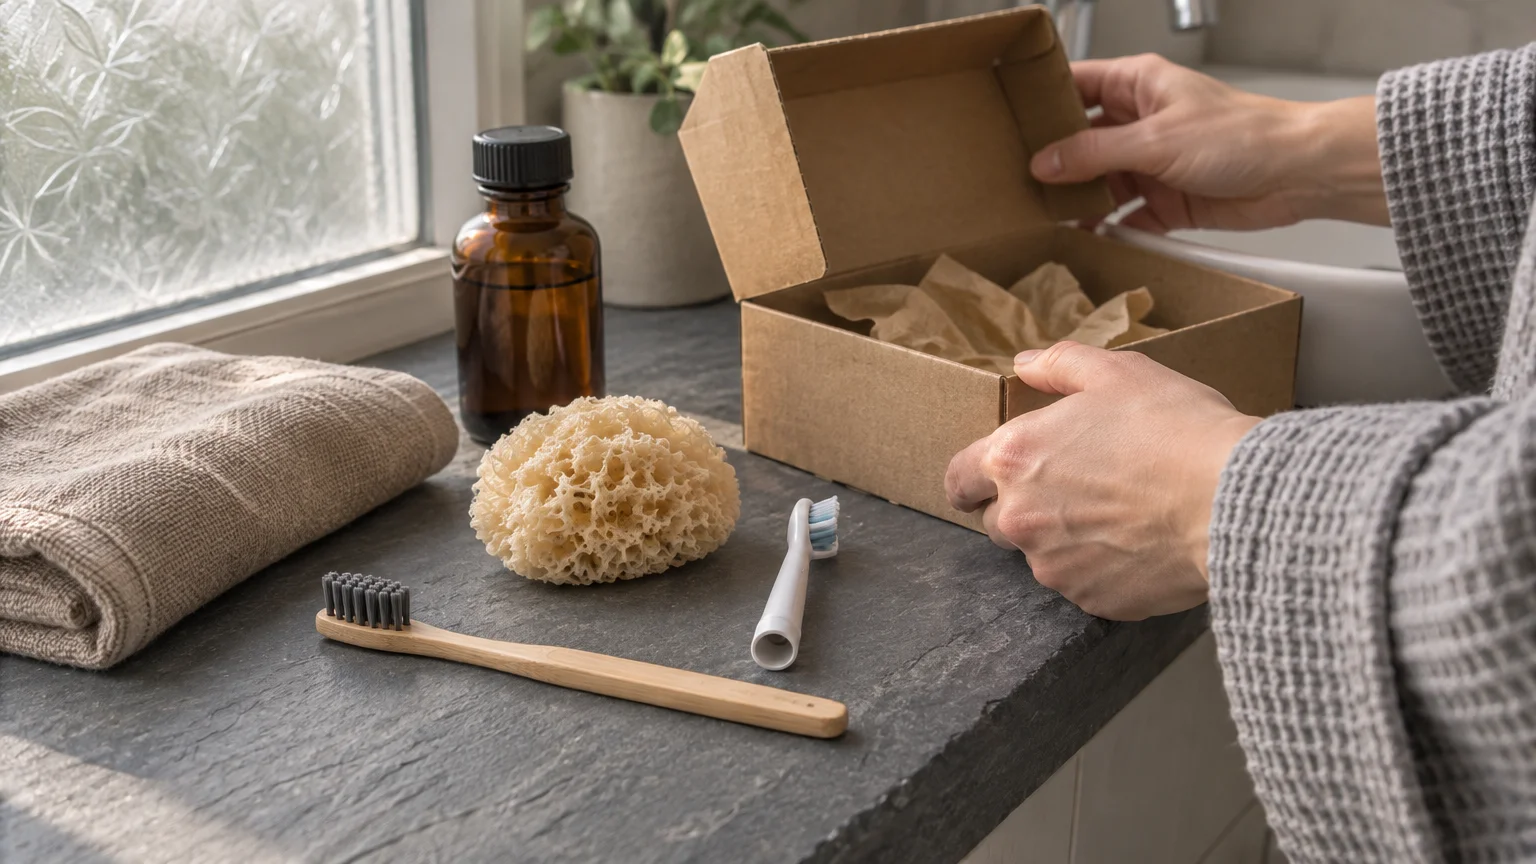
Warmth, steam, and splashing water turn your bathroom into an ideal incubator for bacteria, mold, and degraded active ingredients. Most tools look perfectly fine long after their bristles, pores, or chemical preservatives stop protecting you.
Knowing which bathroom items to replace every few months removes the guesswork from daily hygiene. A steady rotation prevents skin breakouts, eye infections, and lingering odors without adding extra scrubbing to your week.
Follow this professional household replacement schedule to set clear swap dates, store supplies away from humidity, and maintain every surface safely. You will spend less time deep cleaning and keep every routine running smoothly.
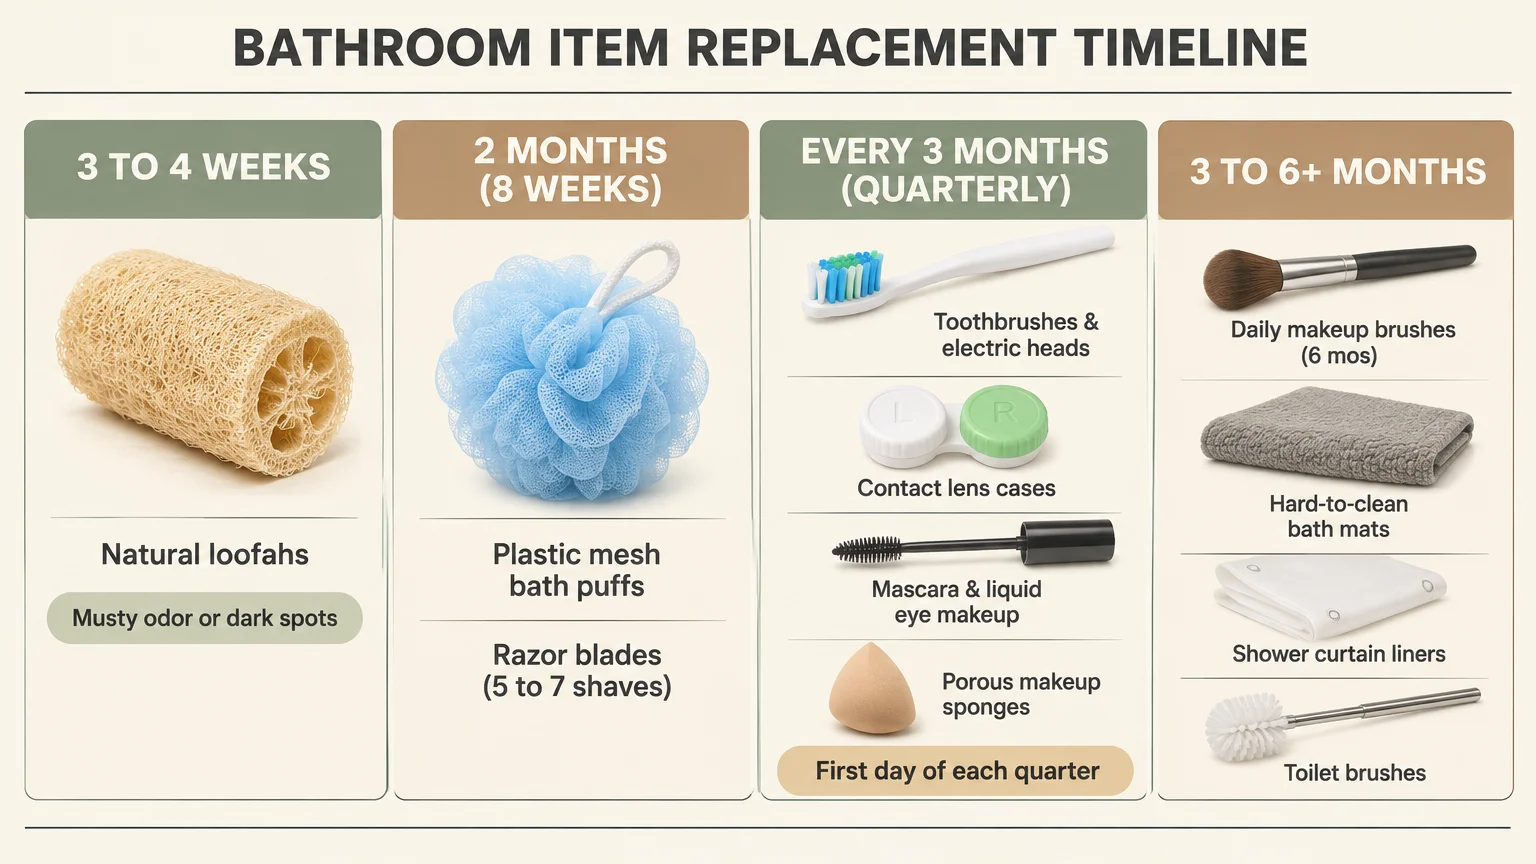
Your Quick-Reference Household Replacement Schedule
Professional organizers and facility managers rarely track individual purchase dates for dozens of small supplies. Instead, they anchor high-turnover bathroom items to predictable calendar cycles—such as the start of each season—so replacements happen automatically.
Use the reference table below to group your swaps into monthly, quarterly, and semi-annual batches. Check the immediate toss column whenever an item shows signs of early wear.
| Bathroom Item | Replacement Interval | Immediate Toss Triggers | Care Between Swaps |
|---|---|---|---|
| Natural loofahs | Every 3 to 4 weeks | Musty odor, dark spots, or slimy texture | Hang outside the shower; soak 5 minutes weekly in diluted bleach |
| Plastic mesh bath puffs | Every 2 months (8 weeks) | Unraveling mesh, lingering odor, or visible spotting | Rinse thoroughly, shake dry, and store outside shower spray |
| Razor blades and disposables | Every 5 to 7 shaves | Trapped hair or soap residue that refuses to rinse clear | Rinse after every swipe; store upright away from standing water |
| Toothbrushes and electric heads | Every 3 to 4 months | Matted, splayed, or frayed bristles; household illness | Air-dry upright and uncovered at least 6 feet from the toilet |
| Contact lens cases | At least every 3 months | Any hairline crack, warped thread, or discoloration | Empty, store upside down with caps off; never use tap water |
| Mascara and liquid eye makeup | Every 3 months | Clumping, dried formula, or recent eye irritation | Swirl the wand gently instead of pumping air into the tube |
| Porous makeup sponges | Roughly every 3 months | Torn foam, deep staining, or sour smell | Wash after every single use with gentle cleanser |
| Daily-use makeup brushes | Roughly every 6 months | Shedding hairs, frayed tips, or loose ferrules | Wash every 7 to 10 days with lukewarm water and gentle shampoo |
| Hard-to-clean bath mats | Every 3 to 6 months | Peeling rubber backing or persistent damp odor | Wash weekly and drape over a bar to dry the underside |
| Shower curtain liners | Every 3 to 12 months (humidity dependent) | Persistent black mold spots or stubborn pink residue | Spray or wash monthly; pull closed after showers to dry flat |
| Toilet brushes | Every 3 to 12 months (cleaning method dependent) | Bent, discolored, or shedding bristles | Disinfect after scrubbing and drip-dry over the bowl before holstering |
Notice how many critical swaps cluster right around the three-month mark. Aligning your contact lens case, mascara, porous sponges, and brush head changes with the first day of each quarter turns maintenance into a five-minute habit.
Oral and Eye Care Tools You Must Swap Quarterly
Your mouth and eyes have delicate mucous membranes that react quickly to microscopic contamination. Treating oral and optical tools like long-term hardware invites avoidable inflammation and infection.
Toothbrushes and Electric Brush Heads
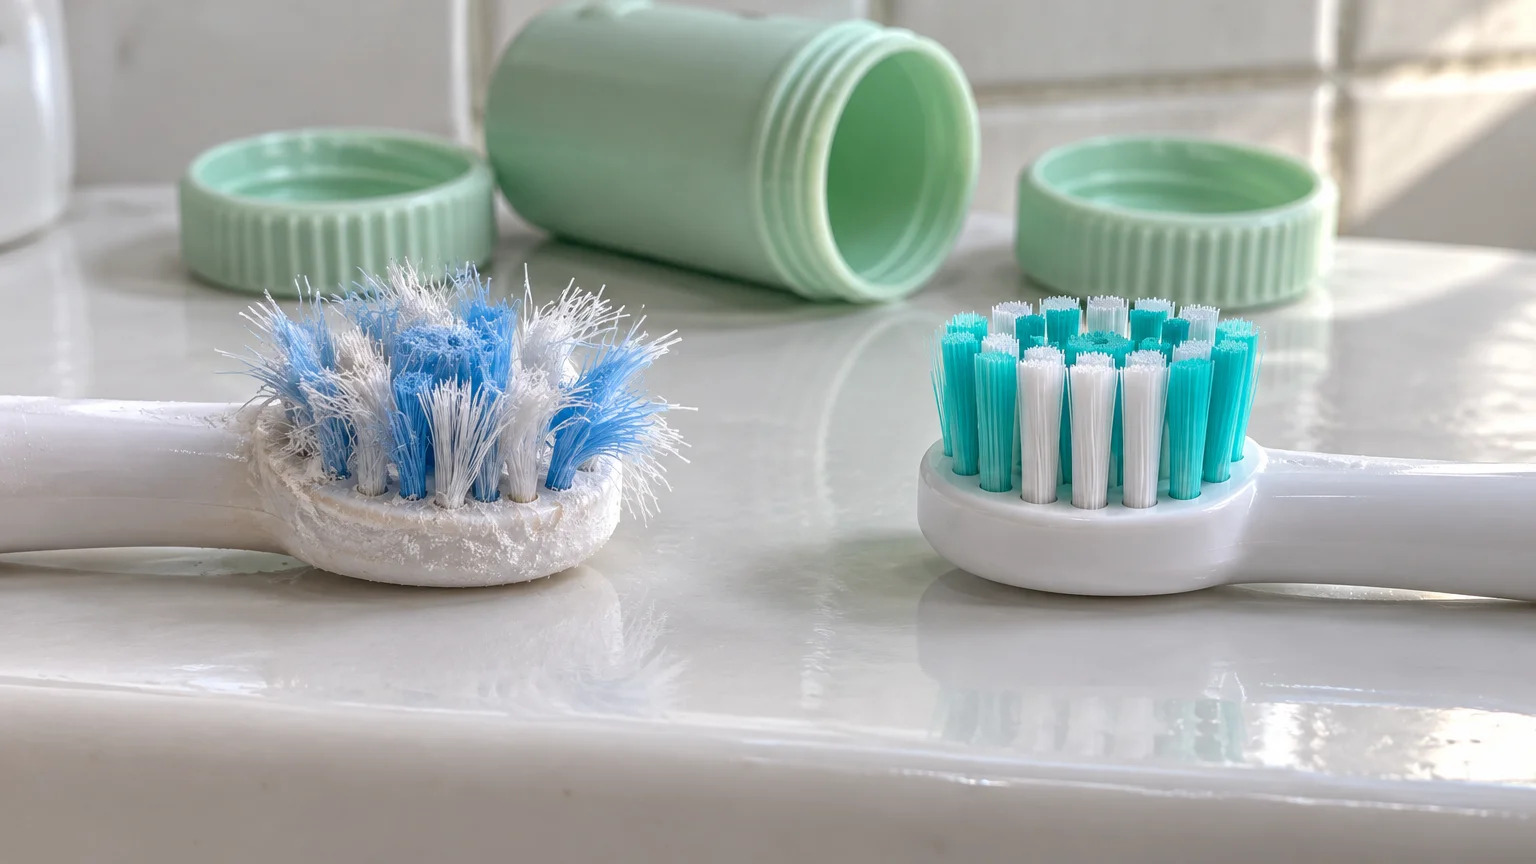
Both the American Dental Association (ADA) and the Centers for Disease Control and Prevention (CDC) advise you to replace your toothbrush—or your electric toothbrush head—every 3 to 4 months. Once nylon bristles become matted, splayed, or frayed, they lose the mechanical geometry needed to sweep plaque away from the gumline.
Even if bristles look straight, worn tips polish enamel poorly and miss tight spaces between molars. Many electric brush heads include dye-infused indicator bristles that fade halfway down the shaft to give you an unmistakable visual cue.
For older adults or anyone managing stiff hands, switching to a wide-grip electric handle removes wrist strain while maintaining consistent brushing pressure. Lighter pressure also prevents premature bristle splaying, helping each head last its full cycle.
Where and how you store your brush matters just as much as when you replace it. The ADA recommends storing toothbrushes upright and uncovered in open air so moisture evaporates rapidly between morning and evening sessions.
Closed plastic travel caps trap dampness around the base of the bristles, creating an oxygen-poor pocket where microbes thrive. Reserve snap-on caps strictly for packed suitcases, and let the head dry completely once you unpack.
Location inside the bathroom is equally critical for bathroom hygiene. Flushing a toilet launches fine aerosolized droplets of bacteria and waste up to 6 feet through the air, according to Dr. Dan Allan of the Cleveland Clinic.
Move countertop toothbrush cups away from the commode, or store upright brushes inside a ventilated medicine cabinet rather than beside the sink edge. Always lower the toilet lid before flushing to contain plume spread across nearby surfaces.
Certain health events override the standard 3-to-4-month clock immediately. The ADA advises replacing all toothbrushes that shared a communal holder after someone in the household has been sick, and replacing your own brush if you had a cold sore or are severely immunocompromised.
Contact Lens Cases
Contact lens cases require the same strict quarterly schedule as toothbrushes. The CDC, American Academy of Ophthalmology (AAO), and American Optometric Association (AOA) all recommend replacing lens cases at least every 3 months—or immediately if the plastic cracks or warps.
Over several weeks of daily use, bacteria and fungi build microscopic biofilms along the textured corners of plastic lens wells. Fresh disinfecting solution cannot penetrate a mature biofilm effectively, even when the plastic looks clear under bathroom lighting.
Two common habits dramatically raise eye infection risks between swaps, according to the CDC and AAO. Never rinse your lens case with tap water, and never top off leftover solution in the wells with a splash of fresh liquid.
Tap water carries microorganisms that can adhere to lenses and trigger severe corneal infections, while topping off dilutes active disinfectants past the point of safety. Empty the case completely every morning after inserting your lenses, rinse with sterile contact solution if needed, and store the empty case upside down with the caps off to air-dry on a clean tissue.
If you handle lenses infrequently, keep multi-pack disposable cases in a dry drawer rather than on a steamy vanity. Unopened cases stay sterile longer and prevent accidental reuse past their safe window.
Shower and Shaving Gear That Traps Moisture and Skin Cells
Inside a warm shower enclosure, relative humidity spikes rapidly and stays elevated long after you turn off the valve. Textured tools that hold soap film and shed skin cells inside damp folds degrade far faster than smooth hard goods.
Natural Loofahs and Plastic Mesh Bath Puffs
Natural loofah sponges are dried fibrous plant gourds filled with tiny internal tunnels that trap moisture and dead skin cells. A 1994 study in the Journal of Clinical Microbiology documented gram-negative bacteria—specifically Pseudomonas and Klebsiella—colonizing loofahs and transferring directly onto human skin.
To keep skin healthy, Dr. Melissa Piliang of the Cleveland Clinic advises replacing natural loofahs every 3 to 4 weeks. Plastic mesh bath puffs hold slightly less organic residue inside smooth synthetic netting, extending their safe lifespan to roughly every 2 months (8 weeks).
Treat either timeframe as a maximum ceiling rather than a guarantee. Discard any sponge or puff immediately if you notice a sour, musty scent or dark spots tucked inside the weave.
Between replacements, basic drying habits slow microbial growth dramatically. Hang loofahs and mesh puffs outside the shower enclosure where air circulates freely, rather than leaving them on a corner caddy that catches cold drips.
Once a week, sanitize your bath sponge using the protocol recommended by the Cleveland Clinic. Submerge the item in a diluted bleach solution for a full 5 minutes, rinse thoroughly with clean water, and shake out excess moisture before hanging it to dry.
Be careful with material compatibility during that weekly soak. Never leave bleach residue on natural stone shower benches or brushed metal hooks, and avoid soaking delicate organic fibers longer than 5 minutes so they do not disintegrate prematurely.
If weekly soaking feels like too much upkeep, swap porous puffs for flat-weave cotton washcloths or non-porous silicone body scrubbers. Silicone resists deep moisture retention, rinses clean in seconds, and works reliably for older adults seeking simpler bathroom cleaning routines.
Razor Blades and Disposable Razors
Dull blades tug hair follicles instead of slicing cleanly at skin level, creating microscopic tears that invite irritation and infection. The American Academy of Dermatology (AAD) recommends changing cartridge blades or discarding disposable razors every 5 to 7 shaves.
Rinse the blade under running water after every single swipe to flush away shaving cream, keratin, and shed skin before it packs tightly between stacked blades. If trapped hair or dried residue refuses to rinse clear, replace the cartridge sooner—Cleveland Clinic specialists note that clogged blades can push bacteria straight into pores or small nicks.
Between shaves, moisture sitting on stainless steel dulls the microscopic cutting edge through oxidation. Tap the handle gently against your palm to clear standing droplets, then rest the razor upright in a dry cup outside the direct shower spray.
Avoid pressing a damp razor blade into a heavy terry towel to dry it, because fabric fibers snag and roll delicate edges. Keeping cartridges dry in open air preserves sharpness across all 5 to 7 uses.
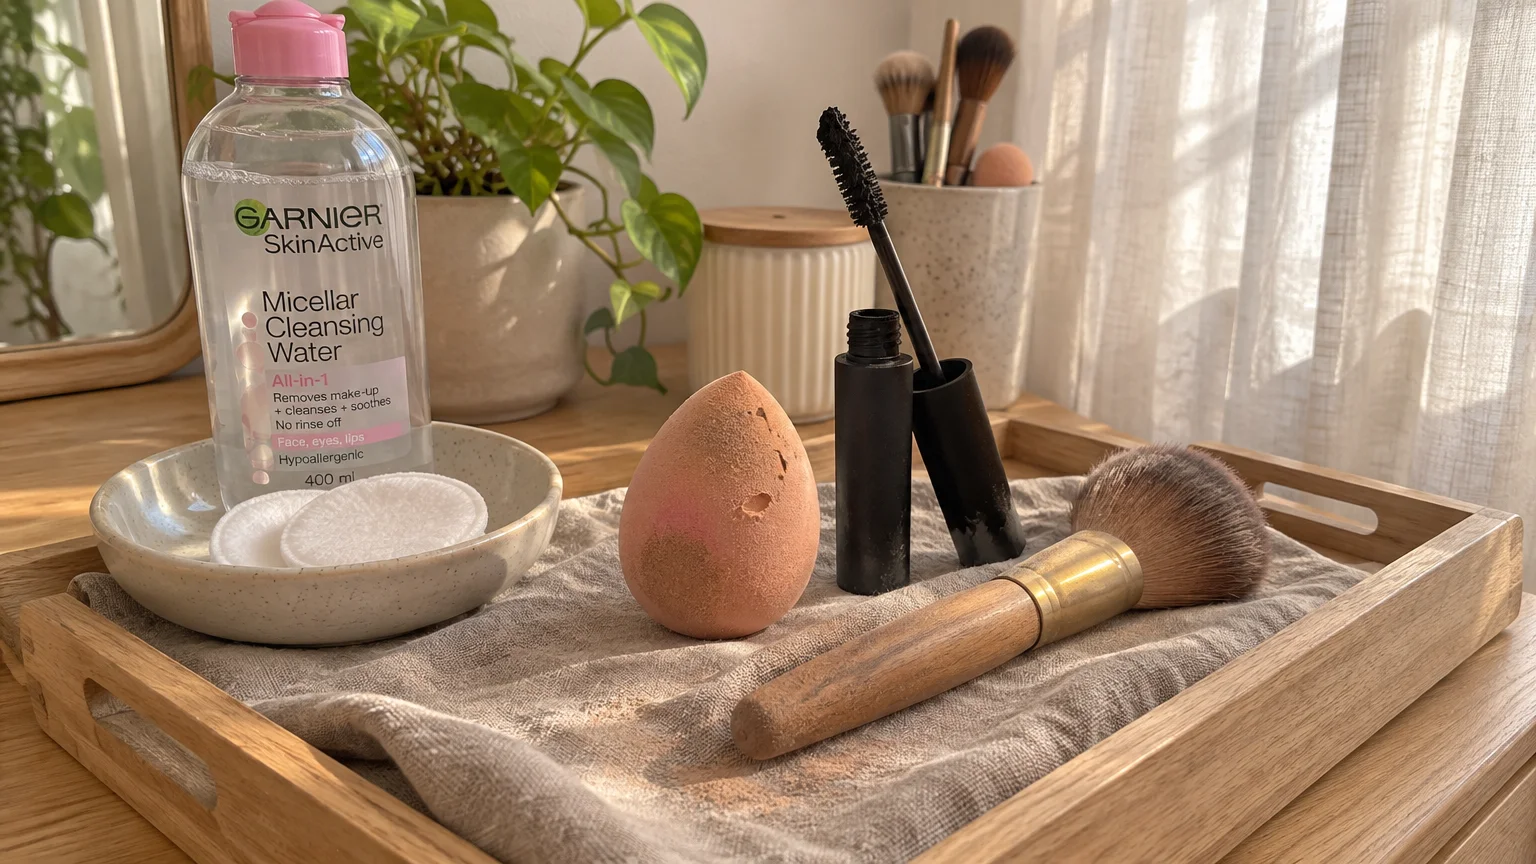
Cosmetics, Brushes, and Skincare Products with Hidden Expiration Risks
Bathroom vanity drawers often hold half-used tubes and jars accumulated over years. Unlike pantry staples, personal care containers rarely smell spoiled when preservatives fail or active formulas break down.
Mascara and Liquid Eye Makeup
Liquid eye cosmetics sit directly beside your tear ducts, making preservative fatigue an urgent health concern. Both the AAO and the U.S. Food and Drug Administration (FDA) advise discarding mascara every 3 months—aligning with typical manufacturer guidance of 2 to 4 months after purchase—to avoid styes and bacterial conjunctivitis.
That three-month cutoff reflects measurable contamination rates in real households. A 2008 study published in Optometry detected microbial growth—including Staphylococcus epidermidis and Streptococcus—in 36.4% of mascara tubes by the 3-month mark.
How you load the applicator determines how fast bacteria multiply inside the dark vial. Pumping the wand up and down forces oxygen and airborne microbes deep into the liquid reservoir while drying out the emulsion prematurely.
Swirl the wand gently against the inner wall instead, then twist the cap snug without overtightening. Keep a fine-tip permanent marker in your vanity drawer and write the open date across the base of every new tube the moment you break the seal.
Cosmetic Labels Versus Over-the-Counter Drug Rules
Many shoppers assume an unlabeled bottle remains safe indefinitely, yet federal labeling laws treat standard makeup differently from medicated skincare. Under U.S. law, the FDA does not require standard cosmetics to print expiration dates or fixed shelf lives, even though manufacturers remain legally responsible for product safety.
By contrast, European Union regulations require expiration dating on cosmetics whose minimum durability falls under 30 months. When you spot a tiny open-jar icon stamped with 6M, 12M, or 24M on imported skincare, that symbol shows how many months the formula stays stable after opening.
Products classified as drugs by the FDA—including sunscreens and medicated acne treatments—are legally required to display an explicit expiration date on the packaging. Most sunscreens remain effective for 3 years under normal storage conditions, with stability tested at 40°C in 75% and 25% humidity for 3 months according to the Skin Cancer Foundation.
Never stretch a sunscreen past its printed expiration date, regardless of how full the bottle feels. Mayo Clinic guidance emphasizes tossing expired sunscreen immediately—and discarding any bottle sooner if the cream separates, smells off, or changes color or texture.
Makeup Brushes and Porous Sponges
Every time a brush or damp foam blender sweeps across your face, it picks up sebum, skin flora, and liquid pigment. Without regular washing, those bristles transfer stale oil back onto clean skin and clog pores.
The AAD recommends washing makeup brushes every 7 to 10 days using lukewarm water and a gentle shampoo. Porous makeup sponges absorb liquid deep into their open-cell core, so Dr. Cynthia Bailey of the AAD advises cleaning sponges after every single use.
Even with disciplined washing, bristles and foam degrade under repeated friction and detergent exposure. Skincare and dermatology guides commonly recommend replacing porous beauty sponges roughly every 3 months and daily-use brushes around every 6 months—or sooner if bristles fray, shed, or hold stubborn stains.
Use an ergonomic drying trick to extend the life of quality wooden or metal-ferruled brushes. After swirling bristles in lukewarm suds and rinsing clear, squeeze gently with a clean paper towel and lay brushes flat with the tips overhanging your counter edge.
Standing wet brushes upright inside a jar lets water trickle downward into the metal ferrule, softening the adhesive that anchors bristles in place. Flat overhanging drying protects the glue joint and lets air reach every side of the brush head evenly.
Why Your Medicine Cabinet Ruins Medications
Calling a bathroom wall box a medicine cabinet is one of the costliest misnomers in home organization. Hot showers send sharp spikes of steam and warmth right through cabinet door seams multiple times a day.
According to the FDA and Baystate Health, most prescription and over-the-counter medications require cool, dry storage between 59°F and 77°F, while sunscreens tolerate 59°F to 86°F. Repeated humidity and temperature swings inside bathrooms degrade active ingredients—reducing therapeutic potency or creating toxic breakdown products.
Moisture can make tablets crumble, turn coated capsules sticky, and skew test strip readings for glucose or home health monitors. Relocate daily prescriptions, vitamins, pain relievers, and backup ointments to a dry hallway linen closet, pantry shelf, or bedroom dresser drawer.
If you keep a morning pill organizer near a sink for convenience, store only one week of doses in a tight-lidding case and keep original bottles in dry storage. Reserve the bathroom vanity solely for durable bandages, thermometers, and tweezers.

Shower Curtain Liners, Bath Mats, and Cleaning Tools
Large fabric and plastic surfaces catch daily overspray, soapy mist, and wet footprints across the floor. Once mold filaments or hardened mineral scale anchor into flexible plastics and backed textiles, routine wiping only cleans the surface.
Shower Curtain Liners and Fabric Curtains
Vinyl and plastic shower liners accumulate body oils, soap scum, and hard-water minerals near the lower hem where standing droplets evaporate slowly. Cleveland Clinic guidance and microbiologist Dr. Alfredo G. Torres of UTMB advise replacing vinyl or plastic liners every 6 months to 1 year—and tightening that schedule to every 3 to 6 months in humid or poorly ventilated bathrooms.
Two distinct biological stains signal when a liner needs urgent attention. Pink or orange slimy film along damp folds is usually Serratia marcescens bacteria feeding on soap residue, whereas dark black spots embedded in the vinyl indicate mold.
Replace any liner immediately if mold or mildew persists after cleaning. Between swaps, cleaning service Merry Maids recommends washing or spraying liners monthly, while the American Cleaning Institute (ACI) advises laundering fabric outer curtains every 3 months.
Simple airflow adjustments extend the useful life of a clean liner. After every shower, pull the curtain fully closed across the rod so wet pleats flatten out instead of trapping humid folds against the corner wall.
If reaching overhead hooks strains your shoulders or balance, switch to split-ring hooks or a hookless snap-in liner system. Weighted PEVA or machine-washable nylon liners release cleanly at chest height and wash easily without scrubbing on your hands and knees.
Bath Mats
Bath mats soak up drips from wet feet while trapping warmth against tile or vinyl planks underneath. The ACI recommends washing bath mats weekly, or every couple of weeks depending on household traffic, to clear trapped skin cells and soap residue.
Heavy tufted mats with thick rubberized backings break down faster than simple woven cotton rugs under frequent hot wash cycles. Dr. Dan Allan of the Cleveland Clinic advises replacing hard-to-clean bath mats every 3 to 6 months.
Inspect the underside of backed mats once a month for fine cracks, chalky powder, or peeling latex. Damaged backings crumble in washing machines, trap dampness directly against floor grout, and flake bits of rubber across clean tiles.
Drape damp bath mats over the edge of the tub or a wall rail between showers so air dries both sides quickly. Choosing two lightweight, reversible cotton mats allows you to swap a fresh one onto the floor instantly on laundry day.
Toilet Brushes and Bathroom Cleaning Tools
A toilet brush handles the highest pathogen load in your house yet frequently gets stuffed wet into a tight plastic cup. Cleaning specialists at Sparkly Maid (Isabella Flores) and Drench advise replacing toilet brushes every 3 to 6 months if you only rinse them after use, or every 6 to 12 months if you disinfect them regularly.
Discard any toilet brush immediately when nylon bristles bend permanently outward, discolor, or shed into the bowl. Bent bristles cannot reach cleanly under the rim jet holes where mineral rings and bacteria accumulate.
Consistent frequency keeps mineral scale from hardening so gentle brushes work effectively without heavy elbow grease. Prof. Sally Bloomfield of the London School of Hygiene & Tropical Medicine advises cleaning toilets 2 to 3 times a week, alongside the ACI recommendation to clean full bathrooms weekly.
Never drop a dripping brush straight back into a solid caddy right after scrubbing the bowl. Wedge the clean brush handle horizontally beneath the lowered toilet seat for ten minutes so excess moisture drips harmlessly into the water before you holster it.
Wait until chemical cleaner residue rinses completely clear before resting the handle under a finished wood or coated plastic seat. For lower-maintenance sanitation, silicone-head toilet brushes shed droplets quickly and resist trapping tangled debris between dense bristles.
Towel Laundering Rules and Safe Bathroom Cleaning Chemistry
Even a freshly stocked bathroom loses ground quickly if damp linens hang in bunched piles or if cleaning cloths spread germs from one zone to another. Combining smart laundering temperatures with strict chemical safety preserves both your health and your bathroom finishes.
Towel and Washcloth Rotation
Bath towels wipe away water along with residual dead skin cells and harmless surface microbes that multiply if fabric stays wet for hours. The ACI advises washing bath towels every 3 to 5 normal uses, while Dr. Alok Vij of the Cleveland Clinic advises washing them at least once a week.
Smaller linens stay damp longer and contact high-touch areas, requiring tighter turnarounds. Wash hand towels every 2 days (ACI) to weekly (Cleveland Clinic), and replace washcloths for a fresh one so they get laundered at least twice a week (Cleveland Clinic).
Laundering temperature determines how thoroughly wash cycles strip embedded oils and microbes from thick cotton loops. Prof. Sally Bloomfield recommends washing towels at 40°C (roughly 104°F), or pairing a cooler 30°C wash with an active oxygen bleach detergent.
Skip heavy fabric softeners and dryer sheets on absorbent bath linens. Silicone-based softeners coat cotton loops in a waxy film that repels water, reduces absorbency, and holds odors inside the weave.
Hardware layout plays an overlooked role in keeping towels fresh between wash days. Single wall pegs bunch damp cotton into thick folds that stay clammy overnight, whereas wide towel bars spread fabric flat so room air evaporates moisture fast.
Microfiber Specs, Cross-Contamination, and Chemical Safety
Professional bathroom cleaning relies on strict tool separation and surface-safe chemistry rather than harsh scrubbing. The ACI warns never to mix bathroom cleaning cloths with kitchen or dish cloths because of fecal and skin-borne pathogen risks.
Adopt a commercial color-coding system using split-weave microfiber cloths. Assign one color strictly for mirrors and chrome, a second color for sinks and counters, and a dedicated third color exclusively for toilet exteriors—then launder bathroom cloths in their own separate load.
Pay attention to bristle stiffness and pad abrasiveness around delicate surfaces. Soft nylon brushes and non-scratch microfiber clean acrylic tubs, fiberglass surrounds, and coated faucets safely, whereas green scouring pads leave permanent micro-scratches that trap soap scum faster.
Natural stone vanities such as marble, travertine, and limestone require pH-neutral stone cleaners rather than acidic descalers or household vinegar. Acids etch calcium-based stone on contact, turning glossy polish into dull, porous rings around faucet bases.
Above all, observe strict chemical mixing rules whenever you disinfect porcelain, grout, or shower liners. Never mix chlorine bleach with vinegar, ammonia, acidic toilet bowl cleaners, or rubbing alcohol, because combining these products releases dangerous toxic gases.
Keep bathroom exhaust fans running during cleaning and for at least twenty minutes afterward to pull chemical vapors and steam outside. Rinse one product thoroughly with plain water and let the surface dry before introducing any different formula.
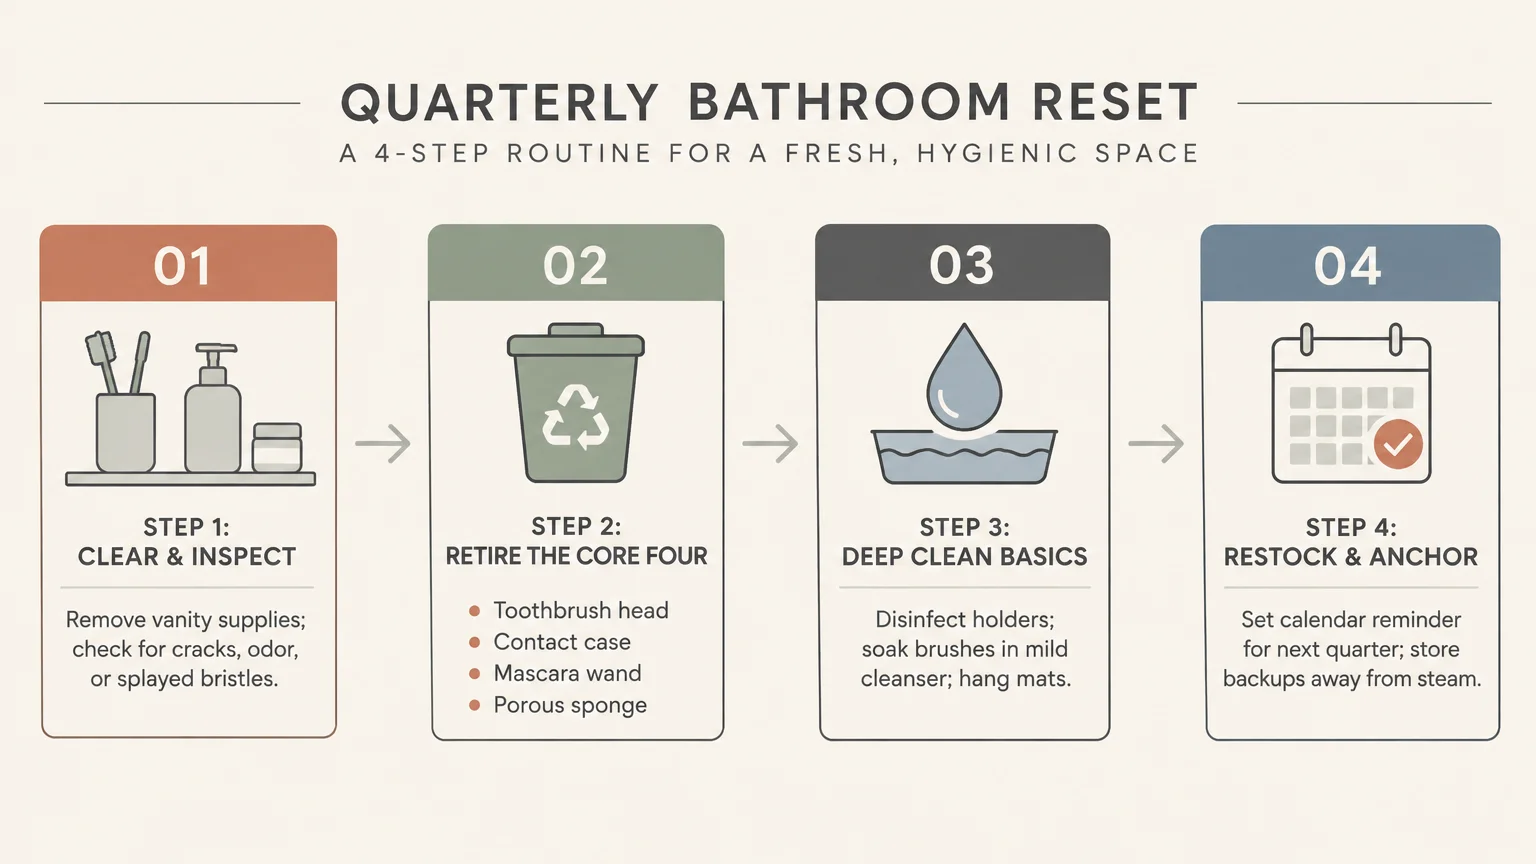
Step-by-Step Quarterly Bathroom Reset Routine
You do not need an entire weekend to stay ahead of bathroom replacements. Pair this quick fifteen-minute workflow with the start of spring, summer, fall, and winter so expired tools leave your home on autopilot.
- Clear the vanity and shower ledge: Carry a small trash bag and a permanent marker into the bathroom, then pull down loofahs, razors, brushes, sponges, and eye makeup.
- Inspect bristle and plastic wear: Toss frayed toothbrushes, bent toilet brushes, clogged razors, cracked contact lens cases, and any mesh bath puff hitting the 8-week mark.
- Check dates and textures: Discard opened mascara past 3 months, porous beauty sponges past 3 months, and any expired sunscreen or altered skincare product.
- Audit cabinet climate: Move heat-sensitive prescriptions and backup over-the-counter medications out of steamy cabinets into a cool, dry hallway or bedroom drawer.
- Check curtains and mats: Inspect shower curtain liners for persistent mold spots or pink film, and check bath mat backings for flaking rubber before laundering linens at 40°C.
- Sanitize keepers: Soak reusable bath sponges for 5 minutes in diluted bleach, wash makeup brushes in lukewarm water with gentle shampoo, and drip-dry your toilet brush.
- Date and restock replacements: Unpack fresh brushes, lens cases, and mascara, write the current month on cosmetic tubes with your marker, and set four recurring calendar alerts.
Keeping backup replacements—extra brush heads, sealed contact lens cases, and fresh razor cartridges—in a dry hallway bin saves you extra errands on reset day. When an item wears out early, you can swap it safely in ten seconds.
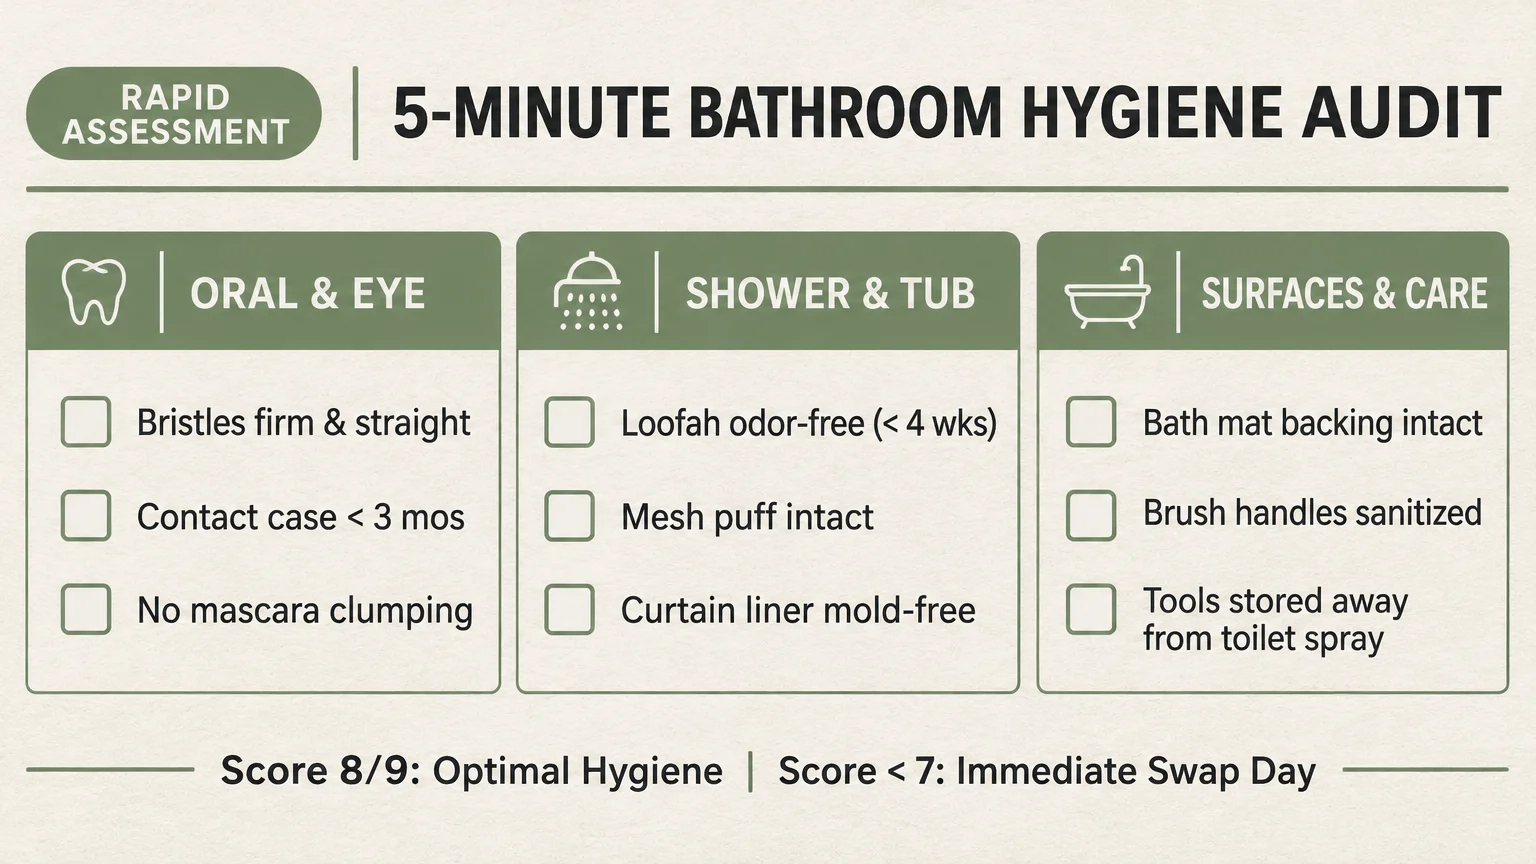
Your 5-Minute Bathroom Hygiene Audit
Open your bathroom door right now with a trash bag and a permanent marker in hand. Check your toothbrush bristles, your shower sponge, and the expiration dates printed on your eye makeup and sunscreens.
Toss anything frayed, musty, cracked, or past its 3-month window, relocate any medications sitting near steam, and set a recurring phone reminder three months from today. That single five-minute reset locks in cleaner bathroom hygiene and lighter weekly cleaning from this afternoon forward.