
Most homeowners judge a room by visible dust, yet the surfaces carrying the highest bacterial, allergen, and fire risks rarely look dirty. Knowing how often to clean each zone turns endless chores into a predictable, lower-effort routine.
Professional cleaners rely on risk-based intervals rather than guesswork or once-a-year marathons. This guide pairs verified hygiene benchmarks with commercial tool specs, dwell times, and material-safe house cleaning tips you can apply immediately.
Use the exact cleaning schedule below to cut wasted scrubbing, protect delicate home finishes, and keep hidden microbial and mechanical hazards under control.
Why Visual Checks Fail Your Cleaning Schedule
Your eyes catch crumbs on dark granite and water spots on chrome, so those surfaces get wiped daily. Meanwhile, invisible colonies of bacteria, dust mites, and lint buildup thrive in places you touch or run every single day.
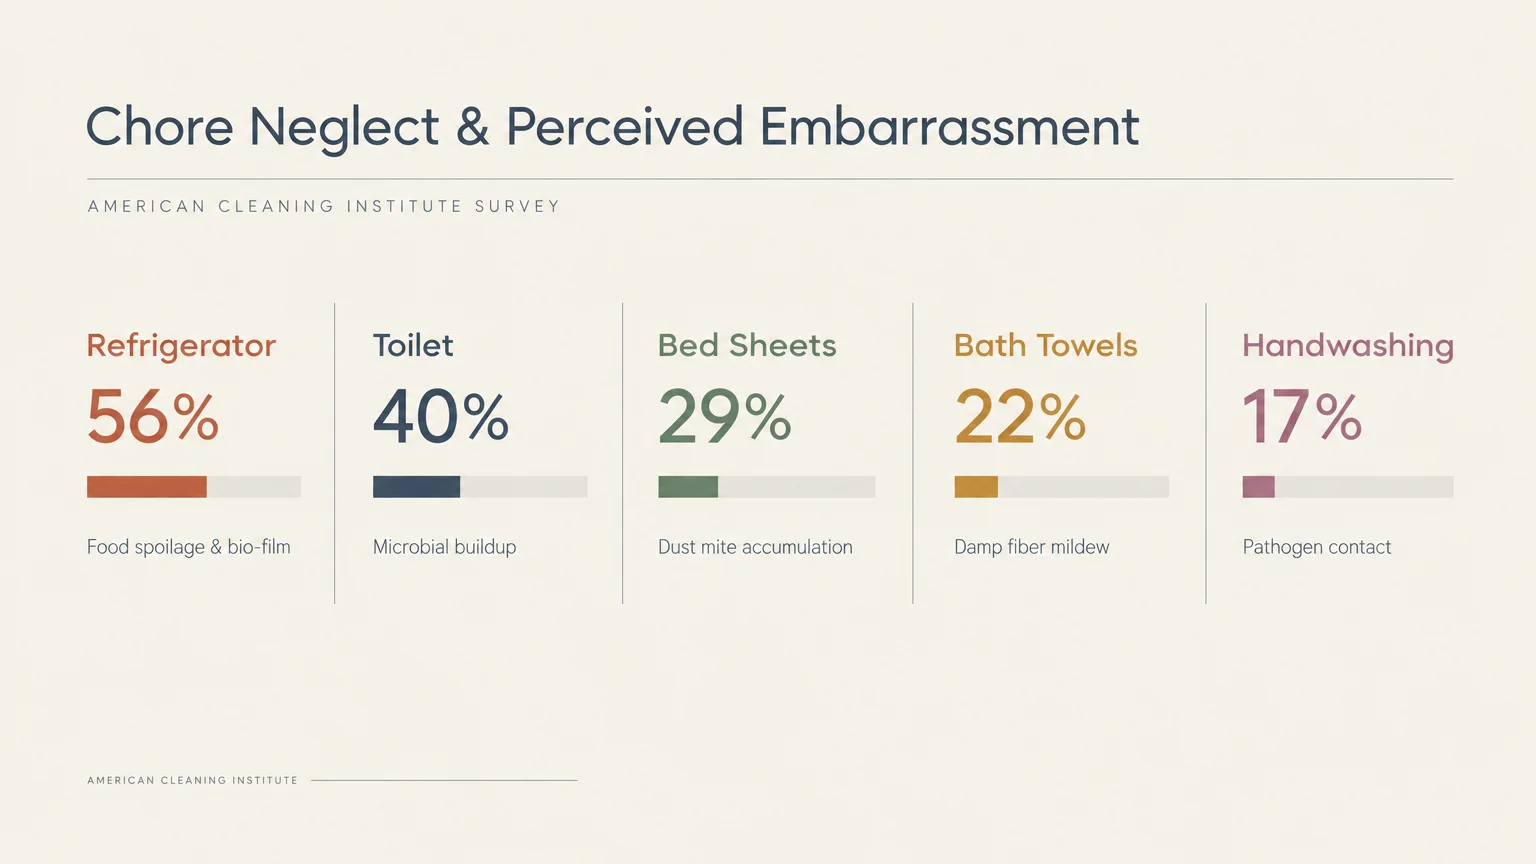
A May 2026 survey by the American Cleaning Institute (ACI) highlights how easily those hidden zones slip through the cracks. Researchers asked 1,000 U.S. adults which chore would embarrass them most if someone knew when they last completed it.
Cleaning out the refrigerator topped the list at 56%, followed by cleaning the toilet at 40% and washing bed sheets at 29%. Another 22% admitted falling behind on bath, hand, or dish towels, while 17% felt sheepish about handwashing habits.
Part of the problem comes from treating home hygiene as a once-a-year event rather than a steady workflow. While 80% of Americans plan to deep clean at least annually—with 58% targeting spring—bacterial and mechanical buildup does not wait for April.
Proactive routines slip even during peak illness months. According to an October 2026 ACI and American Academy of Family Physicians survey, 32% of households never adjust their cleaning habits during cold and flu season.
Another 28% change habits only after someone falls sick, 19% only for guests, and 14% during outbreaks. Only 25% adjust preemptively for the season, echoing an October 2025 ACI finding that 79% miss key illness-prevention steps.
Switching to a scheduled, zone-based system pays off in comfort as well as safety. In the May 2026 ACI report, 72% of respondents said coming home to a clean, organized space feels more relaxing than getting a massage.
Instead of scrubbing an entire room because it feels overdue, group your tasks by biological or mechanical risk. Moisture, food residue, skin oils, and trapped lint dictate when a surface actually needs attention.
Master Home Hygiene Frequency Table
Commercial cleaning crews standardize frequencies on paper so no team member wastes labor on low-risk tasks or skips high-risk ones. Post or bookmark this reference chart to calibrate your household cleaning checklist.
| Item or Surface | Recommended Interval | Technical Standard or Condition | Primary Risk if Skipped |
|---|---|---|---|
| Kitchen dish sponge | Sanitize regularly; replace every 1 to 2 weeks | Microwave wet sponge 1 to 2 minutes or run through dishwasher | Coliform bacteria proliferation and cross-contamination |
| Cutting boards and prep counters | After every individual food item | Hot soapy water wash; 20-second handwashing before prep | Foodborne pathogen transfer between raw and ready-to-eat items |
| Bath towels | After 3 to 5 uses | Hang fully spread between uses; wash separately from kitchen cloths | Skin-borne bacteria and mildew growth in damp fibers |
| Bed sheets and pillowcases | Every 1 to 2 weeks | Weekly for allergies; dry above 130°F for 15+ minutes if needed | Dust mite buildup, dander accumulation, and skin irritation |
| Toothbrush and holder | Replace brush every 3 to 4 months; wash holder weekly | Store brush upright in open air; scrub holder with detail brush | Coliform contamination and trapped moisture bacteria |
| Refrigerator interior and gaskets | Every few months | 1 tablespoon baking soda per quart water; keep temp at 40°F or below | Gasket mold and accelerated food spoilage |
| Dryer lint screen and vent duct | Screen every cycle; brush every 6 months; duct yearly | Wash nylon mesh screen; clear exterior vent line annually | Restricted airflow and severe residential fire hazard |
| HVAC air filters | Inspect monthly; replace at least every 3 months | Check monthly during heavy heating or cooling; annual tune-up | Blower motor strain and recirculated indoor particulates |
Notice how the shortest intervals belong to wet, porous tools and high-heat appliances rather than living room shelves. Addressing those specific targets first protects your family while trimming hours of unnecessary dusting.
Kitchen Zones Where Bacteria Multiply Fastest
Many people assume the bathroom harbors the worst household germs, yet microbiological testing tells a very different story. In the NSF International Household Germ Study—which analyzed 660 swabs across 30 surfaces in 22 homes—coliform bacteria appeared far more often in kitchens.
Coliform bacteria, a family that includes Salmonella and E. coli, turned up on 77% of dish sponges and rags. Researchers also found them on 45% of kitchen sinks, 32% of countertops, and 18% of cutting boards, compared with just 9% of bathroom faucet handles.
One tested kitchen sponge held 1.8 billion coliform bacteria inside its porous foam. Because sponges stay damp and trap microscopic food particles at room temperature, wiping a counter with an old sponge simply spreads microbes across your prep space.
Sponges, Dish Cloths, and Microfiber Swaps
NSF International advises replacing kitchen sponges every 1 to 2 weeks without exception. Between replacements, sanitize damp sponges regularly so bacterial counts cannot skyrocket.
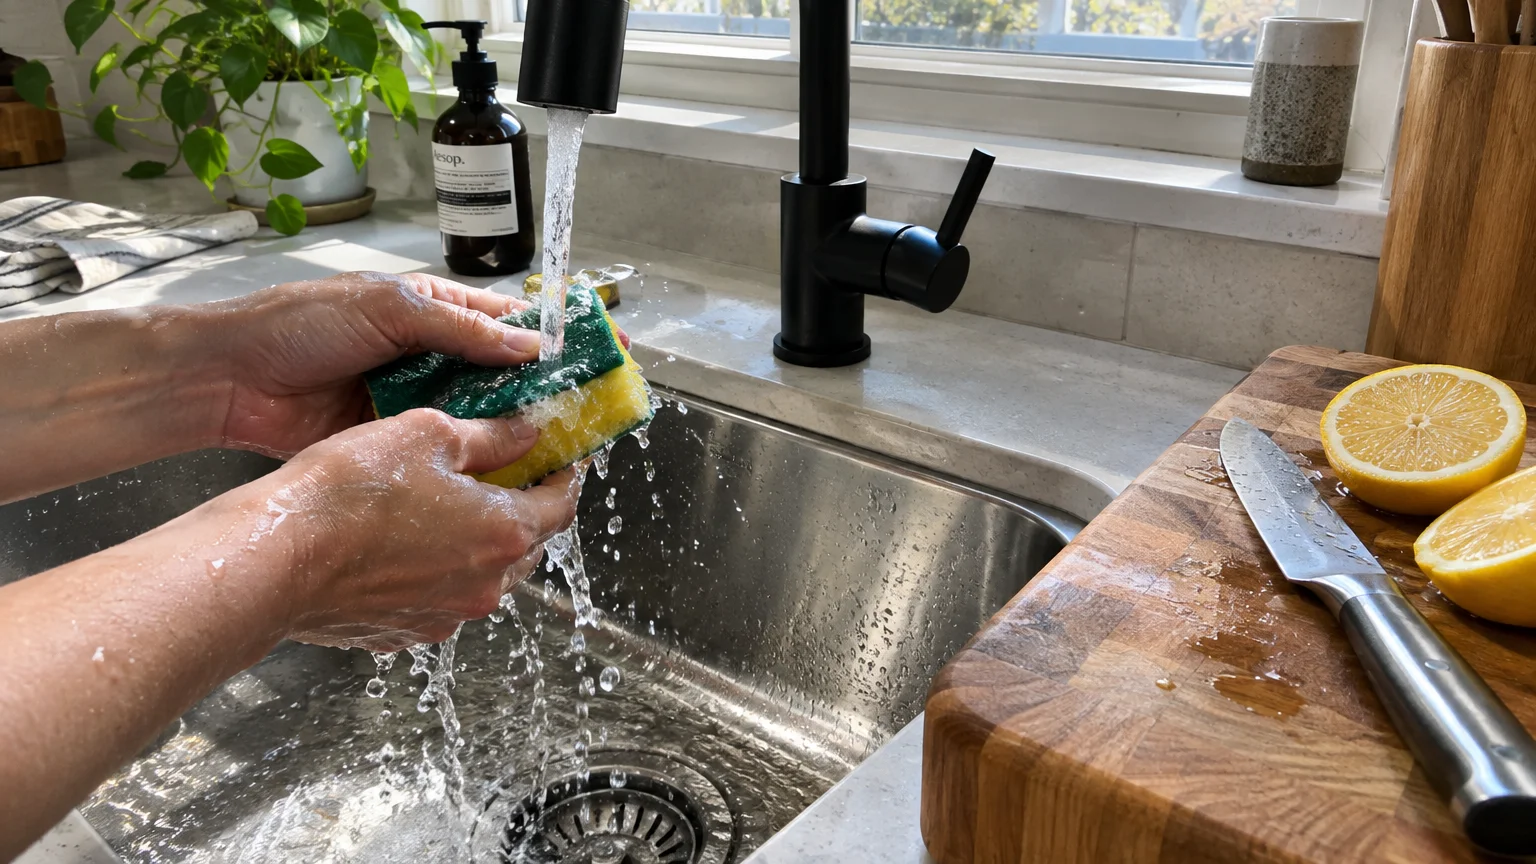
Research from the USDA Agricultural Research Service published in Food Control compared common home sanitizing methods side by side. Microwaving a wet sponge or running it through a dishwasher cycle killed vastly more bacteria, yeasts, and molds than chemical soaks.
Soaking a sponge in a 10% bleach solution for 3 minutes or lemon juice for 1 minute left substantial surviving organisms behind. Heat penetration inside wet microwave steam or a hot dishwasher cycle reaches the core foam where liquid dips fail.
- Verify your sponge contains zero metallic scouring threads or foil backing before placing it near a microwave.
- Saturate the sponge completely with clean water—a dry or barely damp sponge can scorch or catch fire.
- Microwave on high for 1 to 2 minutes, then let the sponge cool inside before touching it.
- Alternatively, place the sponge on the top rack of your dishwasher during a heated drying cycle.
For daily wiping, professional cleaners often skip cellulose sponges altogether in favor of split-fiber microfiber cloths or non-porous silicone scrubbers. Keep a stack of flat-weave or waffle-weave kitchen cloths in a single color dedicated solely to food zones.
Use each cloth for one day, wring it dry, and toss it into a ventilated laundry hamper rather than leaving it bunched in the sink. Silicone scrubbers rinse clean under hot water and dry fast, starving bacteria of moisture.
Cutting Boards, Sinks, and Stone Compatibility
Cross-contamination happens fastest during meal prep when cooks reuse one board or knife across multiple ingredients. The U.S. Food and Drug Administration (FDA) notes that 20% of consumers skip washing hands and kitchen surfaces before starting food preparation.
Wash your hands with soap and running water for at least 20 seconds before touching ingredients. Then scrub cutting boards, knives, and countertops with hot, soapy water after every single food item before moving to the next.
If you slice raw poultry and immediately chop salad greens on the same unwashed surface, detergent later in the evening does nothing to stop contamination. Keep separate color-coded boards—one for raw proteins and another for produce and bread.
Match your cleaning chemistry to your countertop and board materials so sanitizing does not etch expensive surfaces:
- Wood and bamboo boards: Wash promptly with warm dish soap and a soft nylon brush, dry standing upright, and never submerge or run through a dishwasher.
- High-density polyethylene (HDPE) plastic boards: Send these through the dishwasher after raw meat prep, and discard any board with deep knife grooves that trap residue.
- Granite, marble, and soapstone: Use pH-neutral dish soap and plush microfiber; acidic cleaners like vinegar or lemon juice etch calcium-based marble and strip stone sealers.
- Engineered quartz: Wipe with mild detergent and avoid abrasive scouring powders or harsh alkaline cleaners that dull resin binders.
Finish kitchen cleanup by scrubbing the sink basin itself every evening. Use a non-scratch nylon brush around the drain flange and garbage disposal baffle, where wet food scraps cling out of sight.
Refrigerator Interiors and Gasket Mold
Refrigerators hide spills under crisper drawers long after a leak occurs, which explains why 56% of surveyed adults dread admitting when they last cleaned theirs. Cold air slows spoilage, yet certain cold-tolerant bacteria and molds continue spreading across shelves.
The USDA Food Safety and Inspection Service (FSIS) recommends cleaning refrigerator interiors thoroughly every few months. Follow a top-to-bottom commercial workflow so drips from upper shelves never soil lower bins you already wiped.
Mix 1 tablespoon of baking soda per quart of warm water to lift food residue without leaving harsh scents near produce. Let removable glass shelves reach room temperature before washing in warm water so thermal shock cannot crack them.
Pay close attention to the rubber door gaskets, where condensation and crumbs trigger dark mildew spots. USDA FSIS advises scrubbing visible gasket mold with a solution of 3 teaspoons of liquid chlorine bleach per quart of water, then rinsing and drying the rubber completely.
Finish by checking your appliance thermometer to ensure the cabin stays at 40°F or below. During power outages or long unloading sessions, discard perishable foods left above 40°F for more than 2 hours—or 1 hour if kitchen temperatures exceed 90°F.
Bedroom Textiles, Dust Mites, and Water Temperature Math
Your bed collects shed skin cells, sweat, body oils, and airborne pollen every night, turning sheets and pillows into prime habitat for dust mites. Visual inspection cannot detect microscopic allergens until morning congestion sets in.
ACI guidelines call for washing bed sheets at least every two weeks under normal conditions, and more frequently if you perspire heavily or share the bed with pets. If anyone in your home struggles with asthma or dust-mite allergies, raise that standard.
Both the Mayo Clinic and the American Academy of Allergy, Asthma & Immunology (AAAAI) recommend washing sheets, pillowcases, and blankets weekly. Weekly laundering removes accumulated allergen proteins before populations multiply inside mattress fibers.
Balancing Mite-Killing Heat With Home Scald Safety
Temperature rules for bedding often confuse homeowners because allergen guidelines and burn-prevention advice pull in opposite directions. Mayo Clinic and NIH MedlinePlus guidance state that washing bedding in water at least 130°F (54.4°C) kills dust mites.
However, the CDC warns that 130°F tap water can cause severe skin burns in just 30 seconds, compared with 2 minutes at 120°F. For households with young children or older adults, AAAAI clinical guidance recommends keeping home water heaters set below 120°F.
You can hit the 130°F kill threshold safely without turning every faucet in your house into a burn hazard:
- Use your washing machine’s internal heater: Many front-loading washers feature a sanitize or allergen cycle that heats incoming 120°F water internally inside a locked drum.
- Rely on the clothes dryer: Mayo Clinic and NIH MedlinePlus note that drying bedding above 130°F for at least 15 minutes also eliminates dust mites, even after a warm or cool wash.
- Control bedroom humidity: Keep indoor relative humidity below 50% with a dehumidifier or air conditioning, since dust mites cannot absorb enough moisture to survive in dry air.
Never overload your washer drum with heavy comforters and fitted sheets at the same time. Tightly packed fabric blocks water circulation and detergent dispersion, leaving trapped skin oils behind in center folds.
Bath Towels and Strict Textile Separation
Bath towels dry slower than sheets because dense cotton loops trap moisture deep inside the weave. ACI recommends laundering bath towels after 3 to 5 uses, provided you hang them fully spread out on a bar rather than bunched on a hook.
Hook-hung towels stay folded against themselves, delaying evaporation and encouraging sour mildew odors after minimal use. If your bathroom lacks an exhaust fan or stays humid, wash towels closer to every 3 uses.
Professional cleaners enforce strict textile separation during laundering and daily wiping. Never mix bathroom cleaning cloths or bath towels with kitchen dish towels or cloths used on food-prep counters.
Using the same rag across a vanity counter and a kitchen island risks moving skin-borne or fecal pathogens directly onto utensils and plates. Assign distinct towel textures or colors to each room, and wash bathroom loads separately from kitchen linens.
Pillows, Mattresses, and Upholstery Tools
Even with protective covers, pillows and mattresses break down internally over time as sweat salts weaken foam and fiberfill. National Sleep Foundation guidance advises replacing pillows every 1 to 2 years to maintain neck support and hygiene.
Sleep Foundation guidelines recommend replacing mattresses every 6 to 8 years. Between replacements, vacuum your bare mattress surface seasonally whenever you flip or rotate it.
Attach a clean upholstery nozzle—never a floor brush that drags hallway grit across fabric—and overlap slow passes across seams and piping. Slow vacuum movement gives airflow enough time to pull deeply embedded dander out of quilted tops.
Bathroom Hotspots Beyond the Toilet Bowl
Scrubbing the toilet weekly handles the most obvious fixture, yet smaller items around the vanity sink silently collect far more contamination. Warm shower steam paired with sink splashes creates ideal damp zones around daily personal care tools.
Toothbrushes and Holders
The American Dental Association (ADA) advises replacing manual toothbrushes and electric brush heads every 3 to 4 months. Swap them sooner if bristles look matted or frayed, because splayed nylon tips clean teeth poorly and harbor debris.
After brushing, rinse the head thoroughly under tap water and store your toothbrush upright in open air where bristles dry quickly. Avoid snapping plastic travel caps over wet brushes at home, since sealed containers trap moisture and speed microbial growth.
While brushes receive plenty of attention, their holders almost never make it onto a standard cleaning checklist. In the NSF International germ study, 27% of toothbrush holders tested positive for coliform bacteria—three times the rate of bathroom faucet handles.
Soap residue, wet toothpaste drips, and pooled tap water settle at the bottom of ceramic cups and plastic slots. Place dishwasher-safe holders on the top rack weekly, or scrub narrow compartments with hot soapy water and a stiff-bristle nylon detail brush.
Faucets, Handles, and Streak-Free Glass
Flush levers, faucet aerators, and cabinet pulls get touched with unwashed hands multiple times a day. Wipe high-touch vanity hardware every few days rather than saving it for monthly deep cleans.
For chrome fixtures and shower glass, swap cotton terry rags for tight-knit flat-weave microfiber glass cloths. Cotton terry leaves lint behind and pushes soap film around, whereas split microfiber hooks microscopic oil droplets off smooth metal without chemical haze.
Wait until shower enclosures dry or run a rubber-blade squeegee down glass walls immediately after showering. Removing mineral-heavy tap water right away prevents hard-water calcium rings that later demand acidic descalers.
Mechanical Systems and Fire-Prevention Intervals
House cleaning tips usually focus on hygiene and appearances, yet neglecting hidden mechanical vents creates expensive equipment damage and life-threatening fire hazards. Put appliance airflow on the same calendar as your sheets and fridge.
Clothes Dryer Lint Traps and Exhaust Ducts
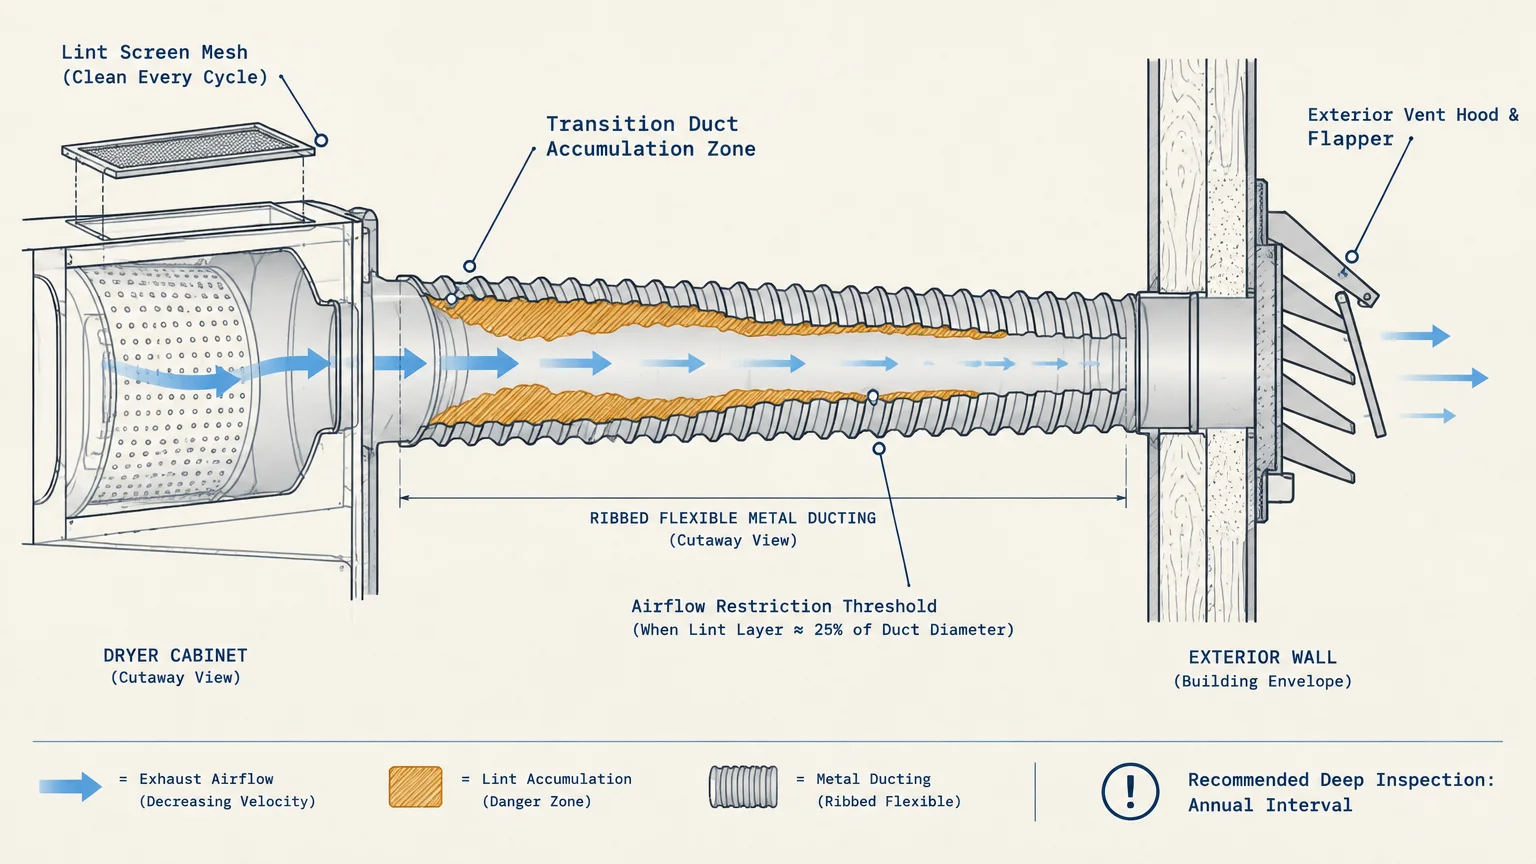
Clothes dryer fires start inside lint-clogged channels you rarely see until smoke appears. According to U.S. Fire Administration (USFA) National Fire Incident Reporting System data from 2018 to 2020, failure to clean was the leading factor in home clothes dryer fires at 31%.
NFPA Research data show home dryer and washer fires cause an annual average of 13 civilian deaths, 444 civilian injuries, and $238 million in direct property damage. Clothes dryers account for 92% of those blazes.
The U.S. Fire Administration recommends a three-tier maintenance schedule to keep exhaust air moving freely:
- Every cycle: Pull out and empty the lint filter both before starting a load and immediately after the cycle ends.
- Every 6 months: Scrub the fine mesh lint screen with a stiff nylon brush and warm soapy water to strip invisible film left by dryer sheets and fabric softeners.
- Every year: Disconnect the rear vent hose and brush out the entire exhaust duct run to the exterior wall cap, removing nested lint from elbows and damper flaps.
Run a quick water test on your mesh lint screen every six months to check for invisible residue. If water pools on top of the screen instead of passing straight through, fabric softener wax is choking airflow and forcing your heating element to run hotter.
HVAC Air Filters and Seasonal Tune-Ups
Dirty furnace and air conditioner filters restrict blower intake, forcing motors to draw extra electricity while pushing dust past clogged pleats. ENERGY STAR advises checking HVAC air filters every month, particularly during peak winter heating and summer cooling months.
Change the filter whenever it looks coated with gray dust, and replace it at a minimum every 3 months even if your system ran lightly. Homes with shedding pets or ongoing renovations often reach filter capacity sooner than the standard three-month mark.
Before upgrading to the tightest pleated filter on the hardware shelf, confirm your HVAC unit’s manufacturer rating. Overly restrictive filters can starve older residential blowers of static airflow, causing evaporator coils to freeze in summer heat.
Pair your filter swaps with an annual professional HVAC tune-up before peak weather hits. Technicians clear condensate drain lines and coil fins that standard household vacuums cannot reach safely.
Disinfecting Chemistry, Dwell Times, and Safe Storage
Spraying disinfectant on a greasy stove and wiping it dry immediately wastes product and leaves bacteria intact. Commercial sanitation separates cleaning from disinfecting because organic soil neutralizes active chemicals on contact.
The Two-Step Clean-Then-Disinfect Rule
Guidance from the Centers for Disease Control and Prevention (CDC) states that you must clean visibly dirty surfaces with soap or detergent and water first. Removing crumbs, grease, and soap scum exposes pathogens directly to the sanitizer.
Once the surface is clean and rinsed, apply an EPA-registered disinfectant or properly diluted bleach solution. Keep the surface visibly wet for the full contact time printed on the product label—do not buff it dry immediately.
Contact time, often called dwell time by cleaning pros, varies sharply by product and concentration. For sanitizing kitchen countertops, FDA guidance cites a solution of 1 teaspoon of liquid bleach per quart of water left wet on the surface for about 10 minutes.
Typical EPA-registered bleach directions for food-contact surfaces call for 1 tablespoon or 2 teaspoons of roughly 5.25% bleach per gallon of water. Always check your specific bottle because household bleach strength ranges from 5% to 9% sodium hypochlorite.
Bleach Potency, Mixing Hazards, and Decanting Risks
Diluted bleach breaks down rapidly once mixed with tap water and exposed to light. CDC guidance stresses mixing fresh bleach dilutions daily because solutions lose disinfecting effectiveness after 24 hours.
Check labels carefully before reaching for laundry products to sanitize counters. Color-safe bleaches rely on oxygenating agents rather than sodium hypochlorite and may fail to disinfect surfaces.
Follow non-negotiable chemical safety rules every time you clean:
- Never mix bleach with ammonia: Combining chlorine bleach with ammonia—found in many glass cleaners and urine—releases toxic chloramine gas.
- Never mix bleach with acids: Combining bleach with vinegar, toilet bowl acids, or rust removers creates hazardous chlorine gas.
- Ventilate small rooms: Open windows or turn on bathroom exhaust fans before applying strong disinfectants in enclosed showers.
Keep chemical safety intact inside your laundry room and pantry as well. An ACI survey published in May–June 2026 found 16% of consumers already decant laundry products into decorative jars or containers, while 44% plan to or would consider doing so.
ACI urges homeowners to skip aesthetic decanting and keep detergents, pods, and disinfectants in their original child-resistant packaging. Original bottles display exact dilution math, first-aid instructions, and hazard warnings that clear glass canisters strip away.
A Practical Weekly Reset Checklist
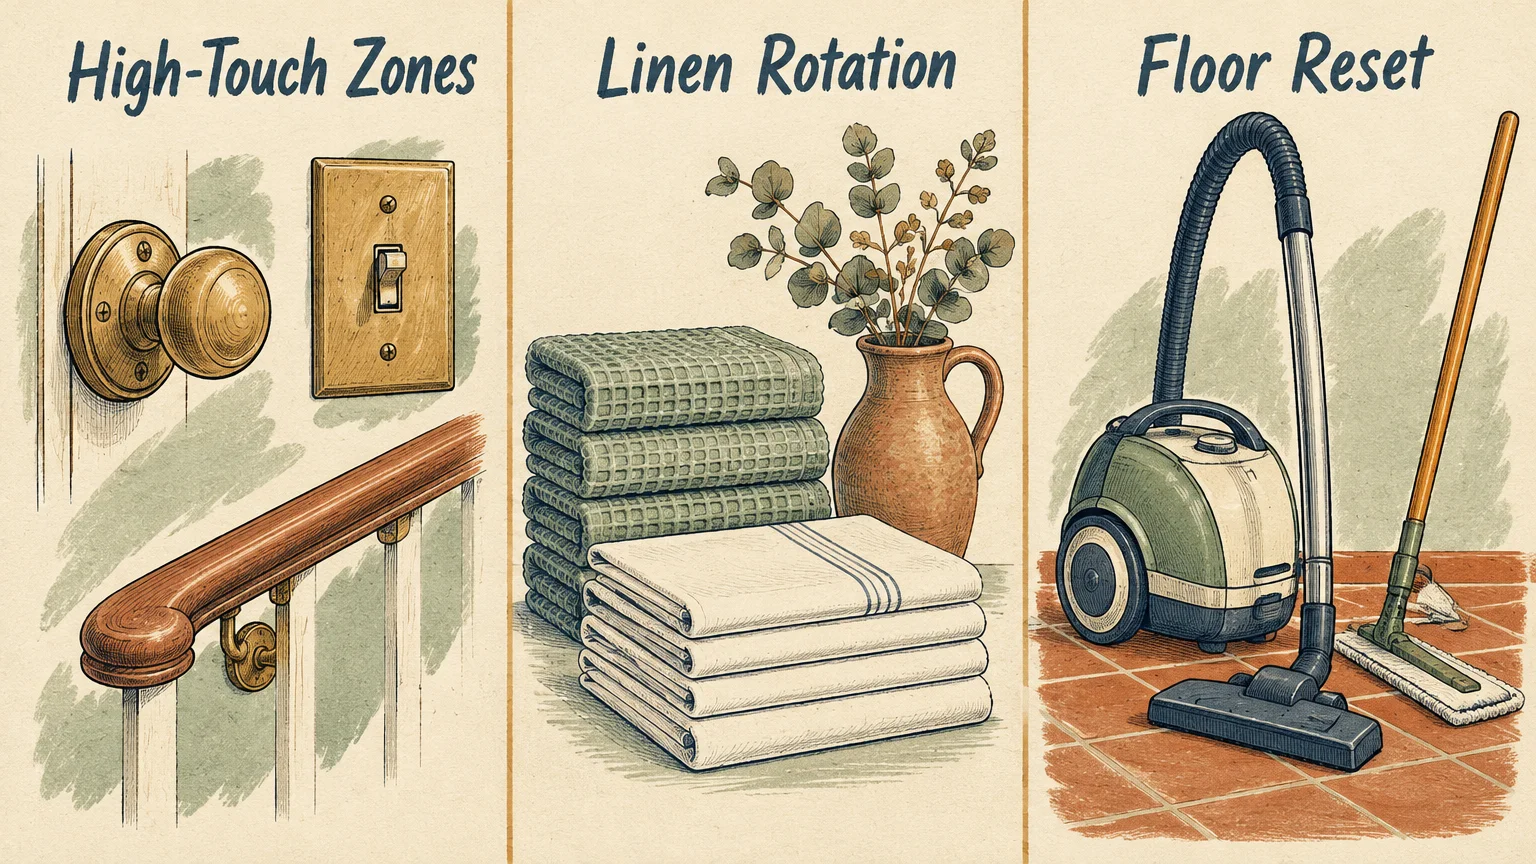
You do not need an entire weekend to stay ahead of high-risk home hygiene zones. Grouping quick, high-impact tasks into one short weekly reset prevents bacterial spikes and keeps deep cleaning effortless.
- Kitchen prep zones: Microwave your wet sponge for 1 to 2 minutes or toss it in the dishwasher, swap in a fresh dish towel, and scrub the sink drain.
- Bathroom hotspots: Put toothbrush holders in the dishwasher or wash them with hot soapy water, wipe faucet handles with damp split microfiber, and hang bath towels spread wide to dry.
- Bedroom linens: Strip pillowcases and sheets for a weekly allergen wash, checking your dryer lint trap and running a high-heat cycle above 130°F for at least 15 minutes if dust mites are a concern.
- Quick appliance check: Glance at your refrigerator thermometer to verify 40°F or below, and set a monthly calendar alert to inspect your HVAC air filter.
Pick one neglected high-risk item from the frequency chart right now—whether that means swapping an old kitchen sponge, washing your toothbrush holder, or brushing lint film off your dryer screen—and schedule its recurring reminder on your calendar today.