You scrub the counters, sweep the floors, and wipe down the stove, but the most stubborn dirt in your kitchen hides exactly where you never look. Tackling these neglected spaces eliminates lingering odors, extends the life of expensive appliances, and makes your daily routines feel much easier to manage. Deep kitchen cleaning does not require spending hours scrubbing every hidden crevice. Instead, focusing on a few specific forgotten cleaning areas yields massive results for the health and efficiency of your home. From energy-draining dust buildup to hidden mold inside your morning appliances, targeting these hidden kitchen dirt spots is the crucial first step. Grab a microfiber cloth and let us clear away the invisible grime.
1. The Dishwasher Filter
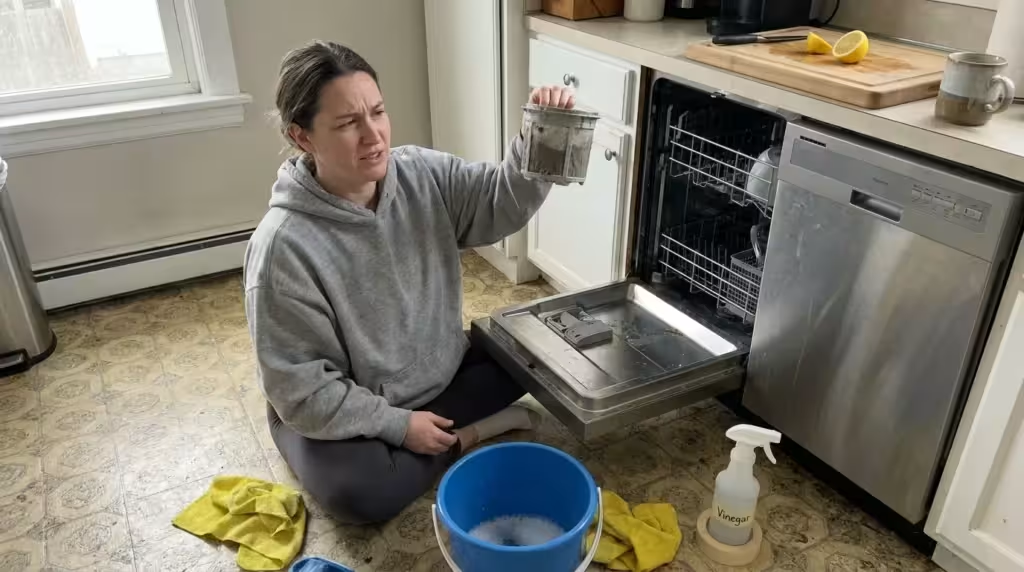
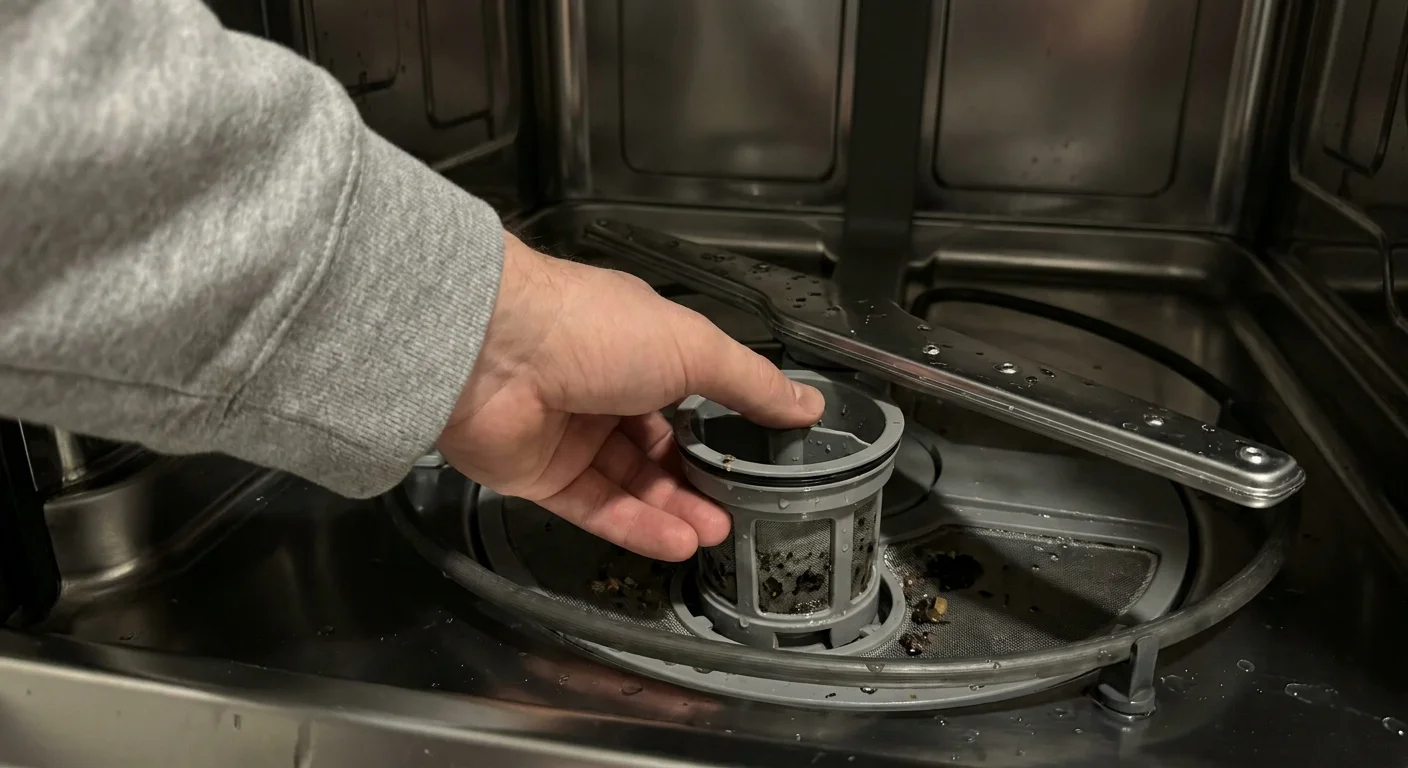
Many people assume dishwashers are entirely self-cleaning machines; unfortunately, they are not. If you notice a funky odor when you open the appliance door, see water pooling at the bottom of the tub, or discover gritty residue stuck to your top-rack drinking glasses, a clogged filter is the likely culprit. Older dishwashers often featured noisy hard-food disposers, but most modern, quiet dishwashers use a manual filter trap. This filter catches food particles, labels from jars, and grease, preventing them from recirculating onto your supposedly clean dishes.
Cleaning this filter ensures your machine operates efficiently, drains properly, and keeps your dishes hygienic. You can easily complete this task in just a few minutes without calling a repair technician or using any special tools.
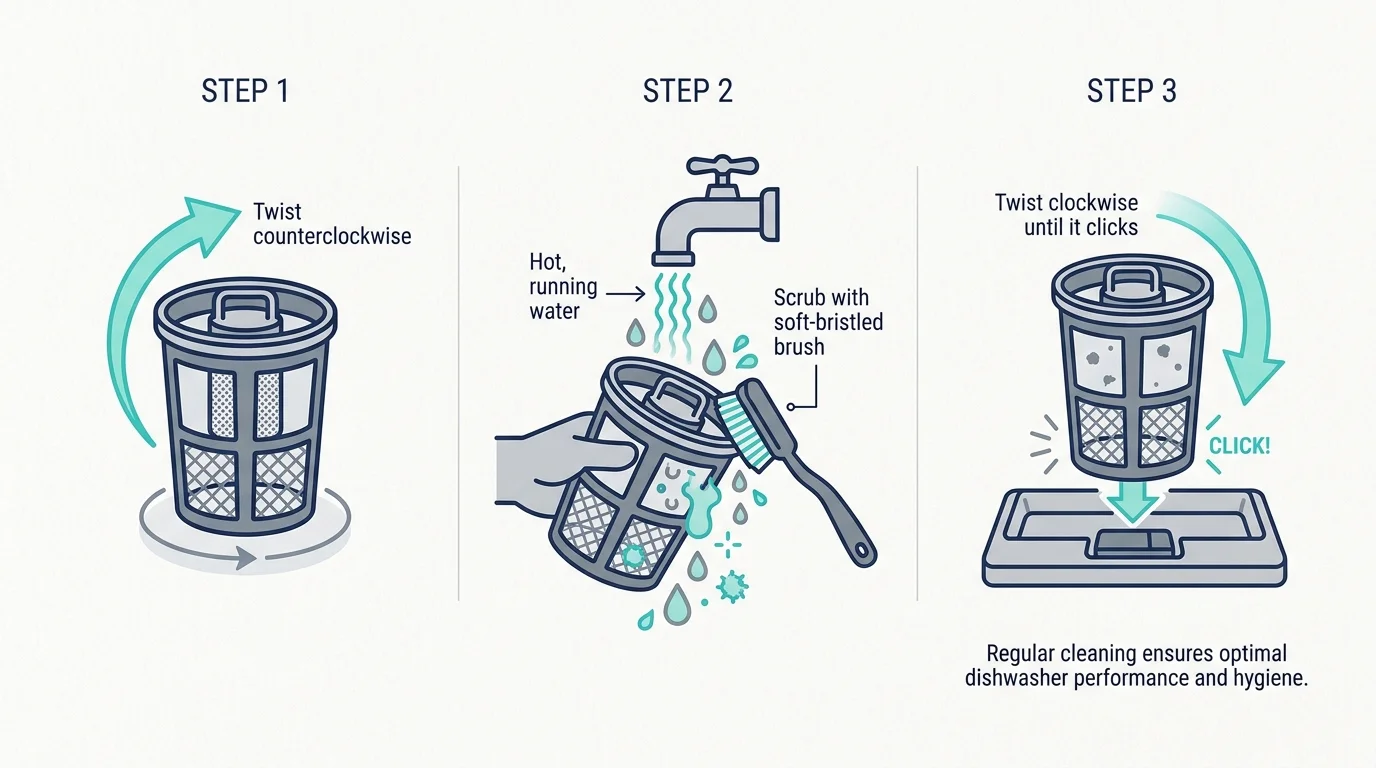
How to Clean the Dishwasher Filter:
- Remove the bottom rack of your dishwasher entirely to access the floor of the tub.
- Locate the cylindrical filter, which typically sits near the base of the lower rotating spray arm.
- Twist the filter counterclockwise to unlock it, and gently pull it straight up and out of the housing.
- Rinse the filter under hot, running sink water to dislodge soft food debris.
- Scrub away stubborn grease and white calcium deposits using a soft-bristled nylon brush and a few drops of dish soap.
- Wipe around the empty filter housing inside the dishwasher with a damp sponge to remove settled grit.
- Lock the clean filter back into place by twisting it clockwise until it clicks securely.
2. Refrigerator Coils
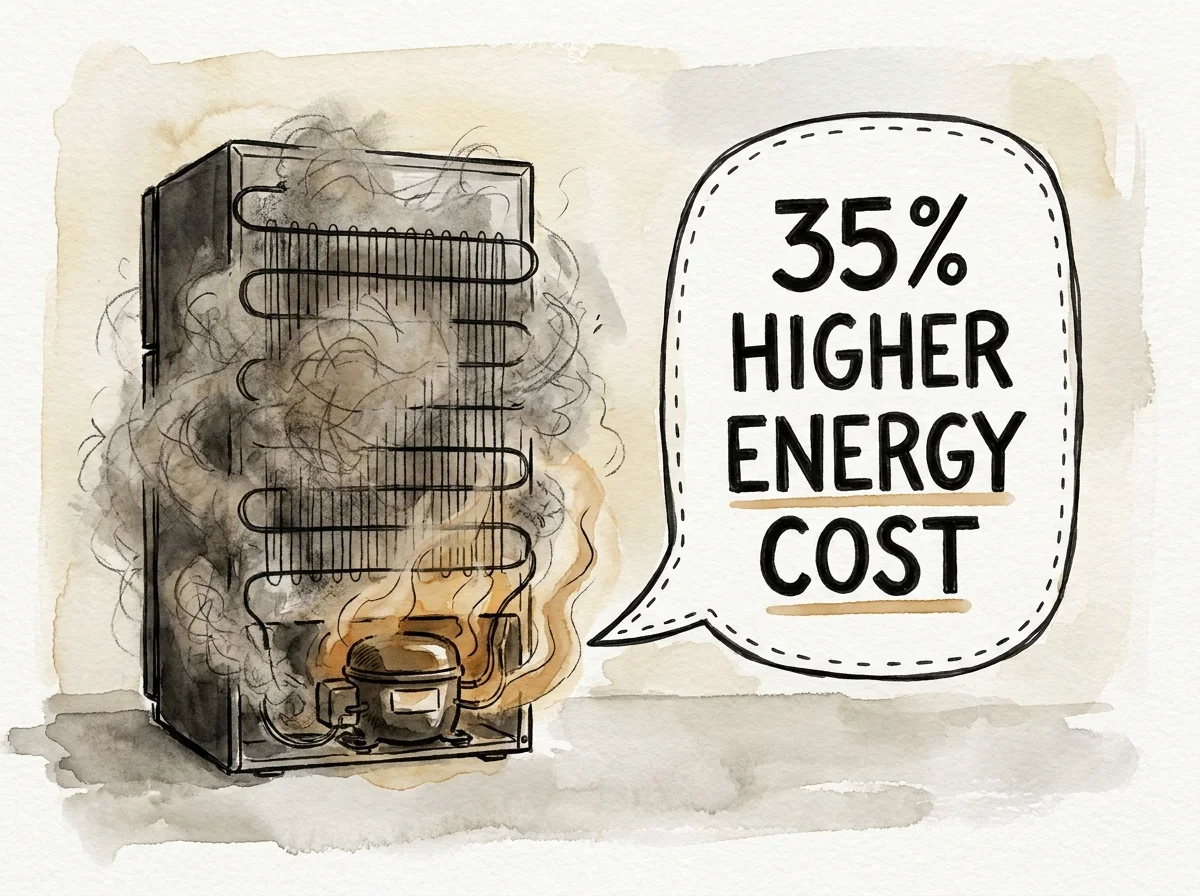
Out of sight usually means out of mind, and refrigerator coils fall victim to this oversight in almost every single household. Located either behind a front kickplate at the floor level or exposed across the entire back of the appliance, condenser coils release the heat your refrigerator removes from the inside. When these coils become choked with a thick blanket of dust, lint, and pet hair, your compressor has to work overtime to maintain safe food temperatures.
According to the U.S. Department of Energy, dirty refrigerator coils force the appliance to work much harder, which can increase your refrigerator’s energy cost by as much as 35 percent and significantly shorten its operational lifespan. If you have shedding pets in your home, this thick layer of insulation builds up even faster. A quick biannual cleaning protects your monthly utility budget and prevents expensive grocery spoilage.
How to Clean Refrigerator Coils:
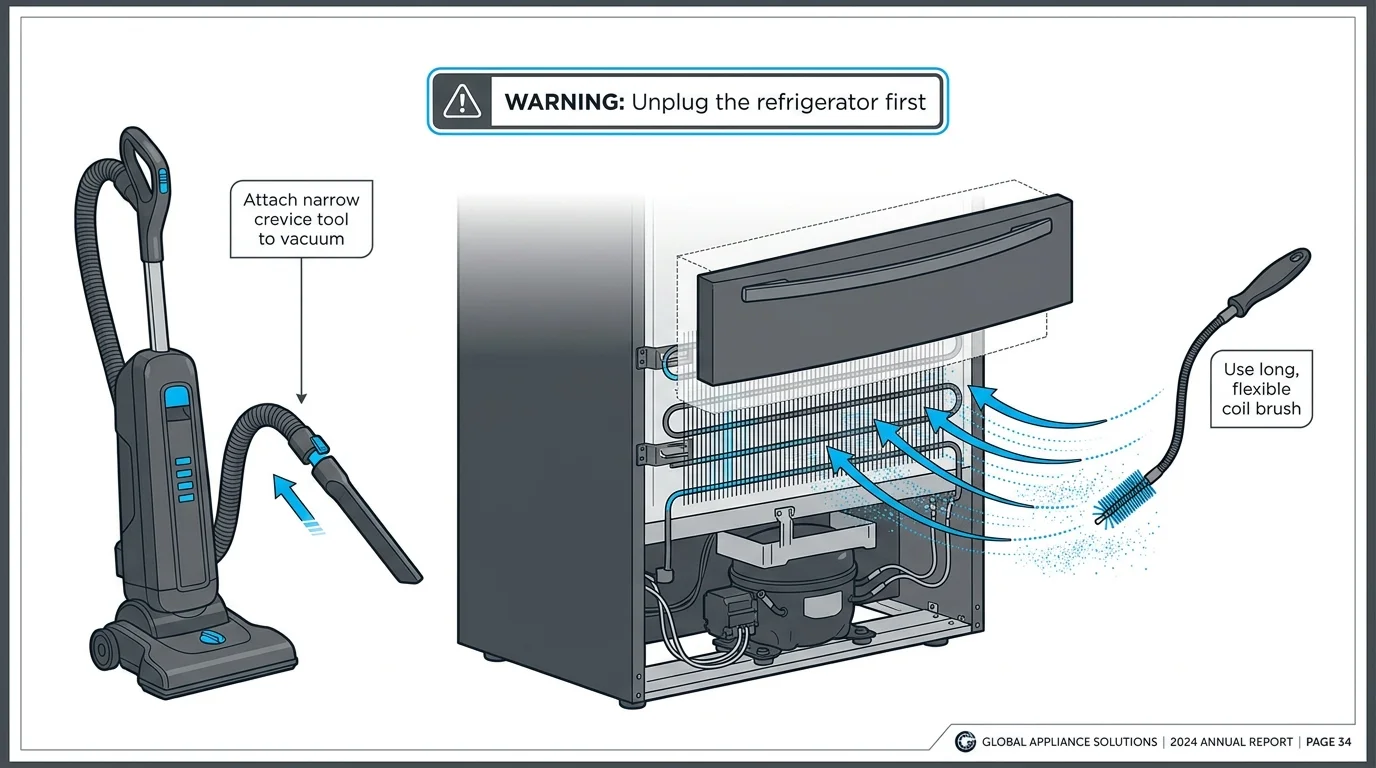
- Unplug the refrigerator from the wall outlet to ensure your absolute safety while working near electrical components.
- Locate the condenser coils. If they sit at the bottom front, snap off the plastic kickplate; if they sit at the rear, carefully pull the appliance away from the wall.
- Attach the narrow crevice tool or a brush attachment to your vacuum cleaner.
- Vacuum the heavy outer layers of dust away using gentle motions to avoid bending the delicate metal coil fins.
- Sweep a specialized long, flexible coil cleaning brush deep into the tight gaps to loosen stubborn lint, and then vacuum up the newly dislodged debris.
- Replace the front kickplate or push the refrigerator back into its proper position before plugging the power cord back in.
3. The Coffee Maker Water Reservoir
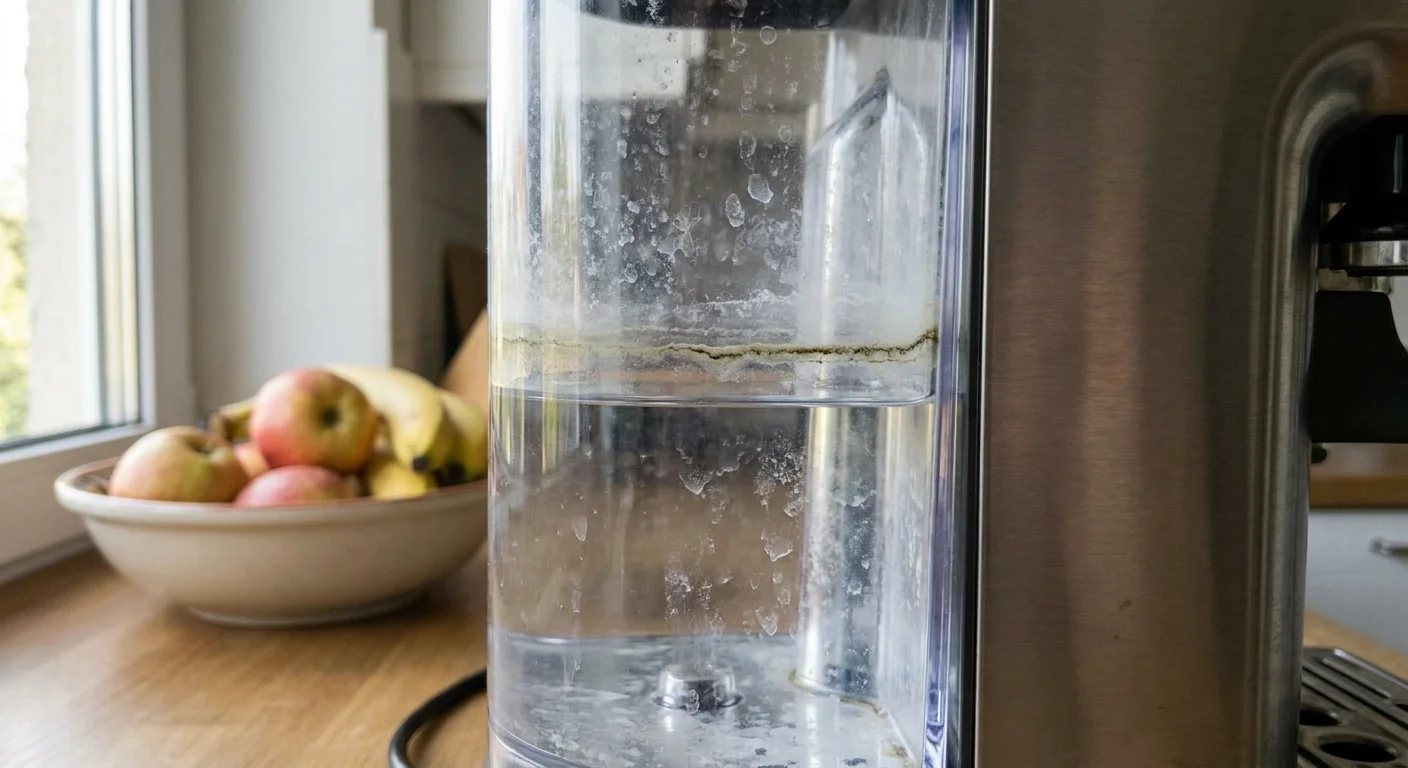
You rely on your morning brew to wake you up, but the internal components of your coffee machine might be harboring unwanted guests. The water reservoir provides a dark, warm, and constantly damp environment—the exact conditions required for microscopic growth. Scale buildup from hard water minerals also coats the internal heating lines over time, which slows down the brewing process and extracts bitter flavors from your coffee grounds.
A comprehensive home hygiene study conducted by the public health organization NSF found that coffee maker reservoirs are among the top germiest places in the typical home, frequently testing positive for high concentrations of yeast and mold. Running plain hot water through the machine does not kill these organisms; you need a dedicated descaling and sanitizing routine.
How to Deep Clean Your Coffee Maker:
- Empty the glass carafe, remove any used coffee grounds, and discard the damp paper filter.
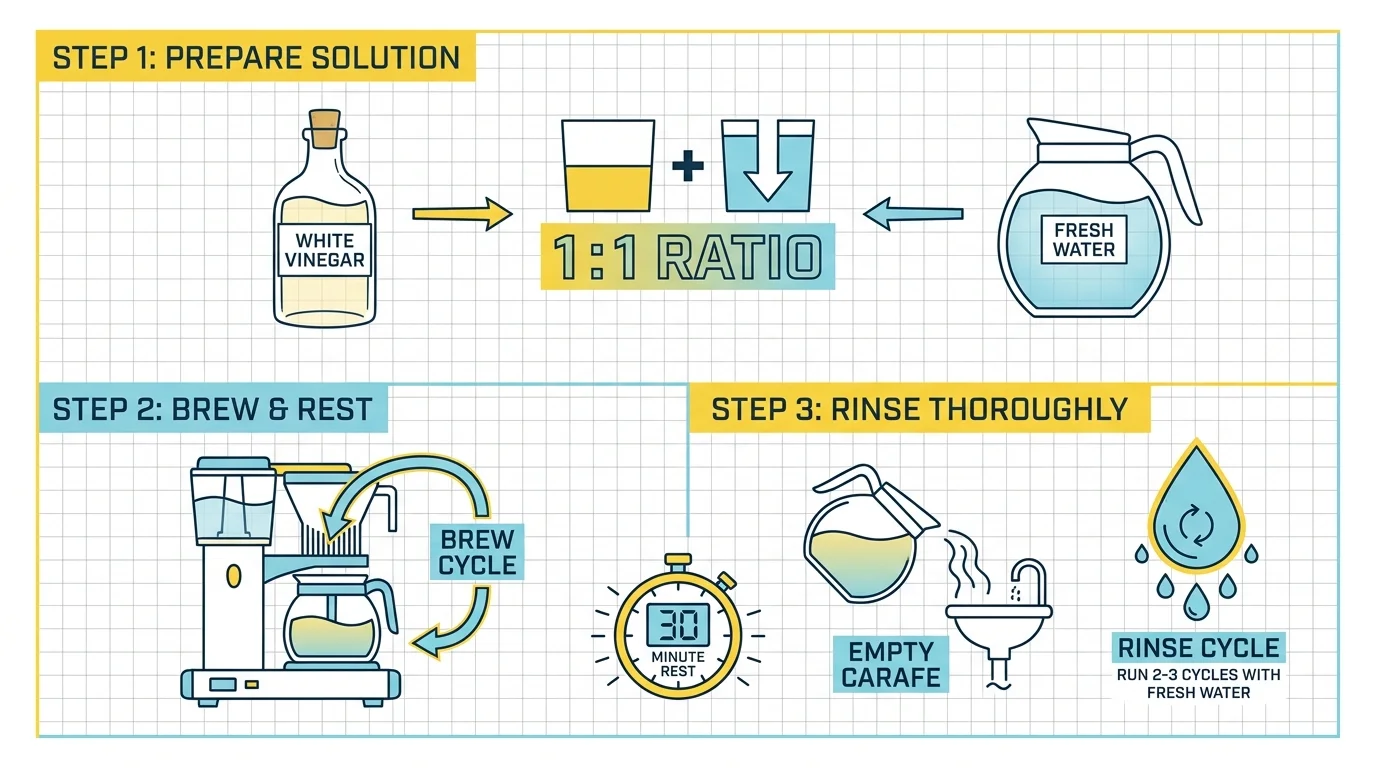
- Fill the water reservoir to the maximum line with a mixture of equal parts distilled white vinegar and cold water.
- Run a standard brew cycle until the reservoir is half empty, then turn off the machine and let the acidic solution sit inside the internal lines for 30 to 45 minutes to break down mineral scale and eliminate mold.
- Turn the machine back on and allow the brewing cycle to finish completely.
- Discard the vinegar solution from the carafe.
- Run two or three complete brew cycles using only fresh, cold water to flush out the lingering vinegar taste and smell before brewing your next pot of coffee.
4. Range Hood Filters
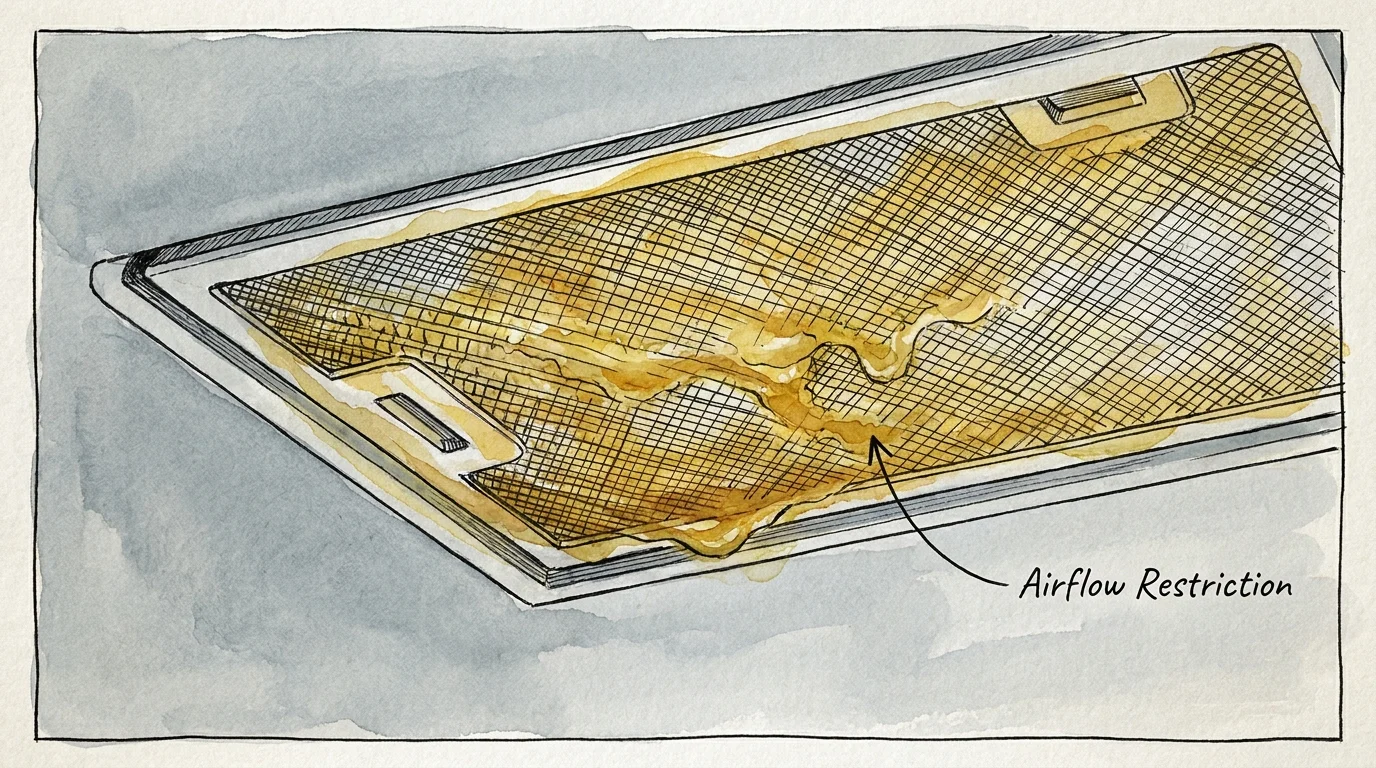
Your range hood acts as the lungs of your kitchen, pulling smoke, steam, and airborne cooking grease out of your environment. Over time, the metal mesh filters located underneath the hood become completely saturated with a sticky, yellow layer of grease. If you fry foods often, this buildup happens incredibly fast. A clogged filter severely restricts necessary airflow, meaning your kitchen fills with smoke and cooking odors more easily.
More importantly, a grease-laden hood filter poses a severe safety risk. Data from the U.S. Fire Administration indicates that cooking fires are the leading cause of home fires, and nearly half of all nonconfined residential cooking fires involve the ignition of cooking oil, fat, or grease. Keeping your filters clean removes this highly flammable fuel source from directly above your hot stove.
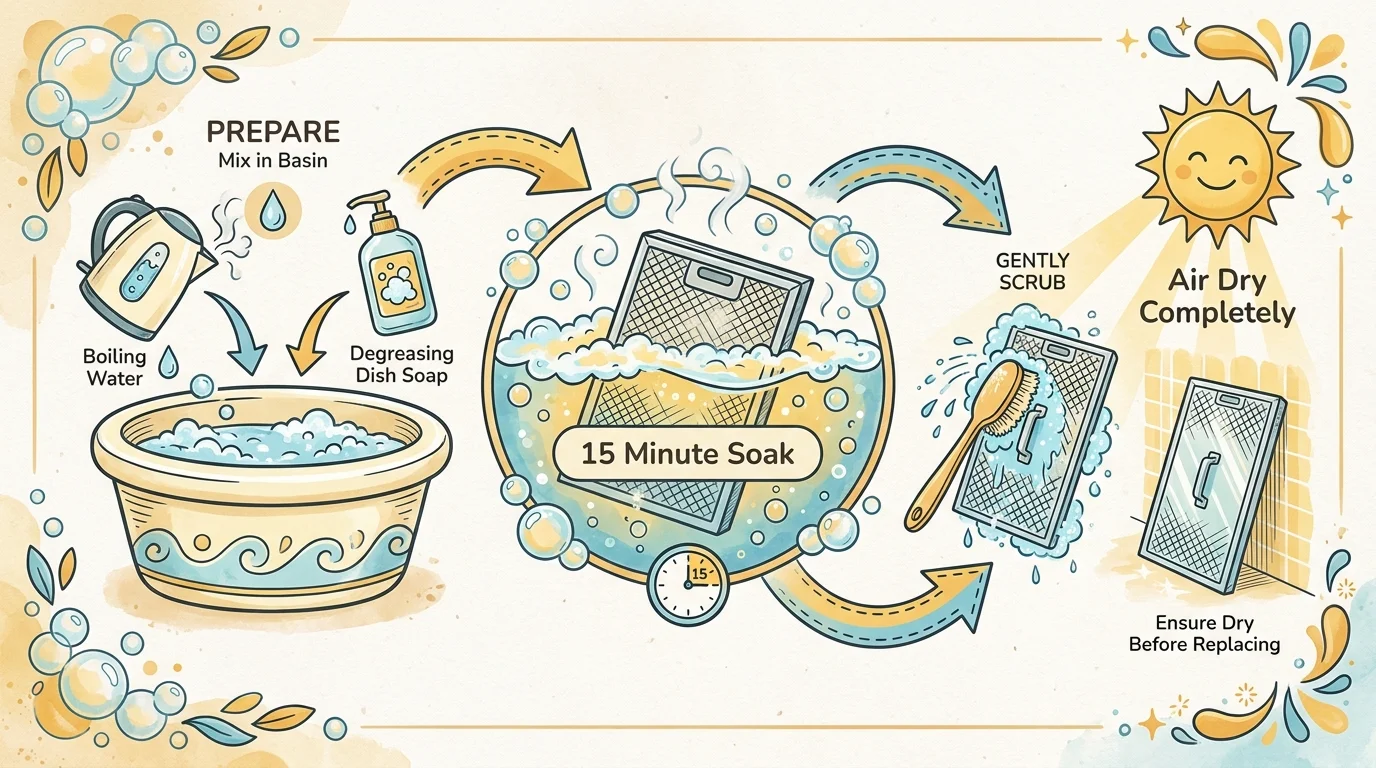
How to Degrease Range Hood Filters:
- Slide the metal mesh filters out of the track beneath your range hood using the small release latches.
- Fill your kitchen sink or a large heat-safe basin with boiling hot water.
- Add a generous squirt of a heavy-duty degreasing dish soap and one-quarter cup of baking soda, swirling the water until the powder dissolves.
- Submerge the greasy filters in the hot soapy water and let them soak undisturbed for 15 to 20 minutes to break down the hardened fat.
- Scrub the metal mesh gently with a non-abrasive dish brush to push the softened grease out of the tiny holes.
- Rinse the filters thoroughly under hot running water, and let them air dry completely before reinstalling them.
5. The Underside of the Garbage Disposal Splash Guard
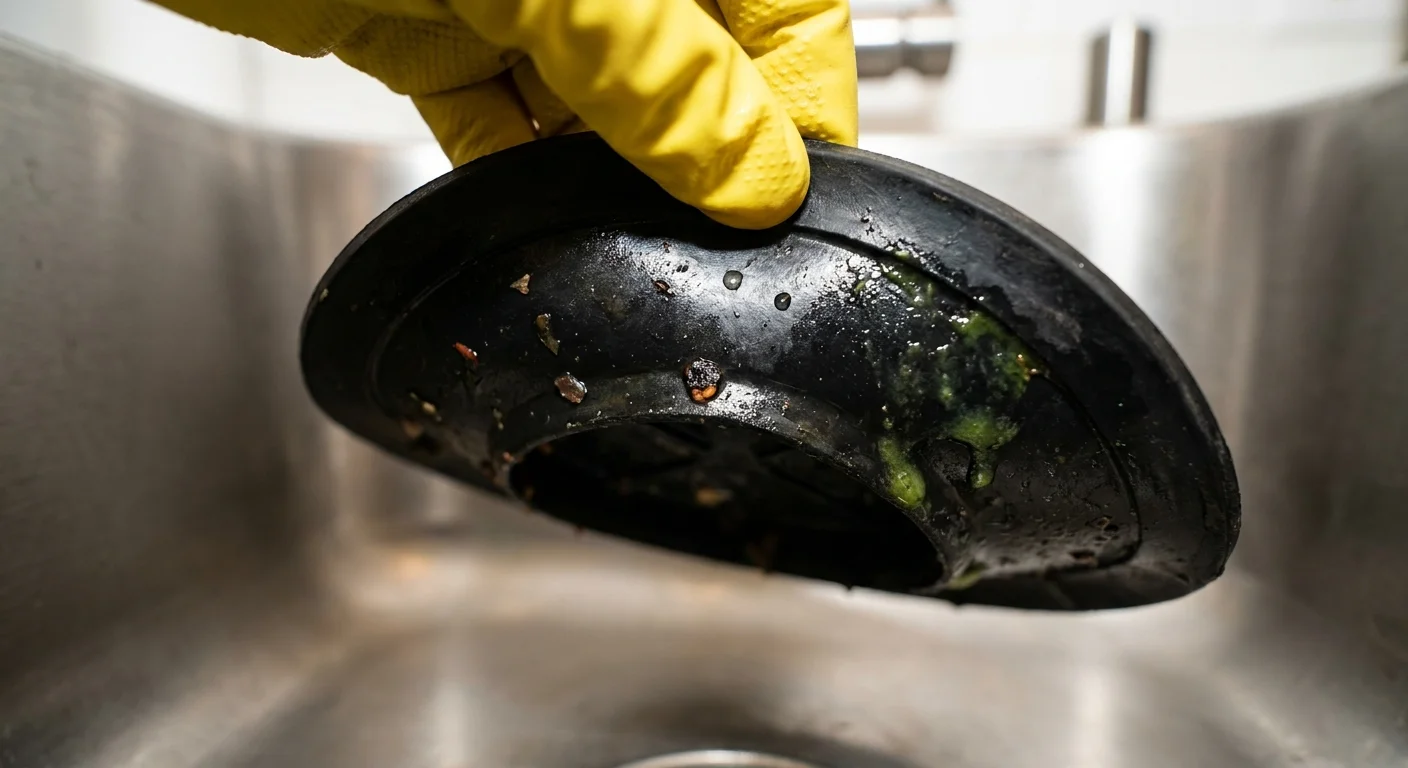
If a persistent, foul odor wafts from your kitchen sink even after you pour down fragrant lemon peels or flush the pipes with vinegar, the source is likely hiding right near the surface. The black rubber splash guard—also known as a disposal baffle—sits inside the sink drain to prevent food and water from shooting back up while the disposal blades run. While the top of the rubber stays relatively clean from running tap water, the grooved underside acts as a hidden trap for rotting food particles and smelly bacterial slime.
Because people rarely lift the rubber flaps to look underneath, this dark sludge can accumulate for months. This creates an embarrassing stench that ruins the atmosphere of an otherwise clean kitchen.
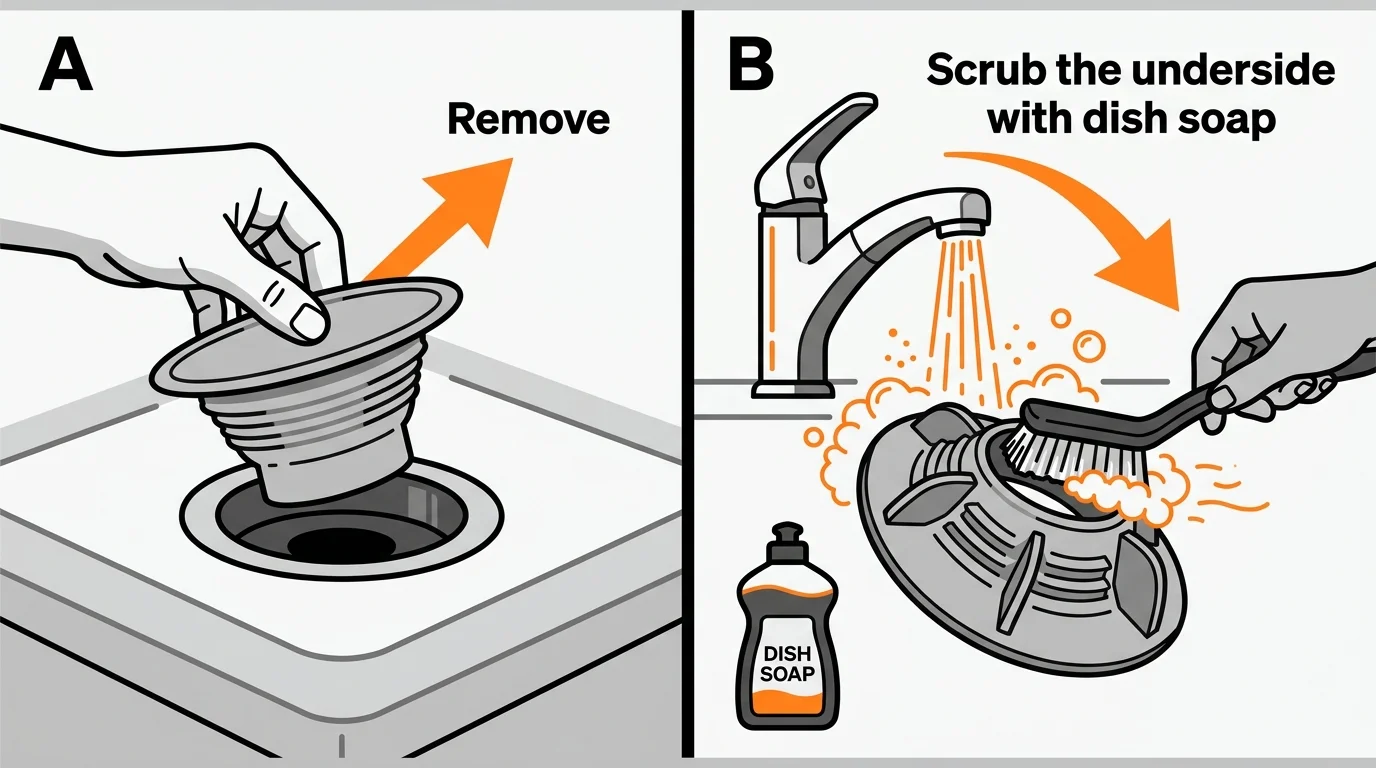
How to Clean the Disposal Splash Guard:
- Turn off the power switch to the garbage disposal and unplug it from the wall beneath the sink if possible, ensuring it cannot accidentally turn on while you work.
- Put on a pair of thick rubber cleaning gloves.
- Apply a generous squeeze of dish soap directly to an old toothbrush or a small, long-handled scrub brush.
- Lift each rubber flap of the splash guard upward to expose the hidden underside.
- Scrub the black sludge off the bottom of the flaps and around the inner metal rim of the drain basin.
- Rinse the area thoroughly with hot water, running the disposal briefly to wash the newly loosened debris safely down the pipes.
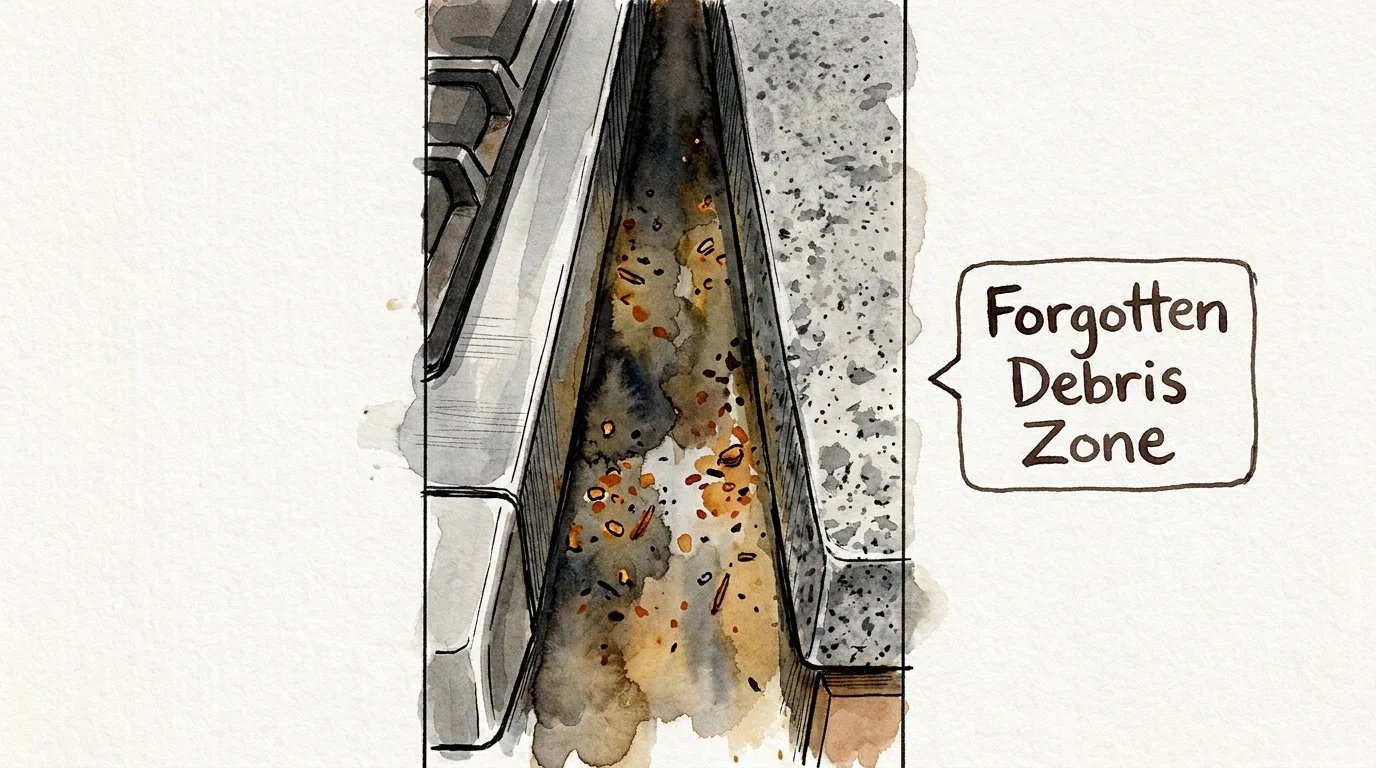
6. The Gap Between the Stove and Countertops
The narrow, dark crevice between your freestanding oven and the adjacent kitchen cabinets acts like a massive magnet for stray ingredients. Every time you chop vegetables, stir a vigorously simmering pot of pasta sauce, or pour a bowl of cereal, tiny crumbs and splatters migrate into this tight space. Because a standard kitchen sponge or broom cannot reach inside the gap, the debris sits there indefinitely.
Leaving rotting food and cooking grease in this hidden zone not only generates stale smells but also provides a highly reliable food source for household pests like ants, mice, and cockroaches. You need to clear out this crumb catcher periodically to maintain a truly sanitary cooking environment.
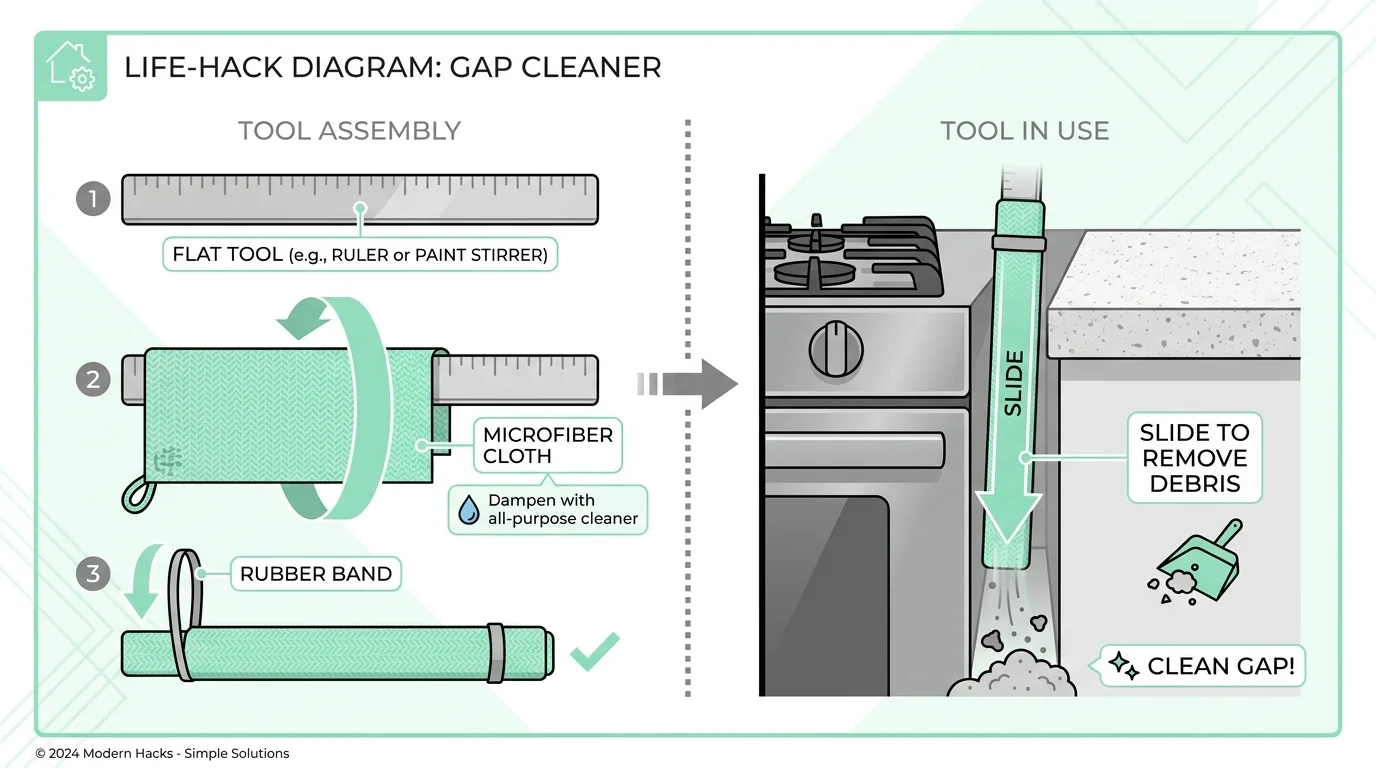
How to Clean the Stove Gap:
- Wrap a slightly damp microfiber cloth tightly around a dull butter knife or a long, flat ruler.
- Slide the wrapped tool into the gap and pull it forward toward you to drag out hidden crumbs and sticky spills.
- If the gap is heavily soiled or has not been cleaned in years, carefully pull the entire stove a few feet away from the wall. Lift slightly to avoid scratching your kitchen flooring.
- Vacuum the exposed floor beneath the appliance, then wipe down the side panels of the stove and the cabinet walls with an all-purpose cleaner.
- Push the stove back into place and consider purchasing inexpensive heat-resistant silicone gap covers to prevent future spills from falling down the sides.
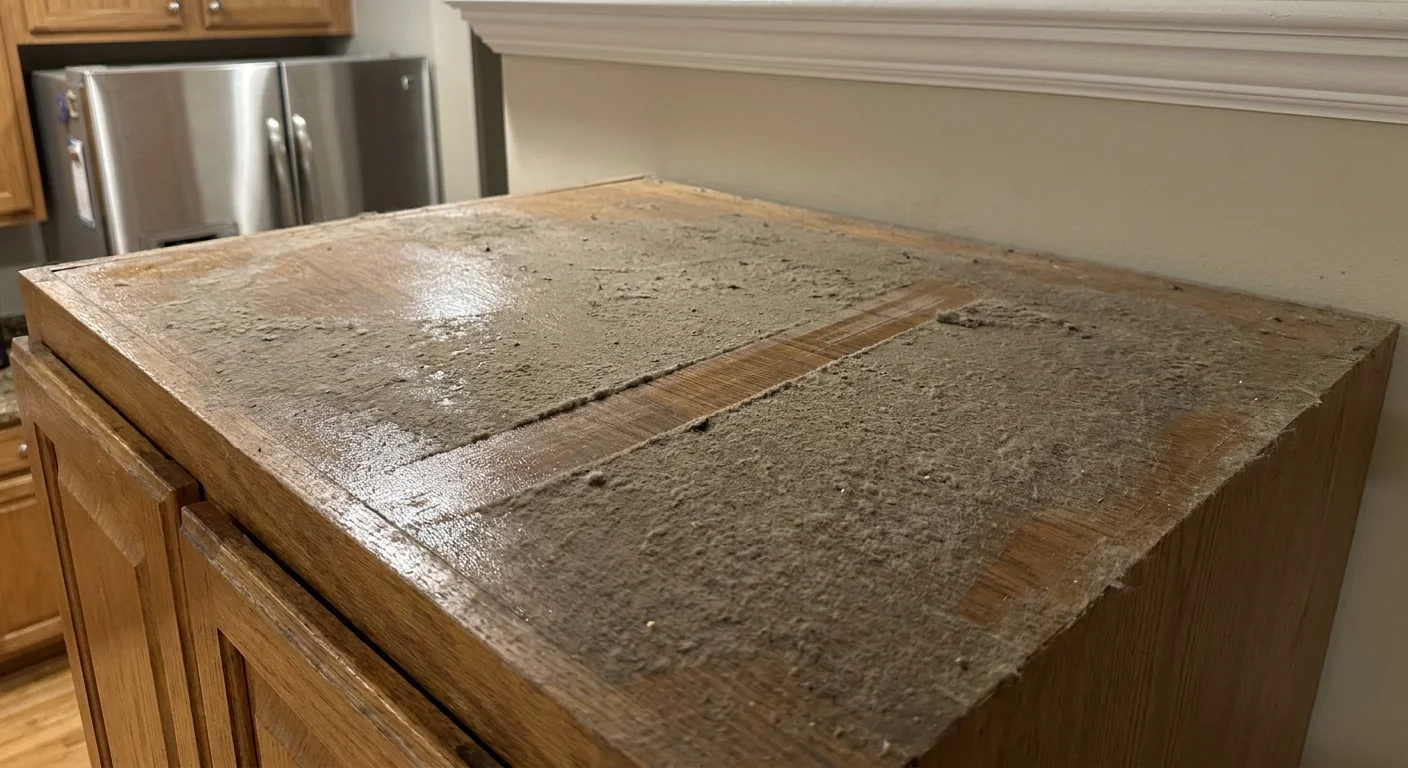
7. Tops of the Kitchen Cabinets
Unless you are exceptionally tall or frequently use a step stool to retrieve rarely used appliances, you probably do not see the tops of your upper kitchen cabinets. Because these flat surfaces sit far out of your daily sightline, they easily miss out on routine dusting. Meanwhile, your kitchen exhaust system pushes fine, airborne cooking grease upward toward the ceiling. As this microscopic grease settles on the cabinet tops, it mixes with regular household dust to form a thick, sticky, and stubborn layer of grime. If you attempt to wipe this mixture with a dry duster, you will merely smear the sticky residue.
Tackling this forgotten real estate brightens the room and improves your overall indoor air quality, preventing that heavy, greasy dust from eventually drifting back down onto your clean food preparation surfaces.
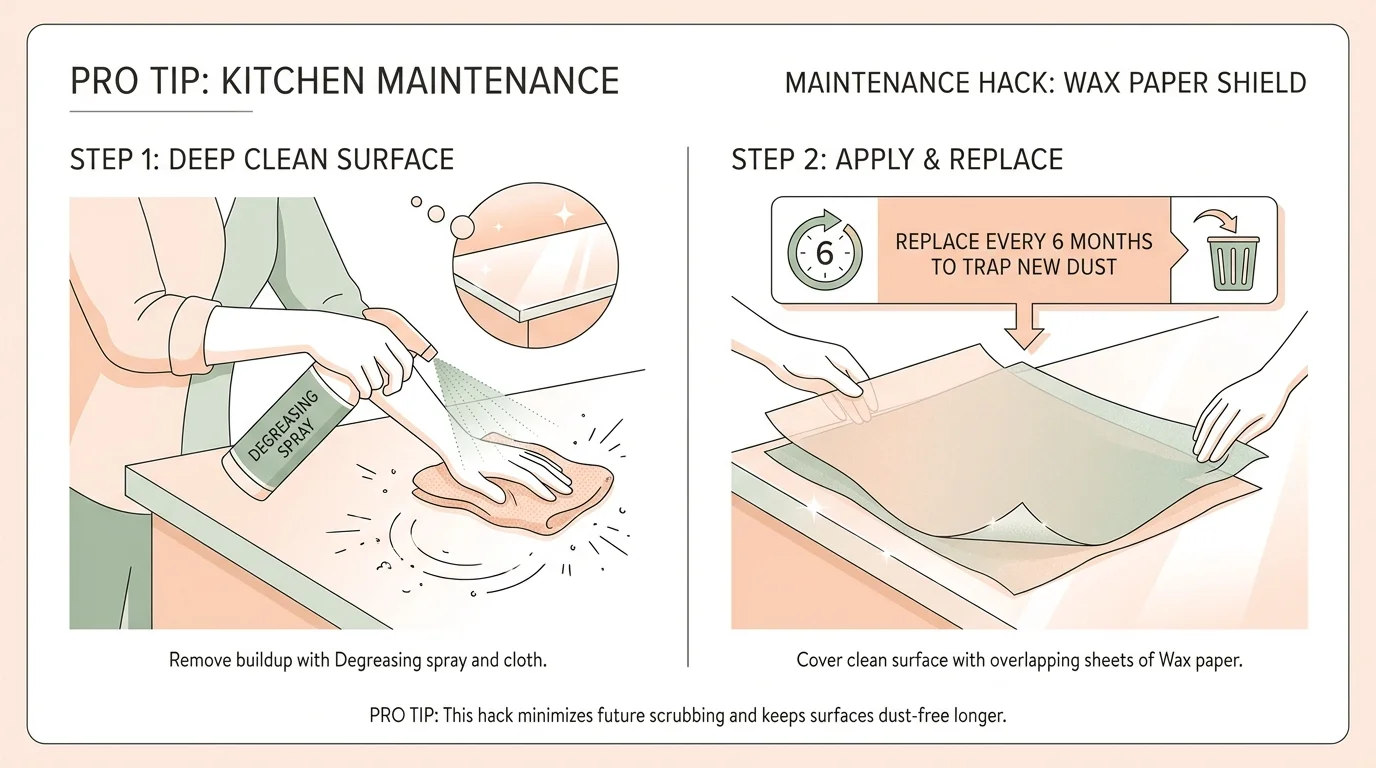
How to Clean the Tops of Cabinets:
- Spray a heavy-duty degreaser or a strong mixture of warm water and dish soap directly onto the sticky surface.
- Let the cleaning solution sit undisturbed for three to five minutes to penetrate and soften the hardened grease-and-dust mixture.
- Wipe away the grime using a damp microfiber cloth or a non-scratch scrubbing sponge, rinsing your cloth frequently in a bucket of hot water so you do not spread the grease around.
- Dry the cabinet wood thoroughly with a clean towel to prevent long-term moisture damage.
- Lay down overlapping sheets of wax paper or parchment paper along the top of the cabinets. The next time you clean, you can simply throw away the greasy paper and lay down fresh sheets in seconds.

8. Reusable Grocery Bags
Switching to reusable grocery bags dramatically reduces plastic waste, but keeping the same unwashed totes in continuous rotation introduces a significant cross-contamination risk directly to your kitchen. You use these bags to haul packages of raw chicken, unwashed root vegetables covered in soil, and damp produce. When you return home from the supermarket, you likely drop those exact bags straight onto your clean kitchen counters or your dining room table while you unload your groceries.
Without regular laundering, bacteria from minor meat juice leaks breed rapidly inside the dark folds of the fabric. Leaving the bags in the hot trunk of your car between shopping trips only accelerates this bacterial growth. Establishing a simple maintenance routine for your grocery totes keeps harmful pathogens away from your food.
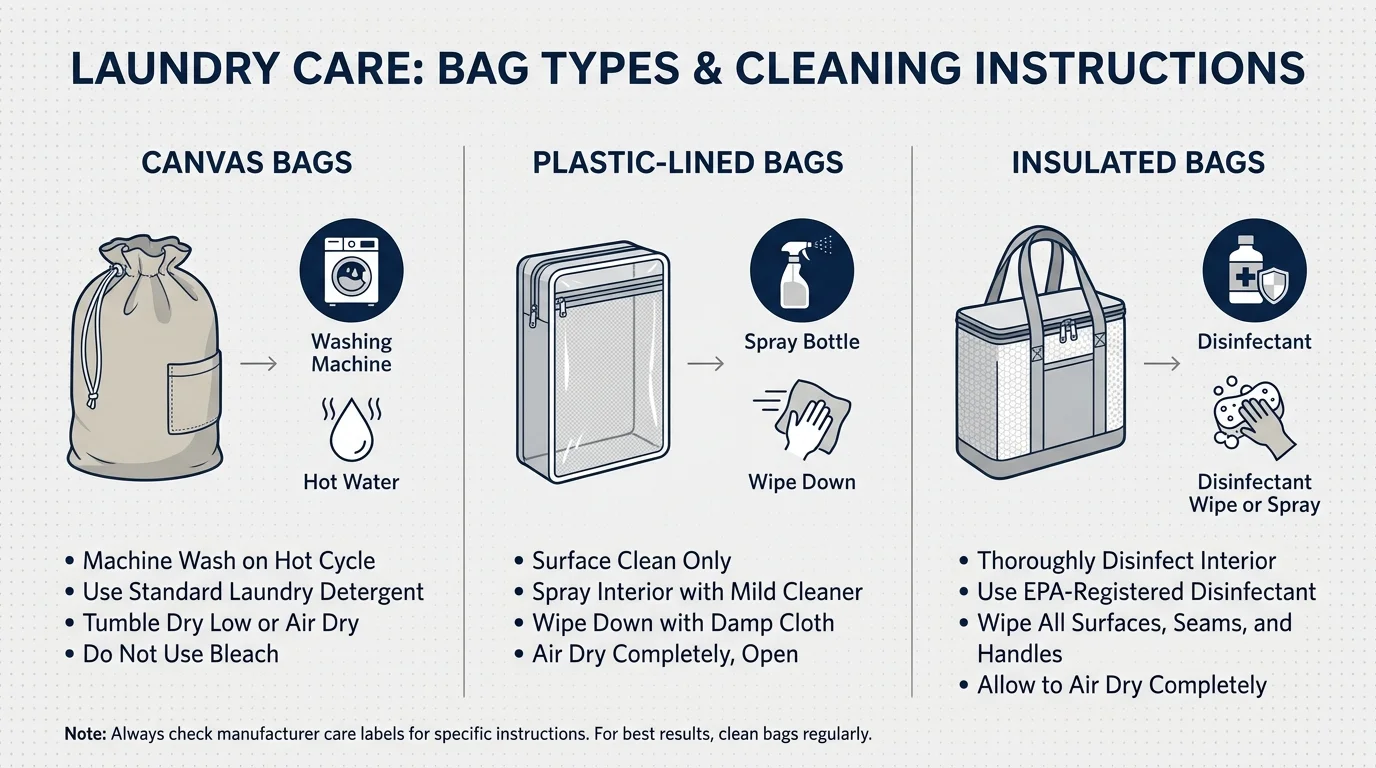
How to Clean Reusable Bags:
- Check the care labels on your canvas or cotton tote bags; most cloth bags can safely go into your washing machine on a hot water cycle with standard laundry detergent.
- Toss cloth bags into the dryer or hang them on a clothesline until they are entirely dry before storing them.
- For insulated cooler bags or structured totes made from recycled plastic, wipe the interior and exterior thoroughly with a disinfecting wipe or a cloth sprayed with an antibacterial multi-purpose cleaner.
- Prop the rigid bags open and allow them to air dry completely to prevent trapped moisture from creating mildew.
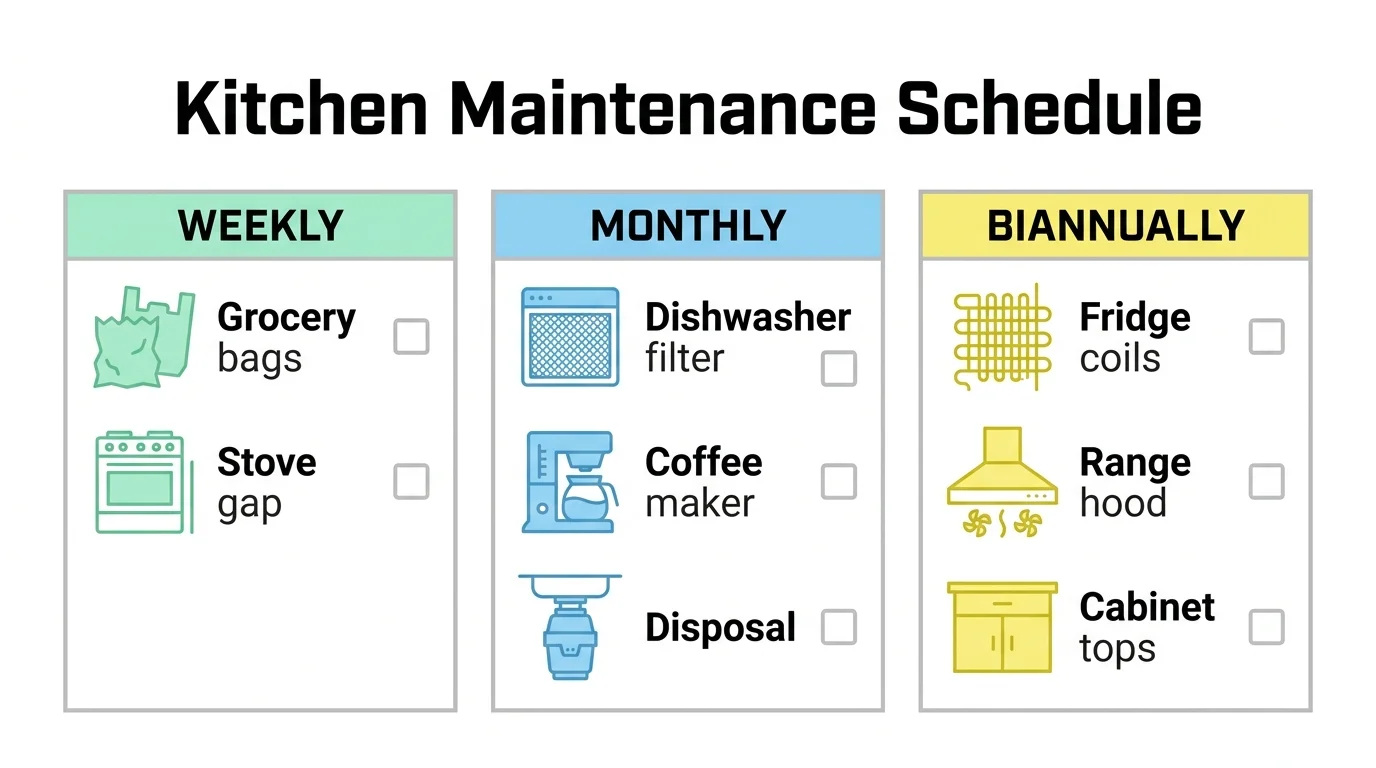
Kitchen Maintenance Schedule at a Glance
To help you effortlessly keep track of these hidden areas, use this quick reference guide to schedule your deep cleaning tasks throughout the year.
| Forgotten Spot | How Often to Clean | Primary Benefit |
|---|---|---|
| Dishwasher Filter | Once a month | Prevents bad odors and keeps dishes grit-free |
| Refrigerator Coils | Every 6 months | Lowers energy bills and extends appliance life |
| Coffee Maker Reservoir | Once a month | Eliminates mold and improves coffee flavor |
| Range Hood Filters | Every 1 to 3 months | Reduces fire hazards and improves kitchen ventilation |
| Garbage Disposal Splash Guard | Every 2 weeks | Stops foul sink smells right at the source |
| Stove and Countertop Gap | Every 3 months | Deters household pests and removes rotting food |
| Tops of Kitchen Cabinets | Every 6 months | Removes sticky grease and improves indoor air quality |
| Reusable Grocery Bags | After every few trips | Prevents bacterial cross-contamination on counters |
Do not let this checklist overwhelm you; pick just one of these neglected areas to tackle this weekend, such as rinsing out the dishwasher filter or running vinegar through the coffee maker. Taking five minutes today to address a single forgotten spot builds momentum, immediately making your kitchen feel fresher and easier to maintain.