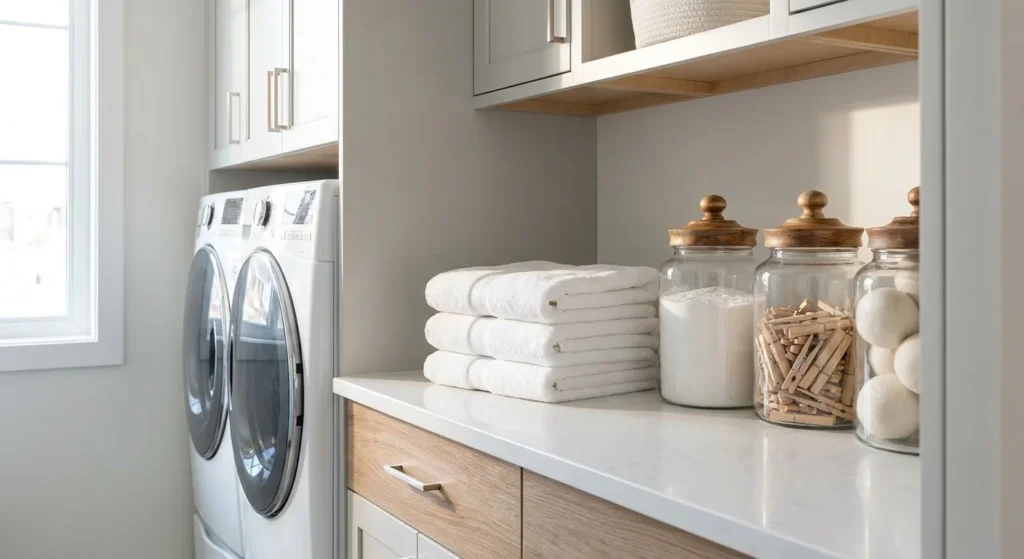
You can spend hours wiping down countertops and vacuuming rugs, yet still find a layer of fine gray film settling across your living room by the next afternoon. This happens because hidden dust traps constantly circulate microscopic particles back into your home’s air supply. Targeting these overlooked accumulation zones cuts your cleaning time in half while improving the overall air quality you breathe. Routine surface cleaning only treats the symptoms of a dusty home; to actually eliminate the problem, you need to go directly to the source. Let’s explore the seven most notorious dust magnets in your house and break down exactly how you can effectively clean them to keep your space fresher for much longer.
1. The Top Edges of Ceiling Fan Blades
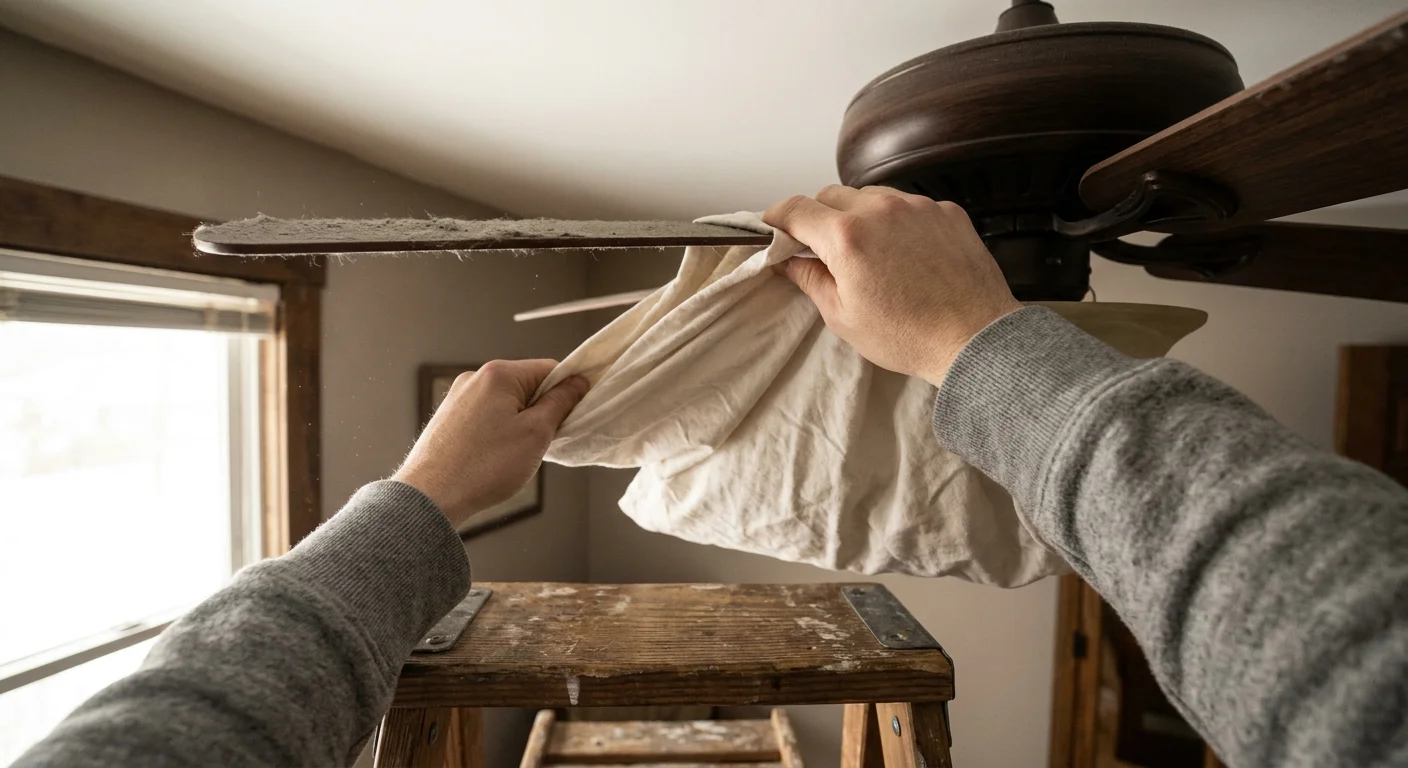
When ceiling fans sit idle, their broad, flat upper surfaces serve as the perfect landing pads for floating debris. Because these fixtures sit high above eye level, this thick layer of gray fuzz often goes completely unnoticed. The moment you flip the switch, however, the centrifugal force launches a shower of accumulated dust across your carefully arranged furniture, bedding, and freshly swept floors. Even if you run your fan continuously during the warmer months, the leading edge of each blade actively slices through airborne particles, causing a stubborn line of dirt to build up on the edges due to static electricity.
Cleaning ceiling fans without creating a secondary mess on the floor requires a highly strategic approach. If you simply run a standard feather duster over the blades, the debris will scatter everywhere, effectively undoing any home cleaning you accomplished that day. Instead, you need to capture the dirt at the source using an item you already have in your linen closet.
Follow this simple, mess-free method:
- Turn off the fan and wait for it to come to a complete stop.
- Place a sturdy, slip-resistant step stool directly beneath the fixture.
- Take an old, slightly damp pillowcase and slide it entirely over one fan blade, just like you are putting a pillow inside.
- Press the fabric firmly against both the top and bottom of the blade, then slowly pull the pillowcase toward you.
- Keep the case closed as you pull it off to trap all the dust inside.
- Repeat this process for every blade.
- Take the pillowcase outside, turn it inside out to empty the large clumps into the trash, and toss it directly into your washing machine.
For the fixture housing and light globes, wipe the surfaces down using a microfiber cloth lightly misted with an all-purpose cleaner. Completing this task once a month ensures that your fan circulates clean air rather than a constant stream of allergens.
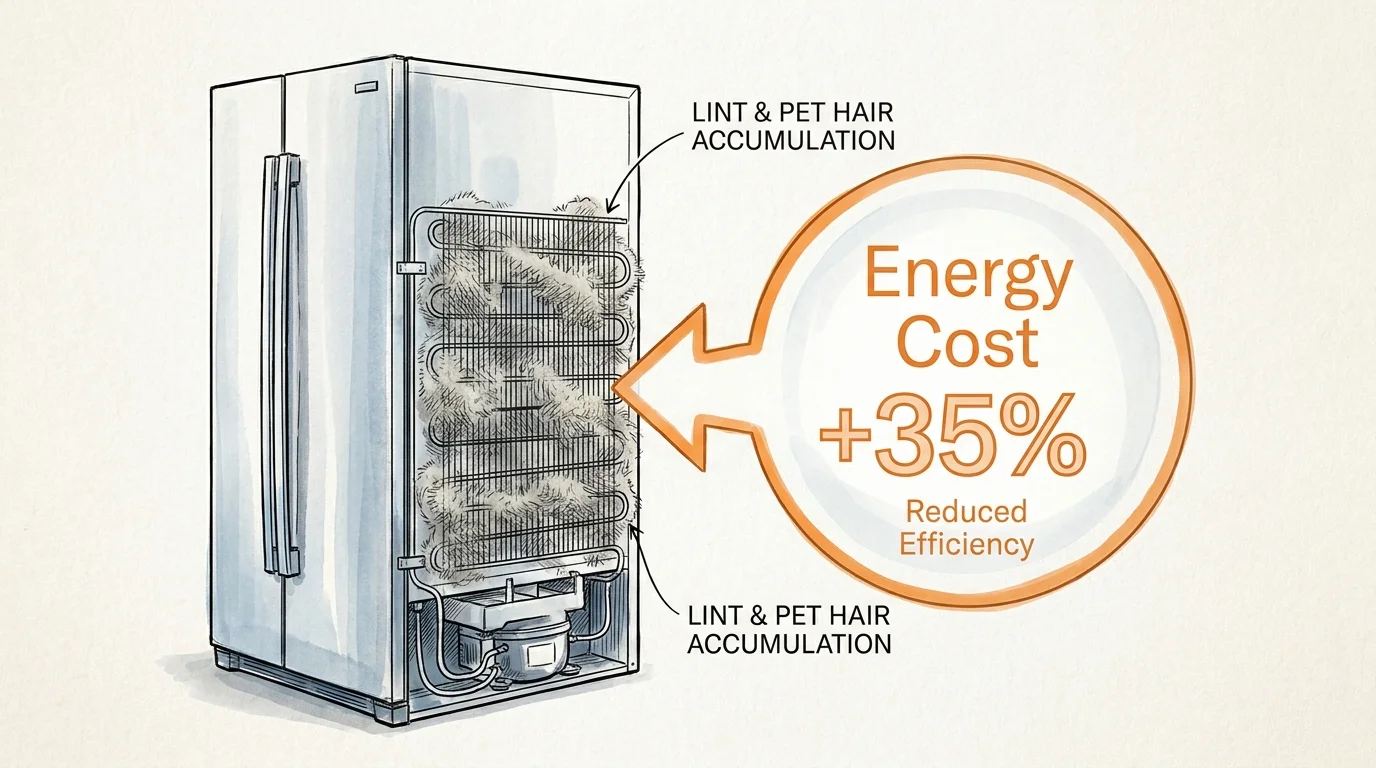
2. Behind and Underneath Refrigerator Coils
Your kitchen appliances work tirelessly to keep food fresh, but the refrigerator is the undisputed workhorse of the household. Hidden out of sight at the bottom or back of this massive appliance sits a network of condenser coils. These coils are responsible for dissipating the heat generated by the compressor, allowing the interior of your fridge to remain cold. Unfortunately, the location of these coils makes them a powerful magnet for dust, dropped food crumbs, and drifting pet hair.
As the fuzz thickens, it forms an insulating blanket around the metal tubing. The heat can no longer escape efficiently, which forces the compressor to run longer and work significantly harder to maintain safe food storage temperatures. According to the Department of Energy, allowing lint and dust to coat these vital components can increase the energy cost of the refrigerator by as much as 35 percent and drastically shorten the lifespan of the appliance. A simple household cleaning task suddenly becomes a matter of protecting a major financial investment.
To restore your refrigerator to peak efficiency, schedule a deep cleaning of the coils every six months. If you own shedding pets, you should tackle this chore quarterly.
First, pull the refrigerator slightly away from the wall and unplug it from the electrical outlet to ensure your safety. Locate the coils; older models usually feature exposed grids on the back, while newer units conceal them behind a vented base panel at the bottom front. Remove the access panel and use a specialized coil brush—a long, bendable bristle brush available at most hardware stores—to dislodge the compacted grime. As you brush the debris loose, hold the crevice tool attachment of your vacuum cleaner right next to the coils to instantly suck up the dislodged dirt. Once the metal tubing looks clean and shiny again, sweep the floor area underneath, replace the panel, and plug the unit back in. You will likely notice that the motor runs quieter and cycles on less frequently.
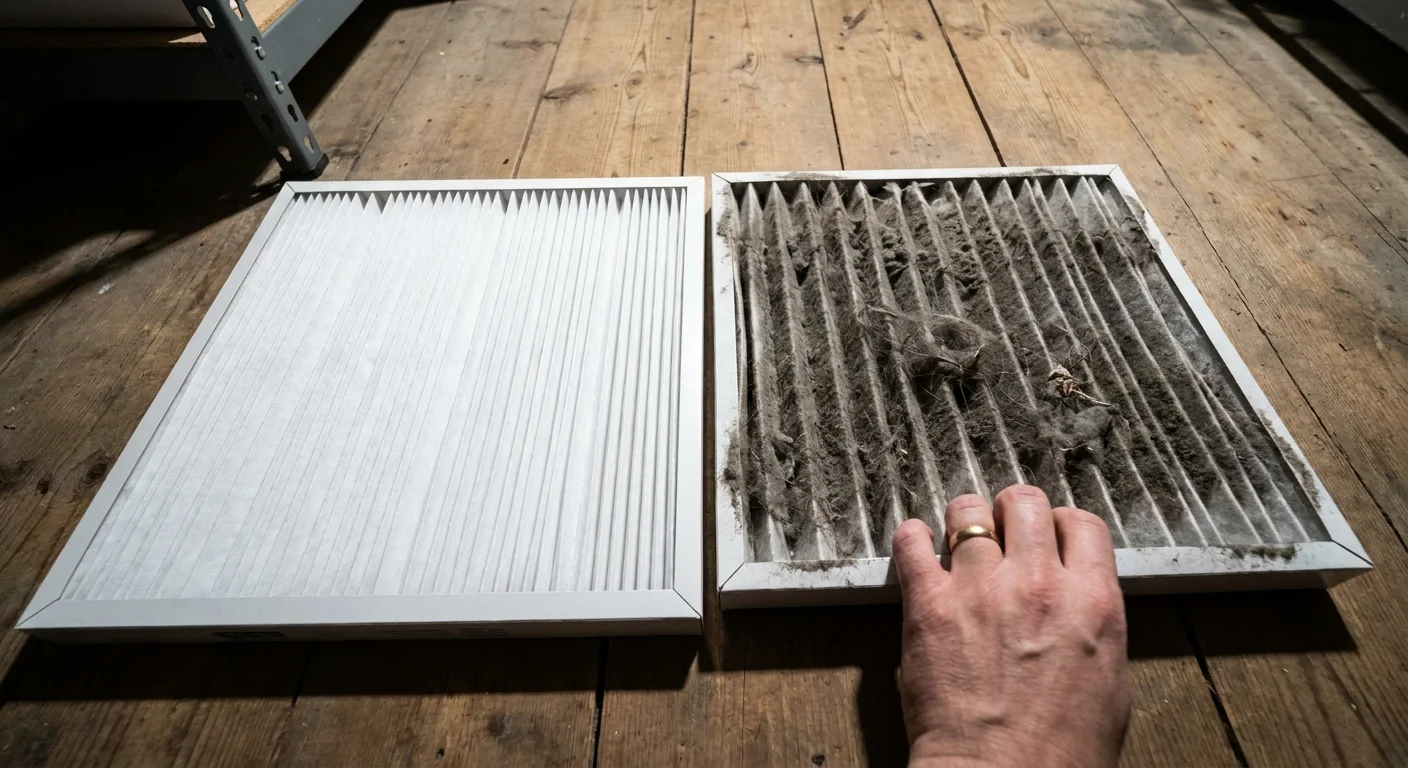
3. HVAC Vents and Air Filters
The ductwork weaving through your walls and ceilings acts as the respiratory system of your home. Every time the heating or air conditioning turns on, air is pulled through intake vents, conditioned, and pushed back out into your living spaces. During this constant cycle, any airborne dust, pet dander, and microscopic debris get pulled right along for the ride. Without proper filtration and regular vent maintenance, your climate control system simply redistributes the same dusty air over and over again.
Many homeowners faithfully vacuum their carpets but completely ignore the slatted covers on their walls and floors. Return vents, which suck air into the system, build up thick, web-like layers of gray dust incredibly fast. Meanwhile, supply vents can accumulate dirt on the louvers, slowly restricting airflow and pushing stray particles out onto your furniture. According to guidelines from the Environmental Protection Agency, reducing indoor pollutants requires a combination of adequate ventilation and proper source filtration. If your filters are clogged, they cannot perform their job.
Start your dust cleaning routine by addressing the filters themselves. Standard fiberglass filters only catch large debris and need replacing every 30 days. For better air quality, upgrade to pleated filters with a MERV rating between 8 and 12. These filters strike the perfect balance; they are dense enough to trap fine dust, pollen, and pet dander, yet porous enough to allow sufficient airflow so you do not damage your HVAC blower motor. Check these pleated filters monthly and replace them at least every 90 days.
Next, focus on the vent covers. Turn off the HVAC system to prevent air from blowing in your face. Use your vacuum’s brush attachment to sweep across the grates of every supply and return vent in the house. For a deeper clean, especially in humid areas like bathrooms where dust tends to stick to the metal, unscrew the vent covers from the wall or floor. Wash them in your sink using warm water and a few drops of dish soap. Dry them completely before reinstalling them. This simple practice instantly revitalizes the look of your rooms and stops dust at the source.
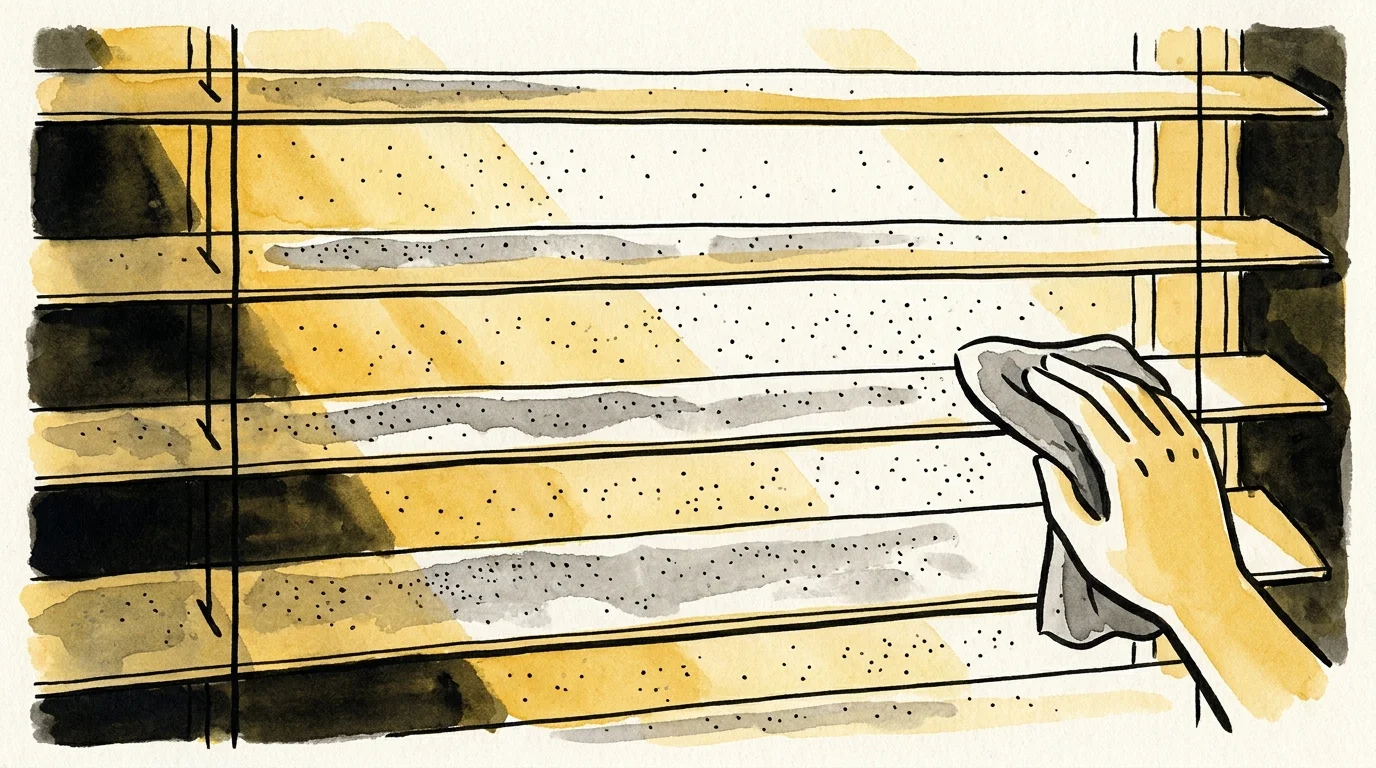
4. Window Blinds and Curtains
Windows provide natural light and fresh air, but the treatments covering them are notorious for capturing massive amounts of airborne dirt. When you leave a window open, incoming breezes carry pollen, exhaust particles, and outdoor dirt directly into the fabric of your curtains or the slats of your blinds. Even when windows remain shut, static electricity naturally attracts indoor dust to these surfaces.
Because blinds and drapes hang vertically, many people mistakenly assume dust simply falls off them. In reality, textured fabrics and horizontal blind slats act like tiny shelves, holding onto debris until a sudden draft or the opening of the blinds knocks the particles loose. If you constantly struggle with a dusty room but vacuum regularly, your window treatments are likely the culprits.
Cleaning blinds can feel tedious, but tackling them with the right tools makes the process highly efficient. For standard horizontal blinds, skip the damp rags; applying moisture to heavy dust simply creates a stubborn, smeary mud. Instead, close the blinds completely so the slats lie flat against one another. Wipe a dry microfiber cloth or a dedicated blind-dusting tool gently from the center to the outer edges. Once you finish one side, rotate the slats the opposite direction to expose the other side and repeat the process. If you want to repel future buildup, lightly mist a clean cloth with an anti-static spray and run it over the clean slats.
Curtains and fabric drapes require a different approach. Since taking them down and washing them is a labor-intensive chore, you can maintain them between deep washes by vacuuming them directly on the rod. Attach the upholstery brush to your vacuum cleaner and reduce the suction power if your machine allows it. Hold the fabric taut with one hand and slowly run the brush down the length of the curtain, paying special attention to the top pleats and the bottom hem, where dust accumulates the fastest. Performing this quick household cleaning step every two weeks keeps your fabrics vibrant and prevents dust from becoming deeply embedded in the weave.
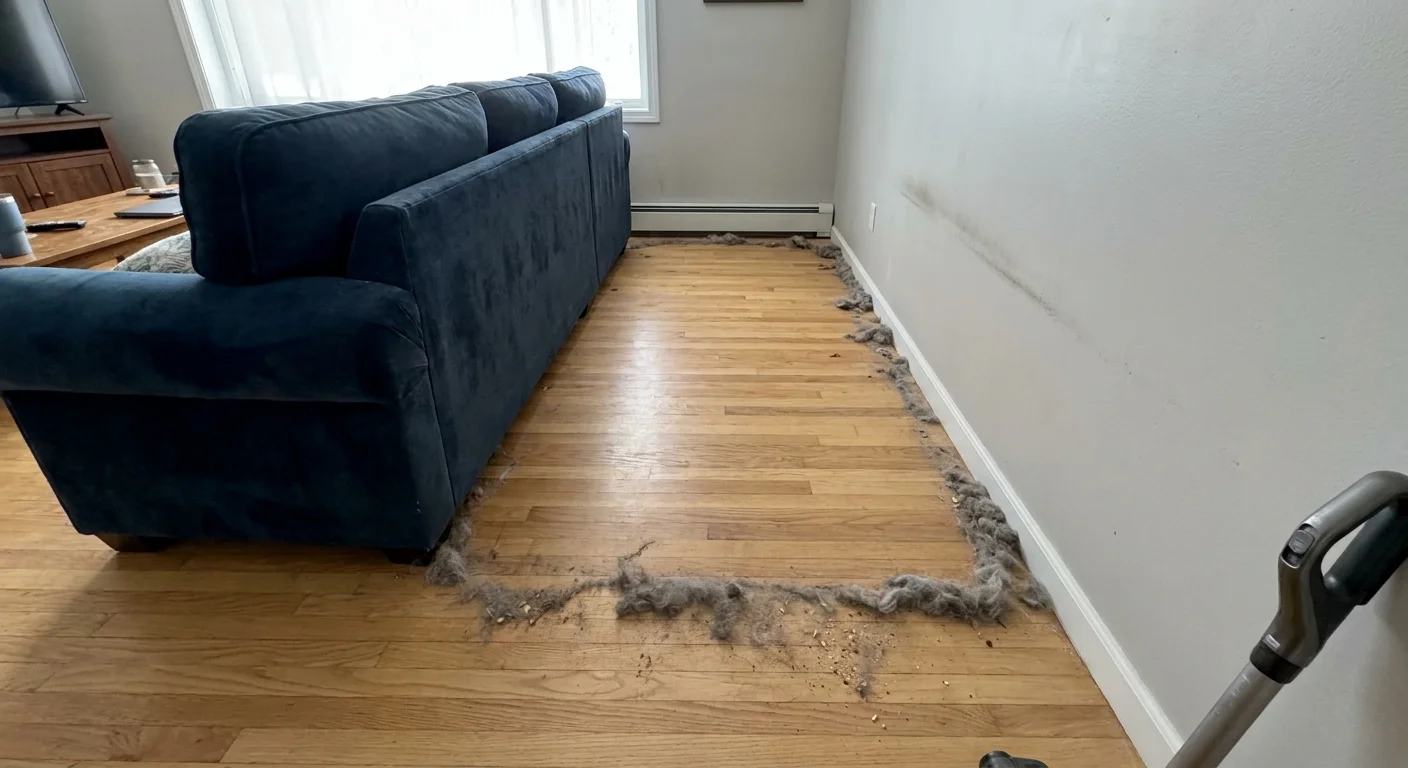
5. The Hidden Void Behind Heavy Furniture
The spaces underneath your bed, behind your living room sofa, and behind heavy dressers are the dark, quiet corners where dust bunnies thrive and multiply. Because these areas lack regular foot traffic and airflow, particles settle undisturbed for months or even years. Every time you change your bedsheets, tiny fibers from the linen, along with microscopic skin cells, float down to the floor and drift underneath the frame. Pet hair naturally gathers in these low-clearance zones, tangling together with the dust to form large, dense clumps.
Out of sight should never mean out of mind when it comes to home cleaning. If you neglect these hidden voids, any slight draft—whether from an open door, a person walking quickly past, or a floor fan—will pull these hidden debris clusters out into the open. You end up trapped in a frustrating cycle of sweeping the visible floor while a fresh supply of dust waits right behind the couch. According to the Asthma and Allergy Foundation of America, indoor allergens like dust mites and pet dander can trigger significant respiratory issues, making targeted cleaning in these areas essential for your well-being.
To eliminate these hidden reserves, you need to incorporate moving heavy furniture into your seasonal deep cleaning schedule. You do not need to do this every week, but pulling large pieces away from the wall two or three times a year makes a massive difference.
Before moving anything, ensure you use furniture sliders under the legs to protect your hardwood floors or carpet from scratches and tears. Once you pull the sofa or bed out, use a broom to sweep the large dust bunnies into a pile, as a heavy concentration of pet hair can easily clog a standard vacuum roll. After sweeping up the bulk of the mess, use your vacuum’s floor attachment to thoroughly clean the remaining fine dust from the floorboards and the base of the wall. While you have access to the back of the furniture, take a moment to vacuum the upholstery on the rear of the sofa or the fabric on the back of your headboard. Dust clings to vertical fabric surfaces just as much as it settles on the floor. Pushing clean, dust-free furniture back against a clean wall immediately elevates the freshness of the entire room.
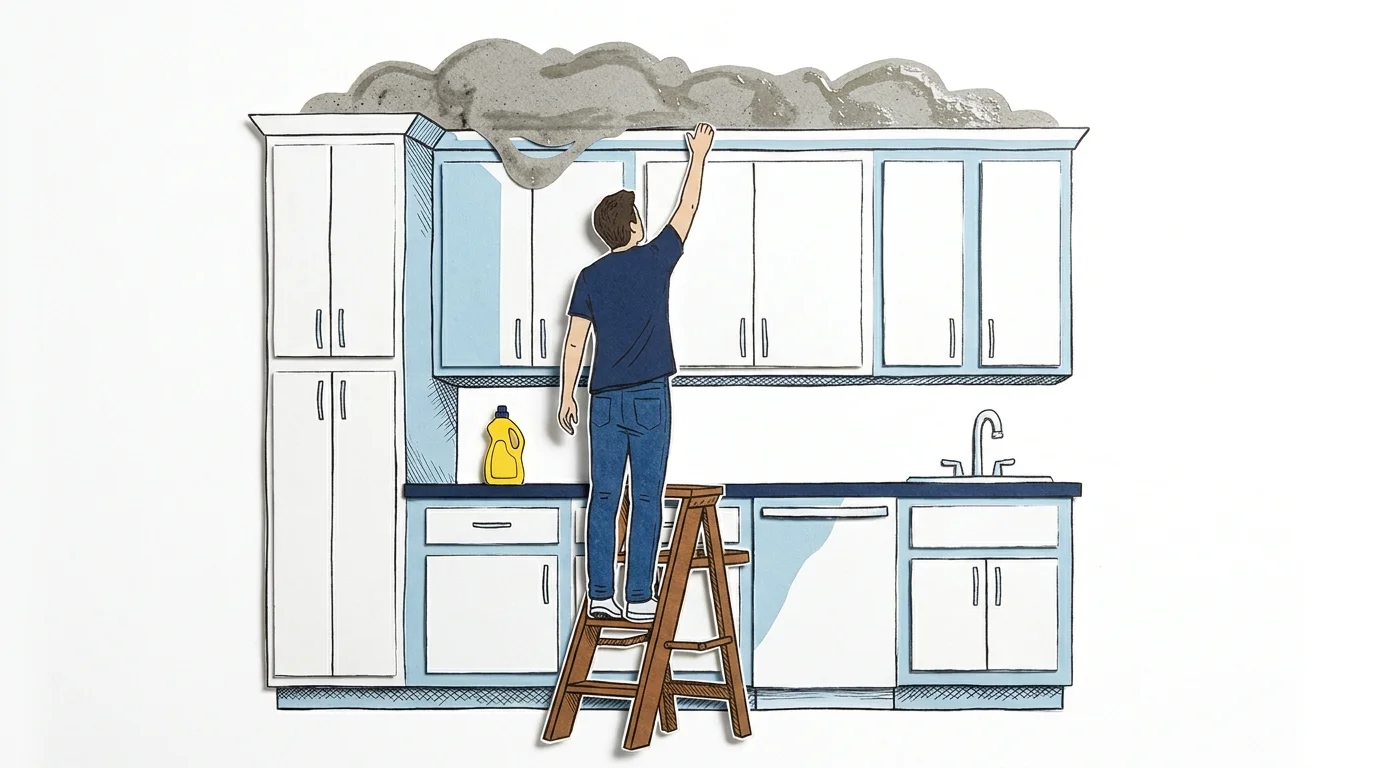
6. Tops of Kitchen Cabinets and Upper Shelving
Kitchens generate a unique and particularly stubborn variety of dust. Whenever you fry food, sauté vegetables, or boil heavily seasoned liquids, microscopic droplets of cooking oil and grease become airborne. As this aerosolized grease floats upward, it eventually settles on the highest flat surfaces in the room—typically the tops of your upper kitchen cabinets and the top of the refrigerator.
Once this sticky grease layer forms, it acts like glue for any normal household dust floating through the air. Over time, the mixture of cooking oil and standard dust hardens into a thick, yellowish-brown sludge that feels impossible to wipe away with a simple dry cloth. Because these surfaces sit high above your natural line of sight, this grimy buildup often goes completely ignored until you climb a ladder for a totally different reason.
Standard cleaning tips rarely apply to kitchen grease. A feather duster will simply drag across the sticky surface and leave its own feathers behind, making the mess worse. To cut through the polymerized grease and remove the dust, you need a powerful degreasing agent.
Mix a few drops of grease-cutting dish soap with warm water in a spray bottle. Lightly spray the mixture directly onto the top of the cabinets and let it sit for three to five minutes. This dwell time allows the surfactants in the soap to break down the sticky bonds of the oil. Next, use a damp, textured sponge or a microfiber cloth to wipe away the loosened grime. You may need to rinse your cloth several times in hot water to avoid spreading the grease around.
Once the surface is completely clean and dry, you can employ a brilliant preventative trick used by professional cleaners. Lay sheets of wax paper or old newspaper flat across the top of the cabinets. The paper sits out of sight from the ground but catches all the rising grease and settling dust. The next time you need to clean, simply roll up the dirty paper, throw it away, and lay down fresh sheets. This single hack saves you hours of intense scrubbing.
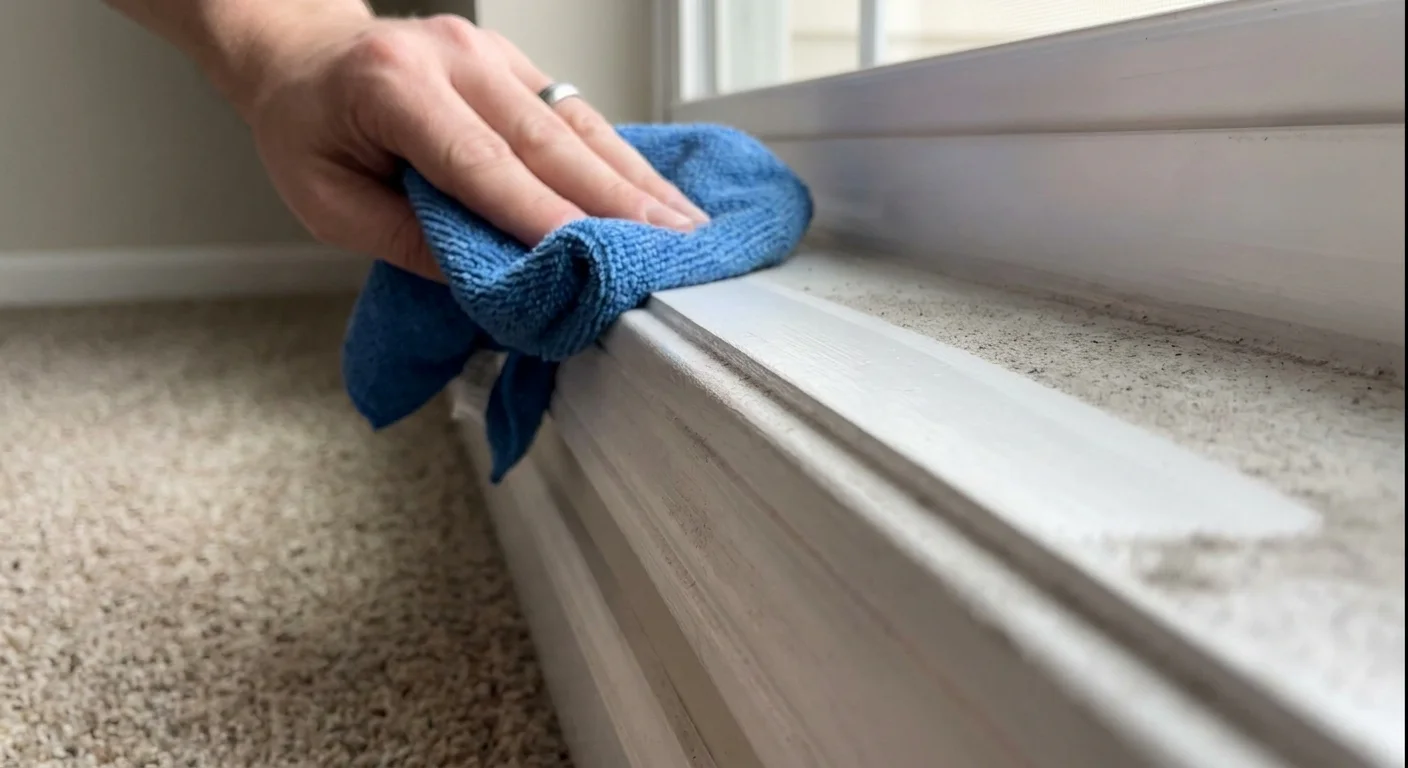
7. Baseboards and Door Frames
You might notice dust on your coffee table or television screen immediately, but you probably walk right past the architectural details of your home without giving them a second glance. Baseboards, crown molding, and the top ledges of door frames feature intricate grooves and flat shelves that collect dust constantly. Baseboards are especially vulnerable because they sit at floor level; every time you sweep, vacuum, or walk across the room, you kick up a small cloud of debris that inevitably settles onto the painted wood trim.
When dust sits on painted baseboards in high-humidity areas like bathrooms or kitchens, the moisture causes the particles to stick tightly to the paint. Over time, the trim begins to look dull, yellowed, and dirty, which subtly degrades the overall crispness and cleanliness of your home.
Cleaning these narrow architectural features requires specific tools to save your back and knees. For standard dry dusting, skip the bending altogether. Take a clean, dry microfiber cloth and secure it over the bristles of a standard broom using a large rubber band. Simply walk around the perimeter of the room and glide your makeshift long-handled duster along the top edge of the baseboards and the upper ledges of your door frames. The microfiber traps the dust instantly without requiring you to stoop down.
For baseboards that have developed a sticky layer of grime, a deeper wet cleaning is necessary. Fill a bucket with warm water and a splash of white vinegar. The mild acidity of the vinegar cuts through household grime without damaging the paint. Dip a clean cloth into the solution, wring it out until it is barely damp, and wipe down the trim. If you want to keep dust away longer, rub a standard laundry dryer sheet along the clean, dry baseboards. The anti-static properties of the dryer sheet leave an invisible residue that actively repels floating dust and pet hair, keeping your trim pristine for weeks at a time.

Routine Dusting Frequency Guide
To help you stay on track, reference this simple schedule for tackling these high-buildup areas before they affect your air quality.
| Dusting Location | Recommended Cleaning Frequency | Best Tool for the Job |
|---|---|---|
| Ceiling Fan Blades | Monthly | Old pillowcase |
| Refrigerator Coils | Every 6 months (Quarterly with pets) | Coil brush and vacuum crevice tool |
| HVAC Vents and Filters | Check monthly; replace filters every 90 days | Vacuum brush attachment |
| Window Blinds and Curtains | Bi-weekly | Microfiber cloth or upholstery vacuum attachment |
| Behind Heavy Furniture | 2-3 times per year | Furniture sliders and vacuum floor attachment |
| Tops of Kitchen Cabinets | Quarterly | Degreasing dish soap and warm water |
| Baseboards and Door Frames | Monthly | Microfiber cloth attached to a broom |

Your Next Step to a Cleaner Home
Pick just one room in your house today and identify the most neglected dust trap from this list. Spend fifteen minutes addressing that specific area. Whether you tackle the ceiling fan in your bedroom or pull the sofa away from the living room wall, eliminating a hidden source of airborne debris instantly makes your weekly cleaning routine easier and keeps your air noticeably fresher.