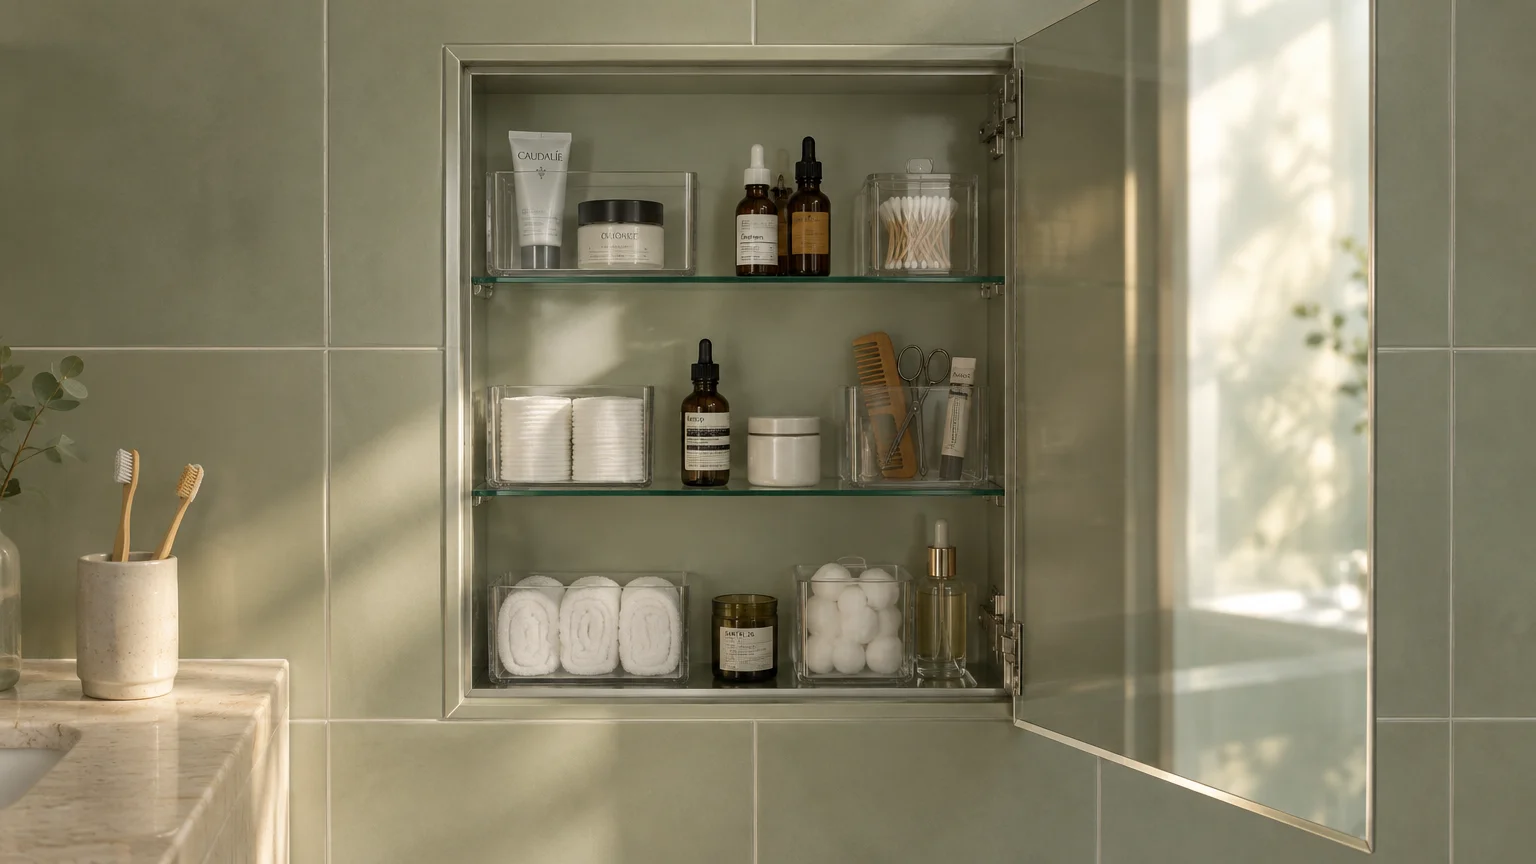
A well-arranged medicine cabinet streamlines your daily routine and prevents dangerous medication mix-ups. You can transform a cluttered mirror cabinet into a clean, highly functional health station in under an hour.
Proper storage also protects sensitive supplies from heat and moisture while keeping curious hands safe. Finding what you need during a midnight scrape or early morning rush becomes effortless.
These practical strategies will help you declutter expired items, reclaim vertical space, and establish an intuitive system that lasts.
Start with a Complete Cleanout and Assessment
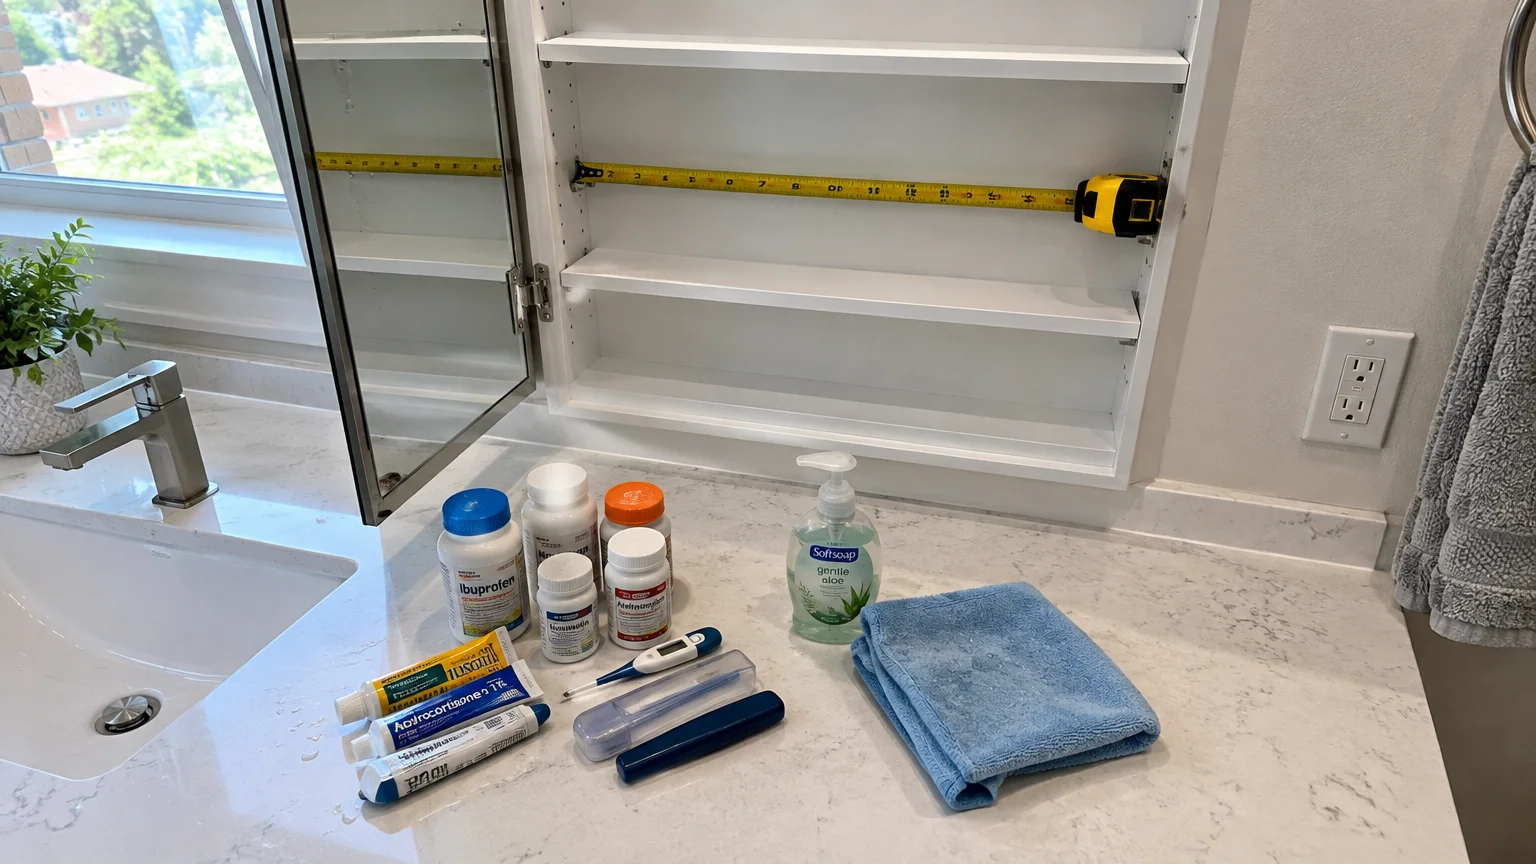
Before applying new organizing systems, remove every item from the cabinet and set it on a clean counter.
Wipe down the shelves with a microfiber cloth dampened with warm water and mild dish soap. Dry the surfaces thoroughly to prevent mold growth inside dark shelf corners.
This blank slate allows you to inspect shelf peg stability, adjust shelf heights, and view your entire inventory at once.
Take photos of the empty cabinet alongside a tape measure so you remember exact shelf dimensions while shopping for bins.
01 Purge Expired Drugs with Safe Disposal Practices
Examine every bottle, ointment tube, and eye drop container for a printed expiration date. Expired medications can lose chemical potency or break down into inactive compounds.
Liquid suspensions and eye drops carry an especially high risk of bacterial contamination once open past their discard window.
Never flush active prescriptions down the toilet unless the medication packaging specifically instructs you to do so.
Consult the FDA safe medication disposal guidelines to identify community take-back programs or approved household trash procedures.
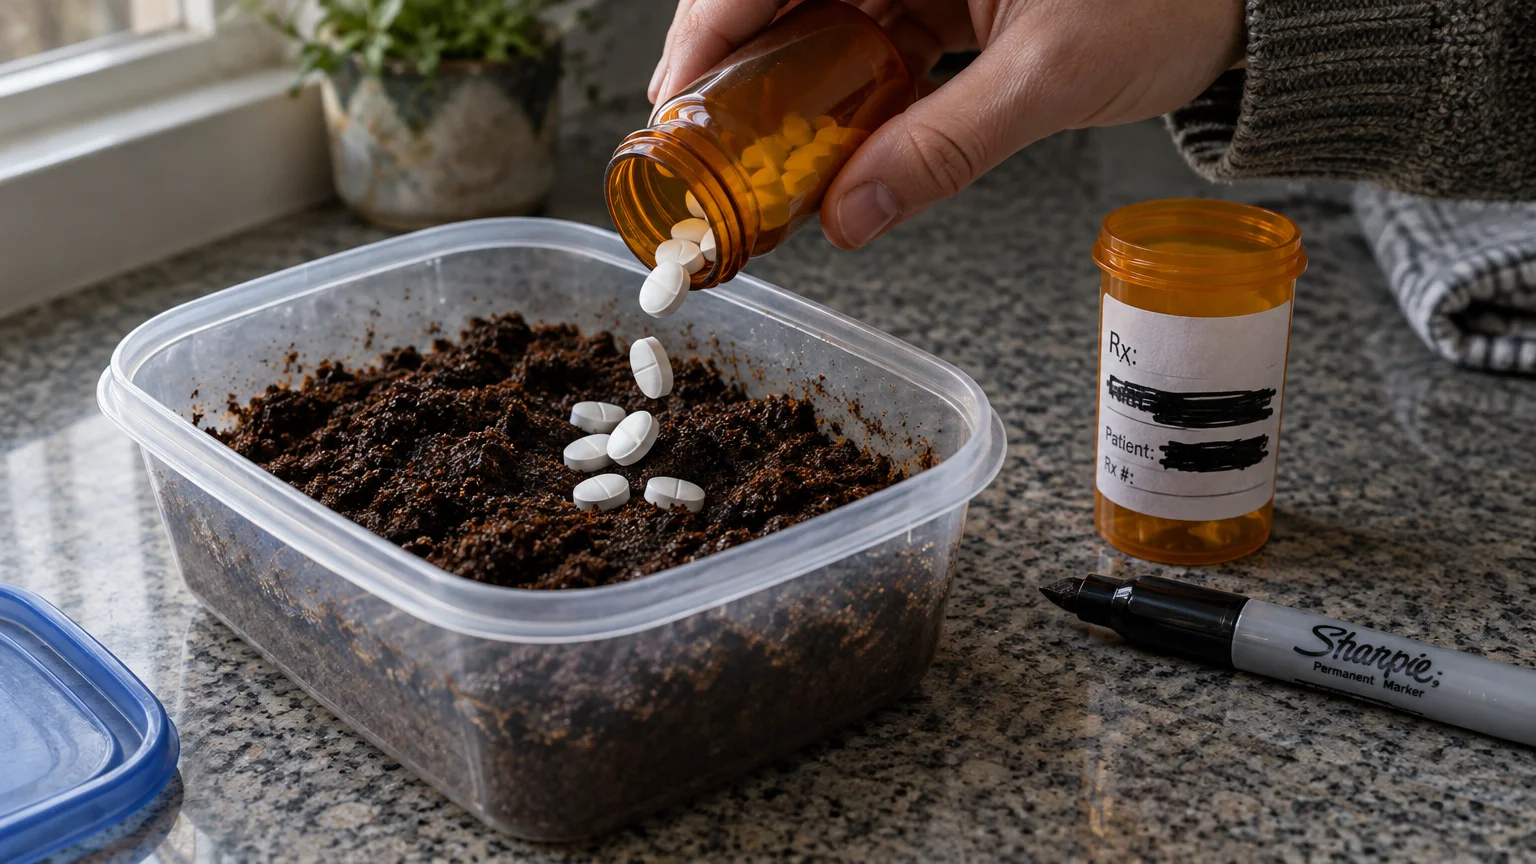
If no drop box exists nearby, mix loose pills with used coffee grounds or cat litter inside a sealed plastic container.
Black out your name, prescription number, and refill details with a permanent marker before recycling the plastic bottles.
02 Assess Bathroom Humidity and Relocate Sensitive Prescriptions
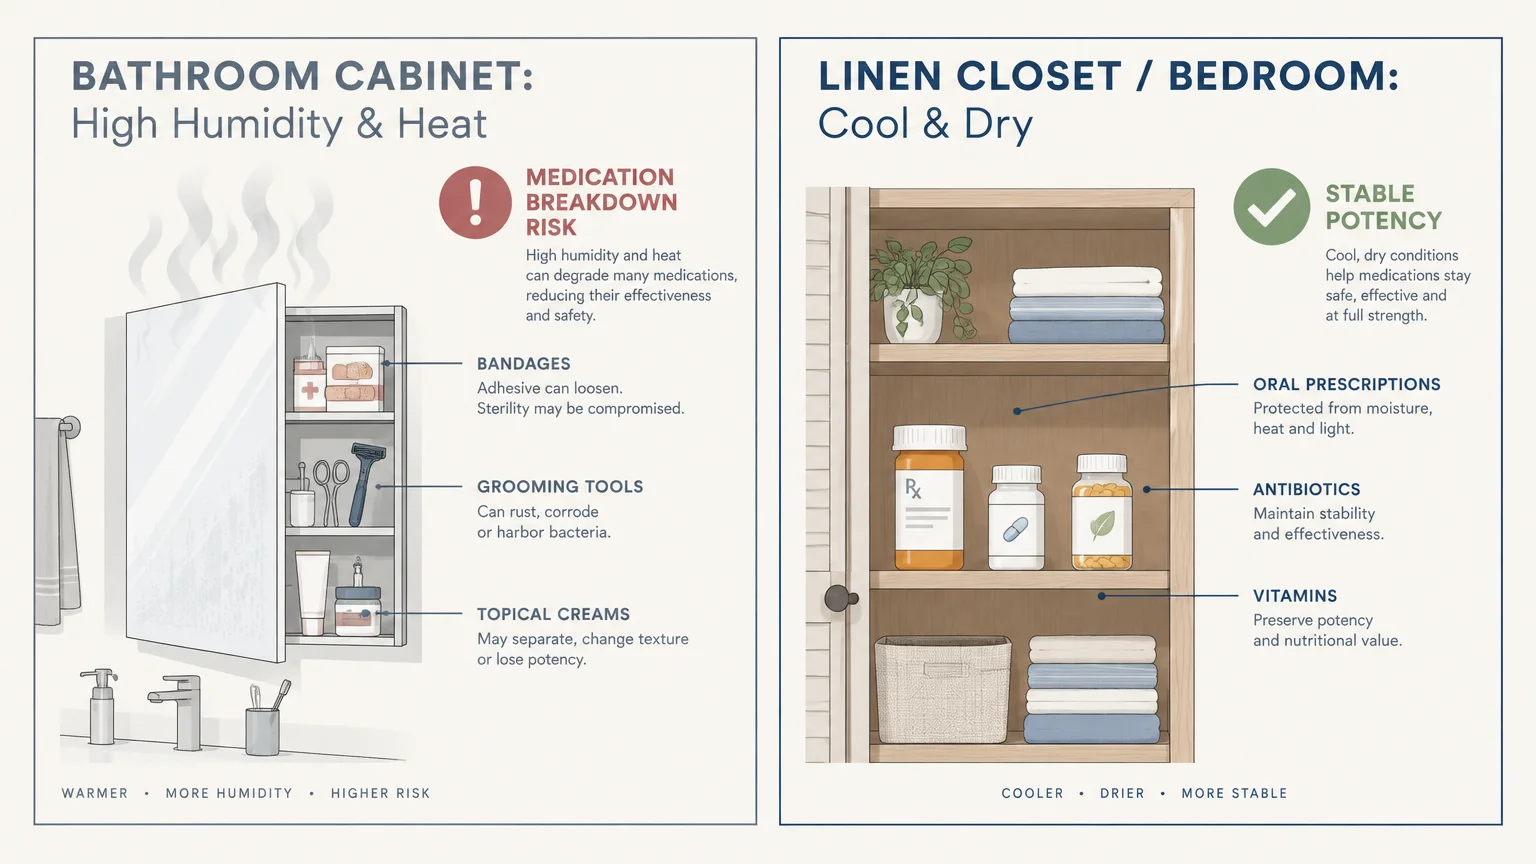
Steam and heat from daily showers quickly penetrate unsealed medicine cabinets, creating a warm, damp environment.
This high humidity accelerates chemical degradation in aspirin, antibiotics, and daily maintenance prescriptions.
According to MedlinePlus safe storage guidelines, pills require cool, dry conditions to preserve their effectiveness.
Reserve your bathroom mirror cabinet for non-perishable grooming tools, bandages, topical ointments, and dental supplies.
Move all oral tablets and vitamins to a dedicated shelf in your linen closet or bedroom dresser.
Avoid storing medications in the kitchen near the stove or dishwasher, where cooking heat introduces similar moisture risks.
03 Establish Logical Zones by Function and User
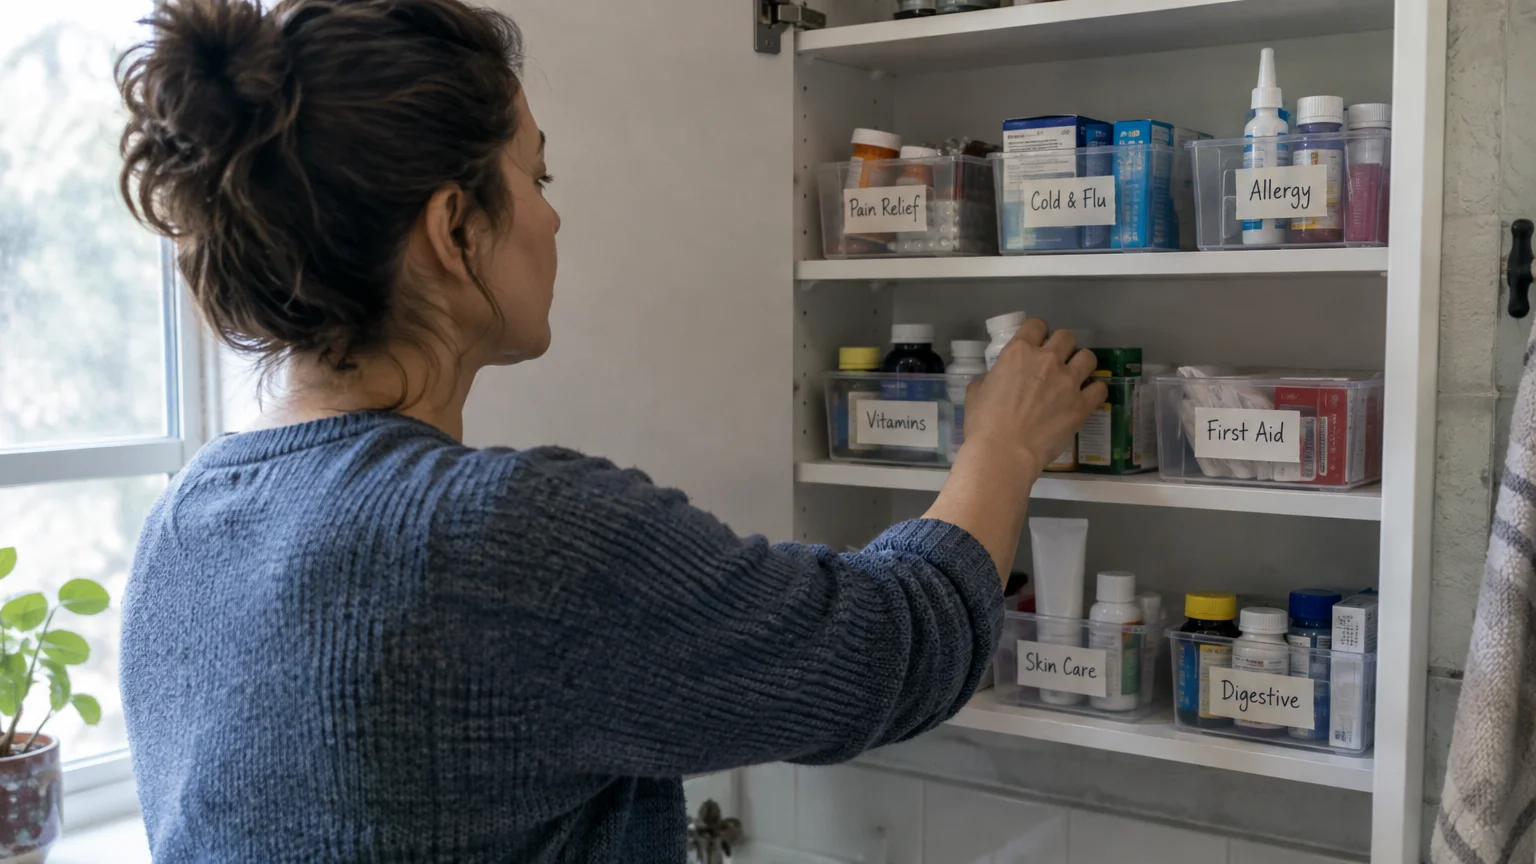
Grouping loose items by function eliminates frantic searches during a household health emergency.
Assign specific shelves to dedicated categories such as wound care, allergy relief, cold symptoms, and daily oral hygiene.
If multiple family members share the cabinet, assign each person a dedicated shelf or colored acrylic container.
Store frequently used daily items at eye level where you can reach them without straining or bending.
Place occasional supplies, such as seasonal sunburn relief or motion sickness tablets, on the upper shelves.
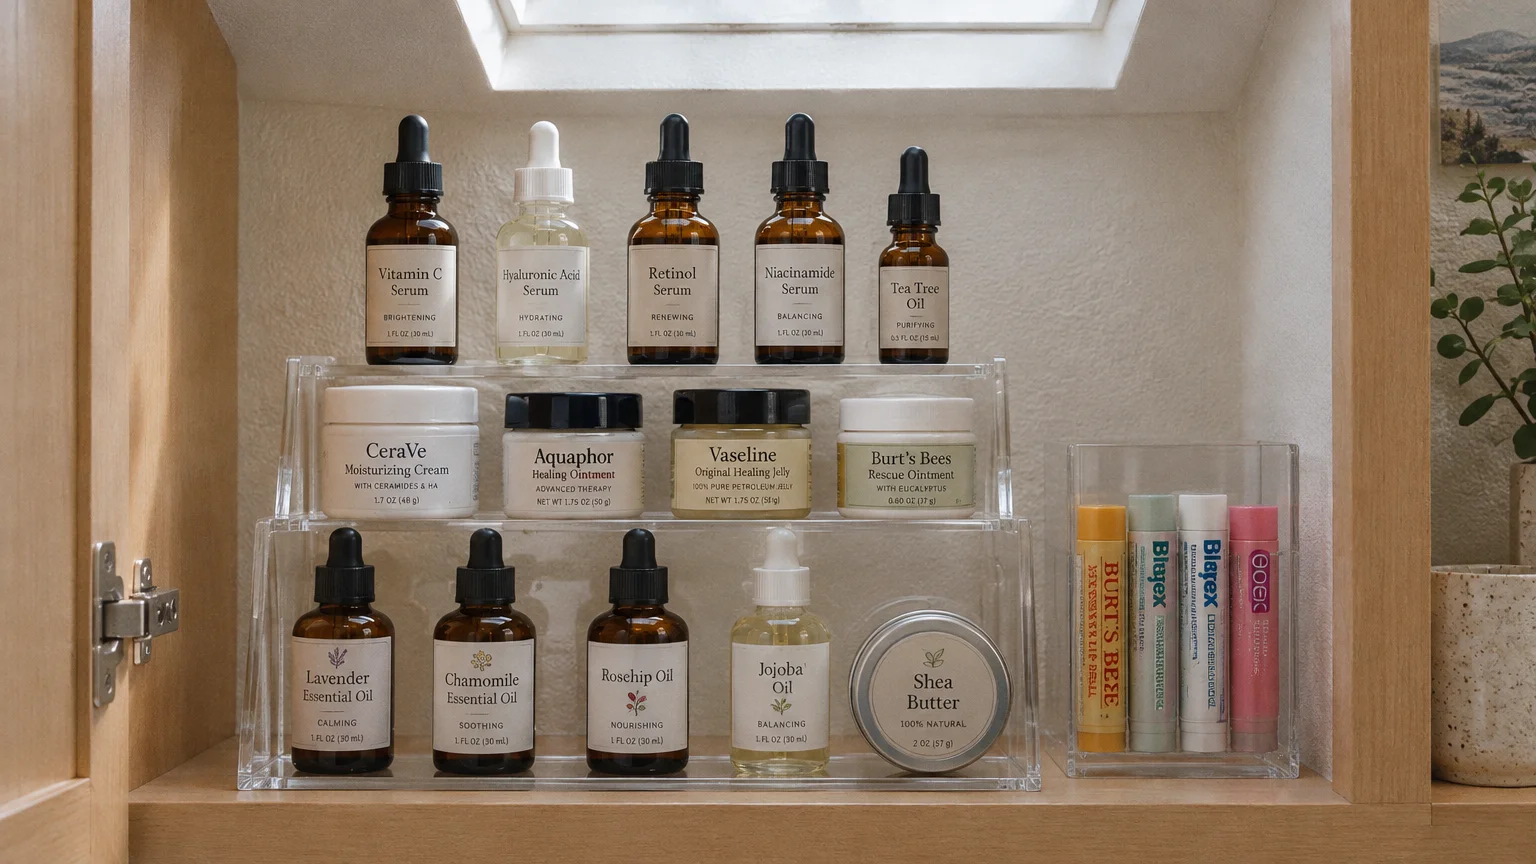
04 Maximize Vertical Shelf Space with Tiered Risers and Clear Bins
Standard medicine cabinets leave excess vertical clearance between shelves, encouraging messy double-stacking.
A two-tier or three-tier acrylic stadium riser lifts back-row bottles so every label remains completely visible.
Narrow acrylic bins prevent round pill bottles from rolling out when you open the cabinet door.
Select bins that match the standard three-to-four-inch shelf depth of recessed bathroom mirrors.
You can also purchase additional glass or acrylic replacement shelves online to eliminate tall, wasted gaps.
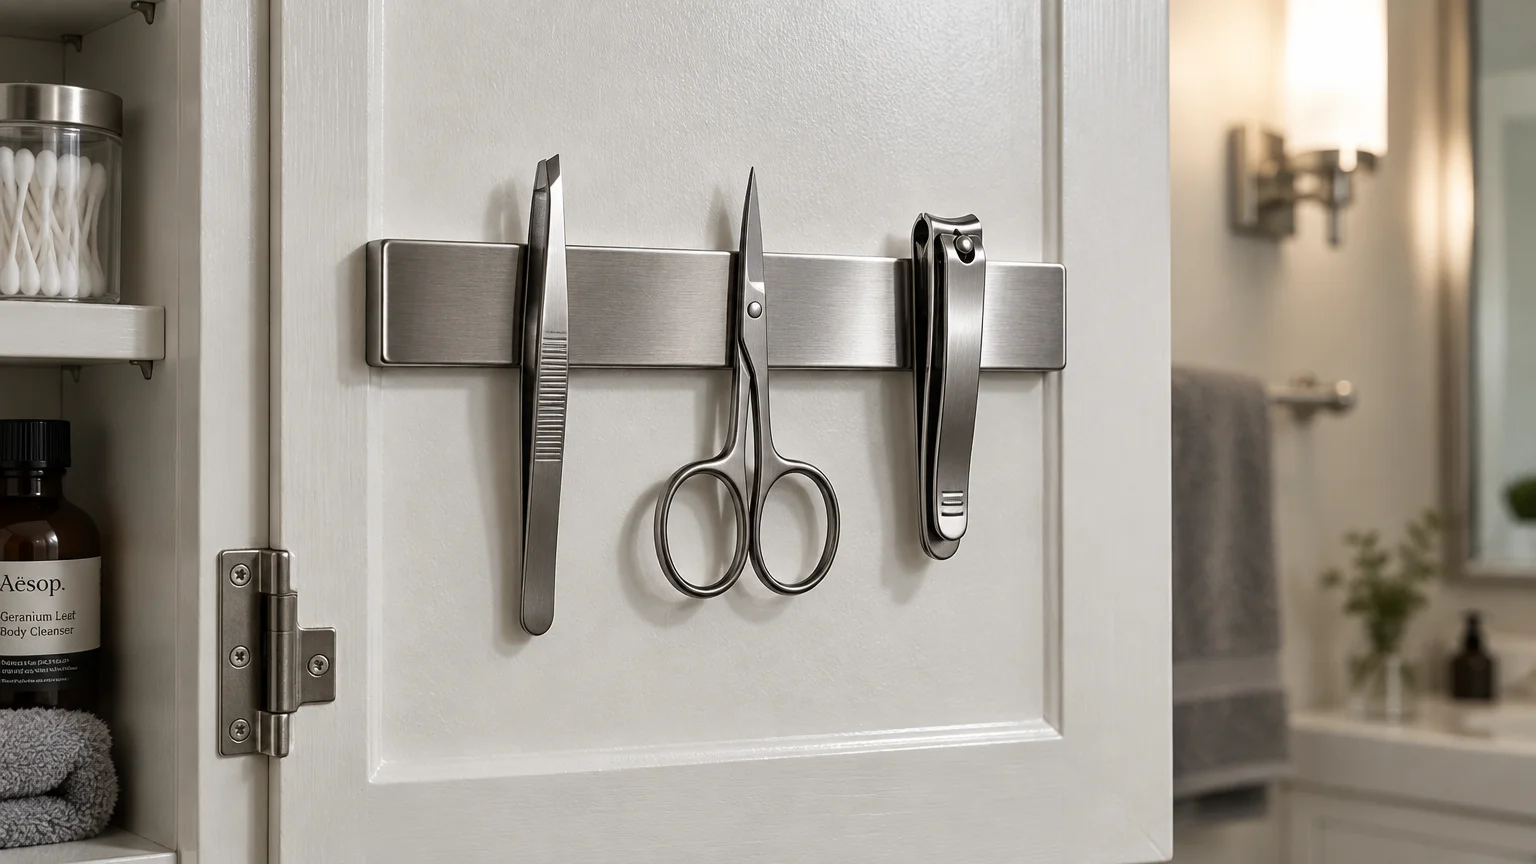
05 Attach Magnetic Strips to the Interior Door for Metal Grooming Tools
The flat interior panel of your cabinet door offers valuable storage space that often sits empty.
Affix a self-adhesive magnetic strip along the inside of the door frame or back interior wall.
This magnet grips metal grooming implements like slant tweezers, nail clippers, cuticle pushers, and small manicure scissors.
Suspending these tools vertically keeps them hygienic, dry, and immediately accessible without cluttering your shelf surface.
Ensure you position the magnetic strip where attached items will not collide with interior shelf edges upon closing.
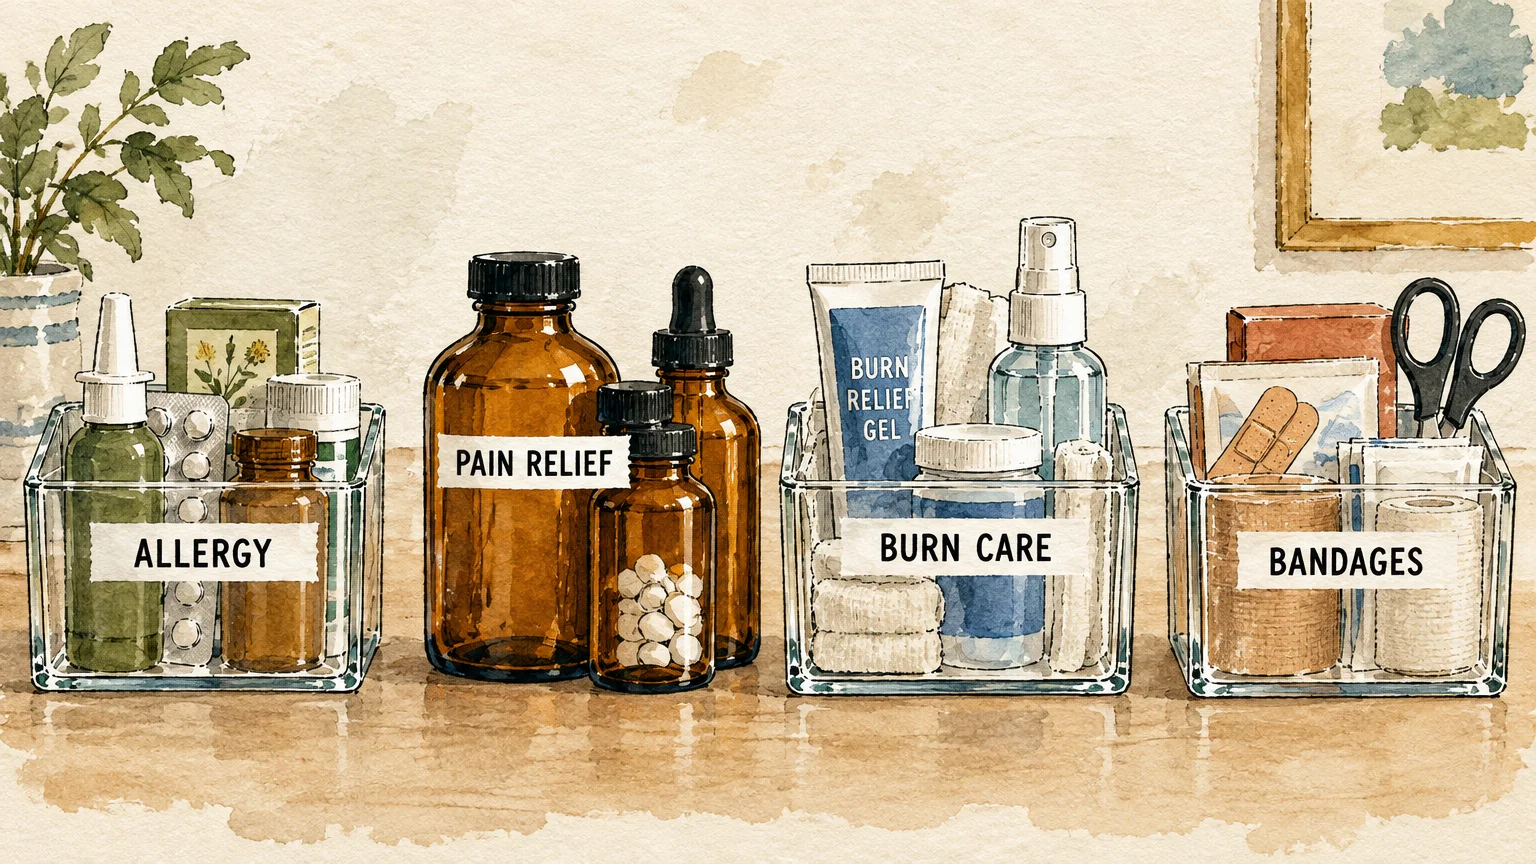
06 Apply High-Contrast, Large-Print Labels for Immediate Recognition
Small pharmacy fonts can cause confusion and accidental dosing errors, especially during nighttime visits.
Use a label maker to print bold, black capital letters on white adhesive tape for every container.
Place labels on the tops of bottle caps as well as the sides for fast identification inside bins.
Add colored dot stickers to caps to denote specific routines, such as green for morning and blue for evening.
This visual coding system offers enormous benefits for older adults and anyone navigating low-light conditions.
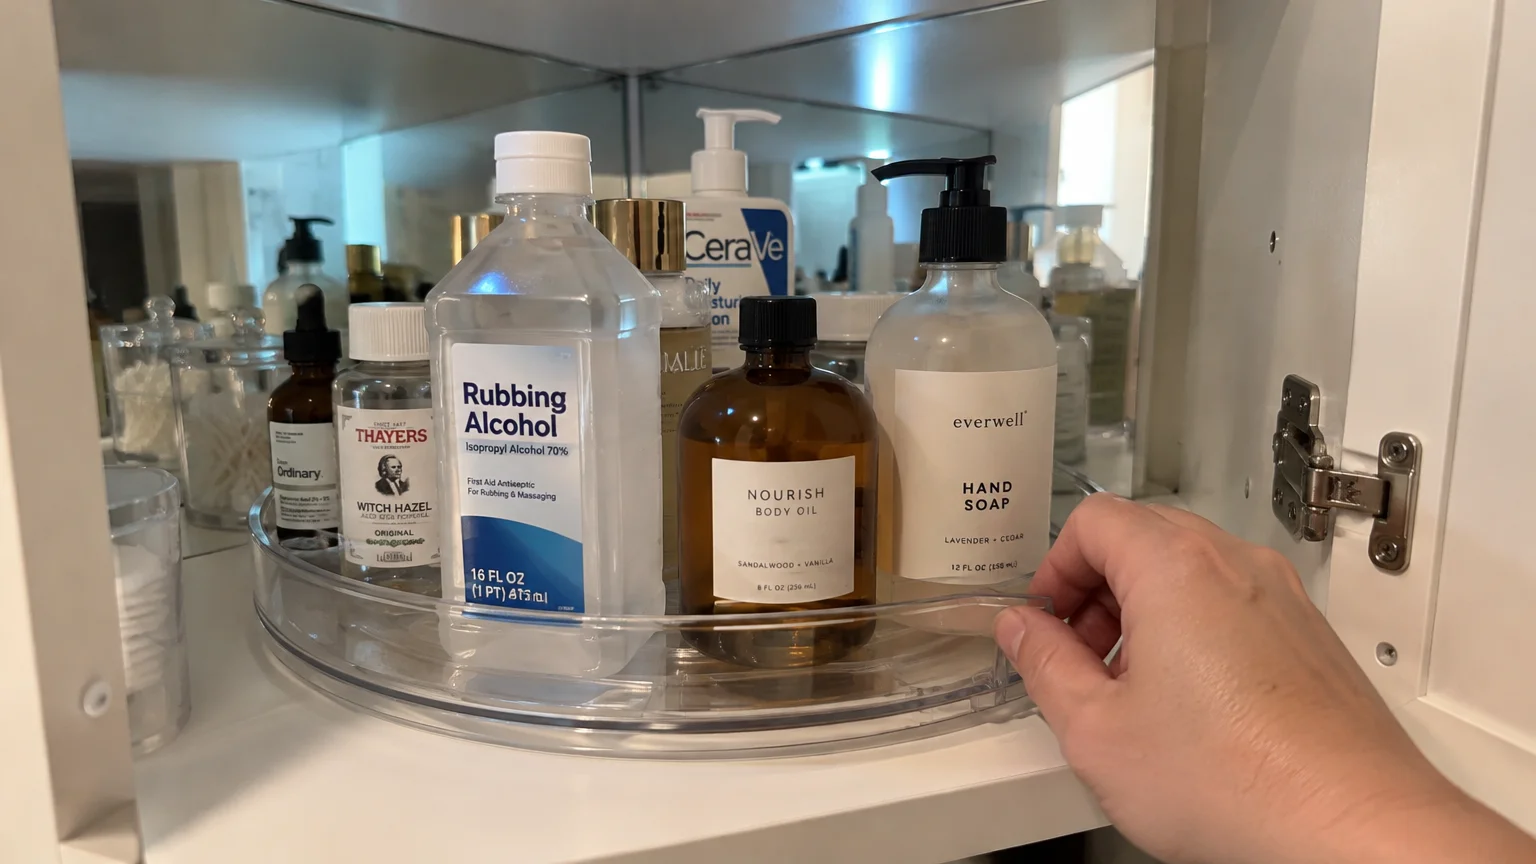
07 Install Shallow Turntables for Awkward Corner Cabinets
Corner medicine cabinets create deep, triangular cavities where small items disappear and get forgotten.
A mini lazy susan measuring four to six inches in diameter brings hidden items into reach with a light flick.
Look for compact turntables featuring non-skid silicone bases and raised outer lips to keep bottles upright.
This rotating mechanism reduces reaching and straining for adults managing joint stiffness or limited arm mobility.
Group round bottles on the turntable while storing flat boxes along the straight sides of the cabinet shelf.
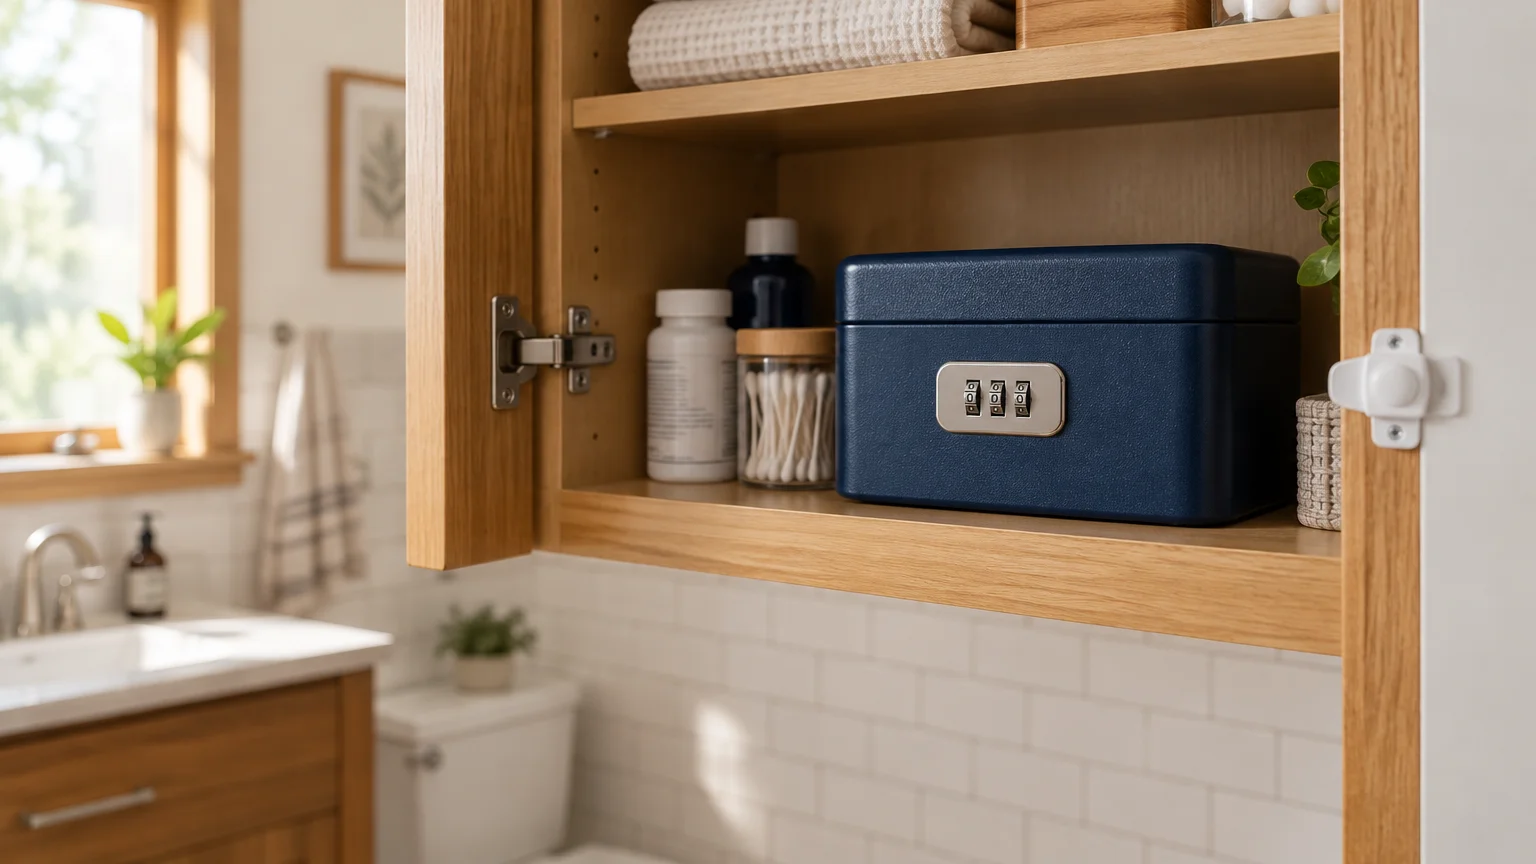
08 Implement Childproof Latches and Secure Lockboxes
Curious children can easily open traditional bathroom mirror cabinets, creating severe accidental poisoning risks.
The CDC Up and Away program urges families to store all healthcare products out of sight and out of reach.
Install a magnetic childproof latch on your cabinet frame if young children or grandchildren visit your home.
For controlled prescriptions or high-strength pain relievers, invest in a compact steel lockbox equipped with a combination code.
Post the national Poison Control helpline number (1-800-222-1222) inside the cabinet door for quick emergency access.
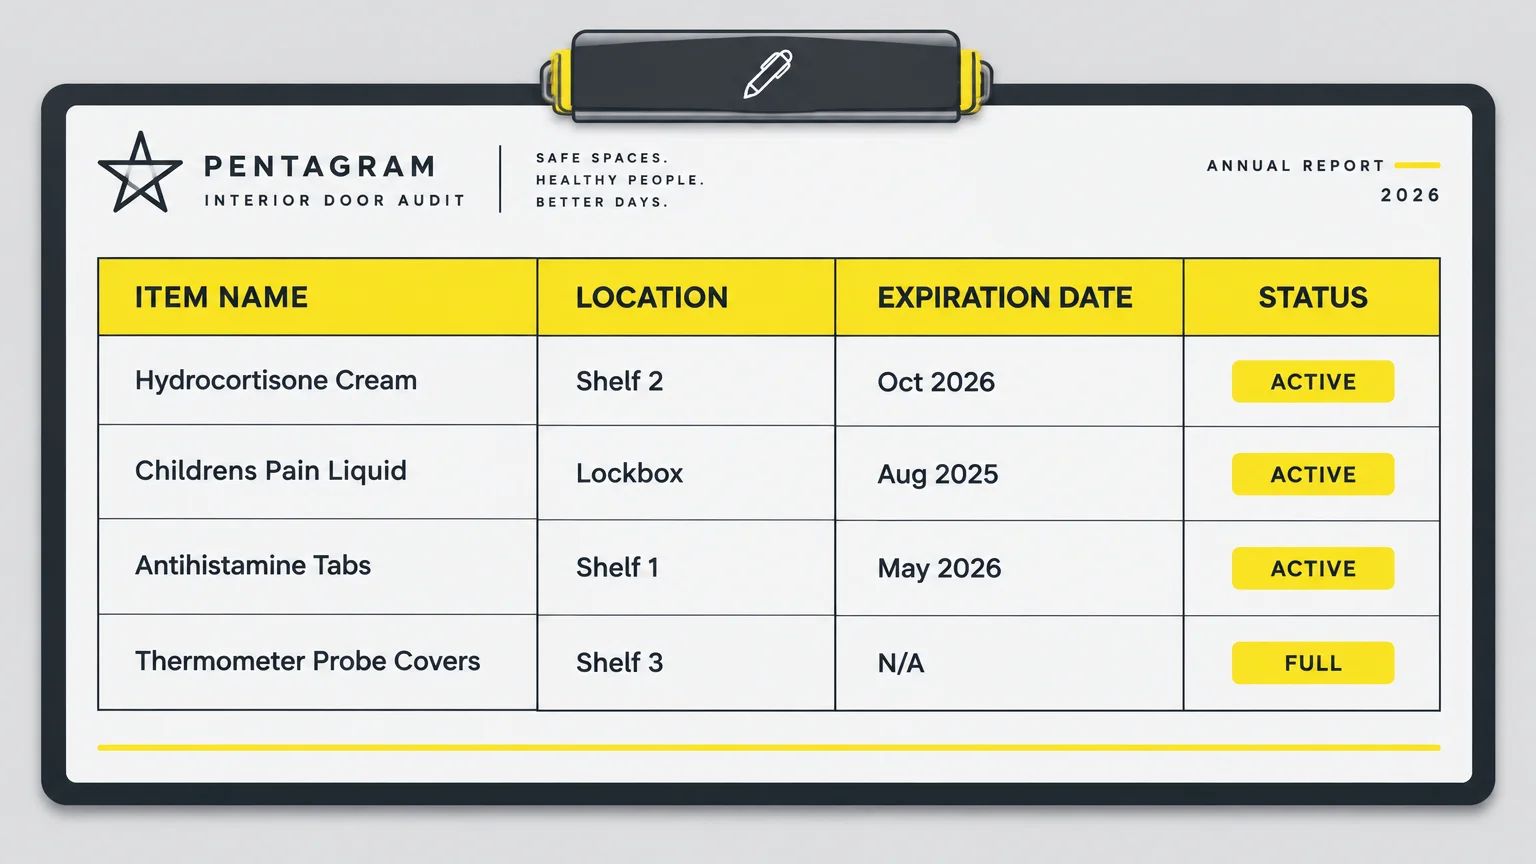
09 Post a Visual Inventory and Expiration Log Inside the Door
A simple inventory sheet prevents you from buying duplicate supplies or running out of critical remedies.
Tape a laminated index card or adhesive whiteboard sheet to the interior cabinet door.
Record prescription refill dates, doctor phone numbers, and low-stock items using a fine dry-erase marker.
Review this list before heading to the pharmacy to ensure you restock only what your household genuinely requires.
Wipe away completed tasks with a tissue to keep the record clean and current throughout the year.
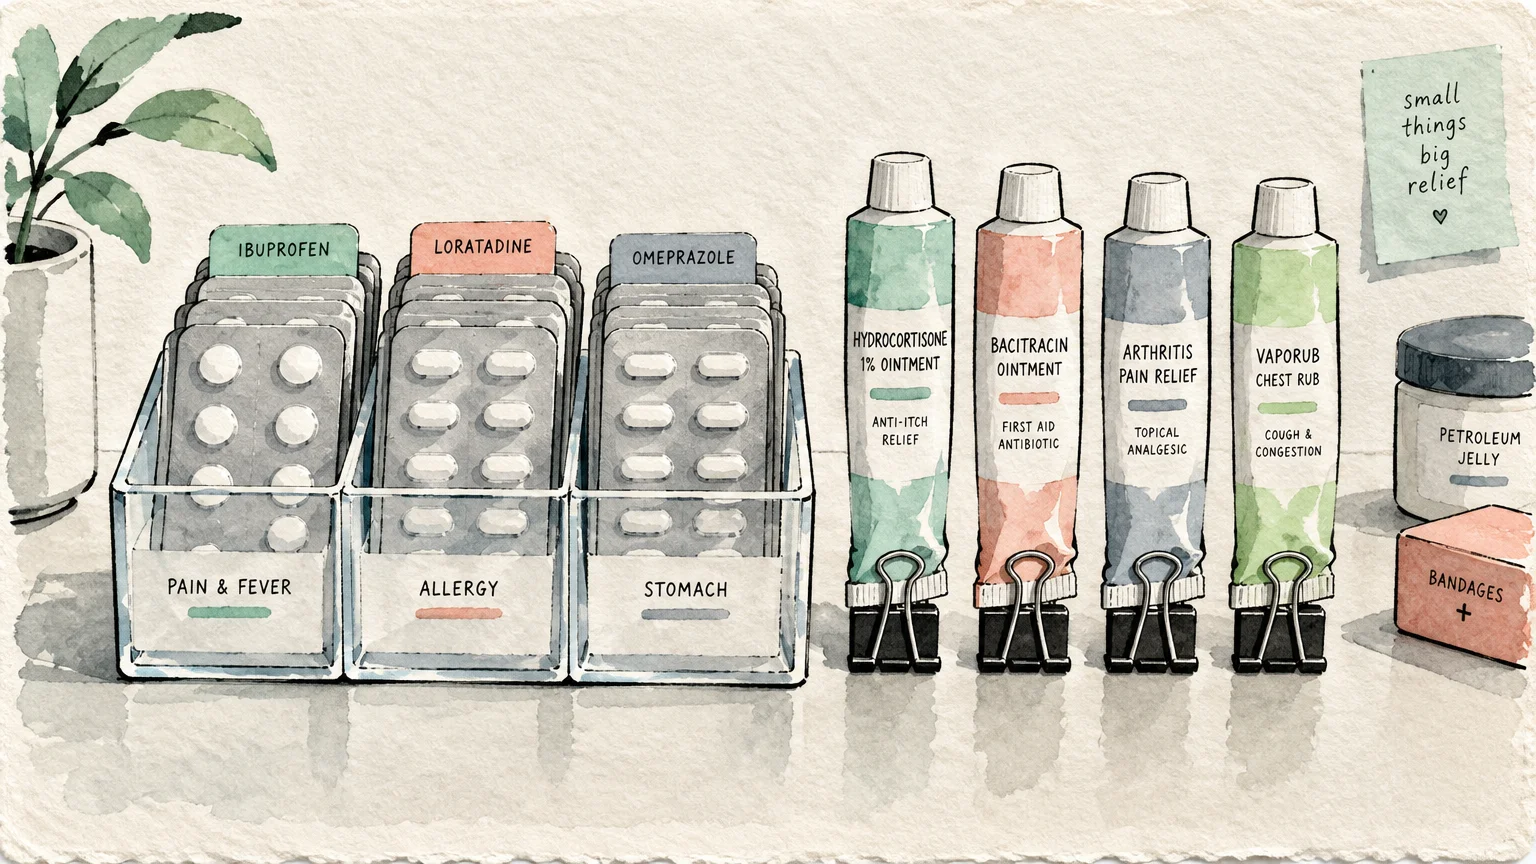
Handling Blister Packs, Tubes, and Irregular Packaging
Ointment tubes and foil blister packs resist neat stacking and often clutter shelf space.
Use clear acrylic lipstick organizers to hold slender topical tubes upright by their caps.
Store blister packs vertically in a small index card holder or recipe caddy rather than laying them flat.
Keep individual foil sheets in their original outer boxes or clearly label each foil strip with its expiration date.
Never decant loose pills from blister packs into unlabeled containers, as exposure to air ruins their moisture seal.
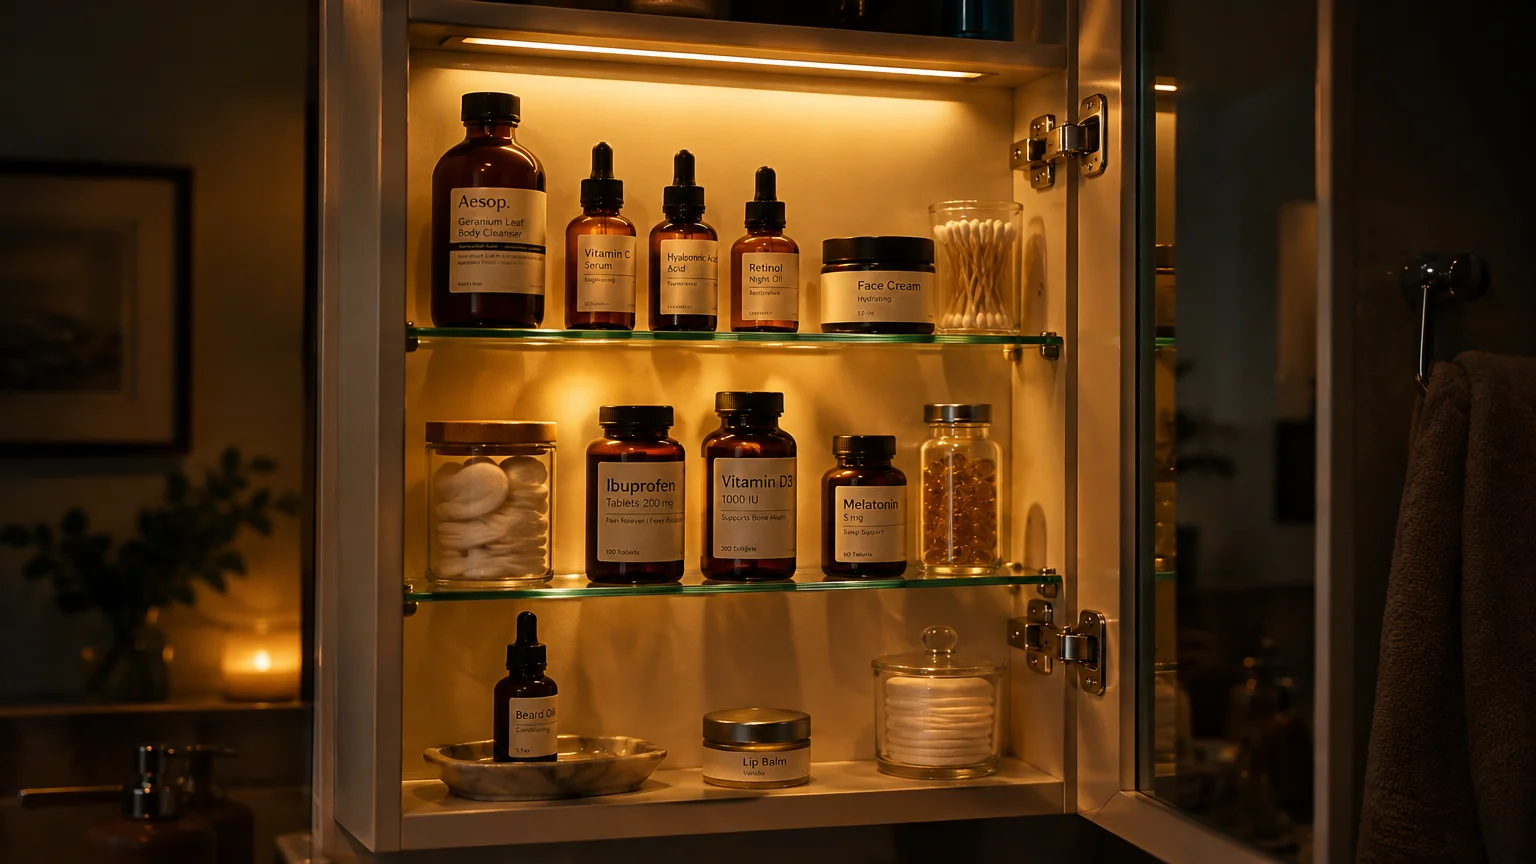
Lighting and Visibility Upgrades for Dark Mirror Cabinets
Recessed medicine cabinets often cast dark shadows over shelf contents, making small dosage labels difficult to read.
Attach a slim, battery-operated LED light strip to the interior roof or underside of shelves.
Choose motion-activated or touch-sensitive puck lights with peel-and-stick backing for tool-free installation.
Bright, neutral lighting helps you verify medication names and dosages accurately without fumbling in dim light.
Select rechargeable LED strips with magnetic mounts so you can detach them easily for periodic USB charging.
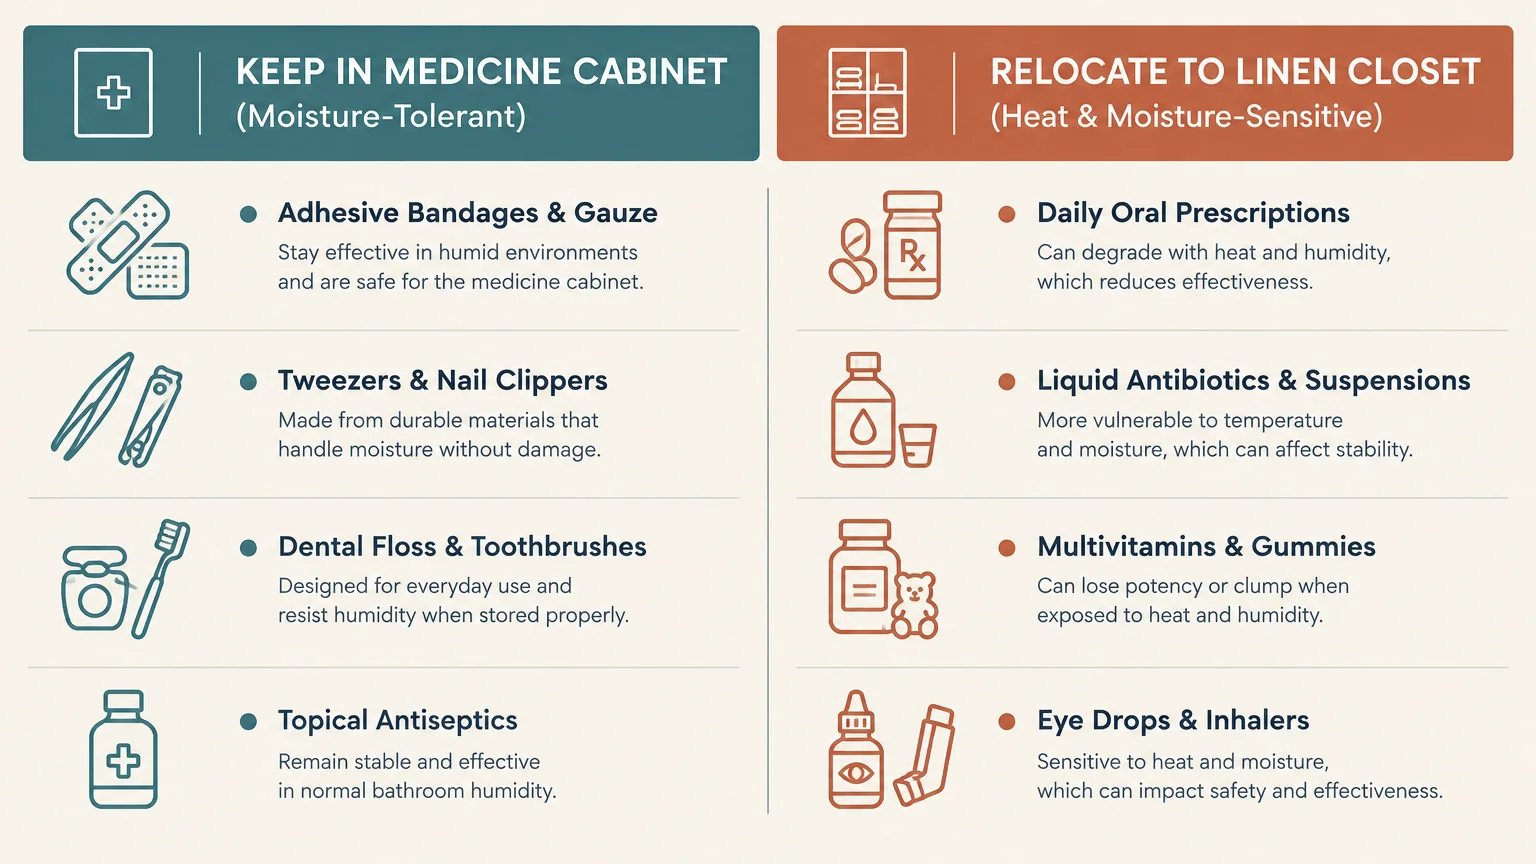
Storage Location Guide: What Stays vs. What Moves
Deciding where to store health items depends largely on their sensitivity to moisture and temperature fluctuations.
Use this reference guide to decide which essentials stay in your bathroom and which belong in a dry location.
| Health Item / Supply | Recommended Storage Location | Why It Belongs There |
|---|---|---|
| Daily Prescription Tablets | Bedroom dresser or linen closet | Shower humidity breaks down active ingredients and lowers potency. |
| Adhesive Bandages & Gauze | Bathroom medicine cabinet | Bandages tolerate mild moisture and stay accessible for immediate cuts. |
| Liquid Cough Syrups | Cool pantry or linen shelf | Temperature swings can cause liquid separation or bacterial spoilage. |
| Topical Antibiotic Ointments | Bathroom medicine cabinet | Thick petroleum bases resist ambient bathroom moisture effectively. |
| Metal Tweezers & Clippers | Cabinet door magnetic strip | Keeps metal dry, prevents drawer rust, and offers mirror convenience. |
| Gummy Multivitamins | Cool, dark kitchen pantry | Humidity dissolves gelatin coatings and ruins active nutrient quality. |
| Eye Drops & Lens Vials | Dry linen closet or bedroom | Prevents airborne bathroom bacteria from settling onto dropper tips. |
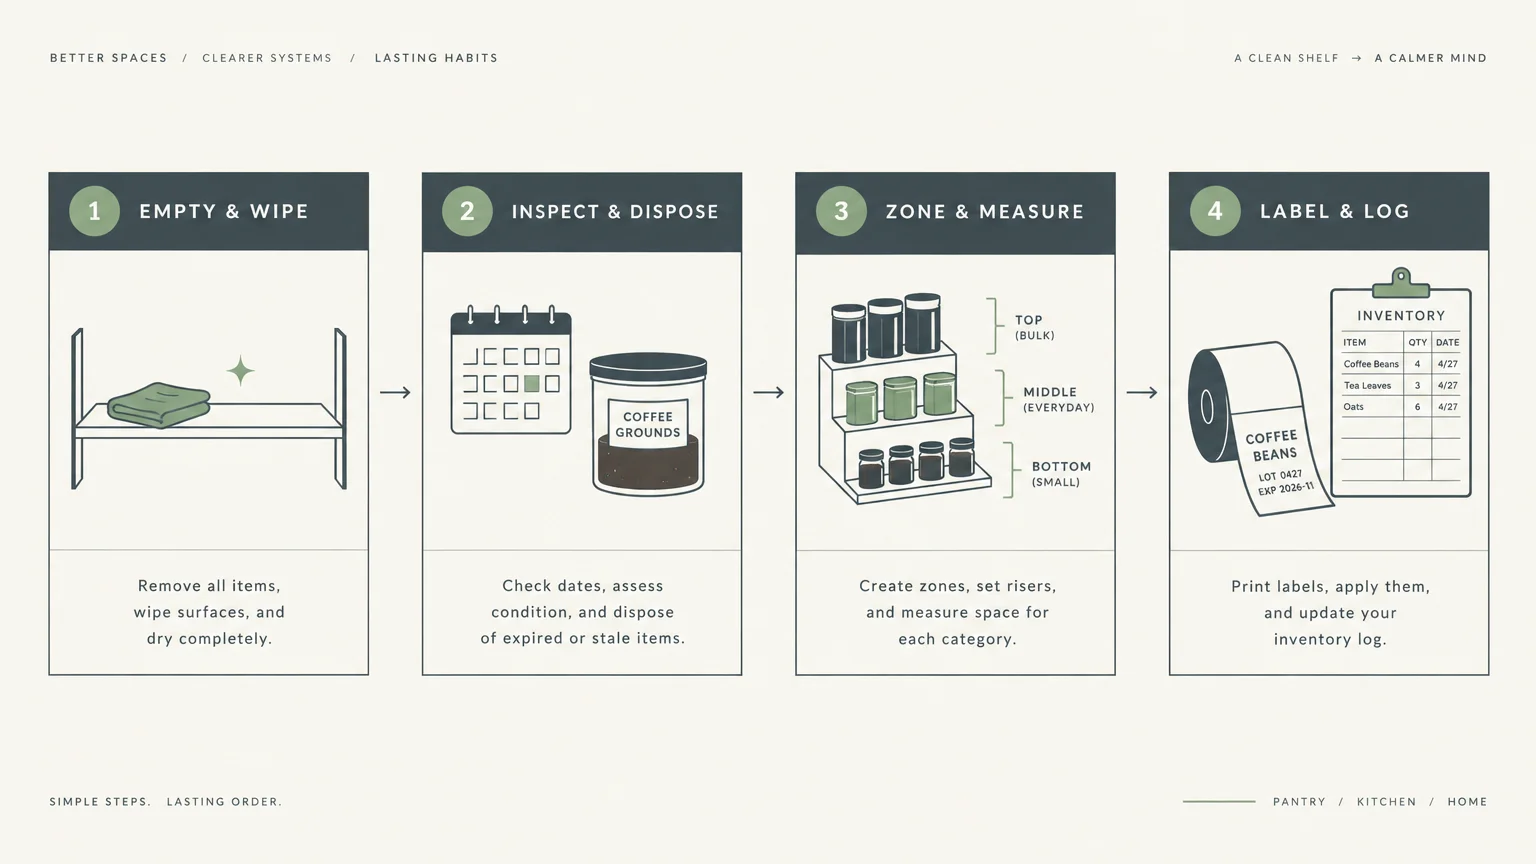
Step-by-Step Medicine Cabinet Refresh Checklist
Follow this step-by-step checklist to organize your medicine cabinet efficiently in a single afternoon.
- Step 1: Empty every shelf. Clear all items onto a clean, dry towel spread over your bathroom counter.
- Step 2: Wipe the cabinet interior. Clean the shelves and mirrored surfaces with warm, soapy water and dry them completely.
- Step 3: Discard expired products. Check dates on every bottle and tube, setting aside expired items for safe disposal.
- Step 4: Relocate humidity-sensitive pills. Move prescription tablets, capsules, and multivitamins to a cool bedroom or linen closet.
- Step 5: Group supplies into functional zones. Sort items into distinct piles for first aid, daily oral care, topical creams, and grooming.
- Step 6: Measure shelf dimensions. Measure the width, height, and depth between shelves before purchasing organizing trays.
- Step 7: Add vertical organizing tools. Install tiered acrylic risers, magnetic door strips, or mini turntables.
- Step 8: Return items with labels facing out. Place products into designated zones with large, legible labels pointing forward.
- Step 9: Mount an inventory sheet. Tape a tracking card to the inside door to log refills and emergency contacts.
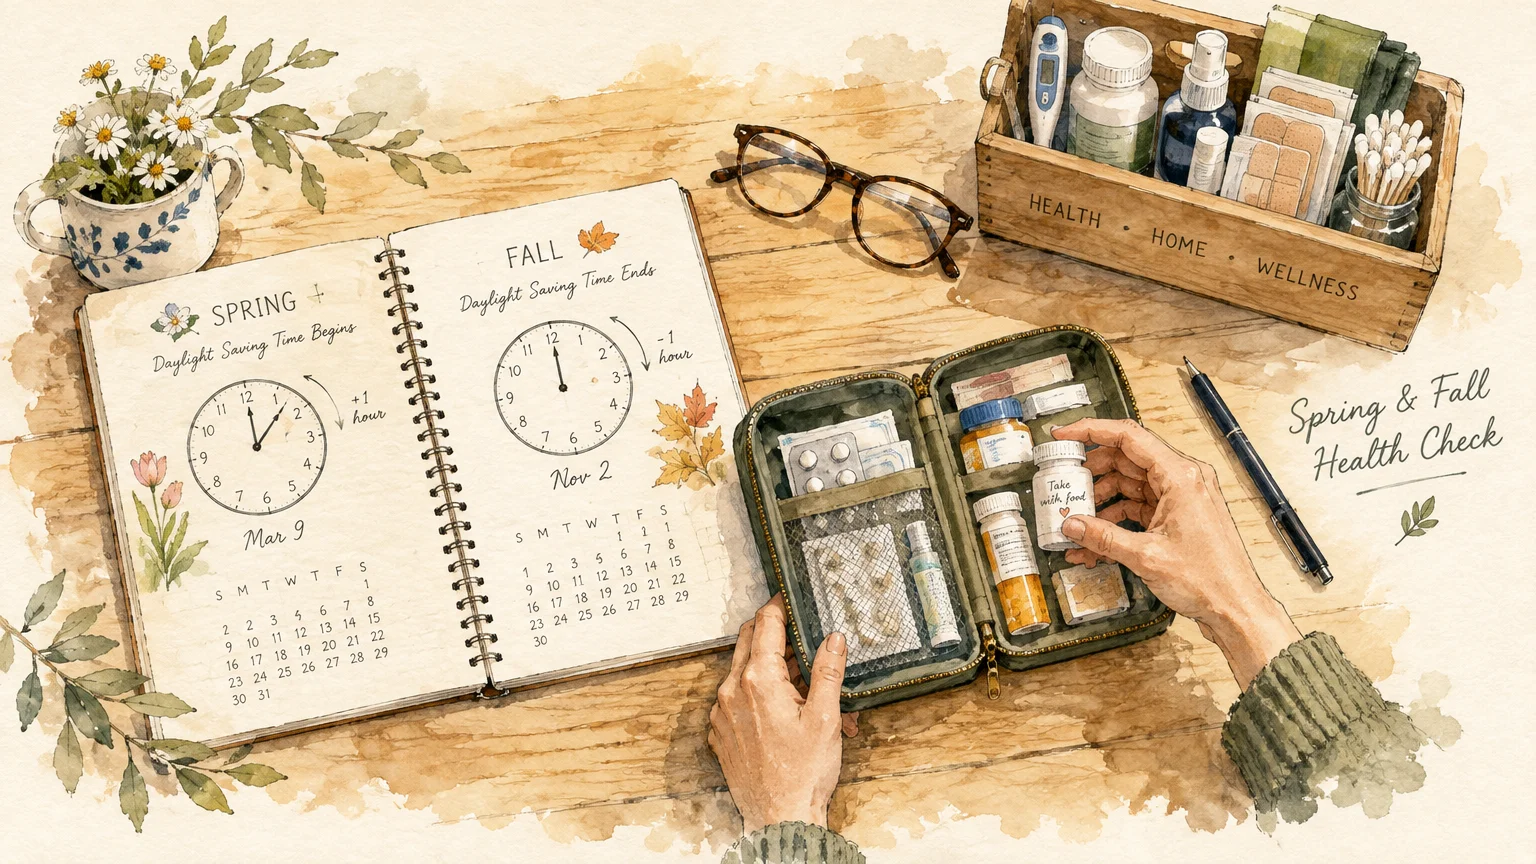
Routine Maintenance: The Twice-Yearly Health Audit
A medicine cabinet requires regular checkups to stay safe, sanitary, and functional year-round.
Schedule your cabinet audit to coincide with Daylight Saving Time clock changes every spring and autumn.
You can also plan cleanouts around the DEA National Prescription Drug Take Back Day held each spring and fall.
Discard opened eye drops that have been unsealed for more than three months to prevent eye infections.
Replace dried-out antiseptic wipes and brittle adhesive bandages before an accidental cut catches you unprepared.
Wiping down shelf surfaces twice a year also stops dust and dried product residue from accumulating.
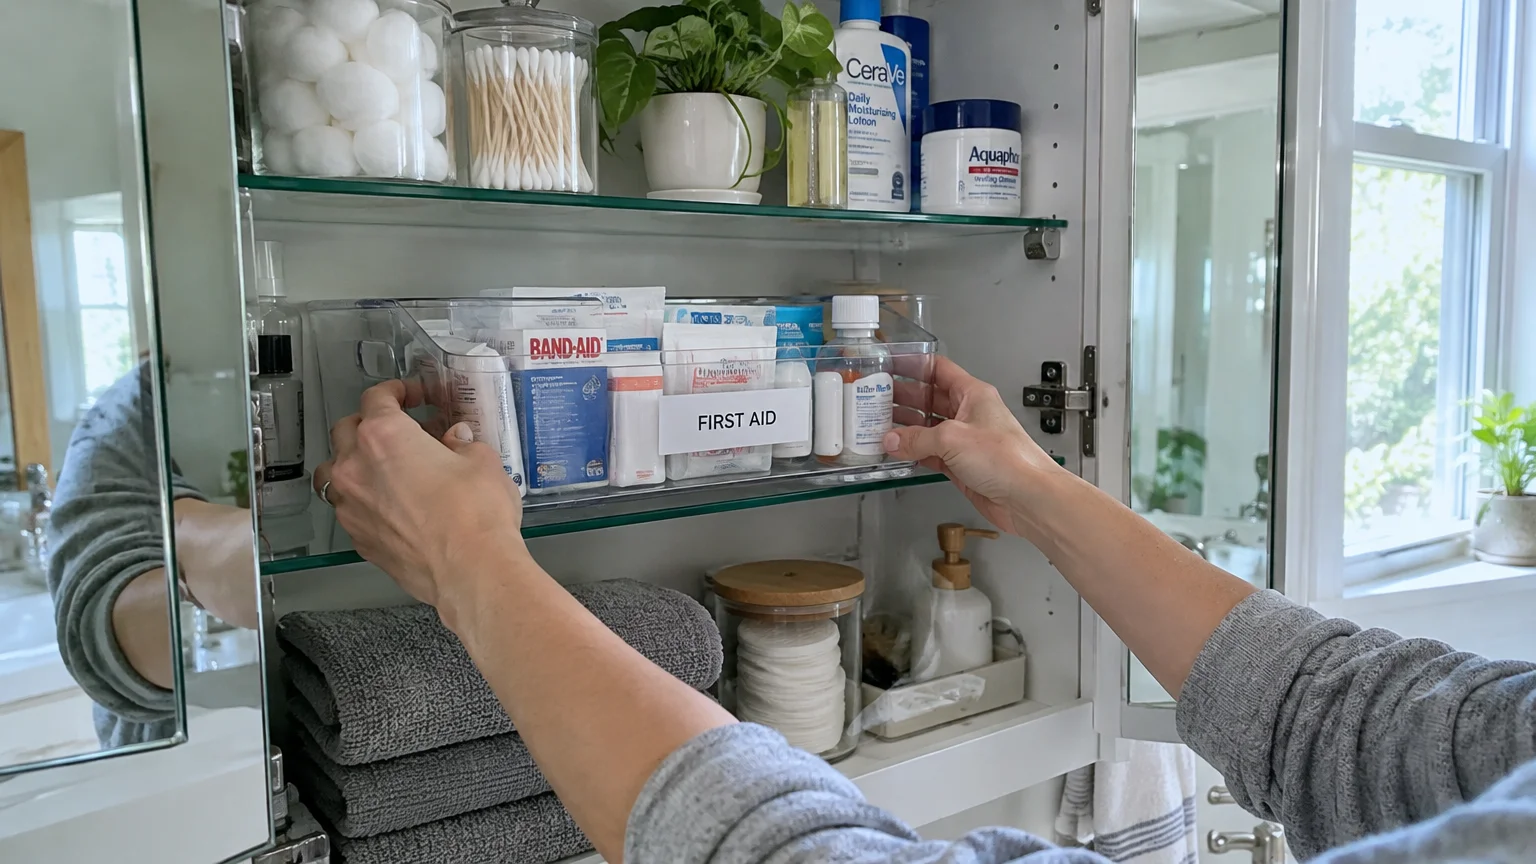
Your Next Practical Step
Open your medicine cabinet today and remove just three bottles to check their expiration dates.
Safely discarding obsolete remedies creates immediate space and builds momentum to tackle the rest of your cabinet this weekend.