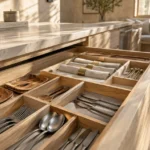
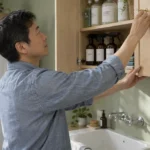
Cluttered countertops drain your energy and turn daily meal preparation into a frustrating chore. Reclaiming your workspace does not require a costly remodel; you simply need to capture overlooked, hollow areas.
Smart, hidden kitchen storage transforms dead zones behind baseboards, inside cabinet doors, and between appliances into accessible workhorses. These functional upgrades protect your joints, simplify cleanup, and maintain clear surfaces.
Explore these ten proven kitchen storage hacks to maximize small kitchen storage, declutter your kitchen, and create an effortless, welcoming environment.
01 Install Toe-Kick Drawers in Unused Baseboard Cavities
Standard kitchen base cabinets sit on a recessed wooden platform known as the toe-kick. Most cabinet builders leave this four-inch-tall void completely empty behind a decorative piece of baseboard trim.
Installing shallow pull-out drawers in this baseboard cavity yields valuable hidden kitchen storage without claiming an inch of floor space.
These flat drawers are ideal for oversized baking sheets, muffin tins, cutting boards, and spare table linens. You keep bulky metal items out of primary cupboards while storing them perfectly flat.
Choose push-to-open drawer slides for the smoothest experience. A gentle press with your toe releases the drawer glides, eliminating the need to stoop down and pull a low handle.
Measure your floor clearance carefully before ordering hardware. Uneven floor tiles or thick runner rugs can obstruct low drawers as they slide outward.
02 Mount Racks and Hooks to Cabinet Door Interiors
The interior face of your cabinet doors offers prime vertical real estate that often sits neglected. Adding shallow wire organizers or adhesive racks puts everyday items immediately within sight.
This approach works wonderfully for lightweight essentials like spices, plastic wrap boxes, pot lids, and measuring spoons. Hanging measuring spoons on individual hooks ends the nuisance of tangled, rattling drawer bundles.
Always verify clearance before mounting hardware to cabinet doors. Check that your door-mounted rack does not collide with interior shelves when the cabinet swings shut.
Adhesive strips work best on smooth laminate or sealed wood surfaces. For heavier solid wood doors, short wood screws provide a permanent, wobble-free anchor.
Avoid overloading cabinet doors with heavy glass jars or cast iron lids. Excessive weight pulls hinges out of alignment over time, causing cabinet doors to sag and rub.
03 Slide Under-Shelf Baskets Across Vertical Cupboard Gaps
Most upper cabinet shelves leave several inches of empty air above stacks of plates, bowls, and mugs. That vacant vertical space is wasted potential that makes cabinets feel overcrowded.
Under-shelf wire baskets slide directly onto your existing shelving without tools, nails, or adhesive. The hanging basket immediately creates a useful second tier for lightweight items.
Use these wire organizers for folded dish towels, tea boxes, coffee filters, and sandwich bags. You double your usable surface area without stacking fragile ceramic items on top of one another.
Look for baskets with slim, rubberized brackets that protect your shelf finish. Thin mounting arms ensure that the cabinet door closes flush without catching or rattling.
Distribute weight evenly across the wire base to prevent shelf sag. Store heavier dinnerware directly on the wooden shelf while reserving suspended baskets for airy, lightweight goods.
04 Roll Out a Slim Pantry Cart in Refrigerator Gaps
The narrow gap between your refrigerator and the adjacent wall frequently collects dust bunnies and stray crumbs. A slim, wheeled utility cart converts this dead zone into a slide-out vertical pantry.
Even a four-inch opening can accommodate a multi-tiered cart designed for canned goods, condiments, oils, and vinegar bottles. A sturdy handle allows you to roll the entire unit out with one hand.
Keep food safety in mind when stocking goods adjacent to large appliances. The USDA Food Safety and Inspection Service recommends storing canned foods and dry goods in cool, dry areas away from continuous heat sources.
Modern refrigerators exhaust warm air through their base or rear coils. Ensure your cart does not block appliance vents or trap excess heat against the refrigerator housing.
Install rubber caster wheels rather than hard plastic variants. Smooth-rolling rubber protects your flooring from scuffs and ensures silent, effortless operation every time you retrieve ingredients.
05 Convert Sink False Fronts into Tilt-Out Sponge Trays
The solid panel directly in front of your kitchen sink basin looks like a drawer, but it is typically a dummy front. Installing a tilt-out tray kit transforms this dead panel into functional storage.
A pair of specialty hinges and a drop-in polymer tray replace the rigid mounting clips. The panel then tilts forward at a forty-five-degree angle with a gentle pull.
This compartment conceals dish sponges, scrub brushes, sink stoppers, and scouring pads right where you need them. It keeps damp cleaning tools off your countertop, reducing unsightly water rings and grime.
Choose removable plastic or stainless steel trays that snap out easily for washing. Routine cleaning prevents soap scum buildup and keeps your sponge station sanitary.
Check the clearance between the back of your false panel and the sink basin before ordering parts. You need approximately two inches of open depth for the tray to pivot freely.
06 Fasten Magnetic Strips and Utensil Rails Under Cabinets
Countertop knife blocks and crowded utensil crocks consume valuable meal prep space. Mounting storage hardware to the underside of upper cabinets clears your counters while keeping tools accessible.
A strong magnetic knife bar fastened beneath a wall cabinet holds chef knives, paring knives, and kitchen shears securely. Blades remain sharp because they never rub against other metal tools in a drawer.
Under-cabinet rails fitted with S-hooks suspend spatulas, measuring cups, and tongs right above your cutting board. This setup creates an ergonomic workspace where tools sit within arm’s reach.
Ensure you select heavy-duty neodymium magnets rated to hold kitchen cutlery firmly. Knives should snap securely into place without slipping or pivoting when bumped.
Position the magnetic strip away from high-traffic edges so you never brush against exposed handles. Keeping sharp cutlery organized overhead also prevents reaching into hazardous, jumbled drawers.
07 Reclaim Lost Corners with Blind-Corner Pull-Out Shelves
Deep corner cabinets are notorious for swallowing cookware, turning everyday retrieval into an uncomfortable crawling exercise. Blind-corner pull-out mechanisms bring hidden items out into the open room.
Articulated shelving systems glide out in stages along heavy-duty metal tracks. When you open the cabinet door, the front baskets pivot outward, pulling the rear baskets forward into direct view.
These units eliminate the need to kneel on hard floors with a flashlight. For older adults, preventing awkward bending and kneeling protects sensitive joints and lowers injury risks.
The National Safety Council emphasizes the importance of avoiding awkward postures and excessive reaching to prevent household strains and injuries. Accessible pull-out hardware supports independent, strain-free living.
Store heavy Dutch ovens, stand mixer attachments, and stockpots on these sturdy corner platforms. Quality steel tracks support substantial weight without wobbling or sticking.
08 File Cookware Vertically with Deep Drawer Dividers
Nesting frying pans, cookie sheets, and cutting boards horizontally creates noisy, precarious towers. Vertical filing organizes cookware like books on a library shelf.
Deep cabinet drawers outfitted with vertical wooden or wire dividers keep each baking sheet and pan upright. You simply slide out the exact pan you need without disturbing surrounding cookware.
This arrangement saves valuable seconds during cooking and protects nonstick skillet coatings from scratching. It also eliminates the loud clatter of unstacking heavy metal pans.
Heavy cast iron skillets and baking stones belong in low drawers on robust ball-bearing glides. Storing heavy items low minimizes shoulder strain and stabilizes your center of gravity.
Adjust divider spacing to fit your specific cookware collection. Leave wider slots for Dutch oven lids or deep roasting pans and narrow slots for thin cutting boards.
09 Expand Prep Space with Over-the-Sink Workstation Platforms
In compact kitchens, your sink basin occupies a substantial portion of usable horizontal space. Over-the-sink accessories convert that empty basin into an active prep surface when you are not washing dishes.
Roll-up stainless steel drying racks bridge the sink rim to hold washed produce or wet glassware. When dry, the rack rolls into a compact cylinder that tucks neatly into a drawer.
Hardwood cutting boards engineered with grooved perimeter edges rest securely over the sink basin. Chopping vegetables directly over the sink keeps scrap disposal neat and prevents juice from staining counters.
This configuration effectively expands your food preparation area by several square feet. It provides instant relief in galley kitchens where counter space is limited.
Choose silicone-coated steel racks to prevent slipping against smooth sink edges. The silicone dampens sound and cushions delicate glassware against accidental chips.
10 Conceal Modular Hanging Rails Along the Backsplash
Backsplash walls between your countertops and wall cabinets are often treated as purely decorative. Installing a low-profile rail system transforms that vertical expanse into modular, hidden kitchen storage.
Slim horizontal tracks support sliding spice caddies, tablet stands, knife sleeves, and utensil hooks. Placing everyday items on the wall lifts clutter entirely off your work surfaces.
Because the rail sits directly below the cabinet shadow line, it blends seamlessly into the kitchen architecture. It keeps high-frequency items visible and accessible without looking messy.
Select stainless steel, brushed brass, or matte black hardware that complements your existing cabinet pulls. Consistent finishes create a cohesive, custom aesthetic throughout the room.
Wipe the rails and hanging accessories regularly with a microfiber cloth and mild soapy water. Keeping items off the counter makes daily countertop wiping swift and effortless.
Ergonomic and Safe Storage for Everyday Comfort
A well-organized kitchen does more than look attractive; it supports physical comfort and safety. As we age or manage joint fatigue, reaching high overhead or bending low to floor level becomes risky.
The ADA Standards for Accessible Design highlight the value of maintaining storage within an accessible reach range between 15 and 48 inches from the floor.
Prioritize this central zone for items you handle every day, such as dinner plates, drinking glasses, and cooking oils. Place rarely used holiday platters or specialty appliances in higher or lower spots.
Falls from stepladders and chairs represent a common household hazard for older adults. The CDC STEADI initiative provides clear evidence that reducing the need to climb on unstable stools prevents severe fall injuries at home.
Hidden storage solutions like pull-down upper shelving inserts and roll-out base trays bring items directly to your resting elbow height. You eliminate the urge to balance on a stool to reach back corners.
Always evaluate hardware weight capacities before storing heavy stoneware or iron pans. Exceeding rated weight limits causes shelf pins to shear and drawers to jam unexpectedly.
Step-by-Step Audit to Identify Dead Kitchen Zones
Before purchasing bins or organizers, conduct a methodical survey of your kitchen layout. Pinpointing unused pockets prevents unnecessary purchases and ensures your new storage solutions work seamlessly.
- Inspect Vertical Cabinet Clearance: Measure the open air space between the top of your items and the shelf above. Gaps taller than four inches indicate prime territory for under-shelf baskets.
- Check Appliance Margins: Measure gaps between your refrigerator, stove, and surrounding cabinetry. Any clearance between three and six inches can house a pull-out cart.
- Examine Plinths and Baseboards: Tap your toe-kick trim to determine whether it conceals hollow space. Most standard baseboards conceal four inches of usable vertical room.
- Survey Door Clearance: Measure the distance between closed cabinet doors and interior shelves. A two-inch buffer allows you to mount interior door racks without obstruction.
- Map High-Traffic Work Zones: Identify the items you reach for multiple times per day. Relocate these essentials to your primary prep zone between hip and shoulder height.
Take precise measurements with a steel measuring tape before ordering hardware. Writing down interior cabinet width, depth, and diagonal clearance saves time and prevents frustrating returns.
Test clearances with cardboard templates if you feel uncertain about a sliding mechanism. Simulating drawer extension ensures your pull-out trays will not strike adjacent door frames or handles.
Comparing Sneaky Storage Solutions by Effort and Capacity
Every kitchen layout presents unique constraints, from rental restrictions to custom cabinetry dimensions. Use the reference table below to choose projects that match your budget and DIY skill level.
| Storage Solution | Best Items to Store | Installation Effort | Usable Space Gained |
|---|---|---|---|
| Toe-Kick Drawers | Baking sheets, platters, linens | Moderate to Advanced | High (captures floor cavity) |
| Cabinet Door Racks | Spices, foil boxes, pot lids | Low (Adhesive or screws) | Moderate (uses door depth) |
| Under-Shelf Baskets | Dish towels, tea, paper wraps | Low (Slide-on brackets) | Moderate (uses vertical air) |
| Slim Refrigerator Cart | Canned goods, oils, sauces | Low (Roll-in assembly) | High (utilizes narrow gaps) |
| Sink Tilt-Out Trays | Sponges, scrubbers, stoppers | Moderate (Hinge retrofit) | Compact (clears sink rim) |
| Under-Cabinet Magnets | Cutlery, shears, metal tools | Low (Adhesive or screws) | High (frees counter surface) |
| Blind-Corner Pull-Outs | Dutch ovens, small appliances | Moderate to Advanced | Very High (reclaims dark voids) |
| Vertical Drawer Dividers | Skillets, cutting boards, lids | Low (Drop-in inserts) | High (stops messy stacking) |
Renters should prioritize slide-on baskets, tension dividers, and adhesive door caddies. These non-permanent options leave zero holes or surface damage when you move.
Homeowners can invest in permanent structural retrofits like toe-kick drawers and articulated corner mechanisms. These durable upgrades boost daily efficiency and enhance your home’s resale value.
Cleaning and Maintaining Concealed Storage Systems
Hidden storage compartments keep clutter out of sight, but they still collect dust, crumbs, and moisture. Establishing a simple maintenance routine keeps your organizers operating smoothly for years.
Vacuum toe-kick drawers and slim refrigerator carts twice each year using a narrow crevice tool. Removing stray debris prevents wheels and ball-bearing slides from binding or grinding.
Wipe down sink tilt-out trays weekly with warm water and mild dish detergent. Allowing sponges to dry thoroughly before storing them prevents mold, mildew, and unpleasant kitchen odors.
Apply a dry silicone lubricant spray to metal drawer glides and pull-out tracks annually. Avoid petroleum-based lubricants, which attract kitchen dust and congeal over time.
Inspect door-mounted racks every few months to ensure hinge screws remain snug. Tightening loose screws promptly prevents cabinet door alignment problems and protects wooden frames from damage.
Your Next Step Toward a Calmer Kitchen
You do not need to overhaul your entire kitchen in a single weekend. Pick one neglected spot today—such as the air gap under a shelf or the back of a cabinet door.
Measure that space, install an appropriate organizer, and experience the quiet relief of clear countertops. Small, intentional changes quickly compound into an organized, joyful kitchen.