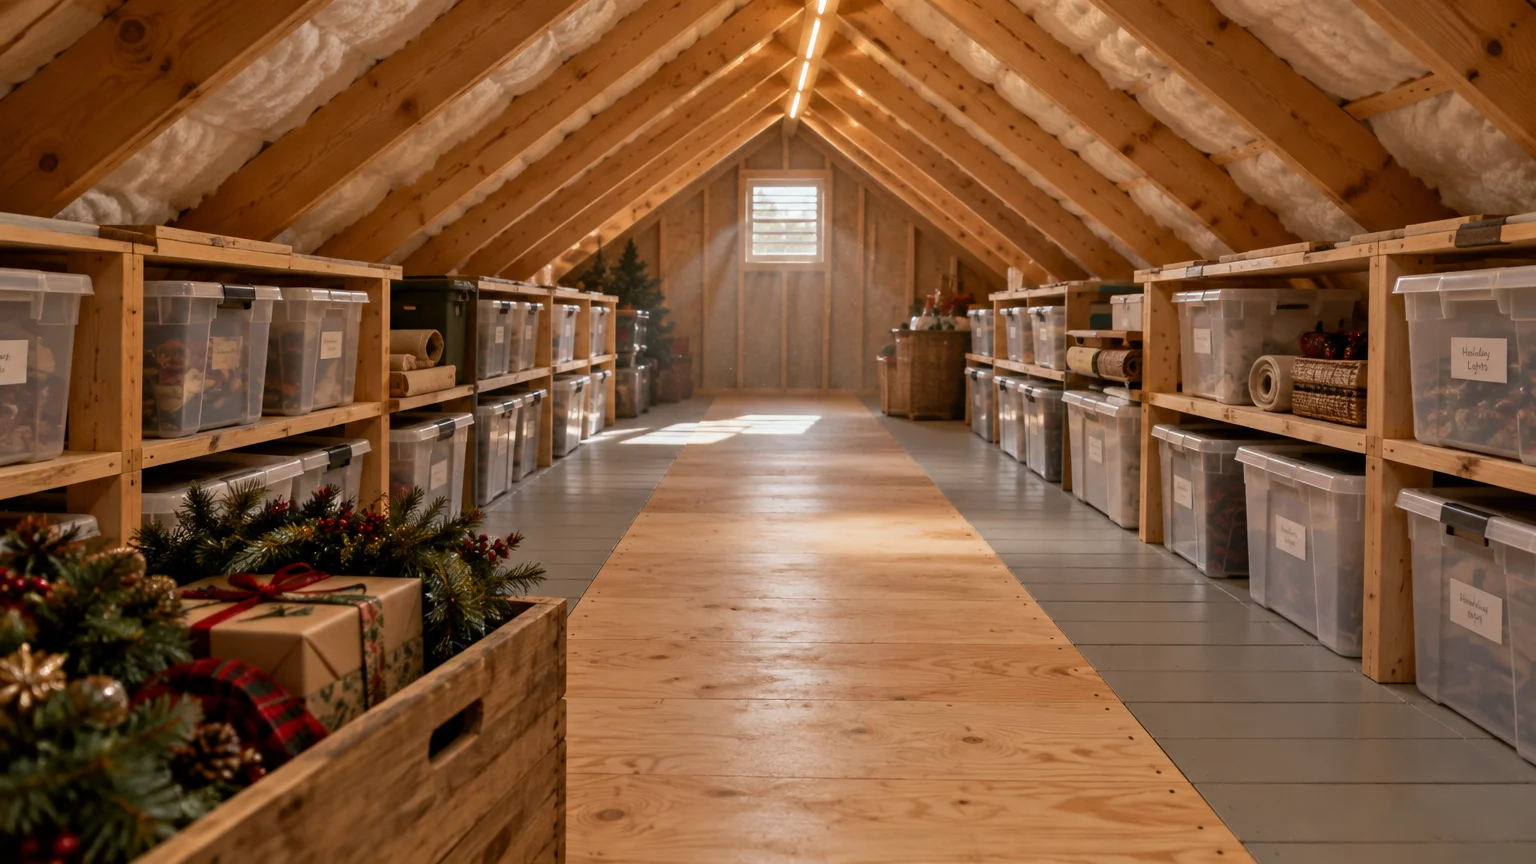
Transforming your attic from a dusty obstacle course into an organized storage hub protects your keepsakes and cuts seasonal stress. You can easily retrieve holiday decor, luggage, and family archives without risking a slip or strain.
Most homes underutilize roof pitch angles and knee walls; clutter builds up simply because items lack designated, accessible homes. A deliberate layout brings immediate calm to your living spaces below.
These practical attic organizing ideas turn challenging rafters and low ceilings into efficient, secure storage zones you can navigate safely year after year.
01 Secure Walking Paths with Rated Attic Flooring
Ceiling joists are designed to support plaster and drywall, not heavy foot traffic or unbalanced stacks of bins. Walking across open joists risks a catastrophic foot slip through your ceiling.
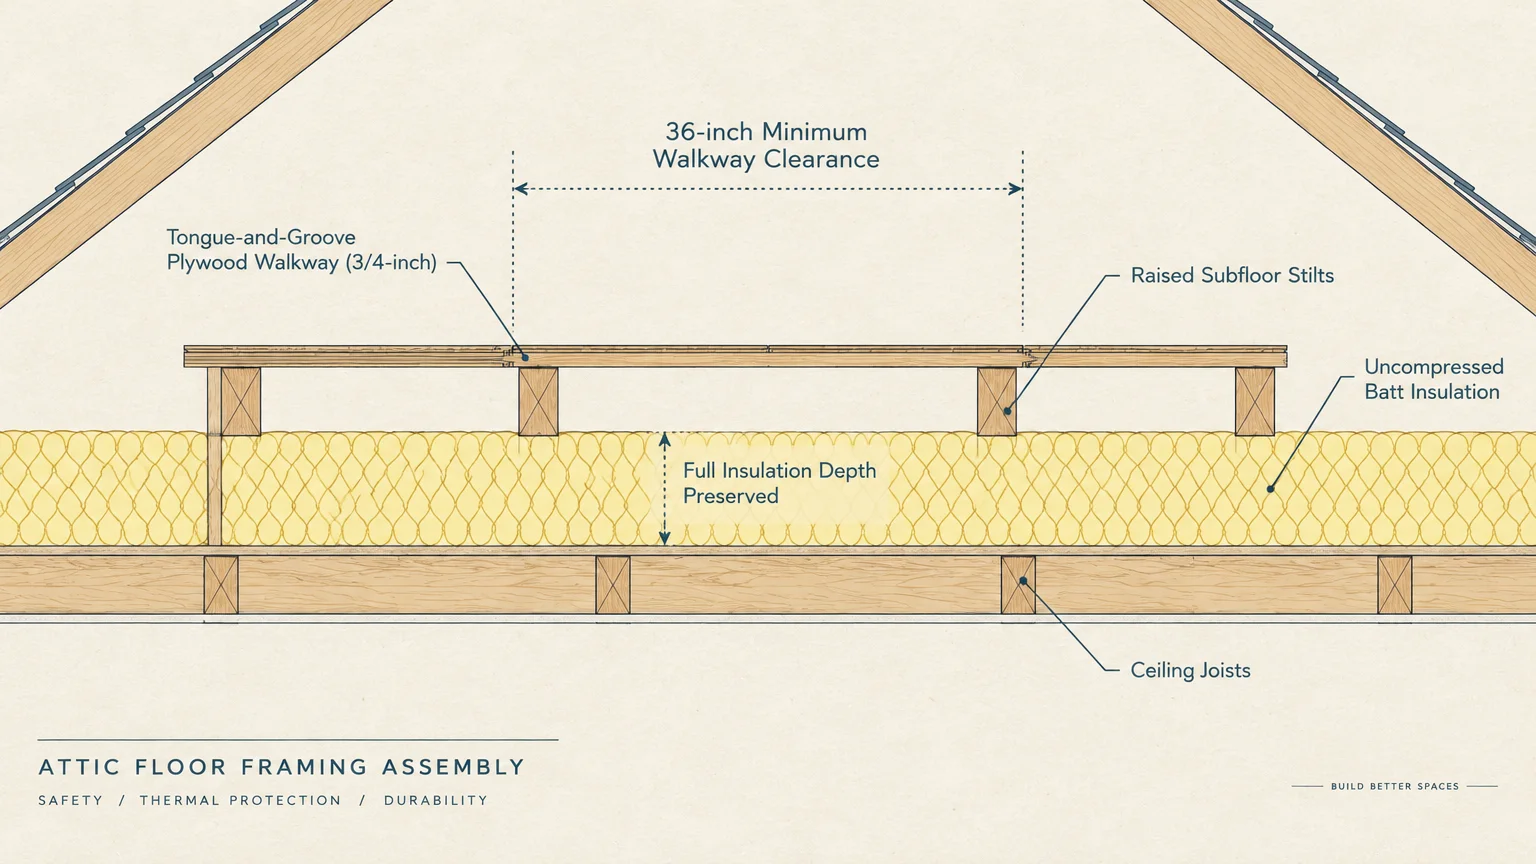
Fasten three-quarter-inch tongue-and-groove plywood or specialized attic deck panels across the floor joists to build a stable central walkway. A solid walking surface protects your ceiling and prevents dangerous falls.
Never compress your insulation blanket when laying down structural panels over framing members. Compressed fiberglass batt or blown cellulose loses its thermal resistance, driving up home heating and cooling bills.
Follow official Energy.gov insulation guidance by installing raised subfloor stilts that leave room for complete insulation depth beneath walkway boards.
Maintain a central path width of at least thirty-six inches. This generous clearance gives you room to carry bulky plastic tubs without scraping your knuckles against exposed framing nails.
Install a sturdy safety grab handle at the top of your pull-down stairs. Having a solid handhold gives older adults steady leverage when stepping onto the attic deck.
02 Declutter Ruthlessly Before Buying Containers
Packing unwanted clutter into brand-new storage bins wastes money and leaves your attic overcrowded. You cannot organize your way out of simply owning too much unused inventory.
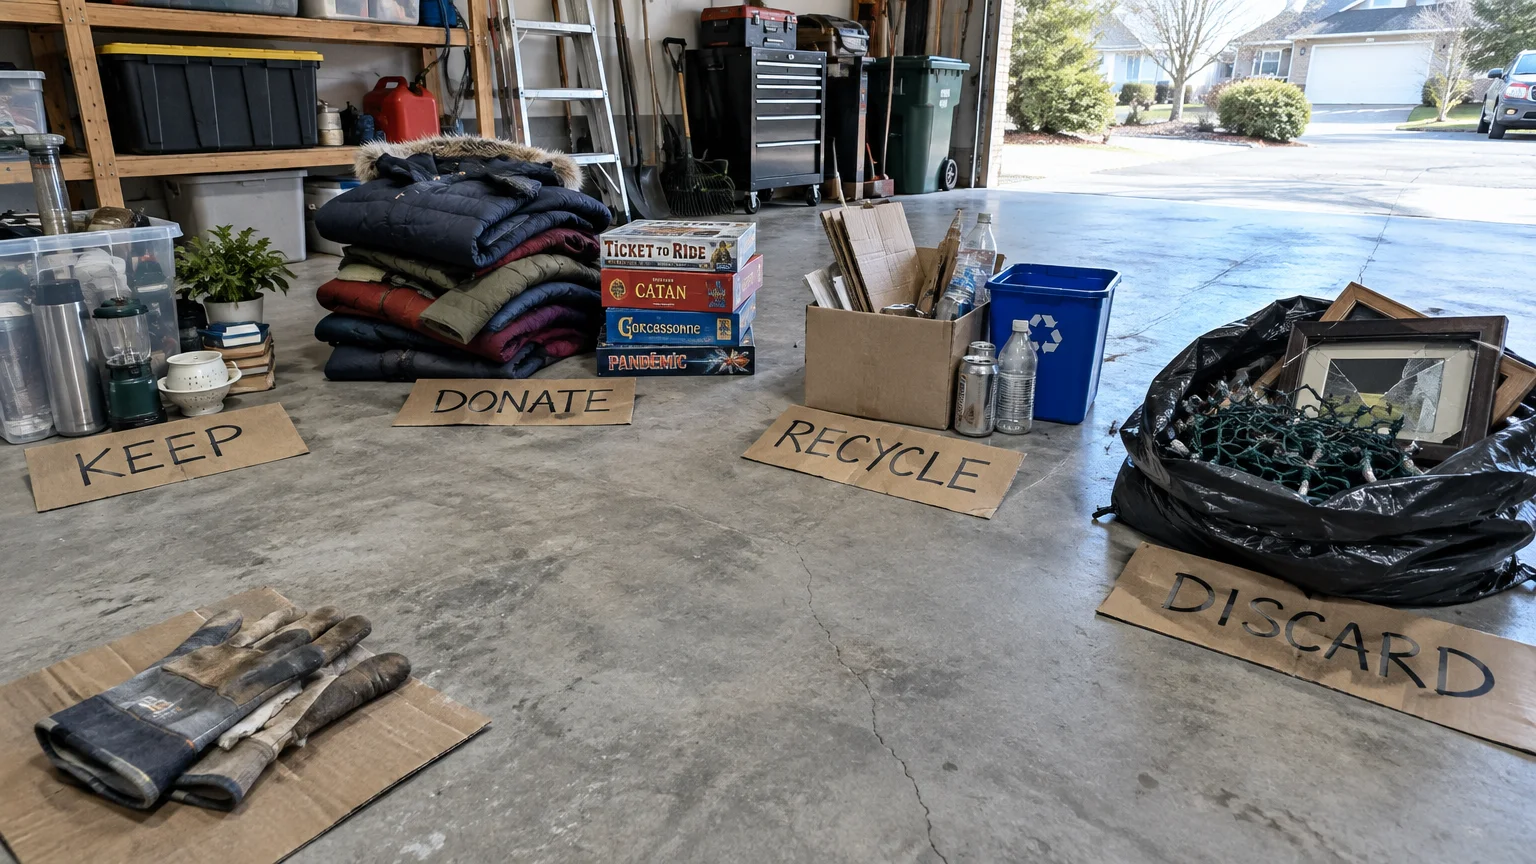
Carry questionable boxes downstairs into a bright garage or spare room before sorting through them. It is far easier to declutter attic boxes in an air-conditioned room with proper lighting.
Establish four distinct staging piles: keep, donate, recycle, and discard. Be honest about whether you will genuinely use an item again.
Throw away damaged ornaments, broken holiday light strings, warped picture frames, and obsolete tax receipts past their retention window. These items occupy valuable square footage while providing zero practical value.
Apply the three-year rule to seasonal clothing and hobby supplies. If a box has remained taped shut for three continuous years, donate the contents to someone who can use them today.
03 Build Under-Eaves Shelving to Capture Knee-Wall Space
The narrow perimeter where your sloped roof meets the floor joists often becomes a chaotic clutter zone. Items pushed into low eaves gather dust and prove frustrating to extract.
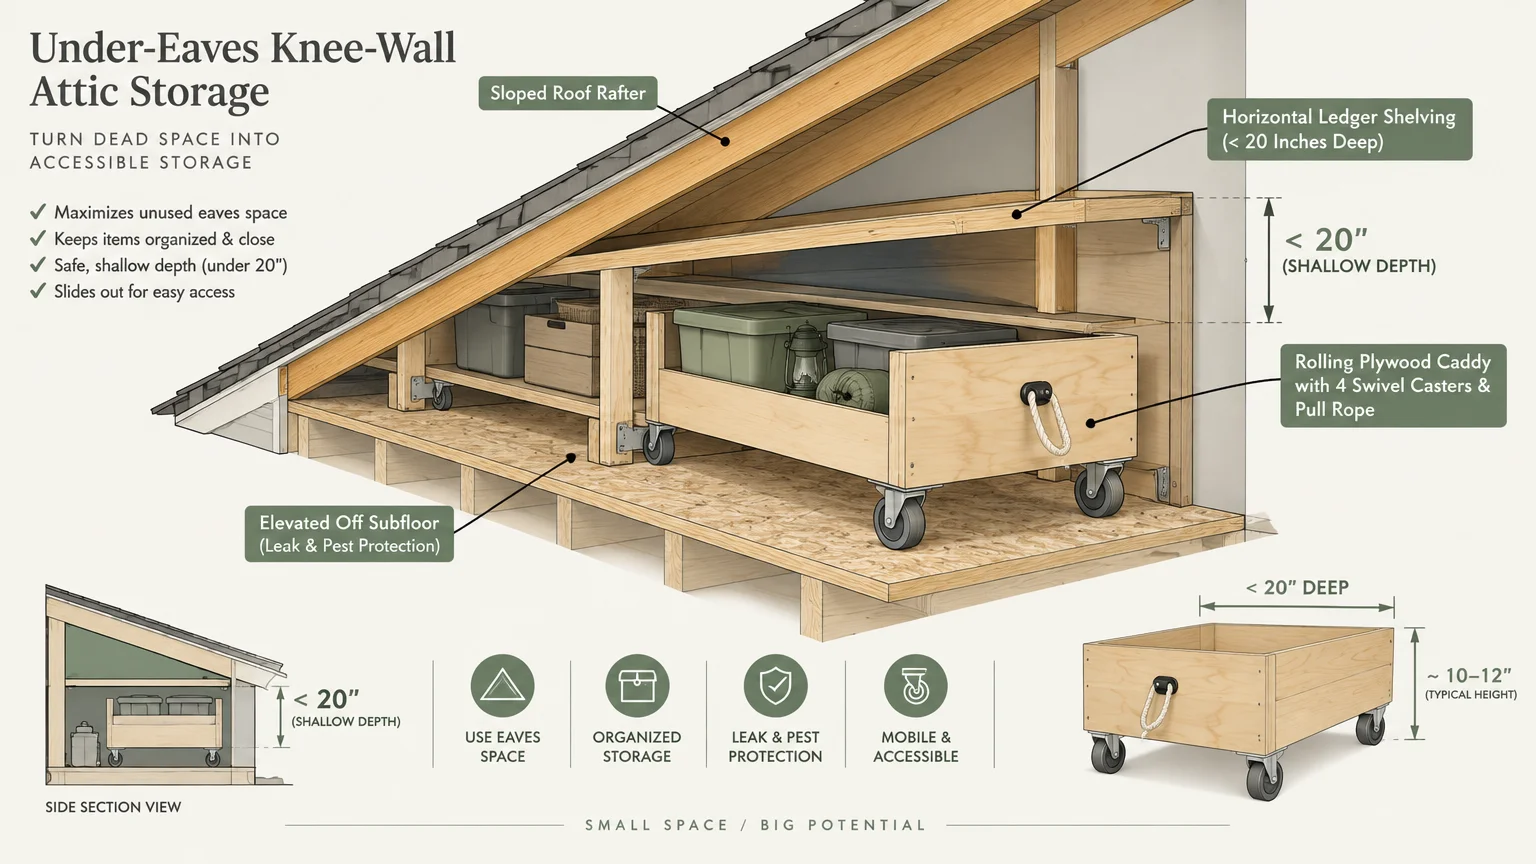
Build horizontal shelving ledgers directly between your vertical roof rafters to maximize this triangular knee-wall void. Simple horizontal supports provide elevated resting ledgers for lightweight bins.
Elevating bins off the subfloor protects them against perimeter roof leaks and pest intrusion. These custom attic storage solutions unlock dozens of cubic feet of usable space without encroaching on central walking lanes.
Build rolling cart platforms using flat plywood scraps mounted on four swivel casters. You can roll these platforms deep under low rafter eaves and pull them out with a simple rope handle.
Keep low shelves shallow—under twenty inches deep—so you never have to crawl on hands and knees to retrieve a container.
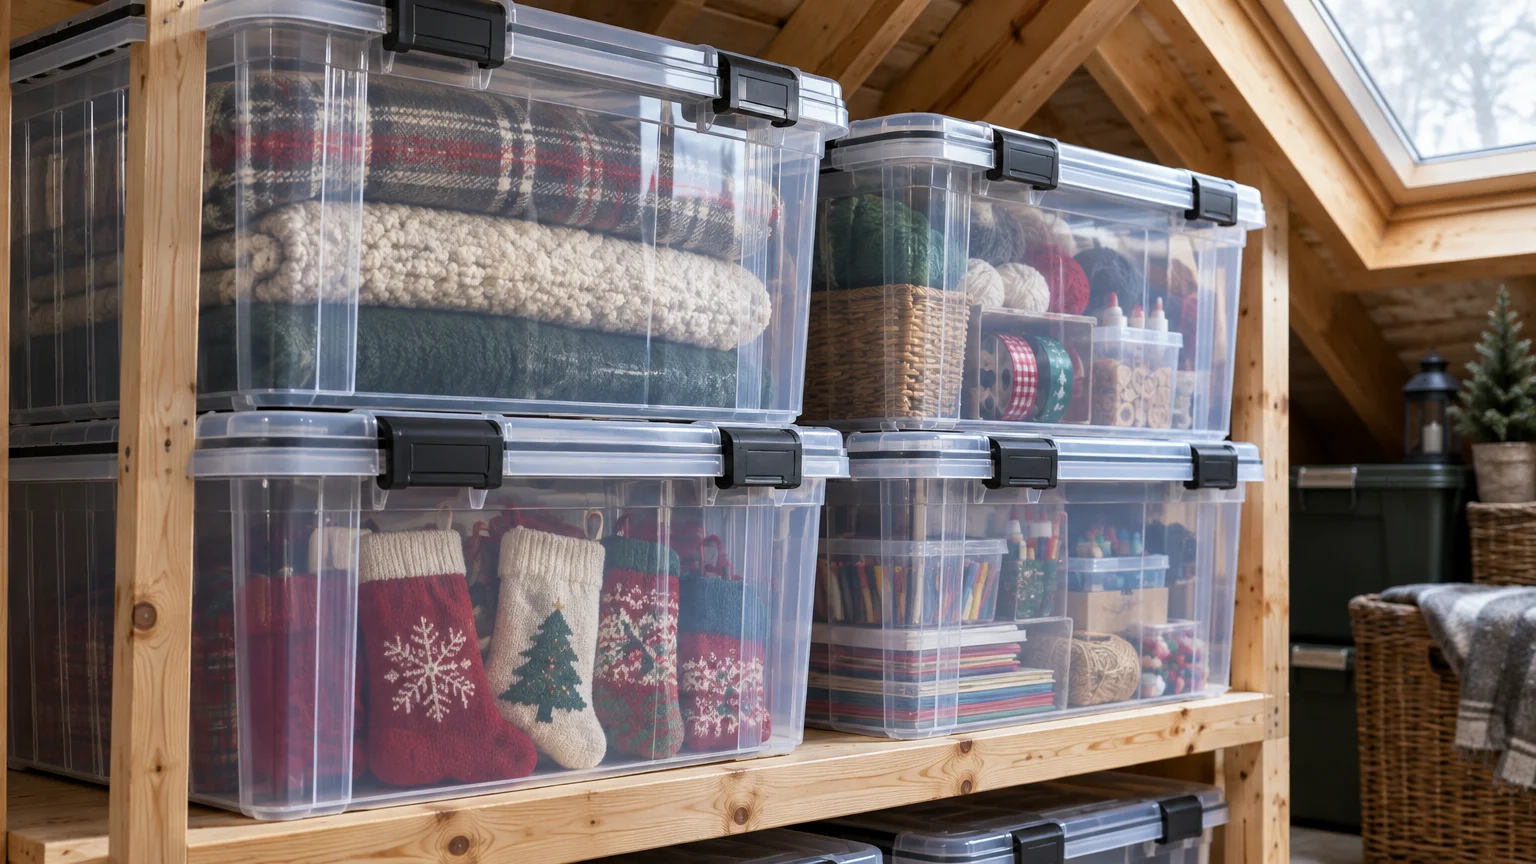
04 Switch to Clear, Heavy-Duty Polypropylene Totes
Cardboard boxes absorb moisture from humid summer air, soften, and collapse under moderate weight. They also emit starch smells that attract cockroaches, silverfish, and mice.
Upgrade your attic storage to durable polypropylene plastic containers designed to withstand wide seasonal temperature shifts. Quality bins will not crack during freezing winter nights or soften in summer heat.
Choose bins equipped with rubber perimeter gaskets and locking latches. Gasket seals block moisture and pests, aligning with established CDC rodent prevention practices for residential storage spaces.
Clear plastic sidewalls let you inspect contents without unstacking heavy towers or popping open tightly latched lids. You instantly see whether a container holds holiday garland or extra winter blankets.
Purchase matching containers from the same product line so their molded lids nest together securely. Uniform footprints prevent leaning stacks and reduce the risk of falling bins along narrow catwalks.
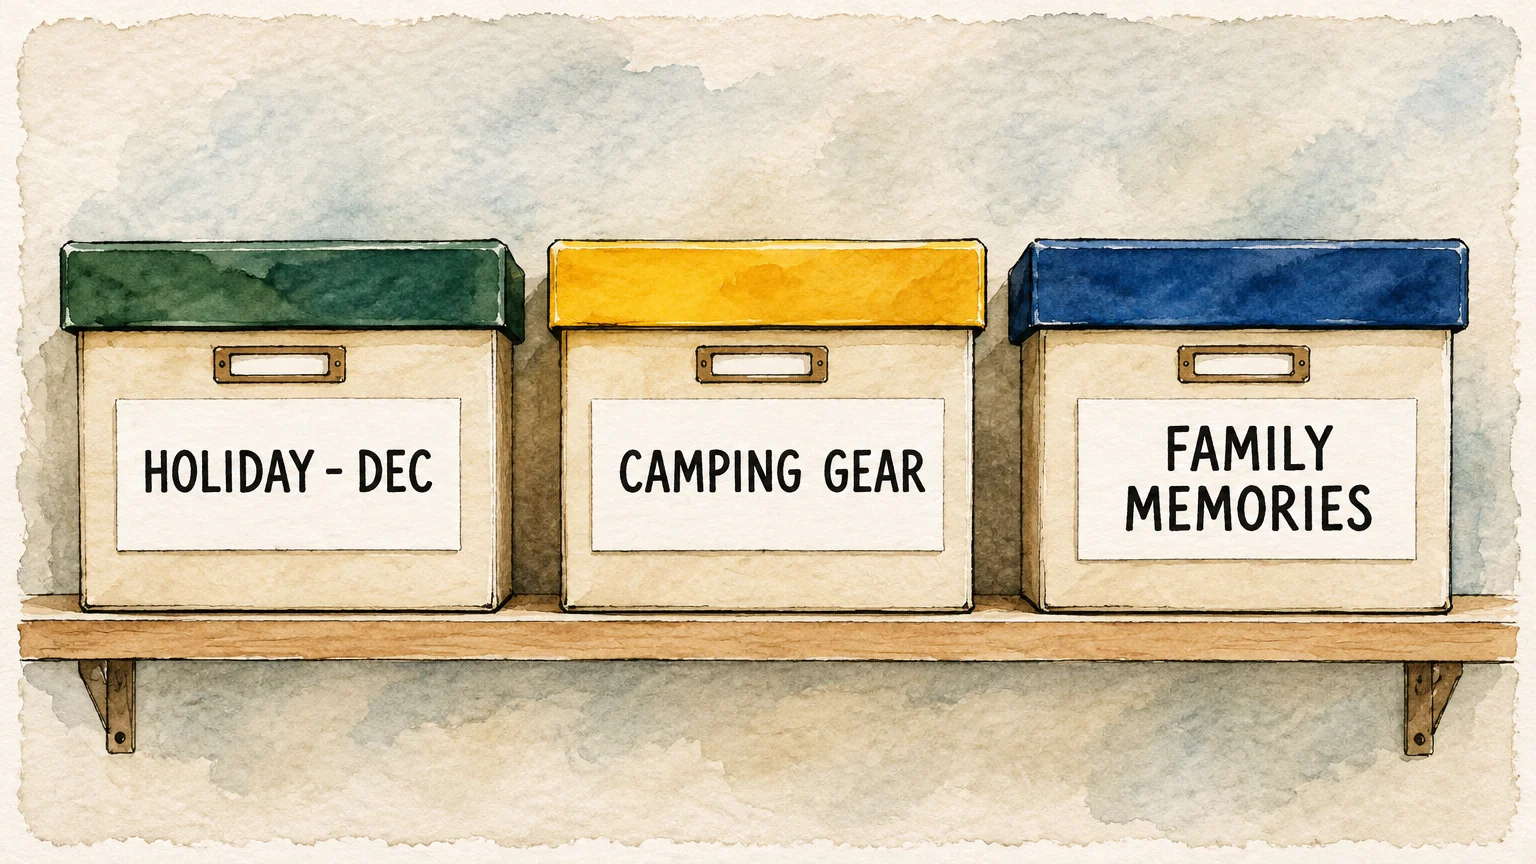
05 Implement High-Contrast Color Coding and Large Labels
Small, handwritten adhesive stickers dry out and peel off when attic temperatures rise. Tiny pencil scrawls force you to bend down and squint in dim corners.
Affix oversized, bold labels to both the long front and short side of every tote. Placing labels on multiple sides ensures visibility regardless of how you position the bin on a shelf.
Pair large-type printed cards with color-coded lids to identify contents across the room. Color cues help you organize attic inventory into immediately recognizable categories.
Use bright red lids for Christmas, orange for Halloween, green for gardening tools, and blue for winter bedding. This visual shorthand saves precious time during busy holiday decorating weekends.
Cover every paper label with broad strips of clear industrial packing tape. Clear tape seals the paper against dust, moisture, and accidental scuffing during handling.
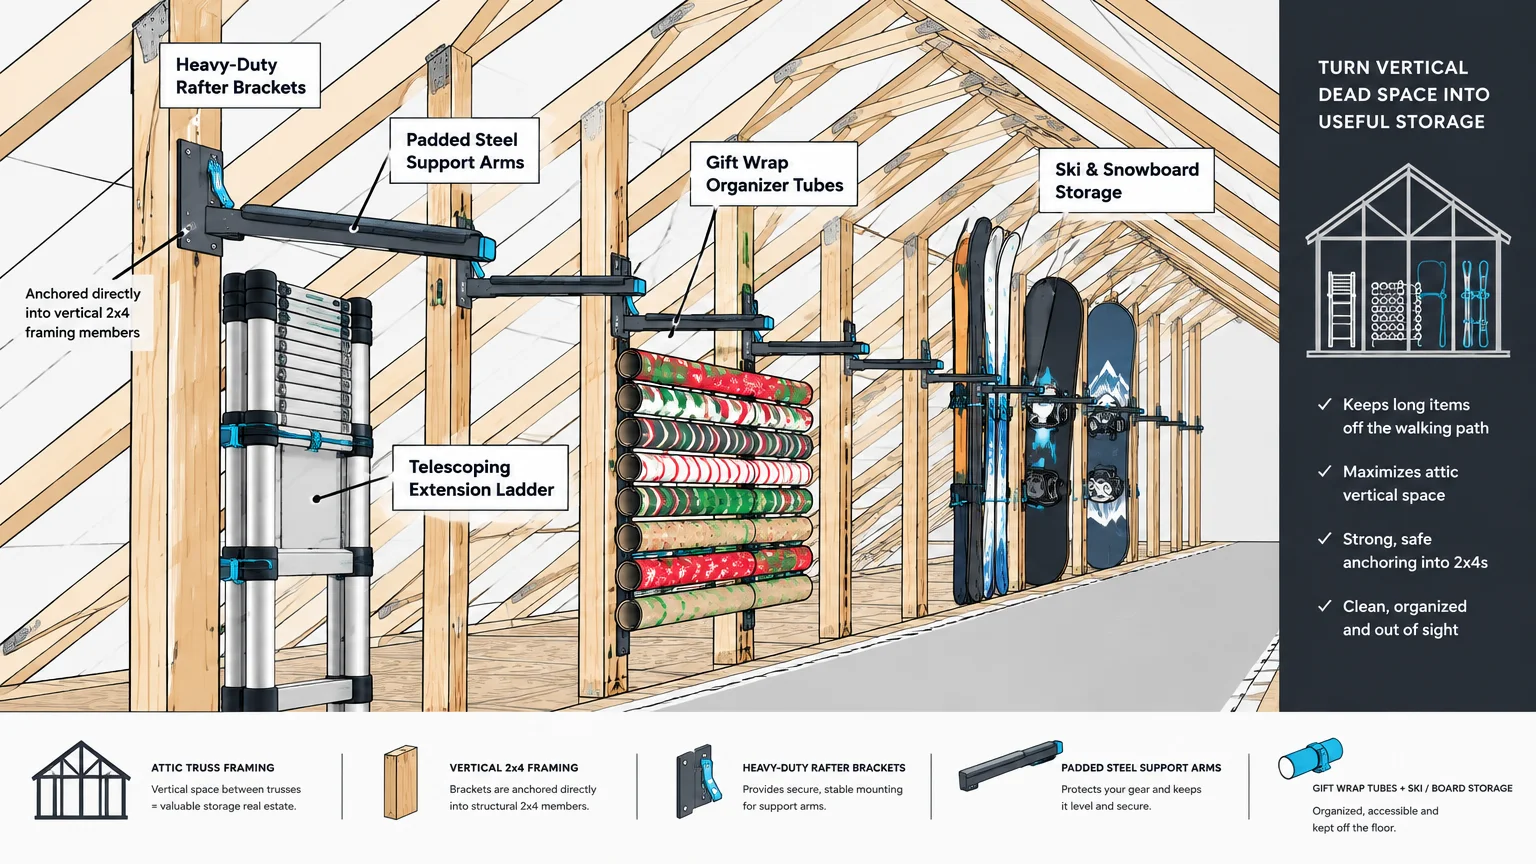
06 Utilize Vertical Trusses and Rafter Brackets for Long Goods
Slender, elongated belongings like artificial Christmas tree poles, folding tables, and curtain rods consume valuable floor space when laid flat. They create tripping obstacles along main walking lanes.
Fasten heavy-duty padded utility hooks or rafter brackets directly into the vertical faces of your roof trusses. Suspending long gear overhead captures empty vertical cubic footage.
These hanging brackets represent smart attic organizing ideas for storing camping tents, folding lawn chairs, and snowboards. Elevating these awkward shapes clears the central floor for easy foot travel.
Always pre-drill pilot holes before driving heavy lag screws into structural attic lumber. Pilot holes prevent splitting seasoned rafters that hold your home’s roof deck.
Distribute suspended weight evenly across multiple trusses rather than hanging several heavy items from a single rafter. Structural balance protects roof integrity over decades of storage.
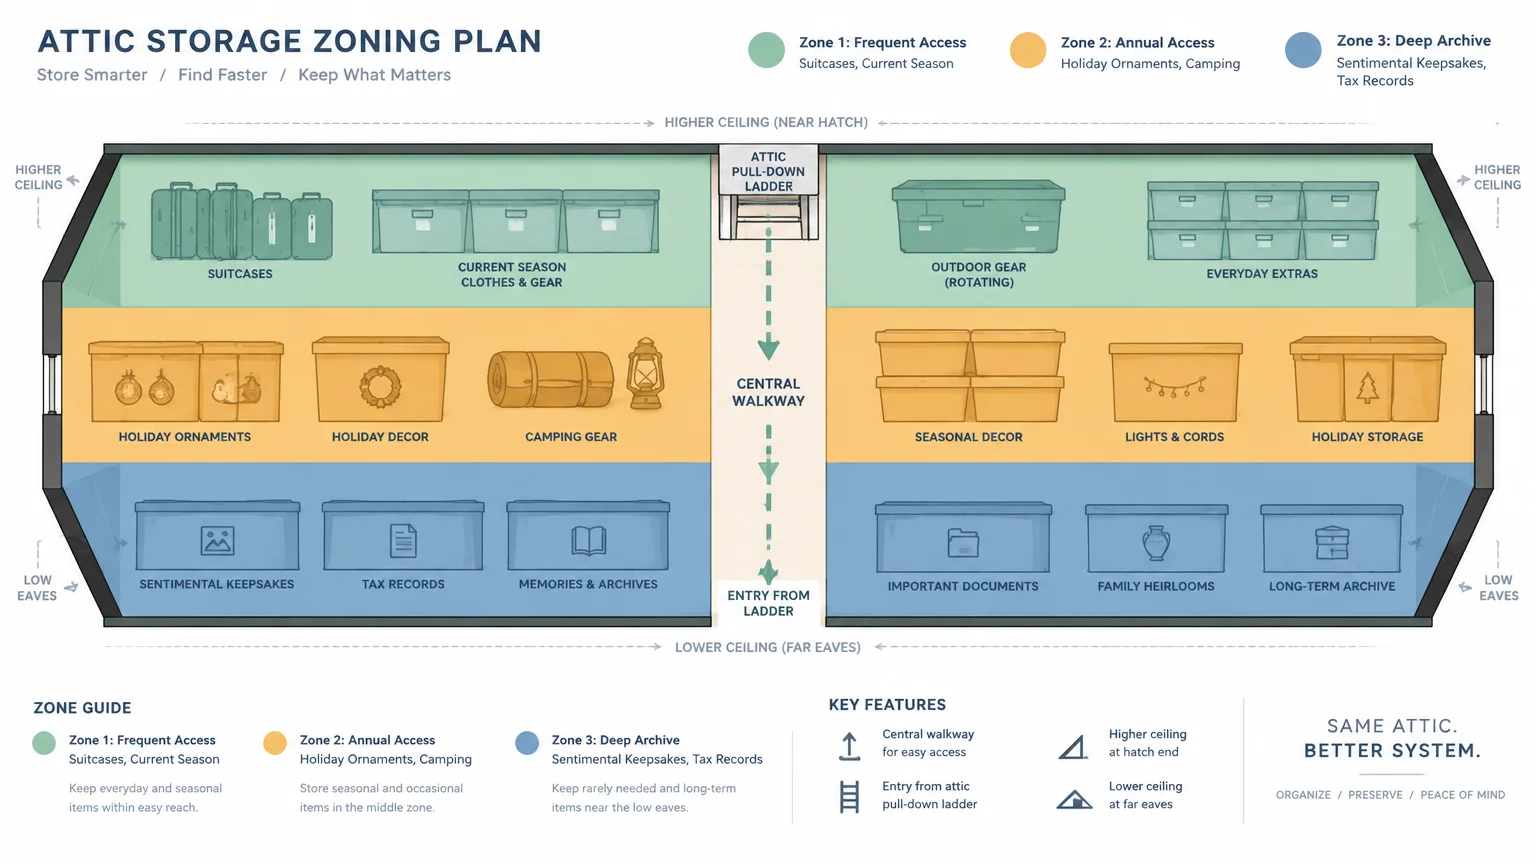
07 Establish Seasonal Frequency Access Zones
Sorting your attic without a clear zoning strategy forces you to shift heavy containers every time you need an item. Strategic zoning prevents physical exhaustion.
Divide your attic floor into three distinct access zones based strictly on how often you retrieve items. Proximity to the entry hatch should dictate item placement.
Zone one sits immediately beside the attic access hatch or drop-down stairs. Reserve this prime zone for items you retrieve several times each year, such as luggage and seasonal wardrobes.
Zone two spans the central shelving units and intermediate floor deck. Place once-a-year items here, including holiday lights, artificial trees, and annual party supplies.
Zone three encompasses the deep perimeter eaves and far corners of the attic. Use this remote space for tax archives, sentimental childhood keepsakes, and permanent household records.

08 Upgrade to Archival Containers for Sentimental Heirlooms
Extreme attic heat accelerates the chemical degradation of fragile photographs, vintage wedding gowns, and heritage paper records. Standard plastic totes can trap residual moisture, triggering mold growth.
Following proper EPA mold prevention guidelines requires maintaining dry conditions and adequate airflow around sensitive organic materials.
House vintage quilts, lace, and heirloom garments in acid-free, lignin-free archival textile boxes. Wrap delicate fabric folds in unbuffered acid-free tissue paper to prevent permanent crease marks.
Encase historic black-and-white family photographs in polyester or polypropylene sleeves rather than acidic adhesive photo albums. Archival enclosures protect delicate photographic emulsions from peeling.
Whenever possible, move one-of-a-kind family heirlooms out of unconditioned attic spaces entirely. An interior bedroom closet provides the steady temperature and humidity delicate heirlooms need to survive.
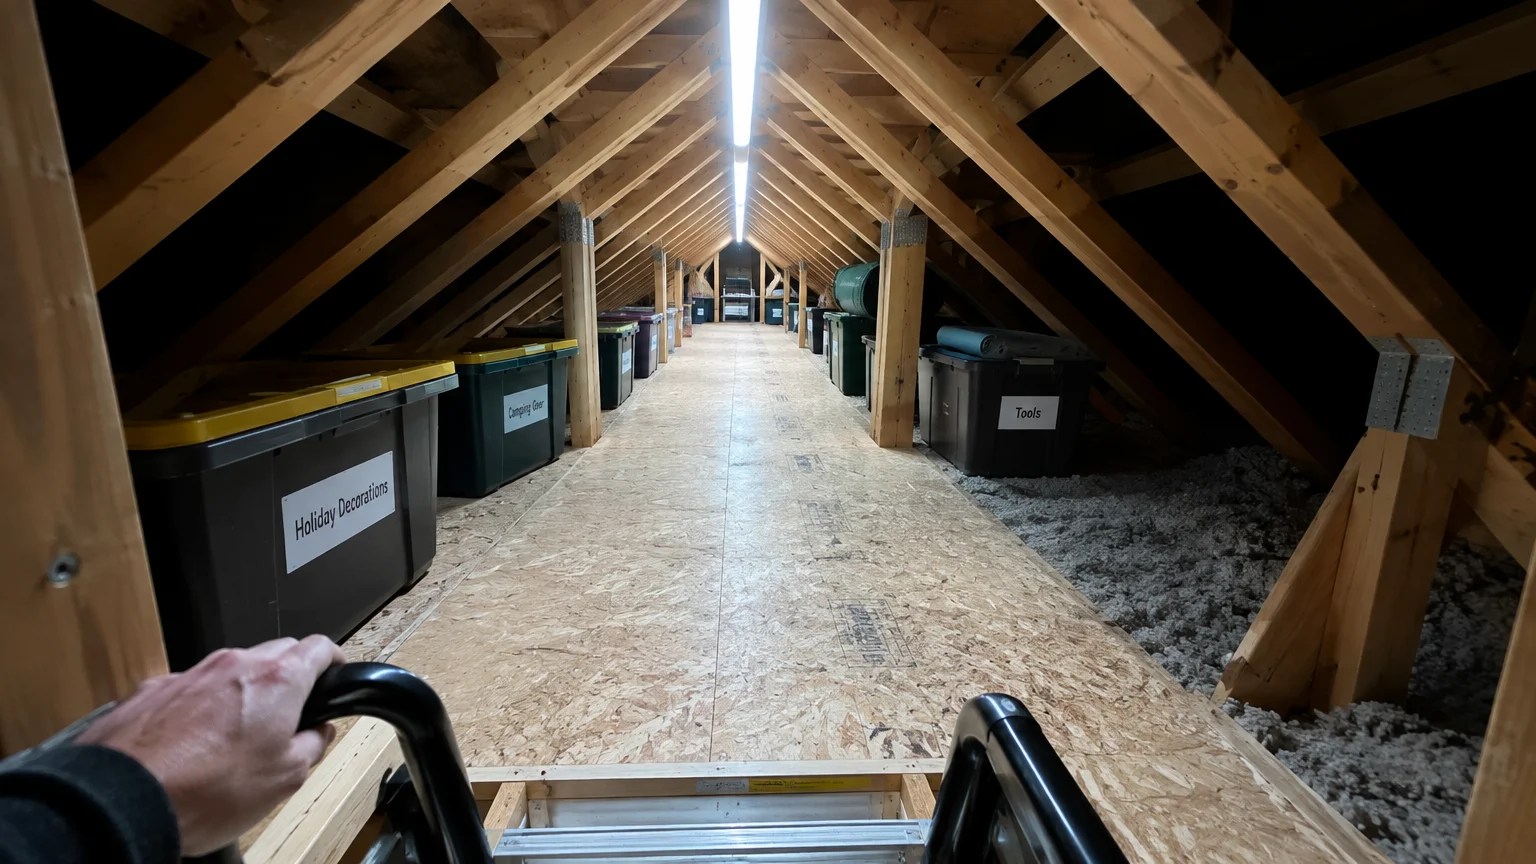
09 Install Overhead Motion-Activated Lighting
Relying on a single pull-chain bulb leaves the perimeter of your attic shrouded in deep shadow. Carrying bulky bins while balancing on stairs demands bright, hands-free lighting.
Replace bare incandescent bulbs with multi-directional LED fixture panels that screw directly into existing ceiling sockets. These multi-leaf fixtures throw bright, daylight-balanced light into dark rafter corners.
Install motion-activated switch adapters or integrated motion-sensing LED shop lights along your walking path. The lights illuminate automatically the moment you push open the attic hatch.
Automatic illumination keeps your hands free to hold handrails and carry storage containers safely. You will never fumble with a pull string in pitch darkness again.
Mount secondary battery-powered puck lights beneath low-eave shelves where overhead ceiling fixtures cast deep shadows. Directional light makes reading bin labels effortless.
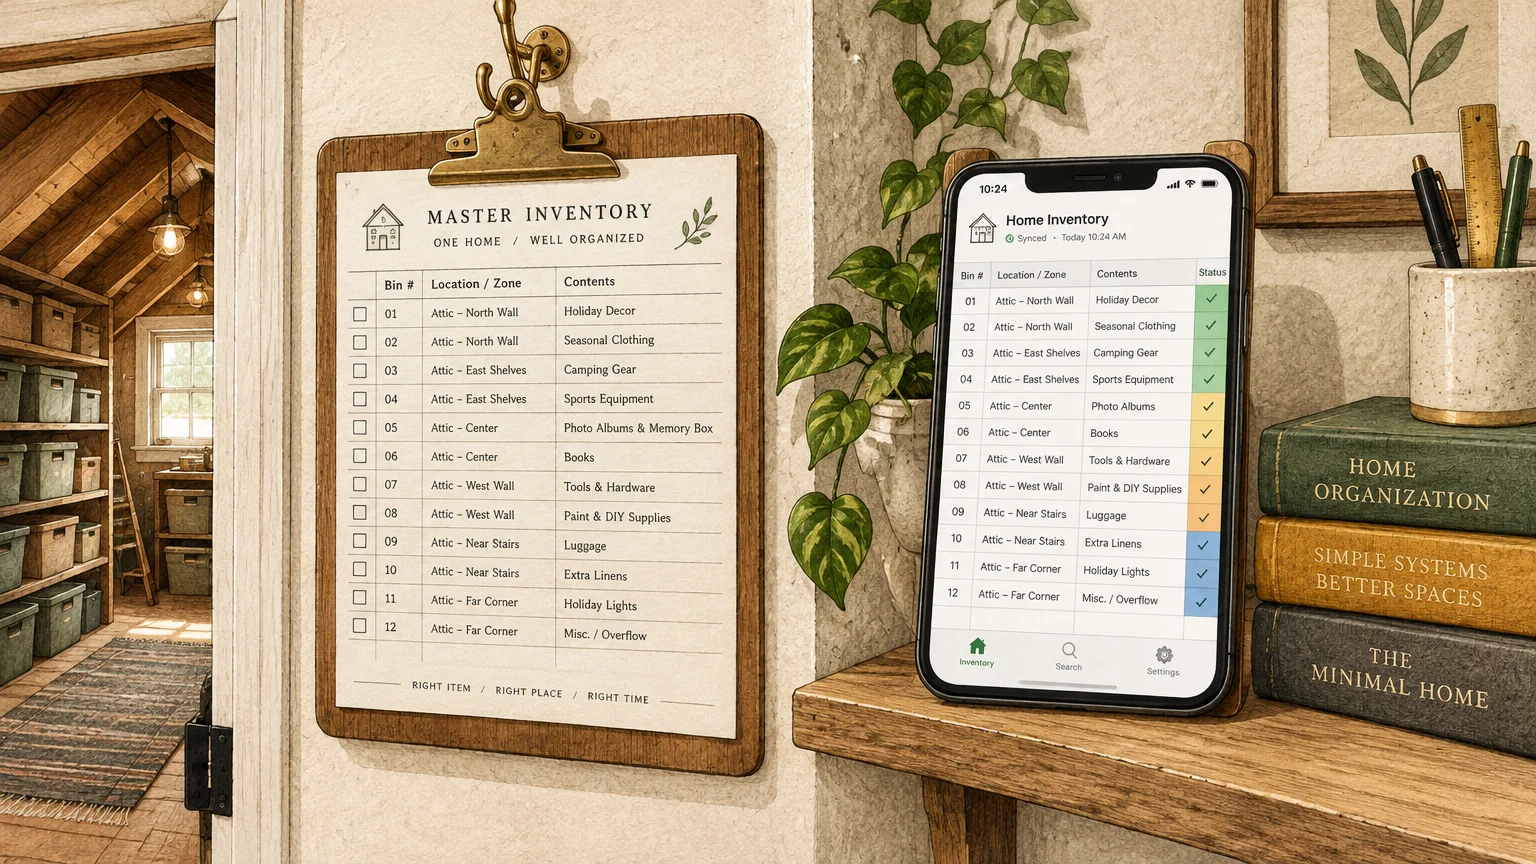
10 Create a Master Digital and Physical Inventory Sheet
A year after organizing your attic, remembering which numbered bin holds your vintage punch bowl becomes difficult. A documented inventory eliminates frustrating guessing games.
Assign a bold number to every storage tote using an oil-based paint marker. Number both the front and side faces for quick visual tracking from the aisle.
Log each container number into a simple spreadsheet or note on your smartphone. List three to five primary keywords detailing the specific contents stored inside that tote.
When you need an item downstairs, open your phone and search for the keyword. Your notes app will immediately pinpoint the exact bin number and location.
Print a physical copy of this inventory list, place it in a plastic sheet protector, and tack it beside the attic hatch. Anyone in the household can check the chart immediately.

What Items You Should Never Store in an Unfinished Attic
Unfinished attics experience dramatic seasonal swings in heat and relative humidity. Storing sensitive household goods in these harsh conditions ruins possessions and creates fire hazards.
Never store volatile chemicals, paint thinners, gasoline cans, or propane tanks in your attic. High summer temperatures expand vapors, creating severe explosive and combustion hazards under your roof.
Follow critical U.S. Fire Administration fire safety recommendations by keeping combustible fluids in approved outdoor sheds or well-ventilated ground-level workshops.
Do not store electronics, laptops, or spare lithium-ion tool batteries in unconditioned attic spaces. Excessive thermal stress degrades battery chemistry and can trigger spontaneous thermal runaway.
Remove candles, wax crayons, and classic vinyl records from your attic inventory. Summer temperatures frequently exceed one hundred degrees, turning wax items and vinyl records into warped, melted puddles.
Avoid storing canned goods, preserved wines, and pantry overflow upstairs. Heat breaks down food preservatives, ruins wine flavor profiles, and causes sealed cans to burst.
Wooden musical instruments—such as acoustic guitars and violins—suffer irreparable damage in dry attic heat. Cyclic swelling and shrinking cracks tonewood soundboards and dissolves traditional hide glues.
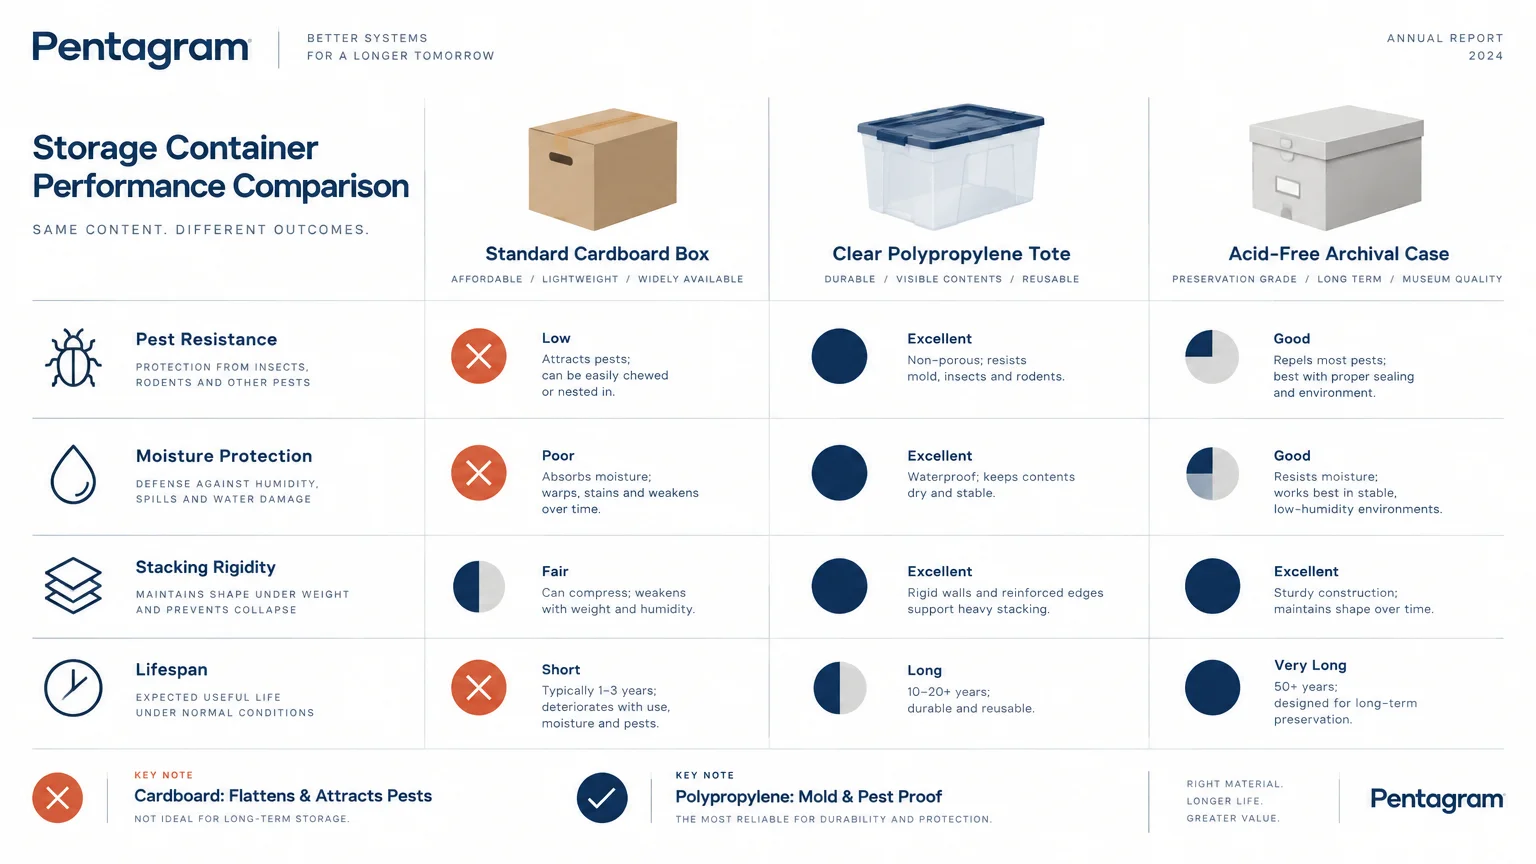
Attic Storage Solutions: Comparing Container Types
Selecting the right container style protects your belongings against dust, insect invasion, and accidental moisture exposure. Different materials offer distinct trade-offs in durability, weight, and stacking stability.
| Container Type | Pest Resistance | Moisture Defense | Stacking Capacity | Best Use Case |
|---|---|---|---|---|
| Gasketed Polypropylene Totes | High | High | High (3 to 4 units) | General seasonal storage, textiles, holiday decor |
| Heavy-Duty Canvas Bags | Low | Low | None (hang or lay flat) | Artificial greenery, seasonal wreaths, soft padding |
| Cardboard Moving Boxes | None | None | Low (risks collapse) | Temporary staging downstairs only; avoid in attic |
| Acid-Free Archival Boxes | Moderate | Low | Moderate (2 units) | Vintage lace, heirloom textiles, historic paper |
| Powder-Coated Wire Racks | High (rodent proof) | High | Very High | Elevating bins off subfloor and framing eaves |
Polypropylene plastic containers remain the undisputed standard for unconditioned attic spaces. While fabric bags work well for soft blankets inside closets, they lack the moisture defense needed near roof eaves.
Avoid stacking containers more than three units high along your attic walkways. Taller towers become top-heavy and risk toppling over when you pull down lower bins.
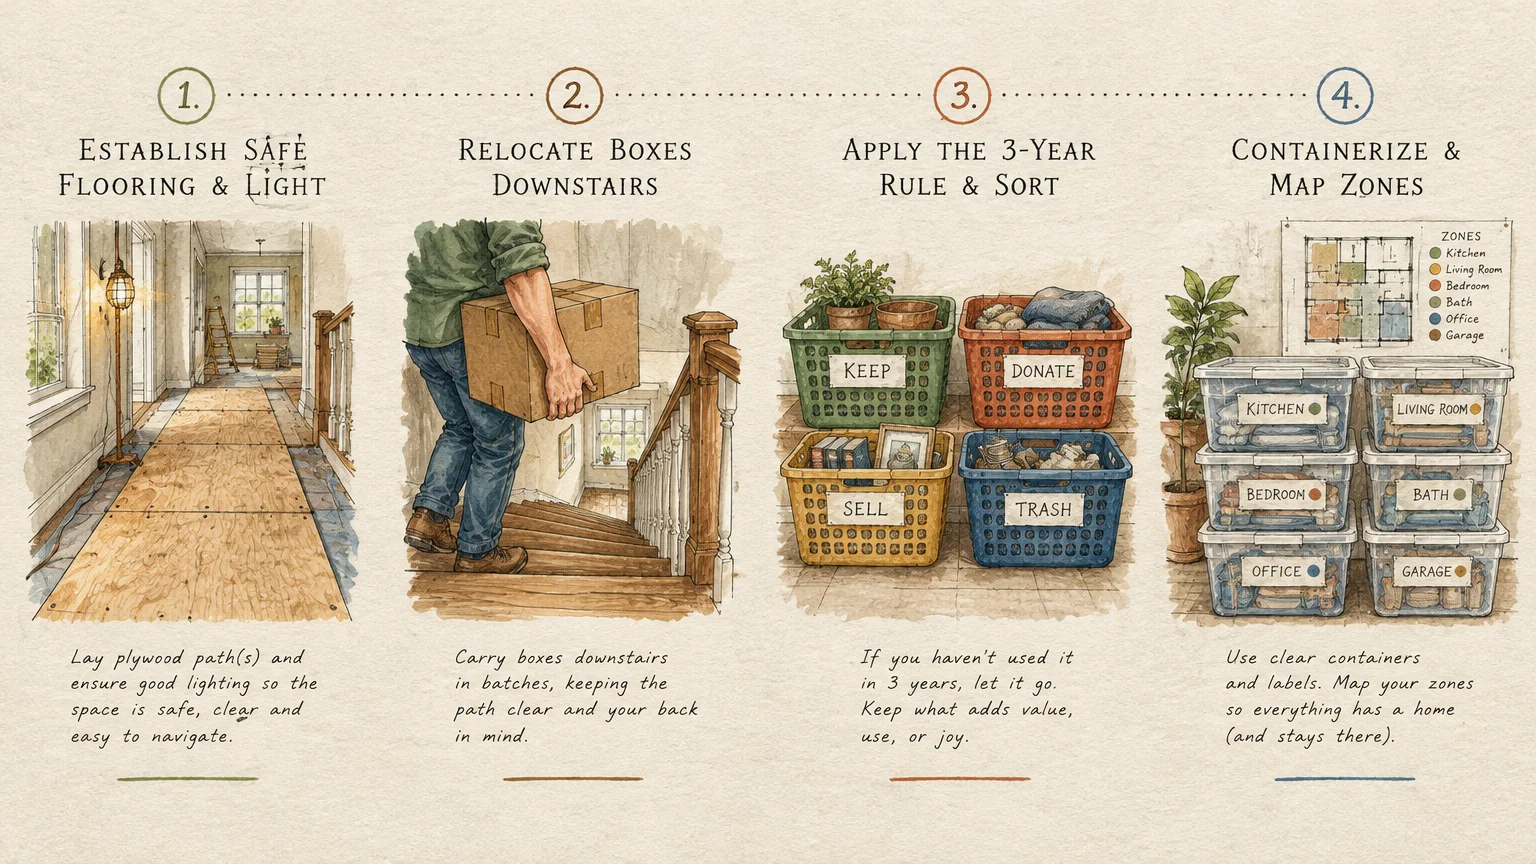
Step-by-Step Attic Decluttering Checklist
Transforming a neglected attic runs smoothly when you approach the job in sequential phases. Follow this step-by-step checklist to streamline your decluttering project safely over a single weekend.
- Conduct a daylight structural inspection: Check the roof deck for active water leaks, inspect framing for termite or carpenter ant trails, and verify that ceiling joists remain sound.
- Clear and secure the entryway: Clean debris from pull-down ladder hinges, tighten loose ladder bolts, and vacuum dust around the ceiling opening before carrying bins down.
- Establish a downstairs sorting station: Set up folding tables in your garage or driveway so you can unpack boxes in fresh air rather than breathing attic dust.
- Extract containers in small batches: Carry down three to four boxes at a time; pacing your descents preserves knee strength and prevents balance fatigue on the ladder.
- Sort ruthlessly using four categories: Separate items into keep, donate, recycle, and trash piles, immediately loading trash bags into outdoor collection bins.
- Vacuum and wipe down attic walkways: Sweep the subfloor catwalk with a shop vacuum equipped with a HEPA filter to eliminate years of accumulated particulate dust.
- Repack remaining goods into uniform bins: Transfer retained items into clear, gasket-sealed plastic totes, affixing bold labels on two sides of each box.
- Reload by frequency zone: Return bins to their designated access zones, placing heavy items low and keeping the primary walkway clear.
Take frequent water breaks downstairs, especially when working during warmer months. Attics trap heat quickly, so staying hydrated protects your focus and physical endurance.
Enlist a family member or friend to stand at the base of the attic ladder. Having a partner receive containers makes moving bulky gear safer and faster.
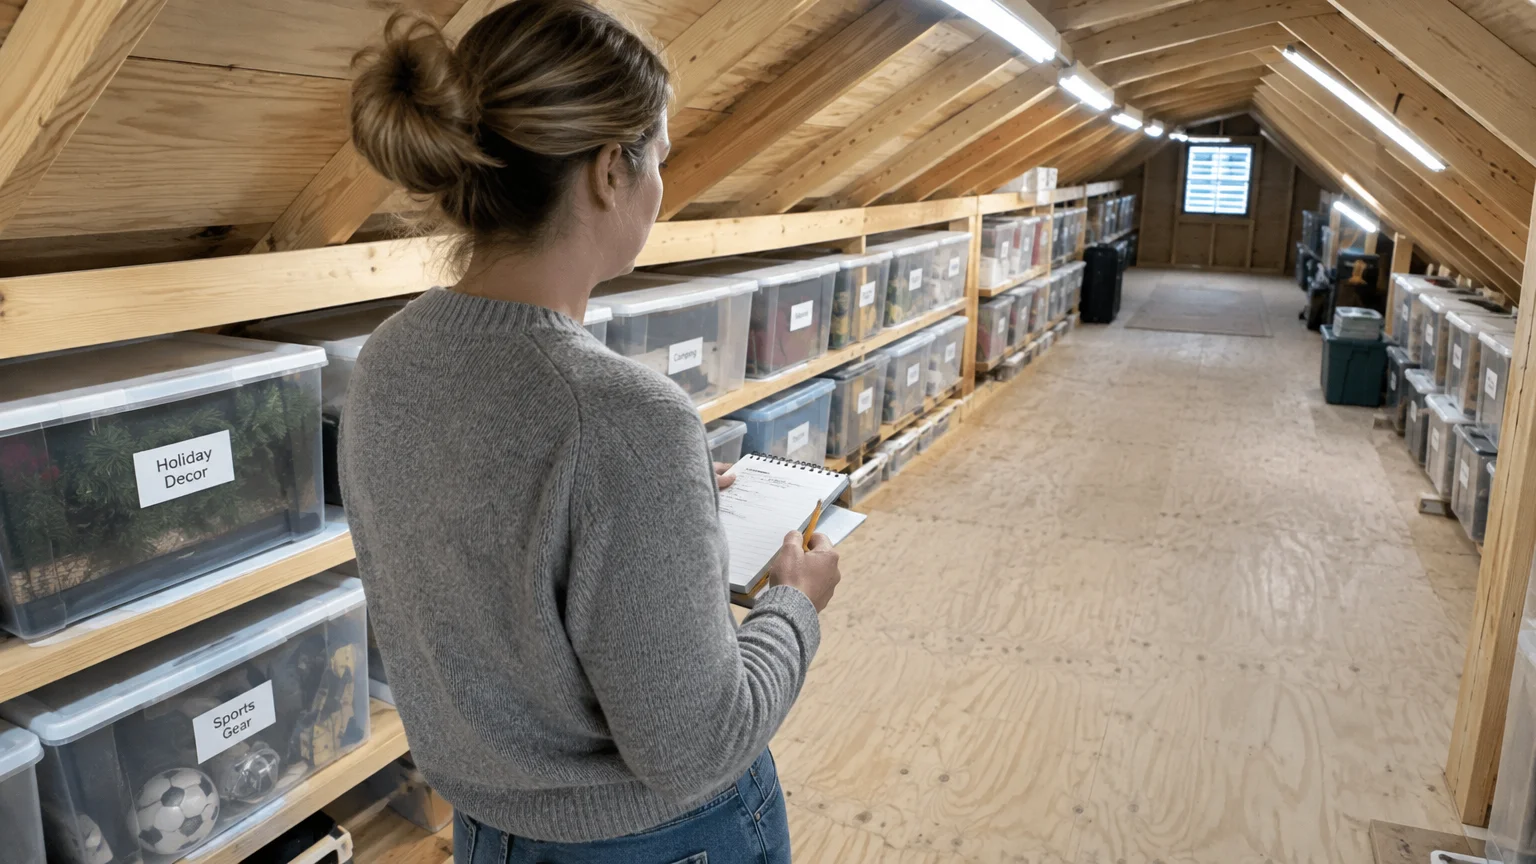
How to Maintain Your Organized Attic Over Time
An attic organizing project only succeeds if you maintain the system throughout the year. Without simple maintenance habits, clutter inevitably creeps back into open walkway spaces.
Practice a strict one-in, one-out policy for holiday decorations and home accents. When you purchase new lawn displays or wreaths, donate an older set to preserve your available space.
Perform a five-minute sweep whenever you visit the attic for seasonal gear. Realign shifted totes, tighten drooping straps, and verify that walking lanes remain completely unobstructed.
Keep a microfiber dusting cloth and a permanent marker in a small bin attached to your entry hatch. You can wipe off dust and amend inventory numbers immediately without climbing downstairs.
Inspect roof rafters and eaves twice a year for signs of water stains or pest activity. Catching minor roof leaks early protects your stored containers and home insulation.

Start with One Practical First Step
You do not have to conquer decades of stored clutter in a single marathon afternoon. Rushing through heavy lifting leads to physical strain and organizational burnout.
Begin today by clearing a four-foot radius around your attic access hatch. Creating an open, well-lit landing zone provides the safe footing you need for future storage projects.