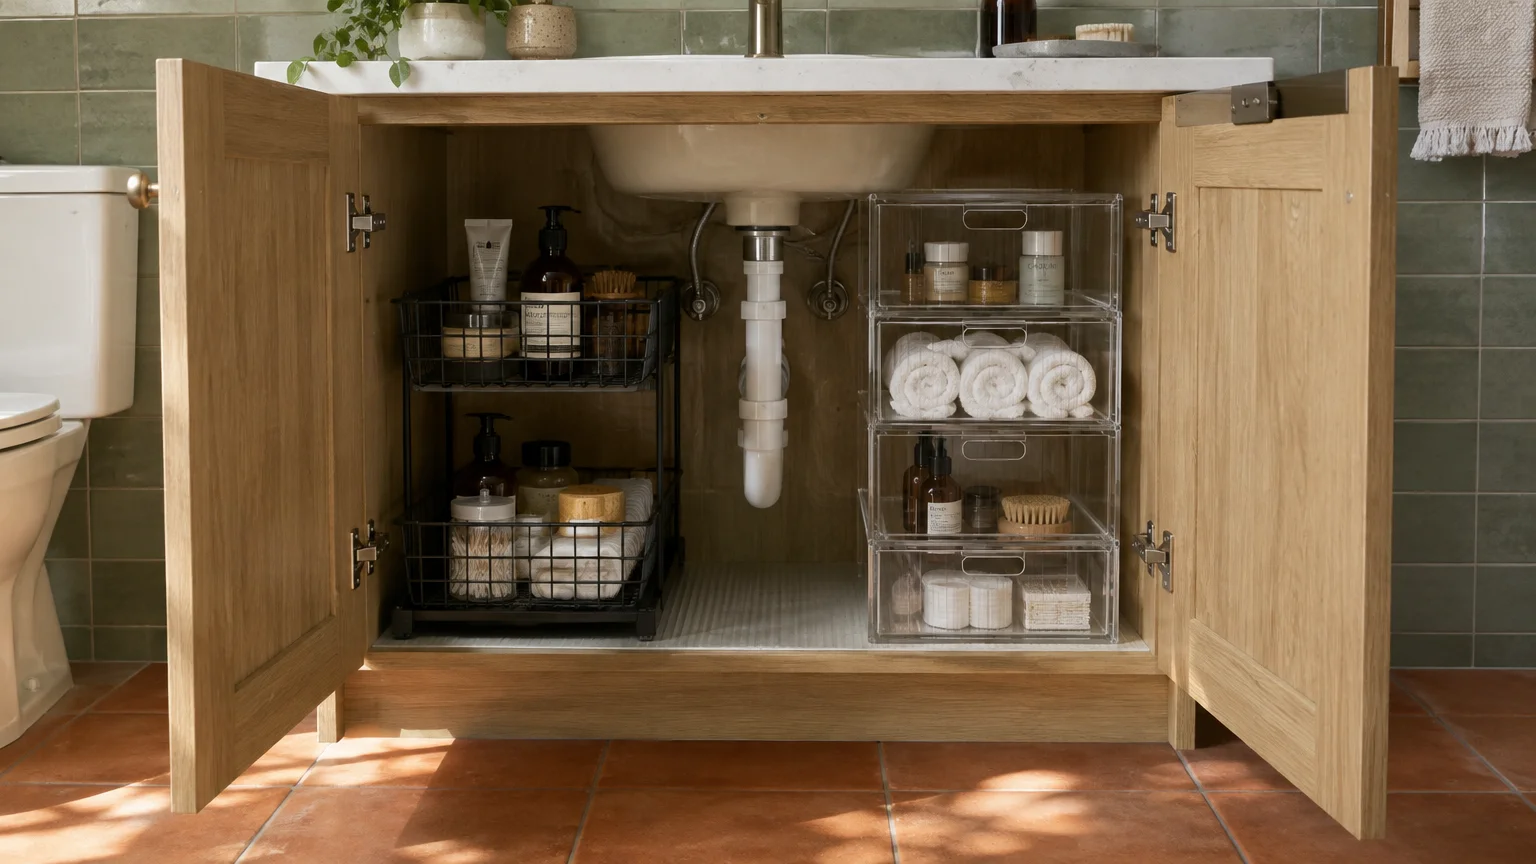
A cluttered vanity steals time and creates unnecessary frustration during your morning routine. With the right small bathroom vanity organization strategies, you can transform cramped, chaotic cabinets into functional, tranquil storage zones.
Maximizing every square inch beneath your sink does not require expensive custom carpentry. Smart modular tools, vertical systems, and practical layouts restore order quickly while keeping daily essentials within easy reach.
These eight reliable bathroom organizing ideas streamline your routines, reduce physical strain from bending, and keep your small bathroom storage perfectly structured.
Measure Around Plumbing Before Buying Organizers
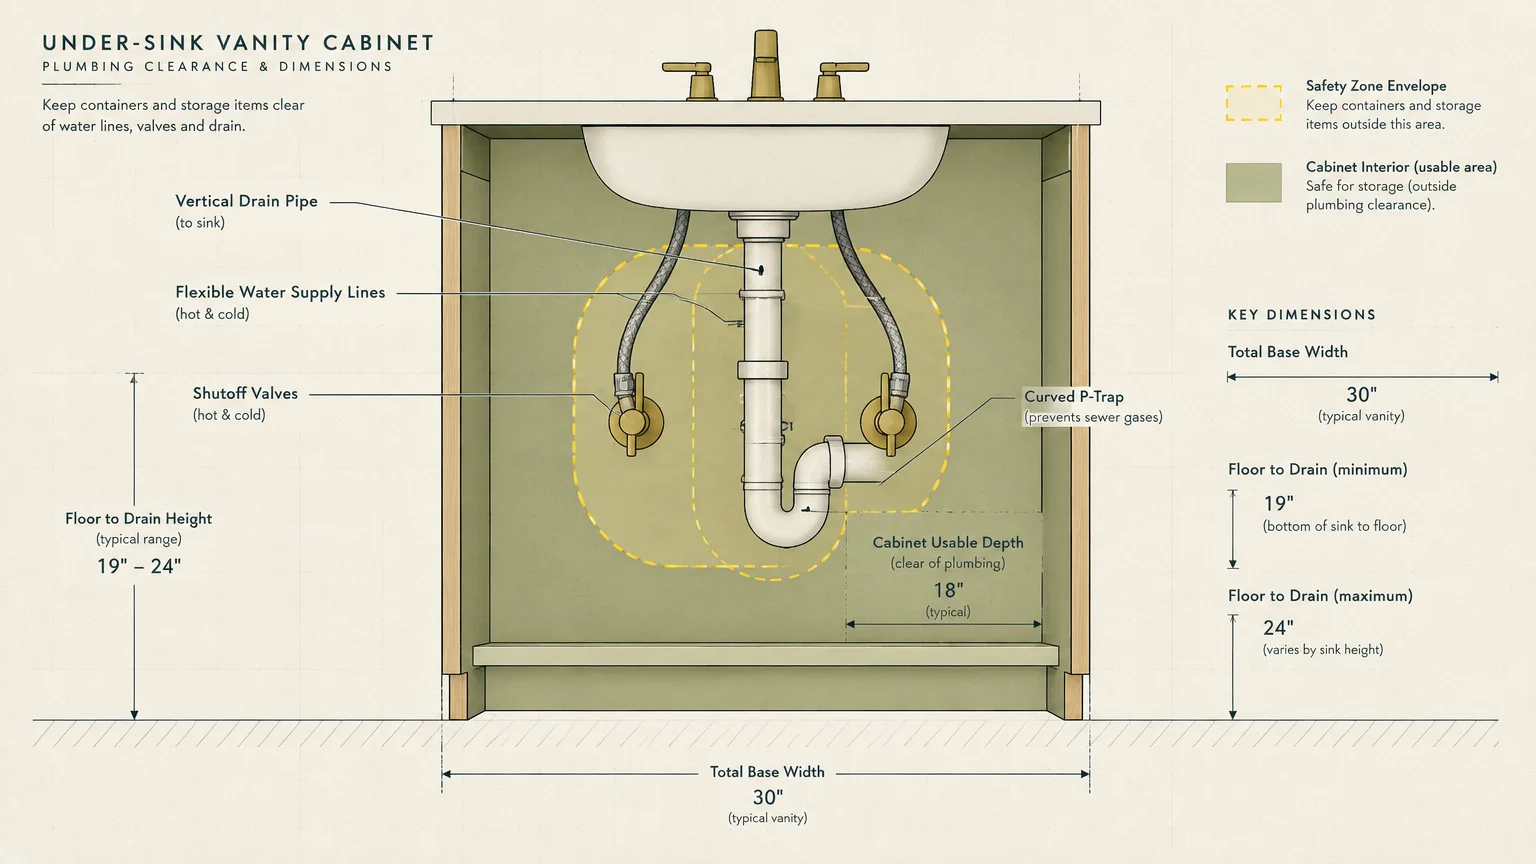
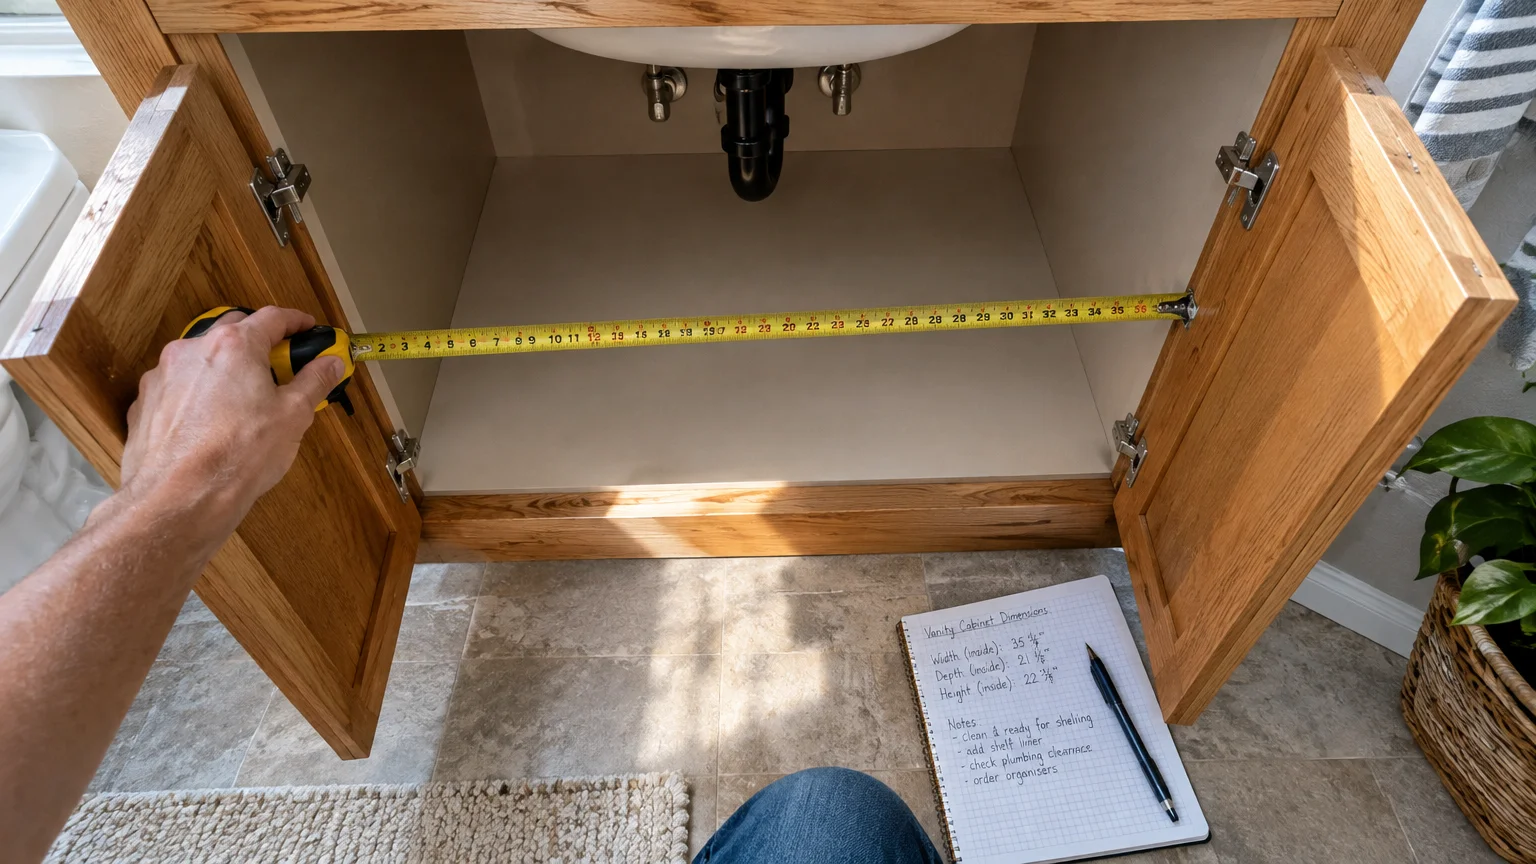
Before purchasing any bins, pull out your tape measure. Vanity interiors present unusual obstacles, including vertical drain pipes, curved P-traps, and flexible water supply lines.
Measure the width of the cabinet base and the total usable depth. Note the distance from the floor to the lowest part of your drain assembly.
Record the location of the water shutoff valves along the back wall. Containers must never press firmly against delicate plumbing fixtures or bend flexible braided lines.
Empty the cabinet completely and sort every single item into clear categories. Toss expired cosmetics, dried lotions, and depleted bottles into the trash.
Relocate prescription medications to a cool, dry area outside the bathroom. The steam and fluctuating humidity from showers degrade active drug ingredients quickly, as outlined in MedlinePlus guidelines on medicine storage.
01 Stackable Clear Acrylic Drawers
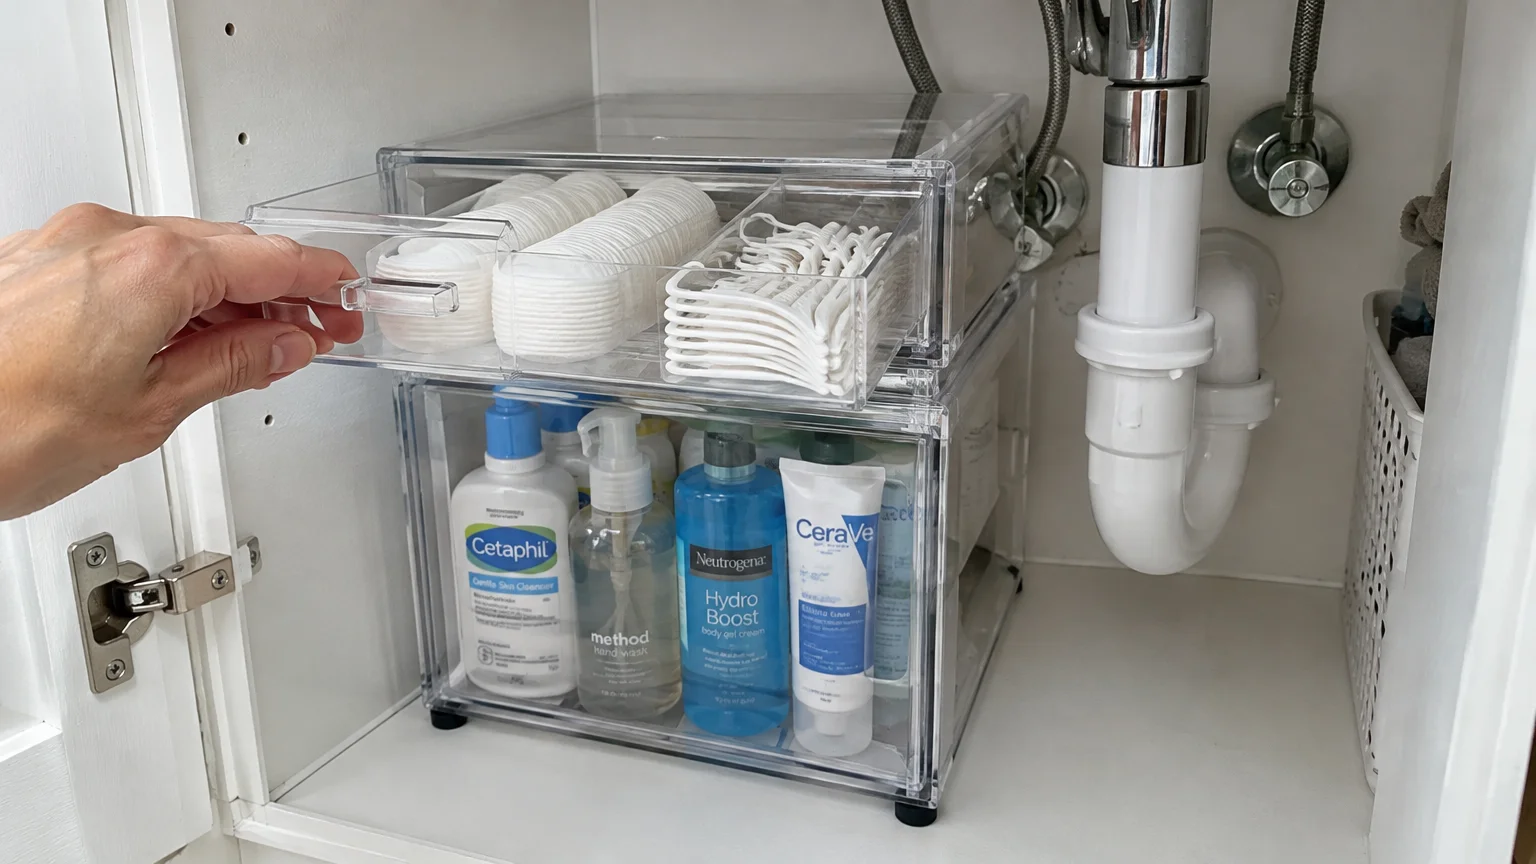
Vertical space inside a small vanity often goes completely wasted. Stackable acrylic drawers utilize that open headroom while creating distinct categories for daily essentials.
Transparent containers let you view your inventory at a single glance. You will never purchase duplicate bottles of shampoo simply because one was hidden in the shadows.
Place heavier items like extra soaps and lotions in the bottom drawer. Reserve upper pull-out compartments for lighter items such as cotton rounds and dental floss.
Look for modular units equipped with rubber non-slip feet on the base. These feet prevent the entire unit from sliding backward when you pull a drawer open.
Because drawers slide forward smoothly, you avoid reaching into dark corners. This gentle glide eliminates unnecessary strain on aging wrists, shoulders, and lower backs.
02 Two-Tier Sliding Wire Baskets with Tracks
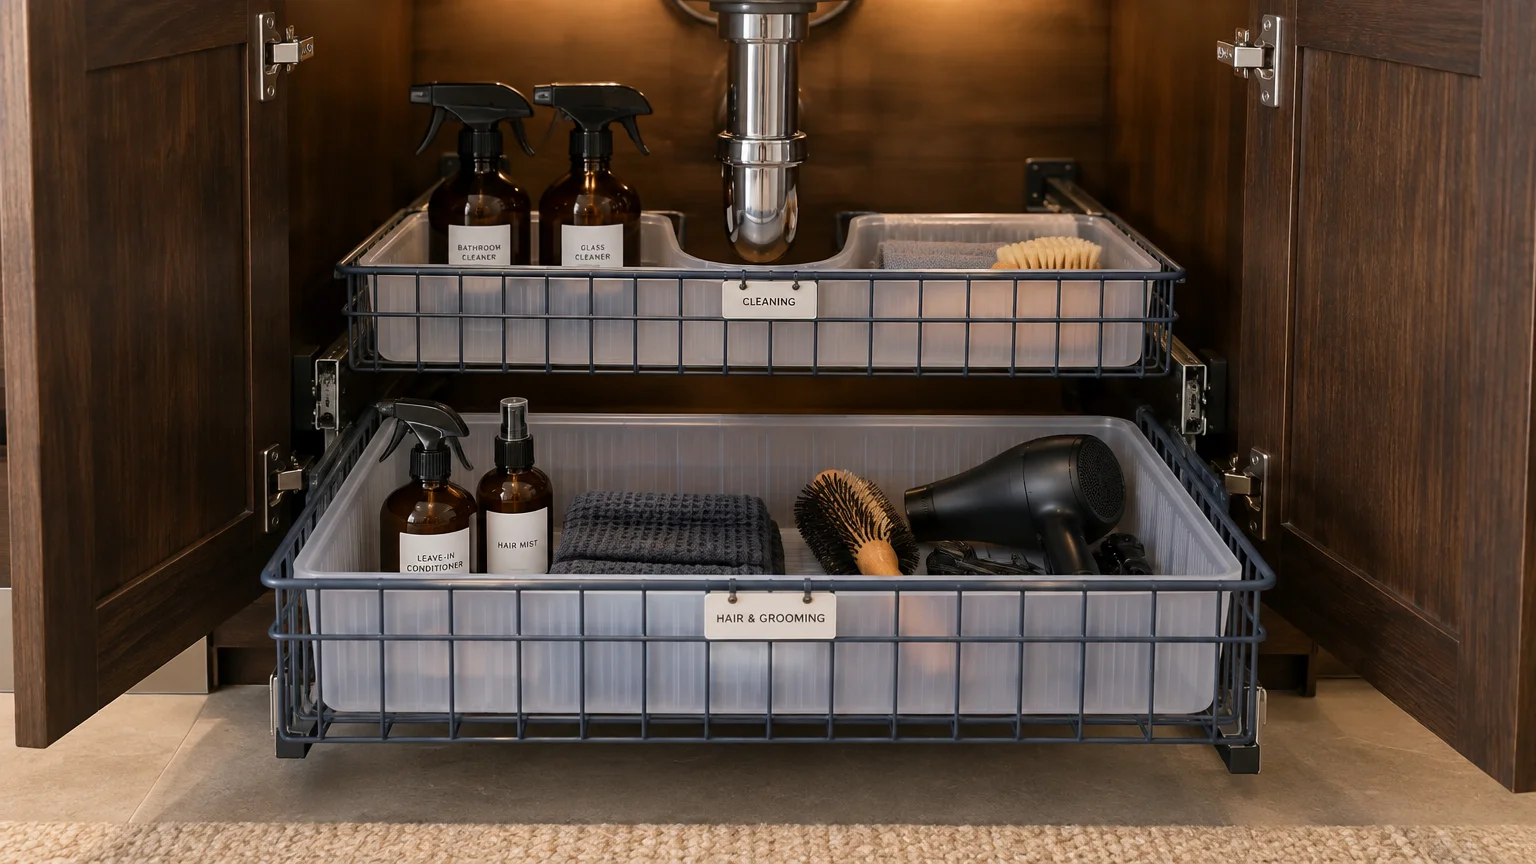
Deep cabinets encourage clutter because items get pushed out of sight. A two-tier sliding basket system brings the back of the cabinet straight out to you.
Mounting sliding tracks to the cabinet floor anchors the entire structure securely. The baskets roll outward on ball-bearing glides, even when loaded with heavy cleaning products.
Choose an asymmetrical unit that features a narrow top basket and a wider bottom basket. This configuration leaves ample clearance for the center drain pipe and sink basin.
Line the wire mesh bottoms with wipeable plastic shelf liners. Liners prevent small makeup tubes or hair clips from tipping over and slipping through the metal gaps.
Label the front of each basket with bold, waterproof tags. Clear categorization helps family members return supplies to their proper positions every single day.
03 Expandable Under-Sink Shelving Units
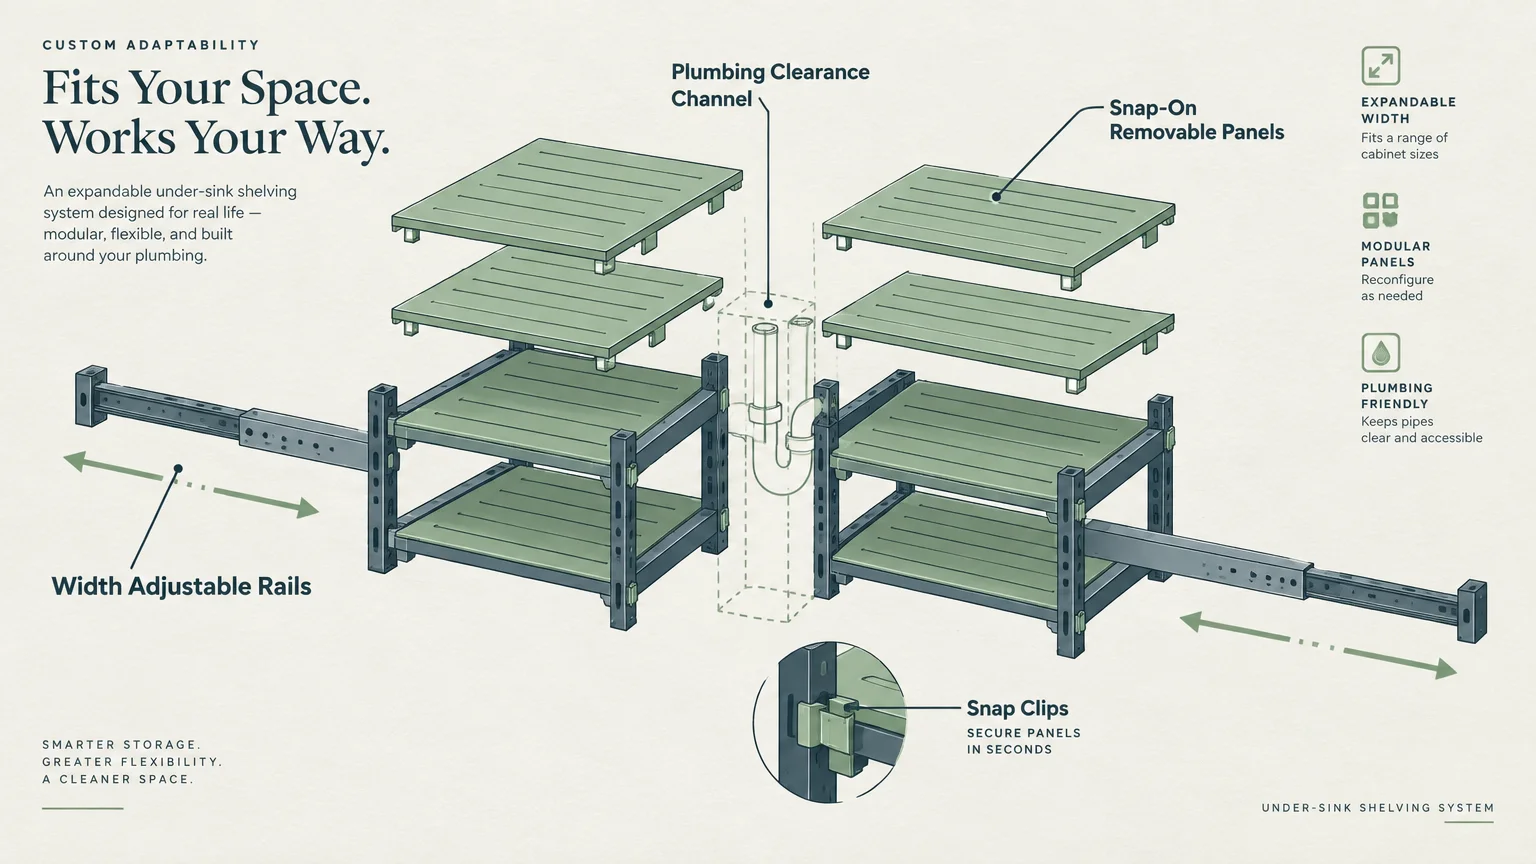
Rigid shelves rarely fit the awkward contours of under-sink storage. Expandable shelving systems solve this challenge by adapting directly to your cabinet’s unique interior dimensions.
These units feature adjustable horizontal rails that expand to span your cabinet width. Removable snap-on shelf panels fit neatly around descending drain pipes.
Configure the panels to leave open slots wherever pipes drop through. You gain stable, continuous shelf levels on both sides of the central plumbing.
Position the lower shelf high enough to store tall bottles of cleaner below. Use the upper shelf for spare hand towels, tissue boxes, or travel bags.
Wipe down the plastic or coated metal shelves with a damp microfiber cloth monthly. These resilient materials resist bathroom moisture and wipe clean in seconds.
04 Over-the-Cabinet-Door Caddies and Hooks
The inside of your vanity door offers valuable, untapped real estate. Hanging organizers move bulky daily tools completely off precious interior shelves.
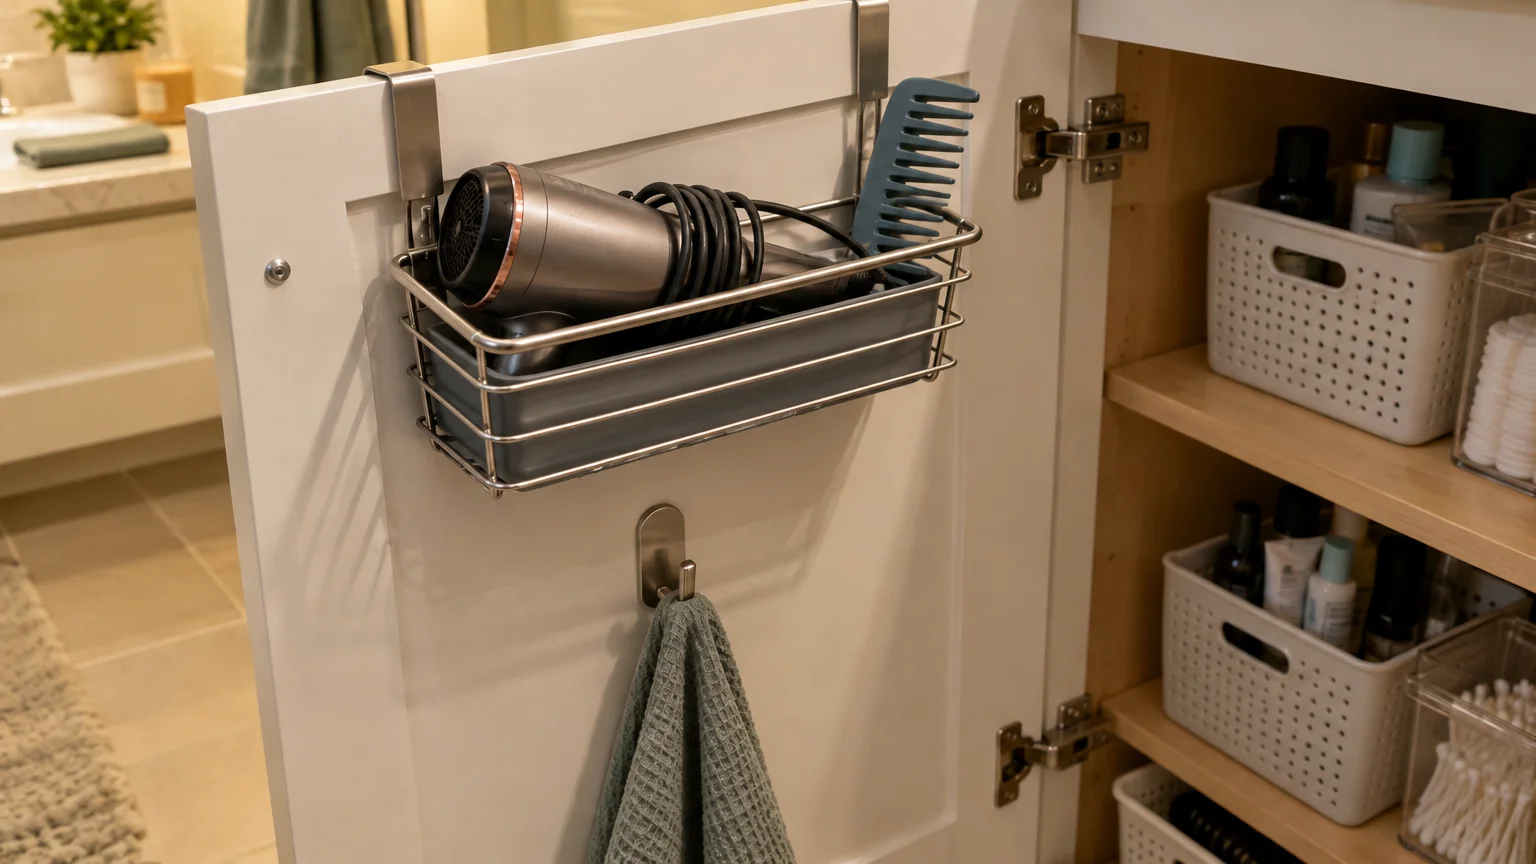
Install padded, over-the-door metal caddies to hold hair dryers, curling wands, and styling brushes. Look for heat-resistant steel spirals that safely cradle warm styling tools.
Check door clearances carefully before loading heavy items onto door racks. Ensure the caddy does not collide with interior pull-out drawers or plumbing pipes when closed.
If you prefer a cleaner exterior appearance, mount adhesive caddies directly to the door interior. Sturdy adhesive strips avoid the visible metal brackets that sit atop door frames.
Add small adhesive hooks near the bottom of the door for washcloths or cleaning towels. Hanging these items keeps them dry and prevents sour damp odors.

05 Turntables and Lazy Susans for Deep Corners
Cramped corners in a small bathroom vanity often become neglected graveyards for half-empty bottles. A compact turntable brings those hidden supplies into clear view with a simple spin.
Choose a lazy Susan with high side walls measuring two to three inches tall. Elevated walls keep tall pump bottles from tipping over during rotation.
Place daily facial cleansers, toners, and moisturizers on the perimeter of the turntable. Rotating the tray brings your morning skincare products right to your fingertips without knocking items down.
Single-tier turntables work best beneath shallow sink basins. If your vanity has taller vertical clearance, select a tiered two-level turntable for double the capacity.
Ensure the turntable features smooth ball bearings built from stainless steel. High-quality bearings resist the steam and moisture common in compact bathroom environments.
06 Tension Rods for Suspended Storage
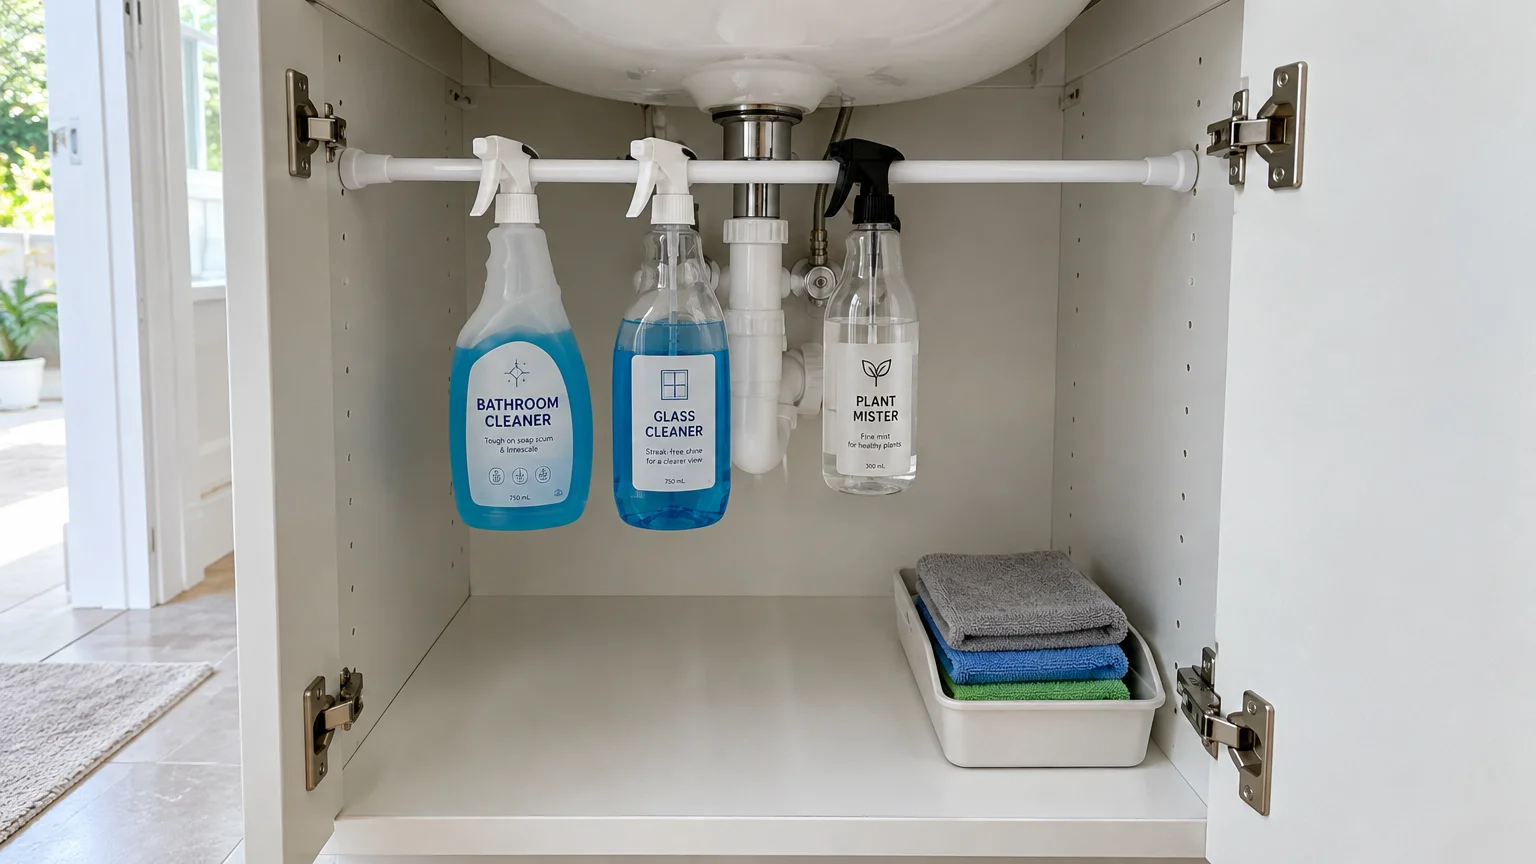
Floor space inside a compact vanity fills up rapidly. Installing a sturdy, adjustable tension rod beneath the sink creates an ingenious second layer of suspended storage.
Twist the tension rod into place between the two interior cabinet walls. Position it across the upper third of the cabinet, directly in front of the plumbing lines.
Hang trigger spray bottles by their plastic handles directly across the rod. Suspending these bottles clears floor space for stackable boxes and heavy bulk items.
Clip lightweight S-hooks onto the rod to hang scrub brushes, cleaning gloves, and squeegees. This keeps damp cleaning tools elevated so they dry thoroughly between uses.
Always review CDC guidelines on safe cleaning practices when storing chemical cleaners. Never store bleach alongside ammonia-based products in tight, unventilated vanity cabinets.
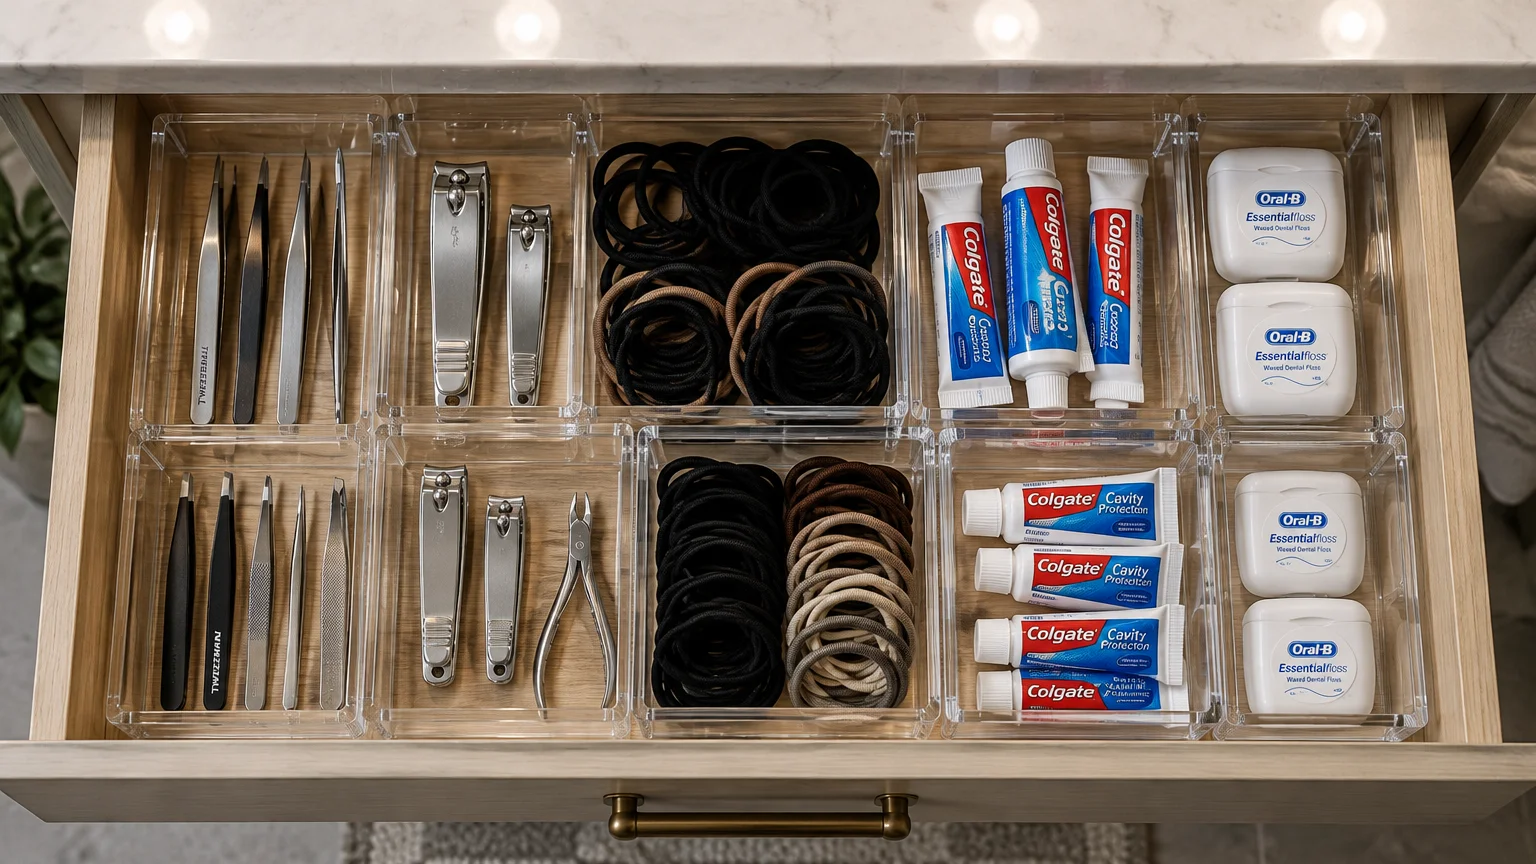
07 Micro-Organizers and Modular Drawer Dividers
If your small bathroom vanity features shallow built-in drawers, clutter accumulates quickly. Without distinct boundaries, loose lip balms, hair ties, and razor blades mix into a frustrating mess.
Measure drawer depth, width, and height before selecting modular drawer organizers. Individual plastic trays with straight sides fit together tightly without wasting perimeter space.
Assign each drawer tray a specific, non-negotiable household function. Dedicate one section to oral care, another to shaving gear, and another to daily grooming tools.
Use expandable spring-loaded dividers for deeper vanity drawers. These dividers separate rolled washcloths, hairbrushes, and spare soap bars into orderly vertical rows.
Place non-slip silicone pads beneath each tray to keep inserts steady. The trays will remain stationary whenever you pull the drawer open firmly.
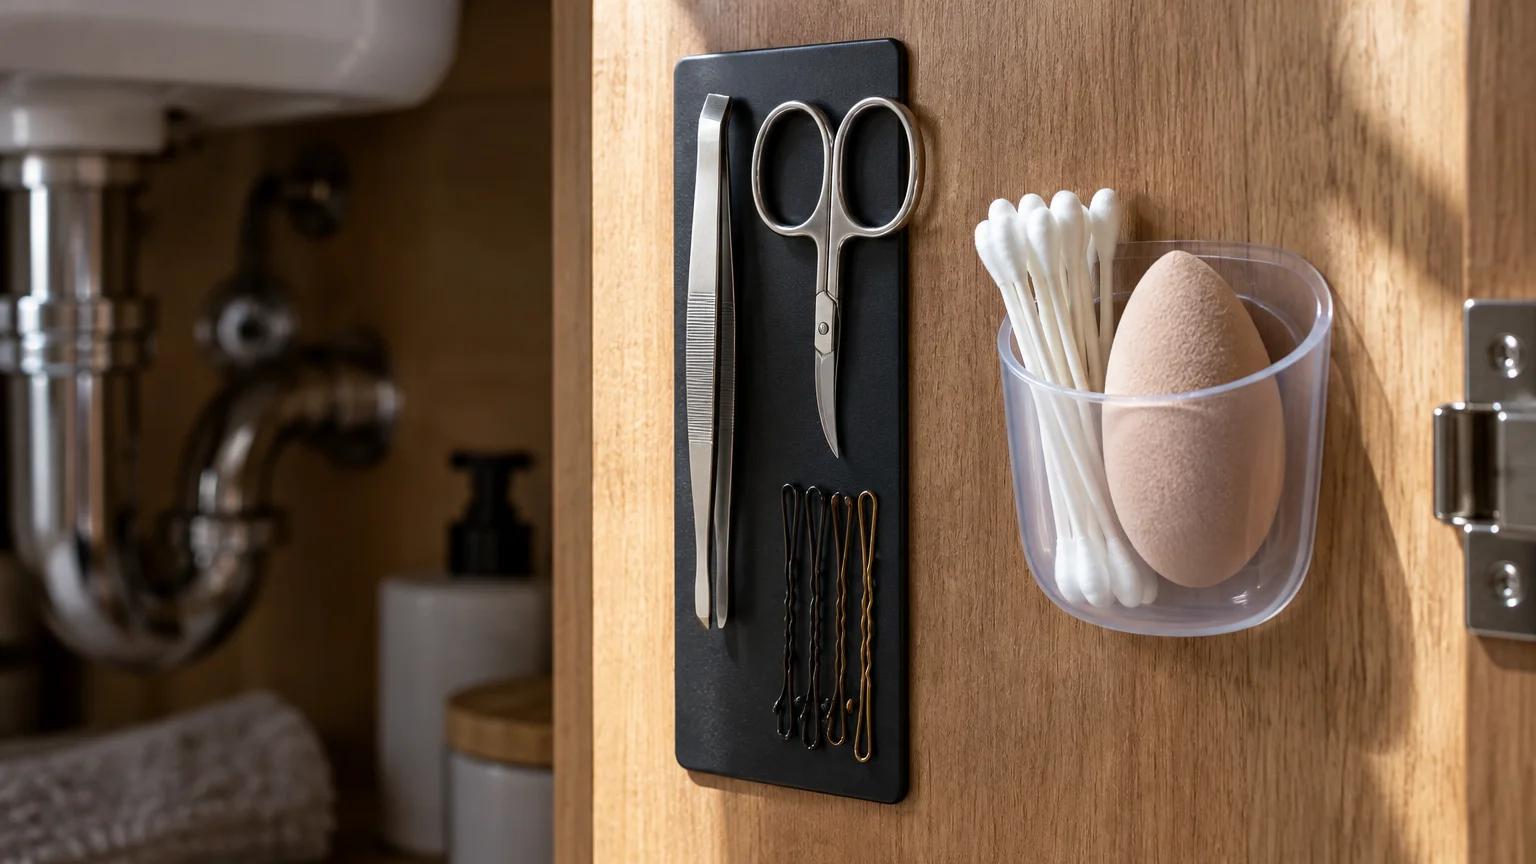
08 Adhesive Wall Pods and Magnetic Tool Strips
Interior vanity walls provide smooth, sturdy surfaces for supplemental storage. Installing lightweight containers directly on these walls preserves every inch of flat shelf space.
Mount a strong magnetic strip on the interior sidewall of the cabinet. Use this strip to hold metal tweezers, nail clippers, bobby pins, and grooming scissors.
Magnetic strips keep sharp implements visible and elevated. This keeps your fingers safe from accidental cuts when reaching into drawers.
Adhere narrow plastic bins or silicone pockets next to the magnetic strip. These pods hold makeup brushes, electric toothbrush heads, or tubes of toothpaste upright.
Clean the interior cabinet wall with rubbing alcohol before applying adhesive backing. A clean, degreased surface ensures the organizer adheres permanently without peeling loose.
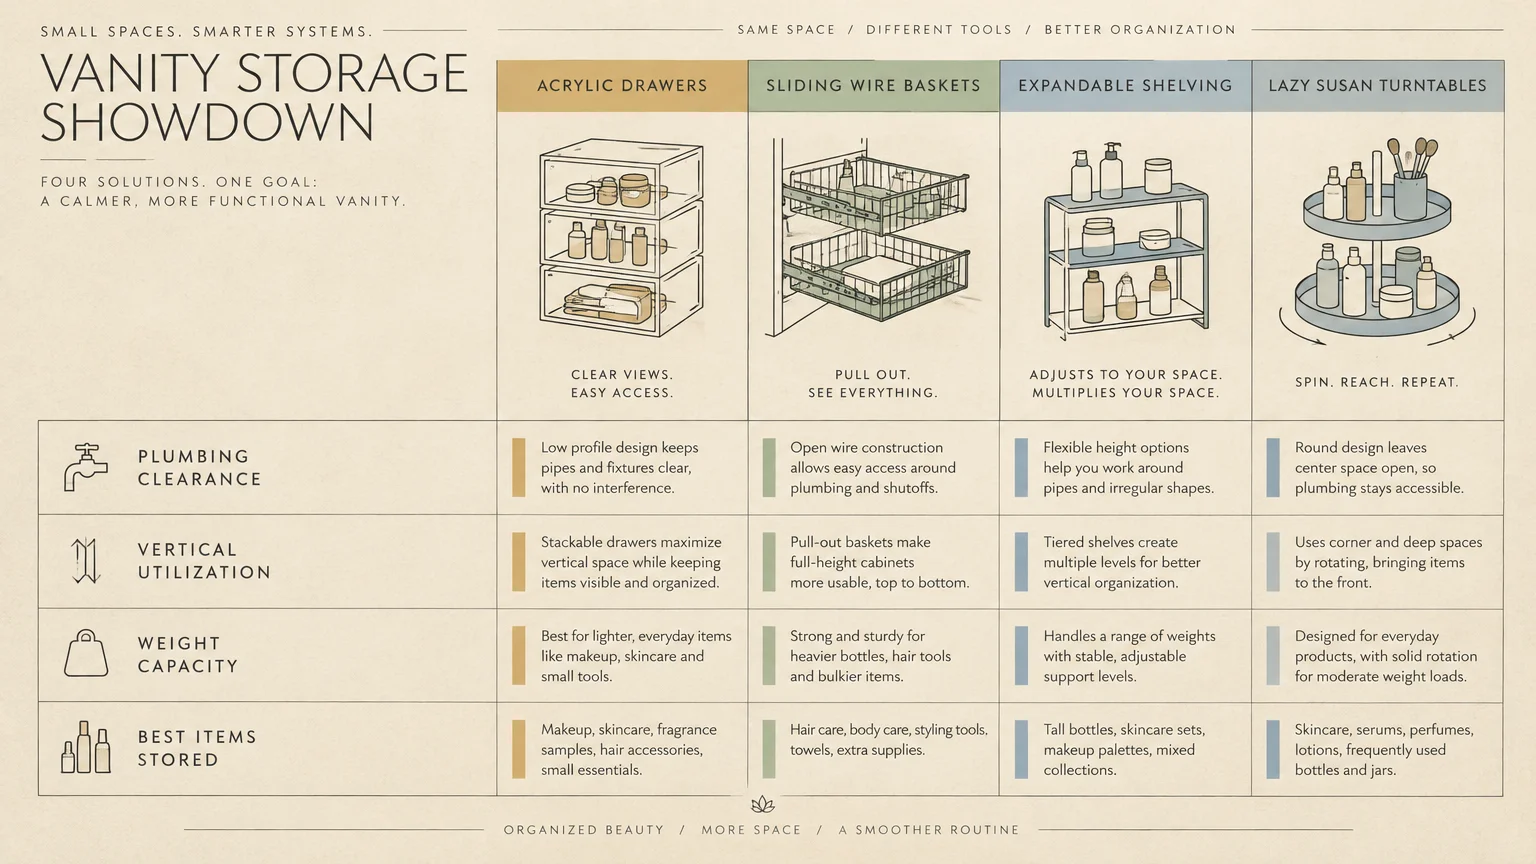
Small Bathroom Vanity Storage Solutions Compared
Selecting the right organizing tools depends entirely on your specific cabinet layout, physical reach, and daily household items. Use this handy reference table to choose the best options for your space.
| Storage System | Ideal Items | Key Measurement | Primary Benefit |
|---|---|---|---|
| Clear Acrylic Drawers | Cosmetics, cotton swabs, spare soaps | Vertical floor-to-pipe height | Prevents forgotten inventory; easy gliding |
| Two-Tier Sliding Baskets | Heavy shampoo bottles, lotion tubs | Cabinet depth and doorway clearance | Brings deep items forward without deep bending |
| Expandable Under-Sink Racks | Towels, paper goods, bulk containers | Total interior cabinet width | Navigates awkward P-traps and water valves |
| Over-the-Door Caddies | Hair dryers, flat irons, hairbrushes | Door swing depth and frame thickness | Reclaims vertical dead space instantly |
| High-Lip Turntables | Skincare bottles, pump dispensers | Corner diagonal turning radius | Smooth 360-degree item access |
| Tension Rods | Trigger sprays, rubber gloves | Side-to-side interior wall width | Frees the cabinet floor beneath bottles |
| Modular Drawer Trays | Dental floss, tweezers, lip balm | Interior drawer height and depth | Eliminates frustrating morning drawer clutter |
| Wall Pods & Magnetic Strips | Grooming tools, makeup brushes | Cabinet wall clearance when door shuts | Keeps sharp items elevated and secure |

Under-Sink Decluttering Action Plan
Tackling your small bathroom vanity storage becomes simple when you follow an orderly sequence. Work through these step-by-step phases to build an organized setup that lasts.
- Stage 1: Complete Emptying. Remove every single product, bottle, and tool from the vanity. Wipe down the interior surfaces with a warm, soapy cloth to remove dust, hair, and dried soap spills.
- Stage 2: Strict Sorting. Group your items by category on the bathroom counter or floor. Immediately discard expired lotions, separated sunscreens, empty bottles, and broken styling accessories.
- Stage 3: Safety Inspection. Inspect pipe joints and shutoff valves for slow drips, corrosion, or water stains. Address plumbing issues before installing new organizers to prevent water damage.
- Stage 4: Measurement and Planning. Measure interior height, width, and pipe clearance. Sketch a quick diagram showing where vertical drawers, turntables, or door racks will sit comfortably.
- Stage 5: Installation and Containment. Place larger units into the cabinet first, followed by hanging caddies. Fill containers using the eighty-twenty rule—leave twenty percent of each bin empty for future supplies.

Safe and Healthy Vanity Storage Practices
Safety must remain a top priority when organizing any enclosed cabinet containing household chemicals and personal grooming tools. Proper storage prevents accidental chemical exposures and keeps household members safe.
Always keep toxic bathroom cleaners out of reach if young grandchildren or curious pets visit your home. Install simple childproof magnetic latches on vanity doors to secure hazardous supplies.
Review the National Poison Control guidance for safe chemical storage protocols. Keep all cleaning supplies in their original labeled containers rather than pouring them into unmarked dispensers.
Avoid storing extra rolls of toilet paper or soft washcloths directly on the cabinet floor. An unexpected leak from a pipe joint or drain pipe can ruin these porous supplies instantly.
Store paper goods and extra linens inside lidded plastic storage totes instead. Sealed tubs shield clean items from stray water droplets and high bathroom humidity.
Check damp sponges and cleaning cloths regularly for signs of mold or mildew. Discard sour sponges promptly and let damp cloths air dry completely outside the cabinet before storage.

How to Maintain Your Vanity Without Extra Stress
An organized vanity only remains functional if your daily system is easy to maintain. Elaborate storage routines often fail because they require too much time during busy mornings.
Adopt a quick thirty-second reset routine at the end of each evening. Return your facial cleanser, hairbrush, and toothpaste to their designated caddies before turning off the light.
Keep a small, clear wastebasket right beside your vanity cabinet. Having immediate access to a trash can prevents empty boxes and spent cotton swabs from lingering inside drawers.
Audit your vanity supplies once every season. Spend ten minutes checking expiration dates, throwing out dried samples, and recycling empty shampoo bottles.
Avoid buying warehouse-club bulk packages unless you have dedicated secondary storage elsewhere. Storing twelve bottles of body wash inside a small bathroom vanity will overwhelm even the smartest organizing system.
Limit your vanity inventory strictly to items you use at least once per week. Infrequently used heating pads, first-aid kits, and seasonal sunscreens belong in a hallway linen closet.
Your Next Practical Step
Open your vanity cabinet today with a trash bag in hand and throw away five expired, empty, or unused bottles. Clearing that small pocket of dead weight gives you immediate momentum to implement these practical storage ideas.