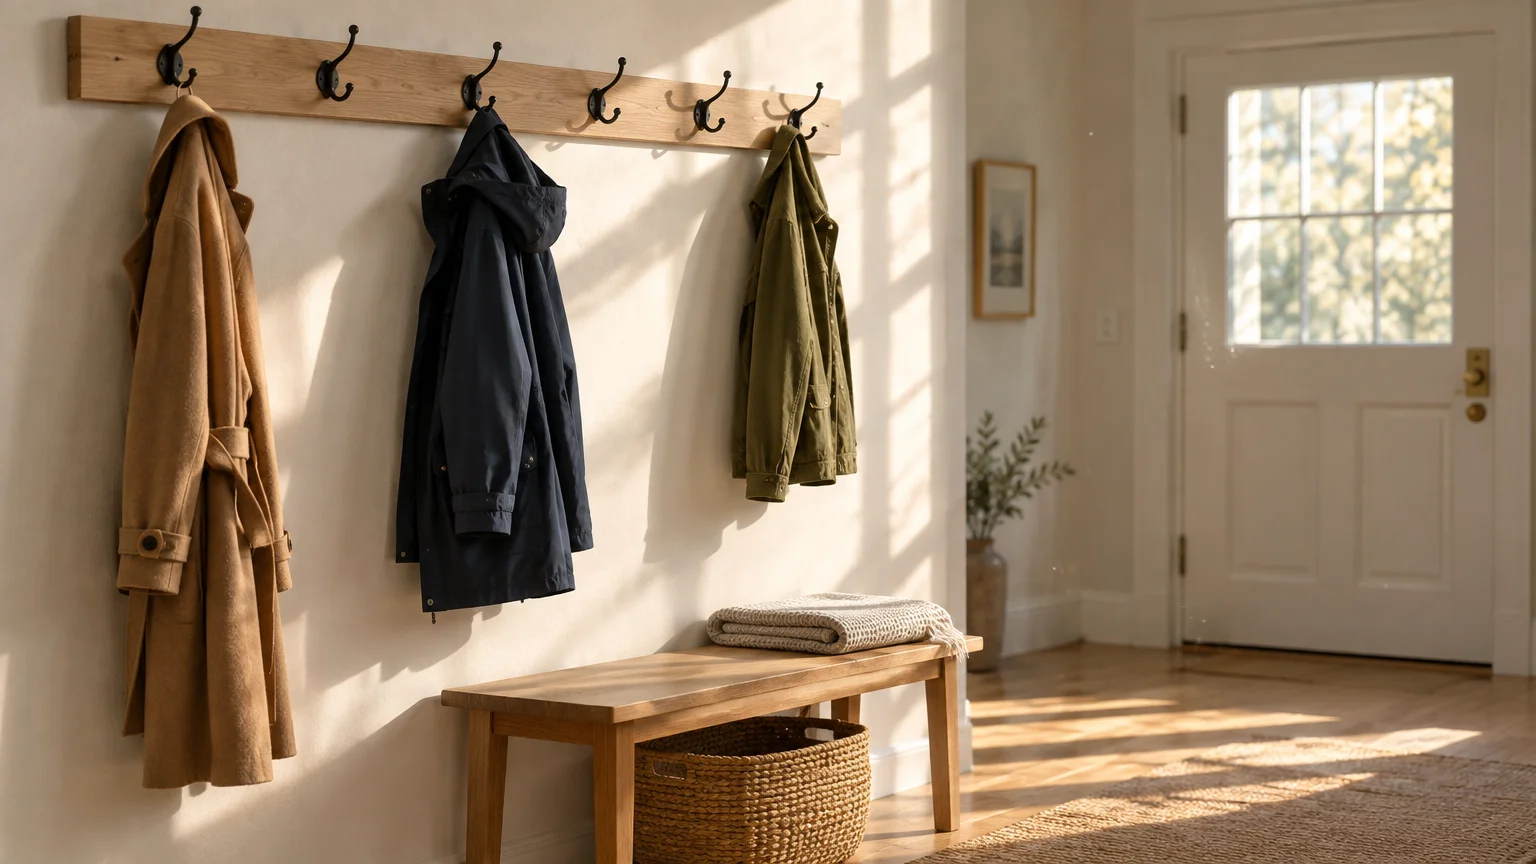
An overflowing coat rack creates instant visual chaos and turns your morning rush into a frustrating treasure hunt. You can restore immediate calm by establishing strict hanging boundaries and smarter entryway storage solutions.
Bulky winter parkas, heavy backpacks, and stray umbrellas constantly threaten to topple freestanding racks. Streamlining this high-traffic zone protects your gear, safeguards family members, and makes your front entry feel twice as spacious.
These eight practical coat rack organization strategies will eliminate clutter, prevent tip-overs, and keep your daily essentials accessible year-round.
01 Audit and Declutter Your Current Coat Pile
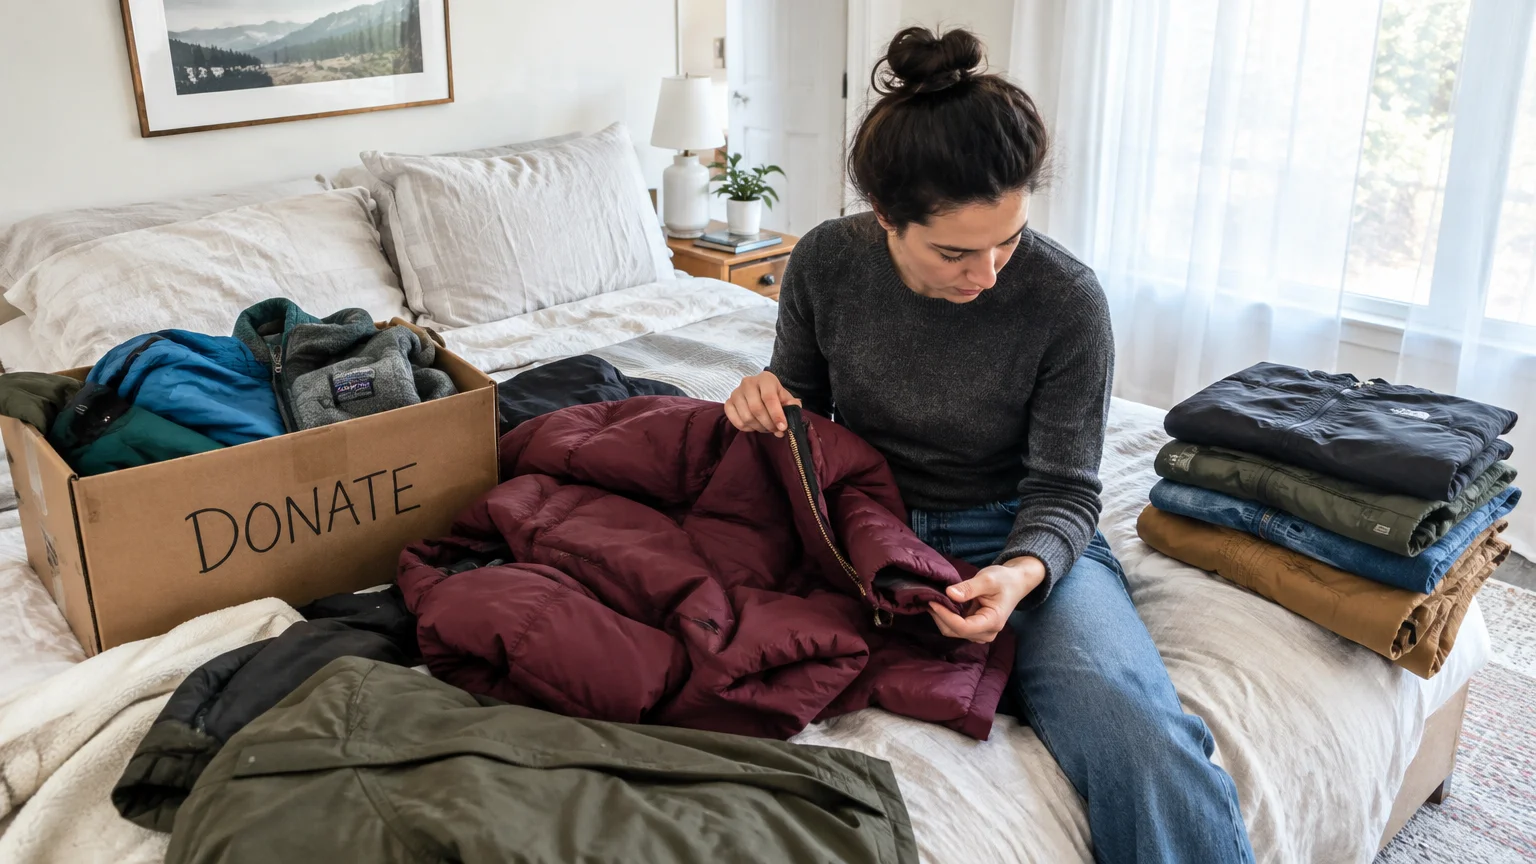
Begin by stripping every single garment and accessory off the rack. Piling everything onto a clean bed or table forces you to confront the true volume of clutter.
Inspect each piece for broken zippers, torn linings, and stubborn stains. Donate jackets that no longer fit comfortably or no longer match your personal routine.
Heavy winter parkas often linger on entryway hooks straight through mid-summer without anyone noticing. Relocate off-season garments immediately to a guest closet or an under-bed storage bin.
A rigorous declutter coat rack session instantly halves the bulk on your entryway pegs. This clean slate gives you room to build a functional, lasting system.
02 Enforce the Two-Coat Seasonal Rotation Rule
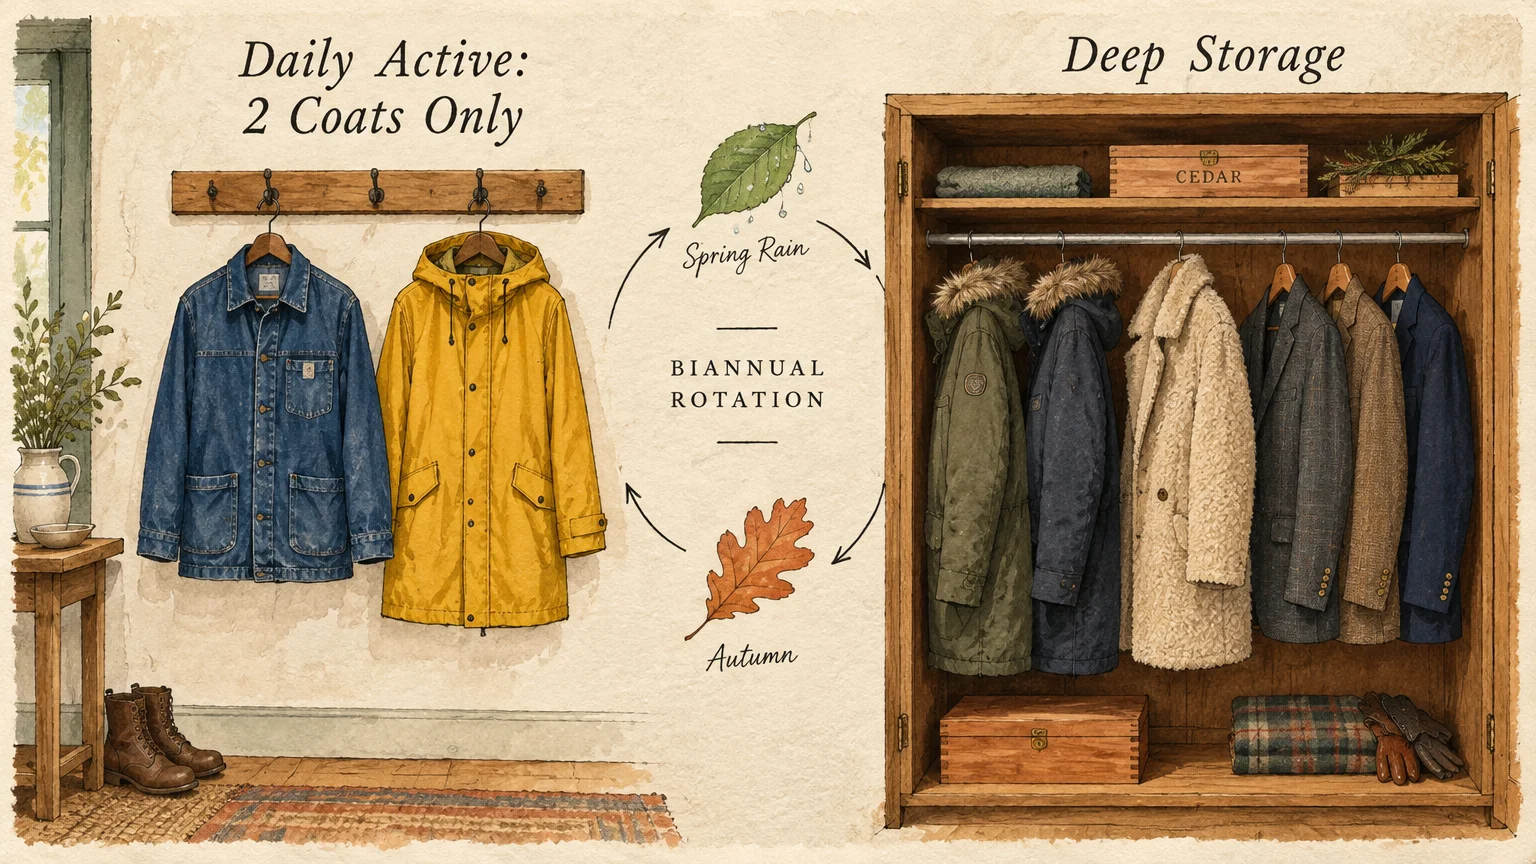
Limit each household member to exactly two active coats on the main rack. One should serve as an everyday workhorse, while the second covers heavy rain or freezing temperatures.
Specialty garments, such as formal trench coats or snow sports apparel, belong in bedroom closets. Practical coat storage tips emphasize reserving your entryway exclusively for daily staples.
Rotate your family’s outerwear selections twice each year as the seasons shift. Pack away heavy wool overcoats during spring rains, bringing lightweight windbreakers and denim jackets forward instead.
Restricting daily options prevents that dense, cascading pile that buries smaller jackets underneath bulky layers. Your hooks remain visible, accessible, and ready to welcome guests.
03 Install Tiered Wall Hooks for Multigenerational Accessibility
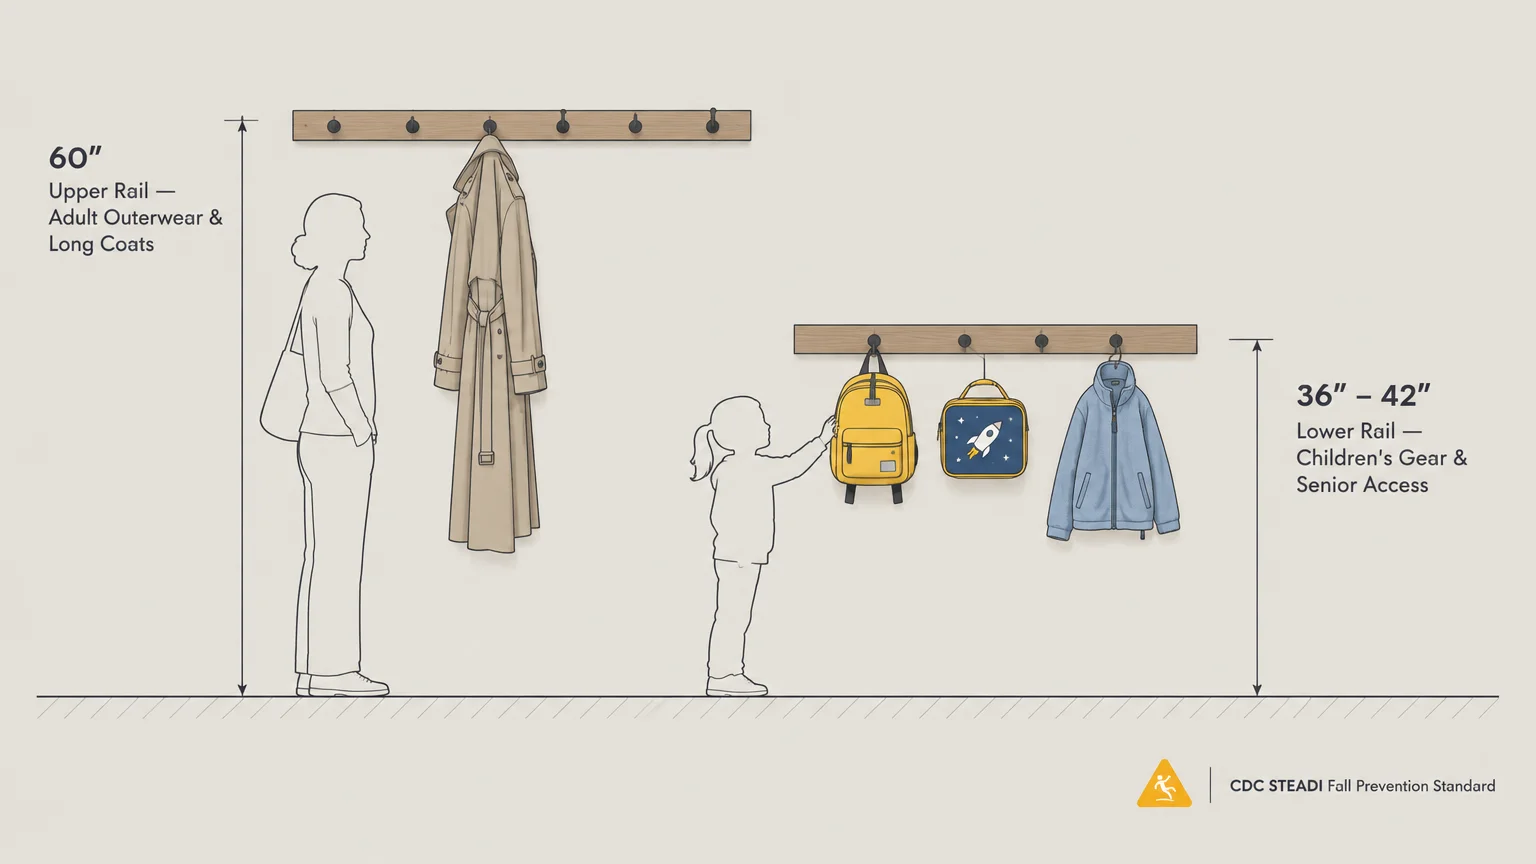
Standard coat racks mount at 60 inches from the floor, creating strain for young children and older adults. Staggering your hooks across multiple vertical tiers solves this reach problem effortlessly.
Mount an upper rail at 60 inches for long adult winter coats. Install a secondary lower rail at 36 to 42 inches for children’s jackets, lunchboxes, and lightweight tote bags.
According to the CDC STEADI fall prevention initiative, clearing clutter and eliminating awkward reaching lowers the risk of household falls. Low hooks allow seniors to hang items comfortably without straining or tilting off-balance.
Lower hooks also encourage self-sufficiency in children by providing accessible targets for their school gear. Thoughtful entryway organizing ideas must serve every generation living under your roof.
04 Balance Freestanding Racks and Secure Wall Anchors
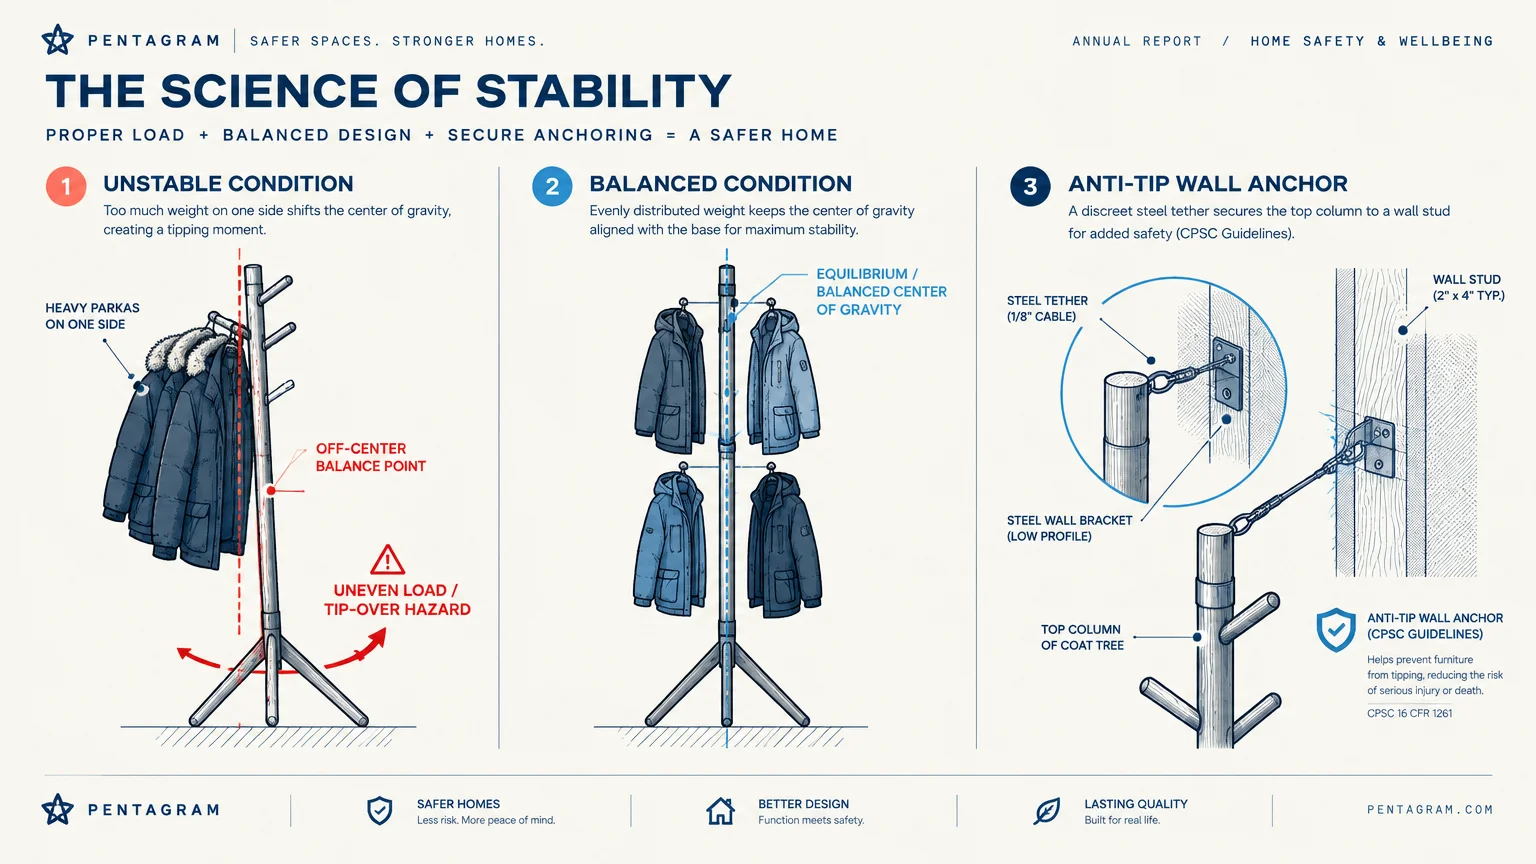
Freestanding coat trees topple easily when loaded unevenly with heavy garments. Always distribute heavy parkas across opposite hooks to maintain balanced center-of-gravity stability across the pedestal base.
If you have active pets or young grandchildren, anchor freestanding furniture directly to the wall. The U.S. Consumer Product Safety Commission Tipover Information Center highlights the critical importance of wall anchoring to prevent severe crush injuries.
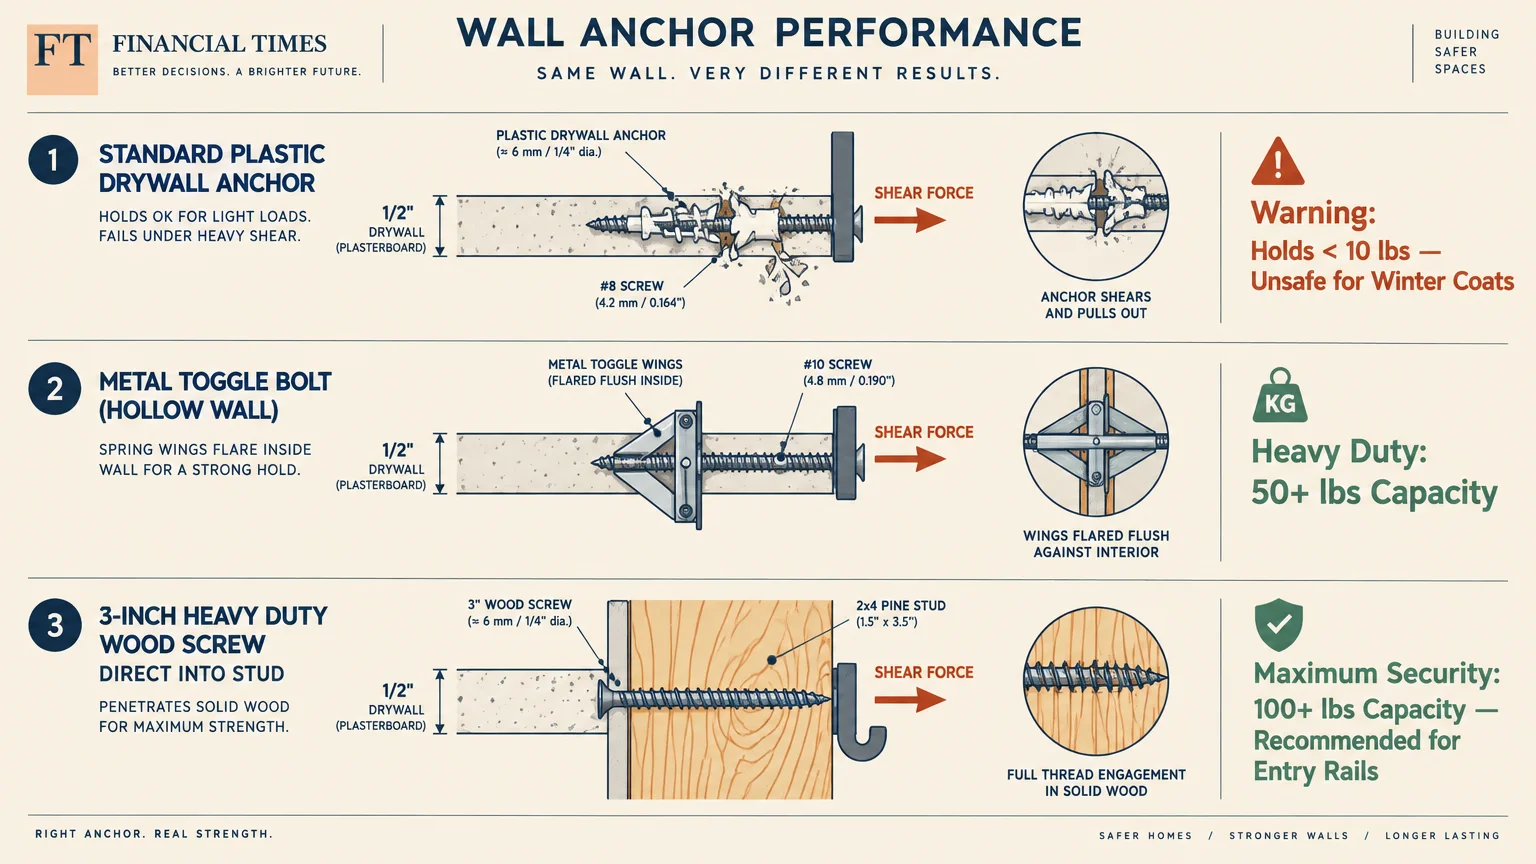
For wall-mounted coat rails, never rely solely on standard plastic drywall anchors for winter outerwear. Fasten mounting rails directly into wooden studs using two-and-a-half-inch steel wood screws.
When stud locations do not align with your entryway layout, use heavy-duty zinc toggle bolts. A single quality toggle bolt safely holds over 50 pounds of shear weight in standard drywall.
05 Offload Accessories into Dedicated Baskets and Trays
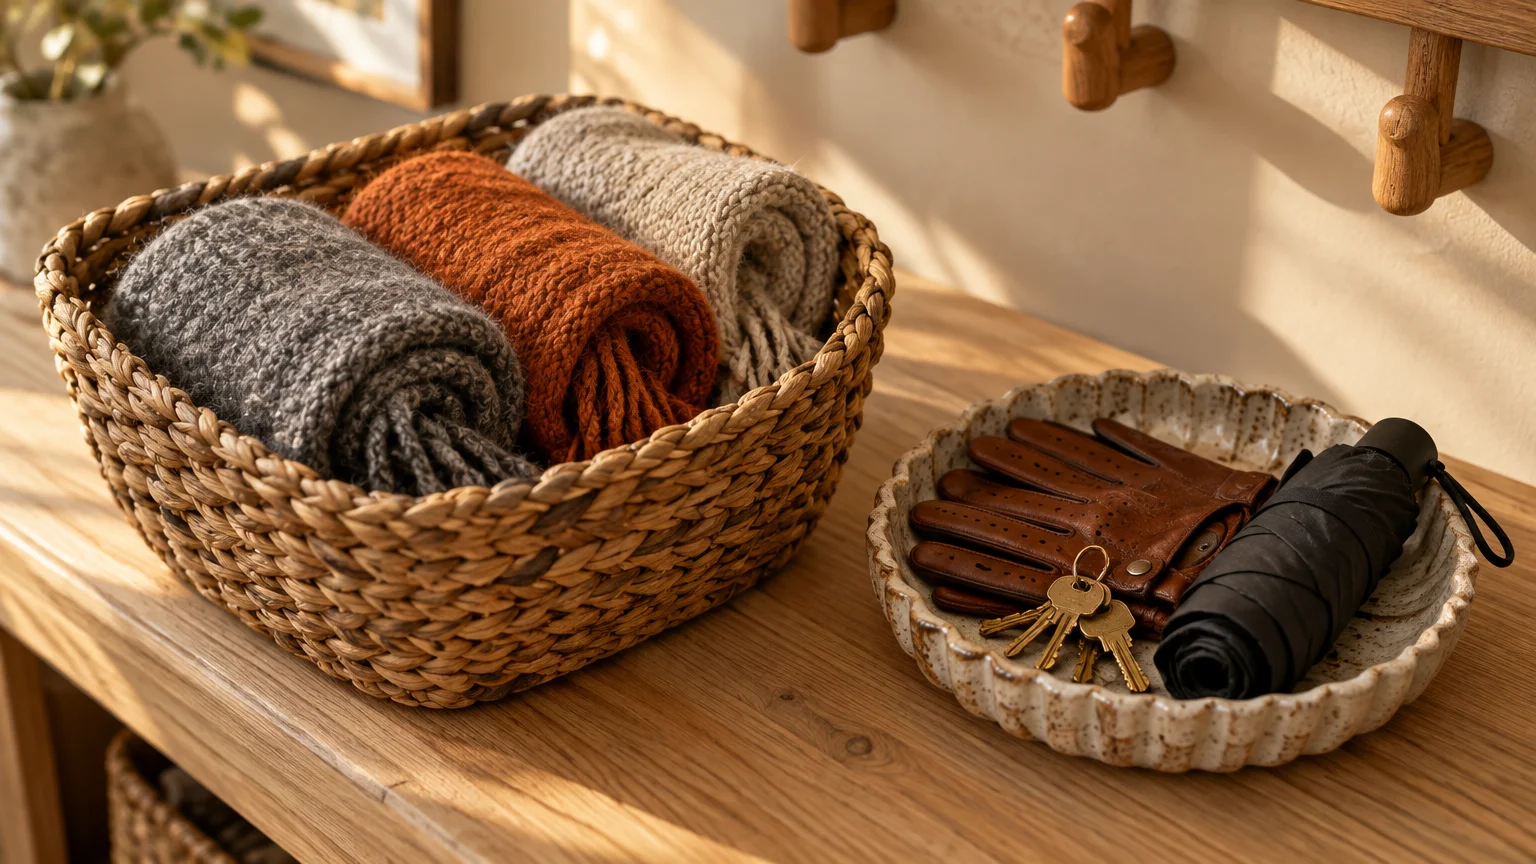
Coat racks often collapse into chaos because people drape scarves, knit beanies, dog leashes, and shopping bags over coat hooks. Garment pegs hold coats well, but they choke under bundles of floppy fabric.
Place a divided storage bench or a slender console table directly beneath your hanging rack. Position open woven baskets or cloth bins there to corral cold-weather accessories and pet essentials.
Designate one basket for hats and gloves, and keep a second bin for dog leashes and flashlights. Separating gear into dedicated bins keeps your primary hanging pegs completely unencumbered.
You will locate matching gloves in seconds instead of digging through tangled sleeves. Your entryway storage solutions should simplify routines rather than add friction to your mornings.
06 Upgrade to Double-Pronged Hooks and Ergonomic S-Hooks
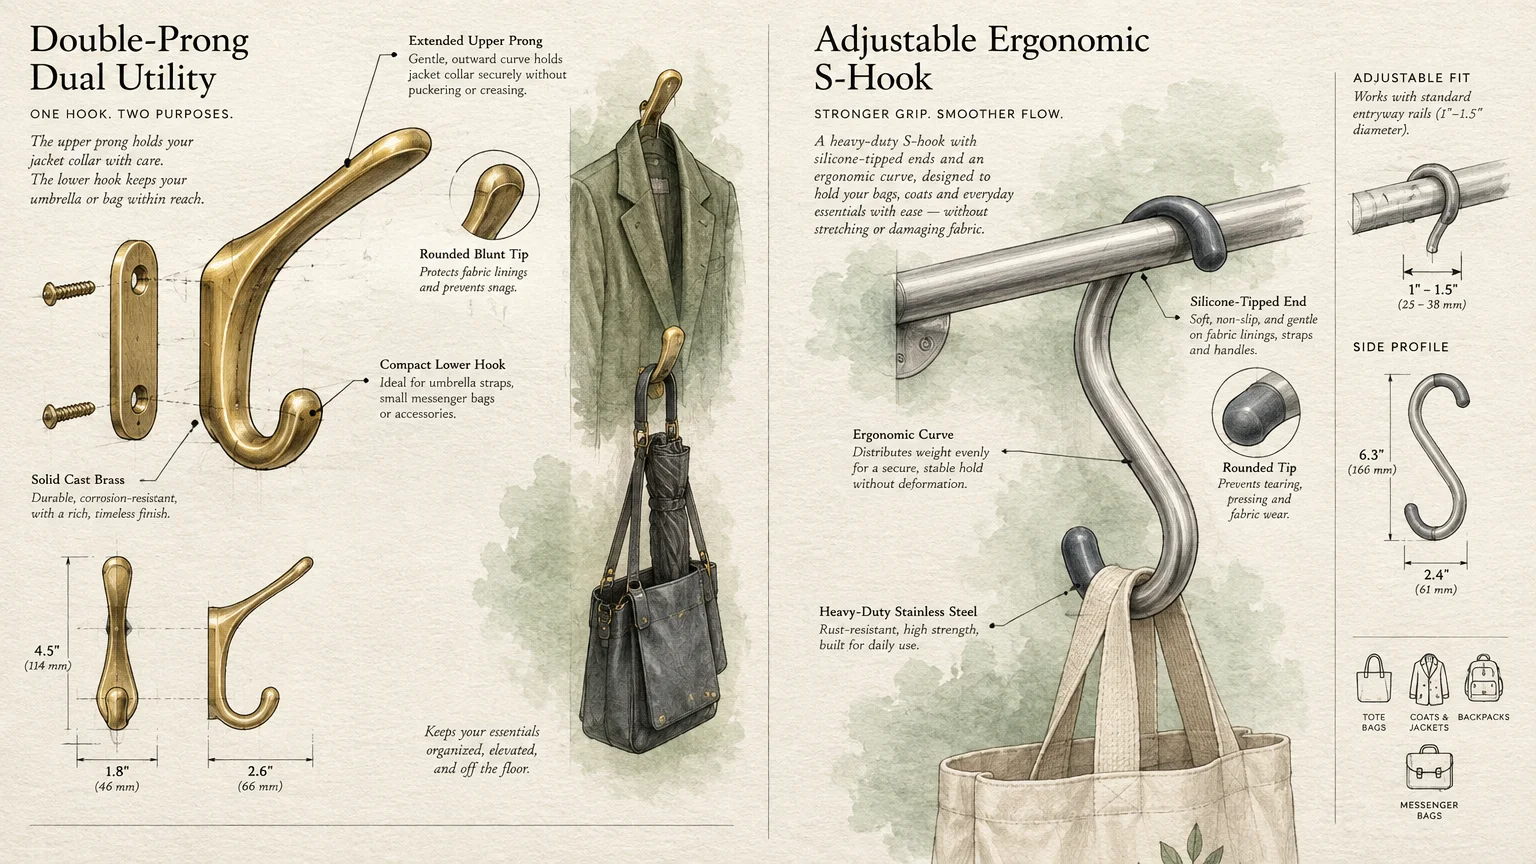
Single pegs waste vertical wall space and force you to stack multiple coats on one point. Upgrading to cast-iron double-pronged hooks instantly doubles your hanging capacity without increasing visual clutter.
Reserve the upper hook for structured outerwear, collared overcoats, and wide-brim hats. Use the lower, curved hook for tote bags, gym sacks, or compact travel umbrellas.
If your rack features a horizontal rail, add smooth stainless steel S-hooks. S-hooks slide horizontally along the rail, allowing you to space wet garments apart so damp fabrics dry thoroughly.
Choose hooks with wide, rounded tips rather than sharp, narrow edges. Broad profiles distribute fabric weight evenly, preventing unsightly neck dimples and stretched garment seams.
07 Assign Dedicated Personal Zones with Visual Labels
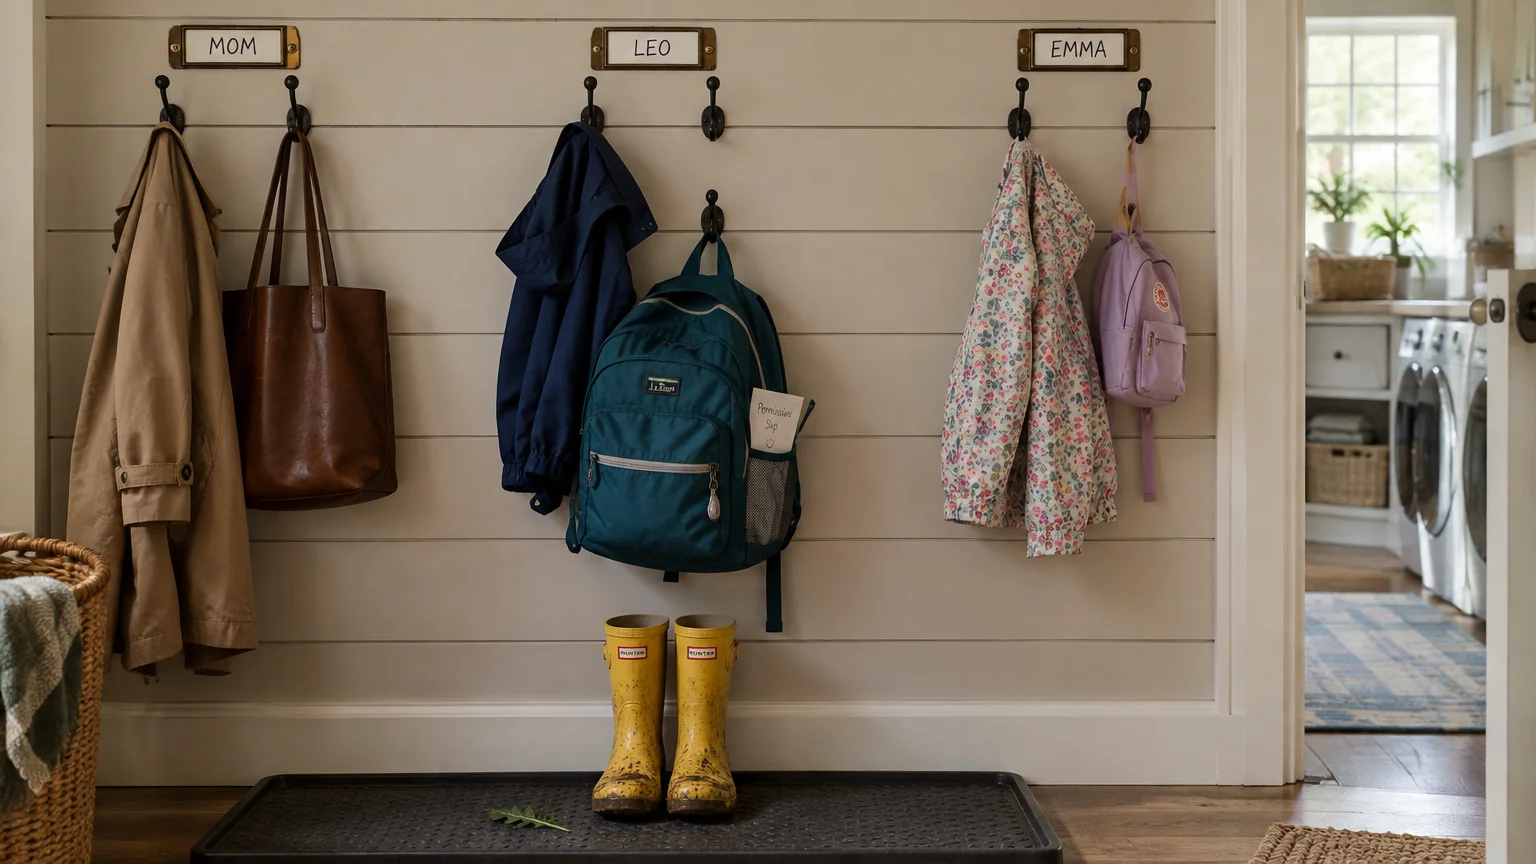
Shared hooks inevitably lead to territory creep, where the most prolific coat wearer consumes all available space. Assigning specific hooks to each family member establishes clear daily boundaries and personal accountability.
Use stamped metal label holders, engraved wooden tags, or colored ceramic pegs to mark individual zones. Visual demarcations make it obvious when someone exceeds their allotted hanging quota.
Keep at least two hooks nearest the front door permanently reserved for visiting guests. An empty hook makes visitors feel immediately welcome without forcing them to balance jackets over chair backs.
Defined personal sections eliminate frantic morning searches when multiple people leave the house at once. Everyone grabs their jacket quickly without dislodging neighboring garments onto the floor.
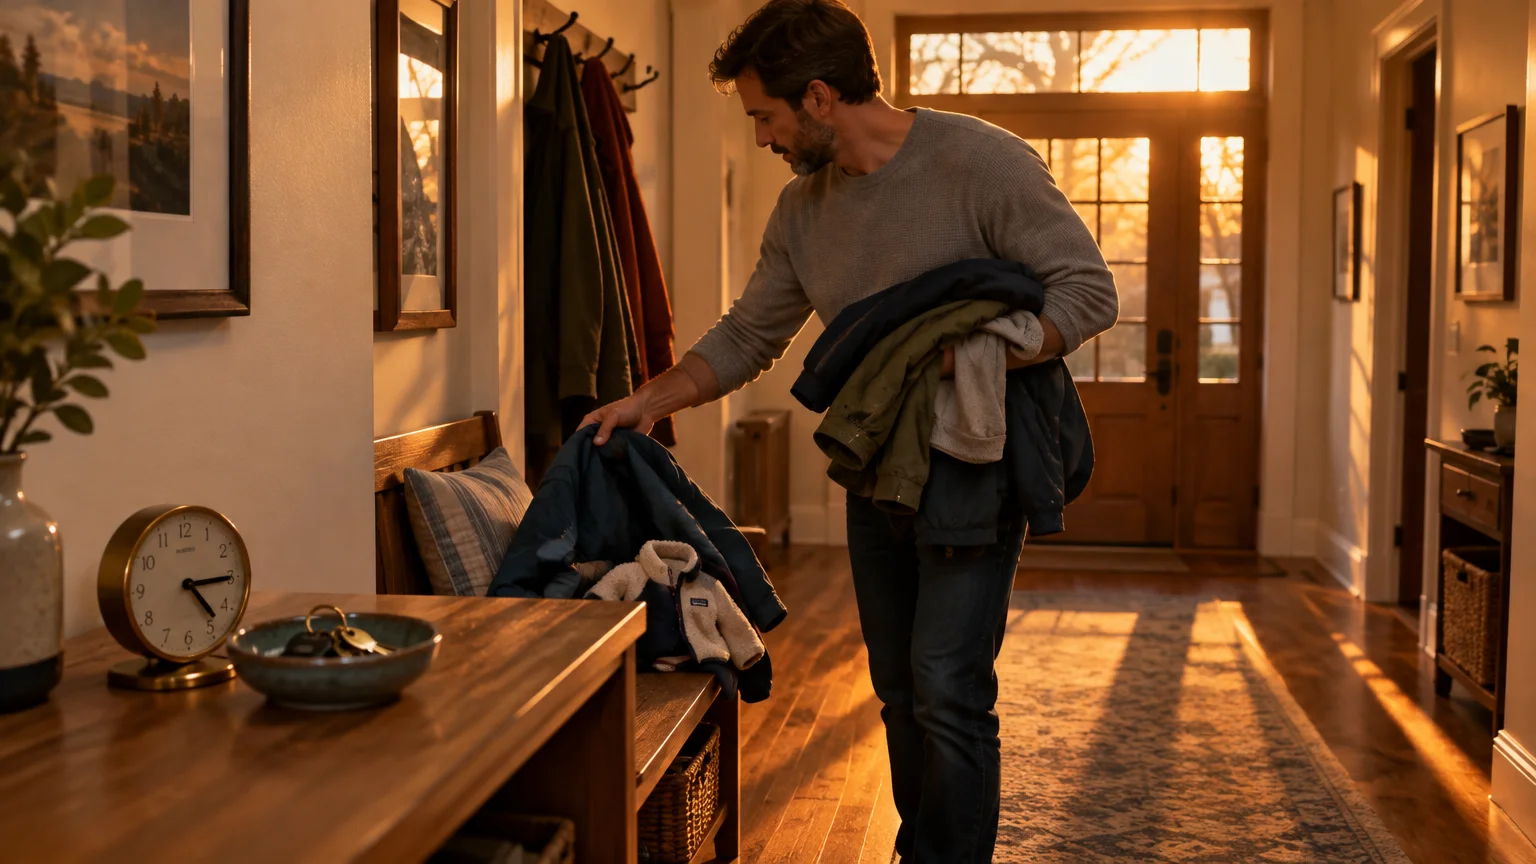
08 Establish a 5-Minute Friday Entryway Reset Routine
Even the best coat rack organization systems slide backward without regular maintenance. Schedule a five-minute reset on your calendar every Friday afternoon to keep entryway clutter under control.
Return stray sweaters, dry-cleaned suits, and extra windbreakers to their respective bedroom closets. Empty coat pockets of accumulated grocery receipts, wrappers, and loose change.
Inspect the floor beneath your rack for rogue mittens, dried dirt, and stray footwear. Wipe down hooks and wall backing with a damp microfiber cloth to remove dust and outdoor grime.
Consistent weekly mini-sessions prevent buildup from reaching an overwhelming scale. Your foyer remains a calm, functional transition area that greets you pleasantly every time you return home.
Selecting Wall Anchors and Hardware for Maximum Load Capacity
Choosing proper mounting hardware protects your walls from structural damage caused by heavy winter layers. Match your wall type to the correct fastener using this load capacity guide.
| Wall Construction | Recommended Hardware Fastener | Safe Working Load (Per Point) | Ideal Entryway Use Case |
|---|---|---|---|
| Standard Wood Stud (16-inch center) | 2.5-inch #8 Wood Screws | 80 to 100 pounds | Solid wood coat racks, heavy row hooks, winter parkas |
| Hollow Drywall (1/2-inch thickness) | Steel or Zinc Toggle Bolts (3/16-inch) | 50 to 70 pounds | Multi-hook rails when wall studs are unavailable |
| Hollow Drywall (1/2-inch thickness) | Threaded Self-Drilling Zinc Anchors | 30 to 40 pounds | Single accessory hooks, light sweater pegs, hat hooks |
| Hollow Drywall (Light Duty) | Plastic Expansion Plugs | 5 to 10 pounds | Small key racks, decorative signs (avoid for coats) |
| Solid Masonry, Brick, or Concrete | Tapcon Concrete Screws or Sleeve Anchors | 150+ pounds | Basement or mudroom heavy utility garment bars |
Fastener ratings represent static shear weight; pulling down hard on a stuck coat increases applied force significantly. The National Safety Council offers helpful home safety guidelines to keep living areas secure and structurally sound.
Always check the manufacturer specifications on anchor packaging before hanging heavy wooden coat rails. Never substitute lightweight plastic drywall plugs when mounting hardware designed to carry multiple heavy winter coats.
Step-by-Step Entryway Organization Transformation
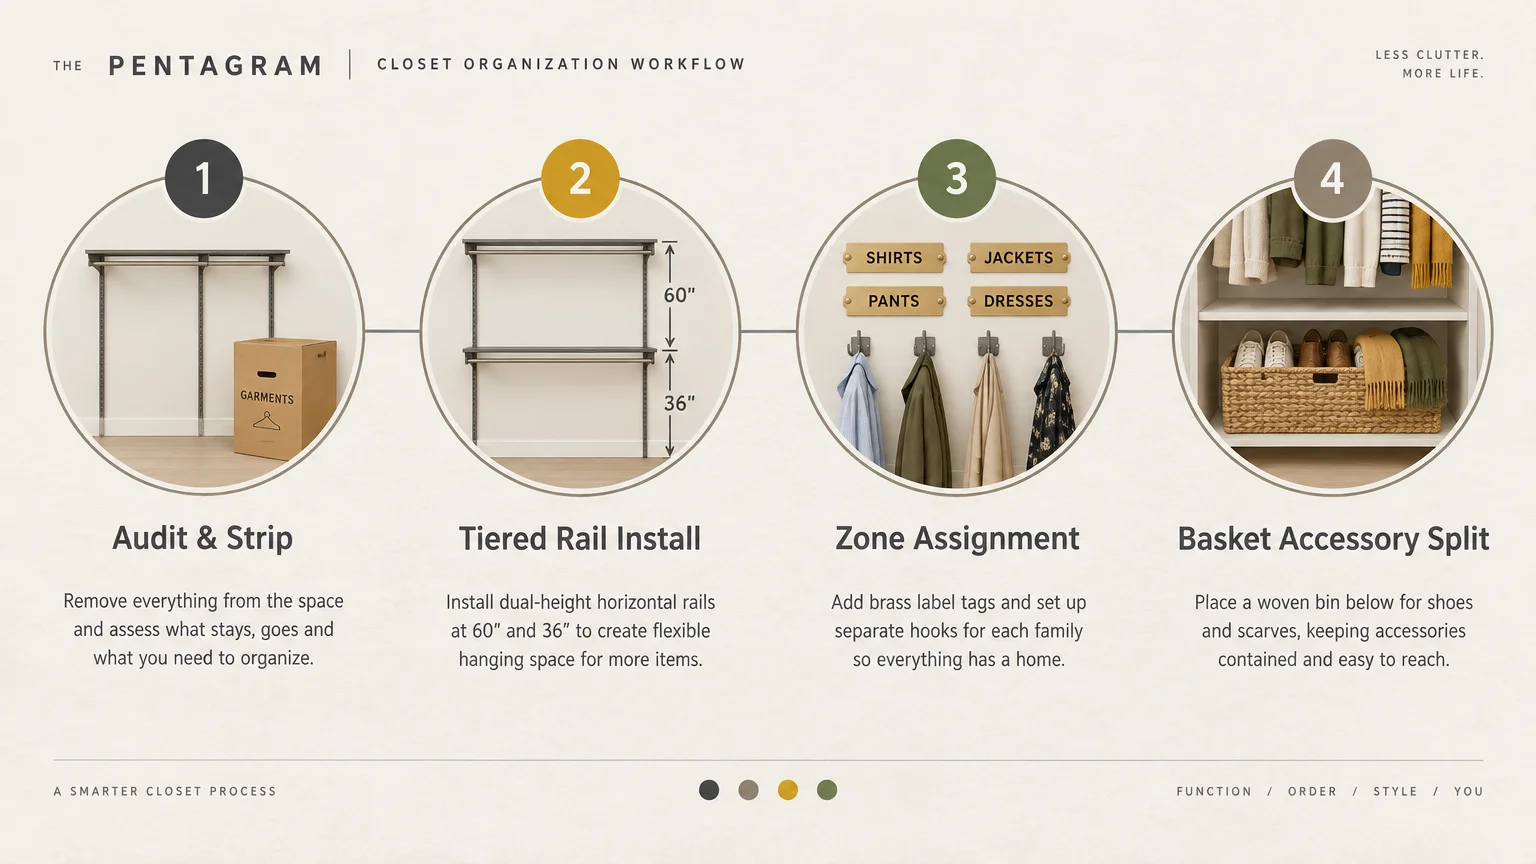
Follow this straightforward implementation process to overhaul your entryway coat rack in a single afternoon.
- Clear the Entire Staging Area: Strip all items from pegs, bars, and lower shelves, moving everything into an open living room space for sorting.
- Categorize Outerwear by Season and Frequency: Group coats into active daily wear, occasional formal wear, seasonal cold-weather gear, and items ready for donation.
- Verify Hardware and Fastener Security: Test wall-mounted rails for wobbling or loose anchors, tightening loose screws or installing heavy-duty toggle bolts where necessary.
- Establish Ergonomic Hanging Heights: Position secondary hooks lower on the wall for young children, mobility aid users, or heavy backpack storage.
- Integrate Drop-Zone Storage Baskets: Set sturdy, labeled fabric or woven baskets below the rack to capture soft scarves, knit gloves, and pet accessories.
- Hang Only the Active Essentials: Return exactly two garments per family member to assigned hooks, leaving spare pegs completely open for guests.
Executing these steps in sequence guarantees that your new entryway system stays functional and durable over time. Take extra care during the hardware installation phase to secure your family’s safety.
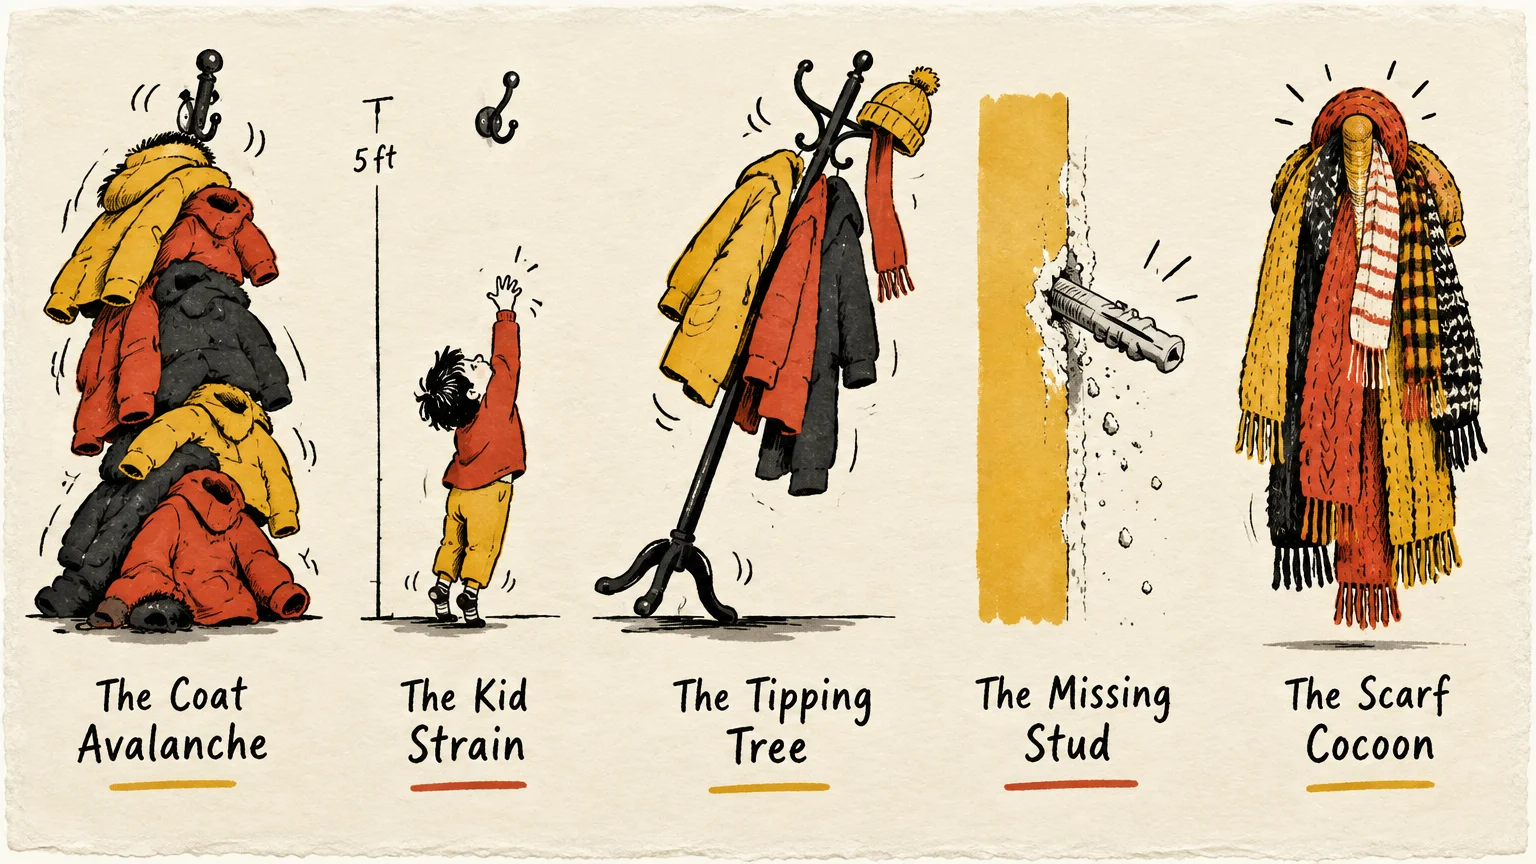
Five Common Coat Storage Pitfalls to Avoid
Sidestepping these common entryway mistakes will preserve your garments and keep your coat rack looking pristine.
Avoid hanging soaked raincoats directly against dry wool coats. Moisture transfers quickly between touching fabrics, trapping dampness and creating unpleasant odors inside tight entryways.
Do not hang heavy laptop bags and loaded backpacks by thin fabric loops on tall coat trees. High weight concentration pulls freestanding racks off balance and weakens wall anchor screws over time.
Never leave off-season garments lingering on hooks out of pure convenience. Pack heavy down jackets away during summer months to create breathing room for daily essentials.
Avoid hanging delicate knits and soft cardigans directly on sharp metal hooks. Pointed hooks stretch shoulder seams permanently; fold delicate sweaters into baskets or hang them on padded wooden hangers instead.
Never ignore loose mounting screws when your wall rail starts pulling away from the drywall. Re-anchor loose rails immediately before the weight of multiple coats tears open your wall board.
Your Practical Next Step
Walk over to your coat rack right now with an empty storage bin. Remove every out-of-season garment, broken umbrella, and mystery tote bag that has accumulated on the pegs.
Store those extra items in your secondary closet, leaving only your two favorite seasonal jackets behind. You will feel an immediate sense of relief the moment you see your cleared entryway.