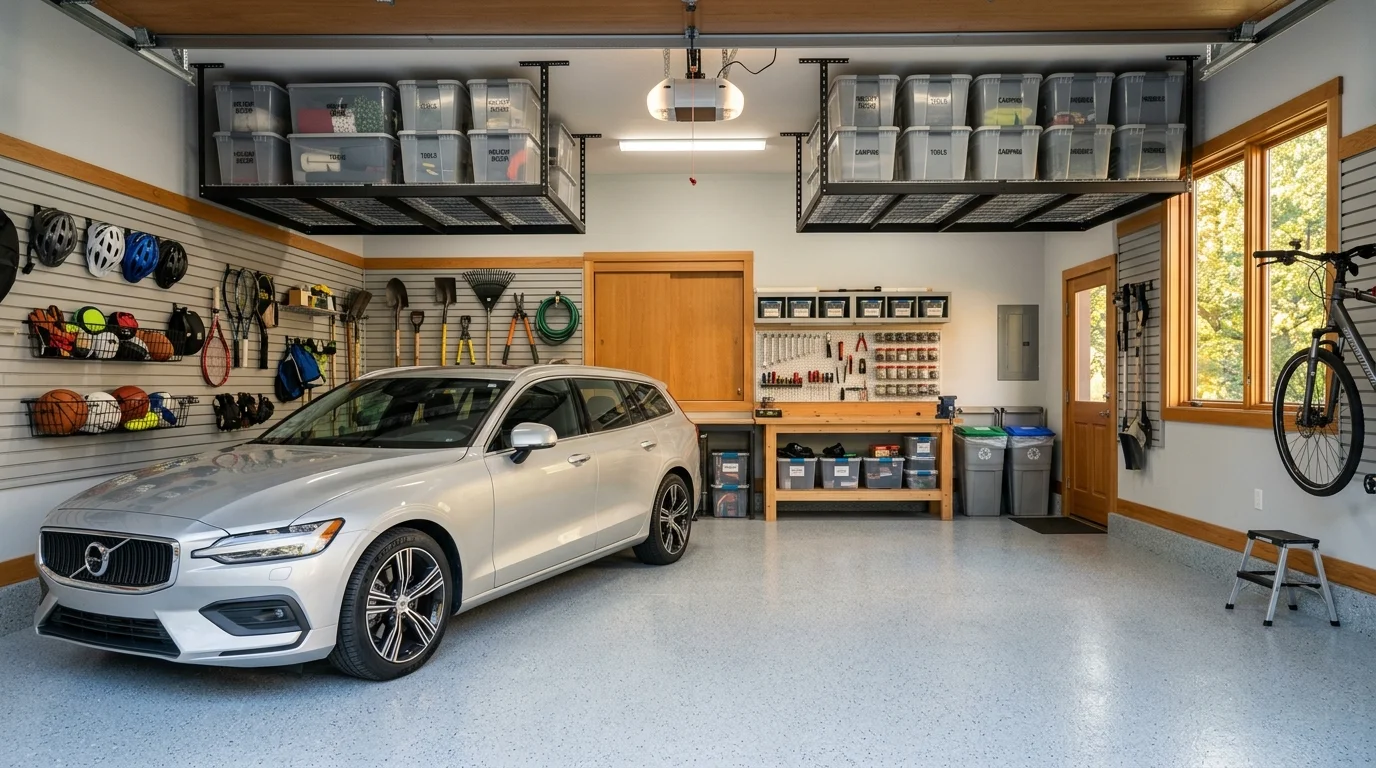
Reclaiming your garage floor gives you room to park your vehicle while making every tool and seasonal item instantly accessible. Research shows that 93% of homeowners rely on their garage primarily for storage, yet 25% of two-car garage owners cannot fit a single car inside due to overwhelming clutter. You do not need to spend thousands of dollars to solve this daily headache. By executing smart garage storage hacks that exploit unused overhead areas, vertical walls, and awkward corners, you will transform chaotic clutter into an effortless, streamlined system. These ten practical garage organization ideas will maximize garage space and restore total control over your home.
01 Mount Heavy Overhead Ceiling Racks
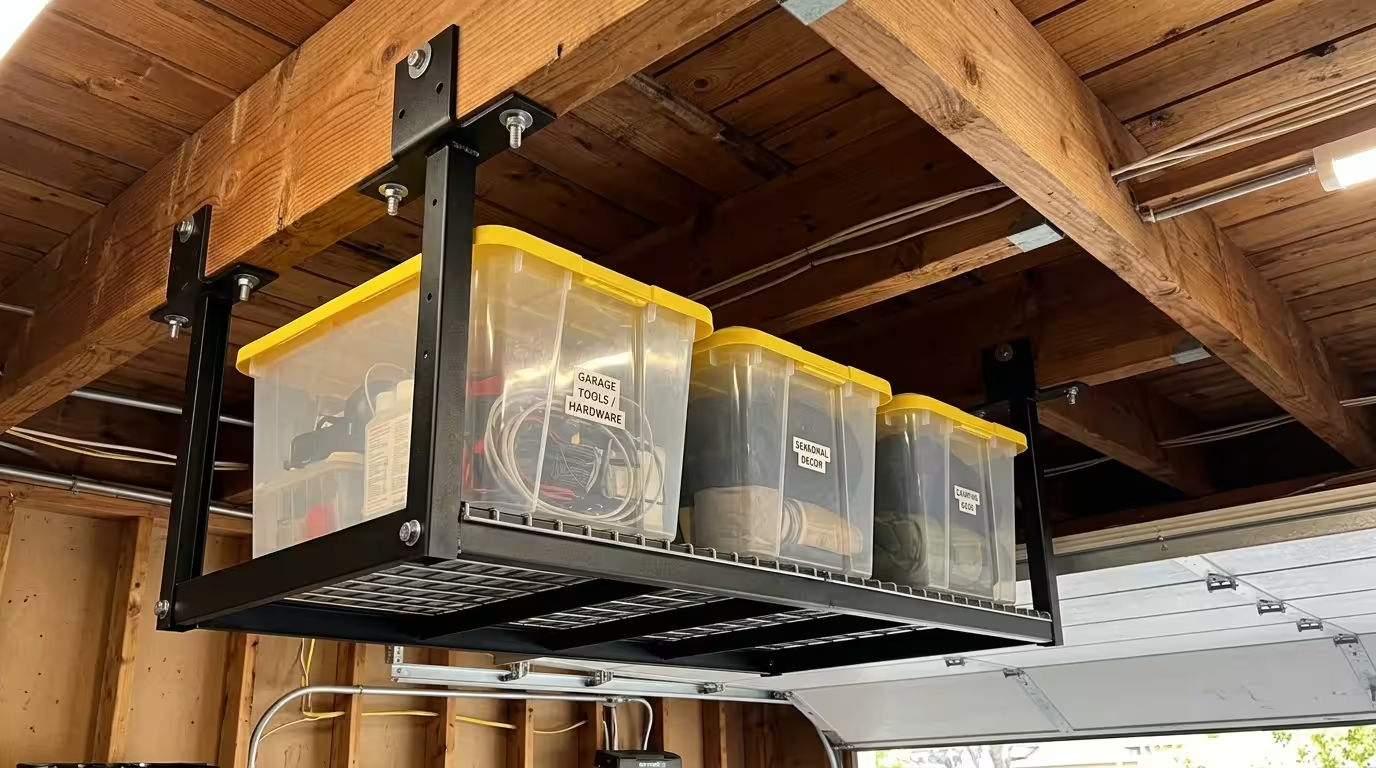
The space between your garage door tracks and the ceiling offers vast, untapped square footage. Installing heavy-duty ceiling racks keeps bulky, infrequently used items—such as holiday decorations, camping equipment, and plastic storage totes—completely off the floor. Heavy industrial steel racks mounted overhead can support between 300 and 600 pounds when anchored properly into ceiling joists.
Always use a stud finder to locate the center of solid wood ceiling joists before drilling. Fasten the steel support brackets using heavy lag bolts rather than standard drywall screws; structural integrity matters when hanging heavy loads over parked vehicles. According to safety guidelines published by the U.S. Consumer Product Safety Commission, verifying weight ratings and securing fasteners prevents catastrophic structural failures. Position overhead racks high enough to provide ample clearance for your vehicle’s roof and garage door mechanism while keeping tote handles within comfortable reaching distance on a sturdy step stool.
02 Install Vertical Slatwall and Pegboard Systems
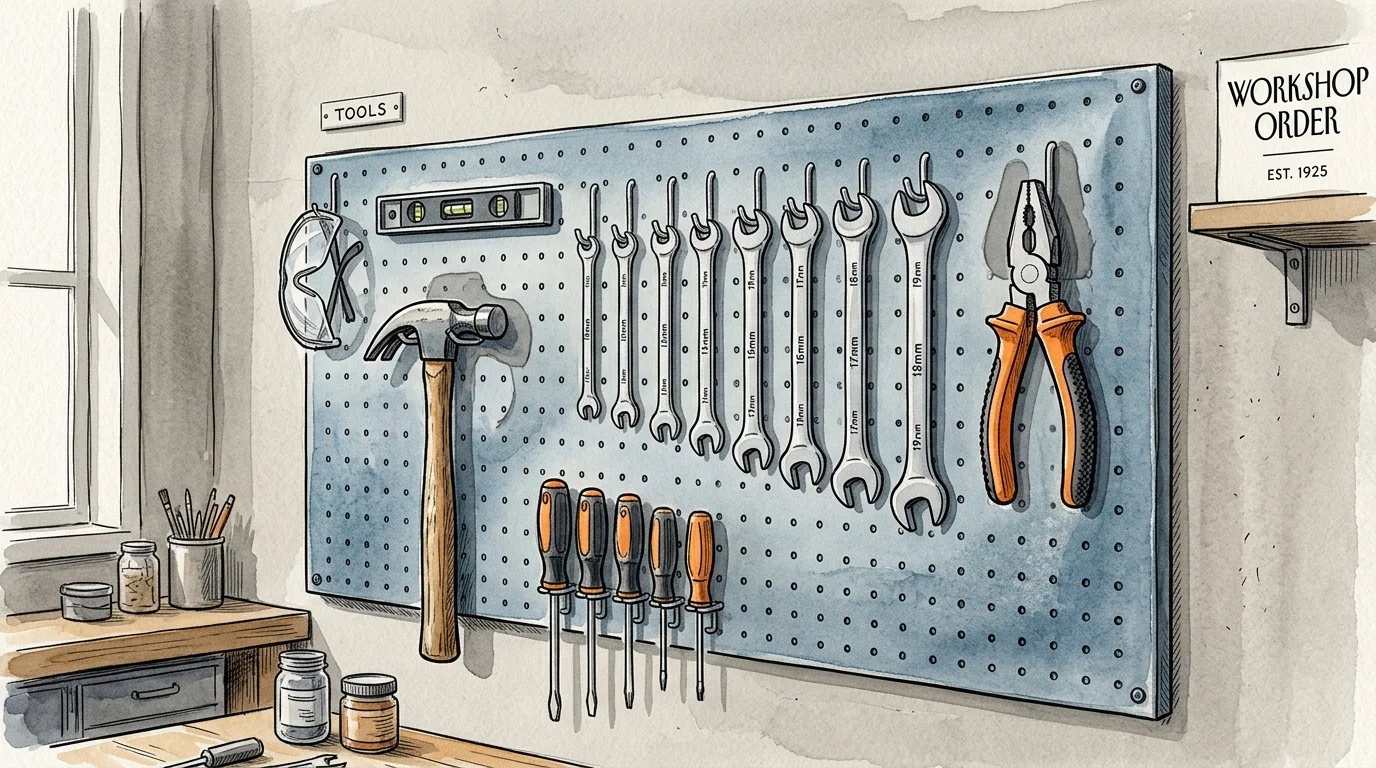
Floor space disappears quickly when long-handled tools, extension cords, and lawn equipment lean against drywall. Installing a wall-to-wall slatwall or heavy-gauge steel pegboard panel converts plain drywall into a fully customizable modular storage zone. Slatwalls handle heavy weight loads like string trimmers and leaf blowers, while metal pegboards keep hand tools organized directly above your work area.
Arrange your tools systematically on specialized hooks, wire baskets, and shelf brackets. Paint outlined silhouettes—often called shadow boarding—around hung tools so family members know exactly where to return items after use. Replacing floor clutter with vertical wall mountings provides immediate visibility; you will never spend twenty minutes hunting down a tape measure or pair of pliers again.
03 Establish Functional Storage Zones
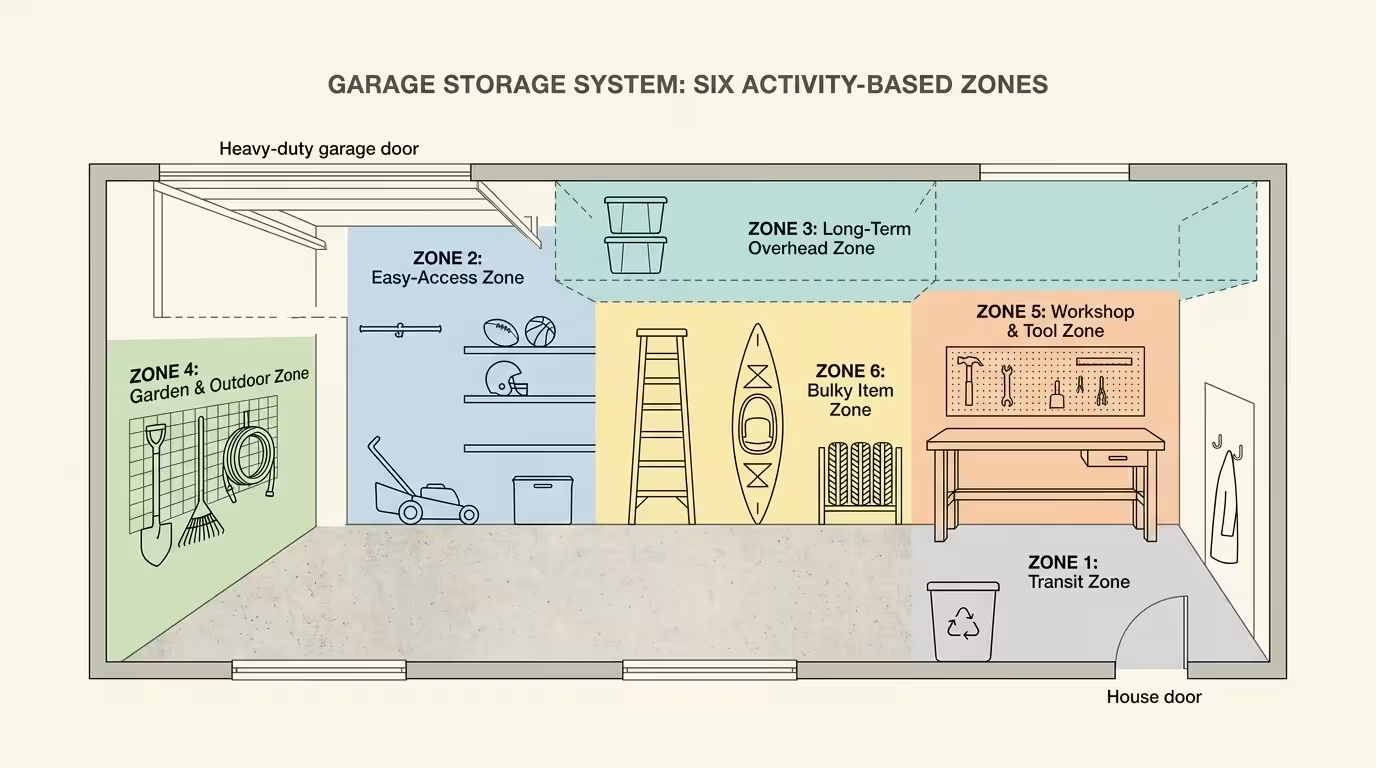
A primary reason garages collect chaotic piles stems from a lack of intentional layout design. According to survey data from CRAFTSMAN, 78% of homeowners prioritize decluttering their garage, yet many fail because they store items haphazardly wherever open floor exists. Divide your garage into six clear, activity-based storage zones to maintain long-term order:
- Zone 1: Transit Zone — Located next to the home entryway door for daily items like coats, boots, and recycling bins.
- Zone 2: Easy-Access Zone — Positioned near the main vehicle doors for frequently used items such as lawn mowers, trash cans, and dog food.
- Zone 3: Long-Term Overhead Zone — Reserved for seasonal decor and off-season sports gear suspended near the ceiling.
- Zone 4: Garden & Outdoor Zone — Designated wall space for hoses, fertilizer, shovels, and landscaping equipment.
- Zone 5: Workshop & Tool Zone — Centralized around workbenches, hardware cabinets, and power tools.
- Zone 6: Bulky Item Zone — Dedicated wall space or heavy shelving for ladders, wheelbarrows, and folding chairs.
04 Upgrade to Clear, Weather-Tight Storage Bins
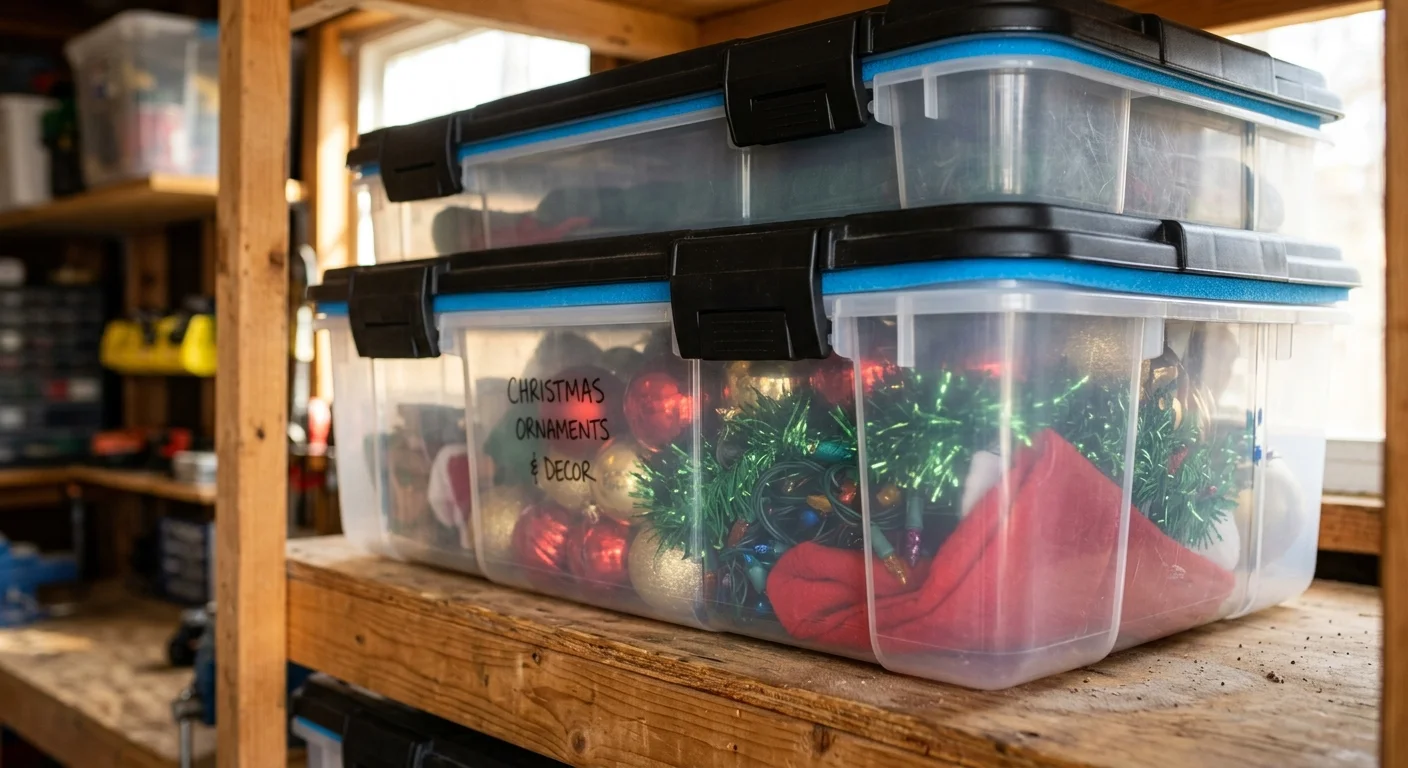
Cardboard boxes decompose over time; humidity softens the paper fibers, and pests easily chew through them. Replace every cardboard box in your garage with heavy-duty, clear plastic storage bins featuring weather-tight rubber seals. Clear plastic provides immediate visual identification of contents, eliminating the need to dig through multiple stacked boxes.
Standardize your bin sizes so they stack neatly without leaning or sliding. Apply large, high-contrast labels to at least two sides of every bin. Group similar items together—such as winter apparel, plumbing supplies, or paint brushes—and store heavier bins on lower shelves while placing lighter containers up high.

05 Utilize Vertical Bike Hoists and Wall Mounts
Bicycles represent one of the biggest space thieves in any residential garage. Parking bikes on kickstands along the floor consumes valuable foot-traffic corridors and prevents close car parking. Installing vertical bike racks or ceiling-mounted pulley hoists elevates bicycles off the floor entirely.
For high ceilings, pulley-style hoists allow you to lift a 50-pound bicycle with minimal physical effort using a ratcheting rope mechanism. For lower ceilings, wall-mounted swiveling bike racks hold bicycles perpendicular to the wall; you can swing them flat against the drywall when not in use. Following basic ladder and hanging safety guidelines—such as those recommended in the National Institute for Occupational Safety and Health fall safety standards—ensures secure installation when working on elevated ladders to mount ceiling hardware.

06 Fasten High-Powered Magnetic Tool Strips
Small hardware items, drill bits, screwdrivers, and metal hand tools routinely clutter workbench surfaces. Mounting industrial magnetic tool strips directly onto wall paneling or workshop splash-boards keeps small metal items arranged in plain view and within arm’s reach.
Unlike standard kitchen knife strips, industrial garage magnetic bars utilize heavy-duty neodymium magnets capable of holding heavy wrenches, pliers, and hammer heads. Mount two or three parallel magnetic strips above your workbench to organize drill bit sets, chisels, and small metal hardware trays without occupying valuable surface desk space.
07 Build a Wall-Mounted Folding Workbench
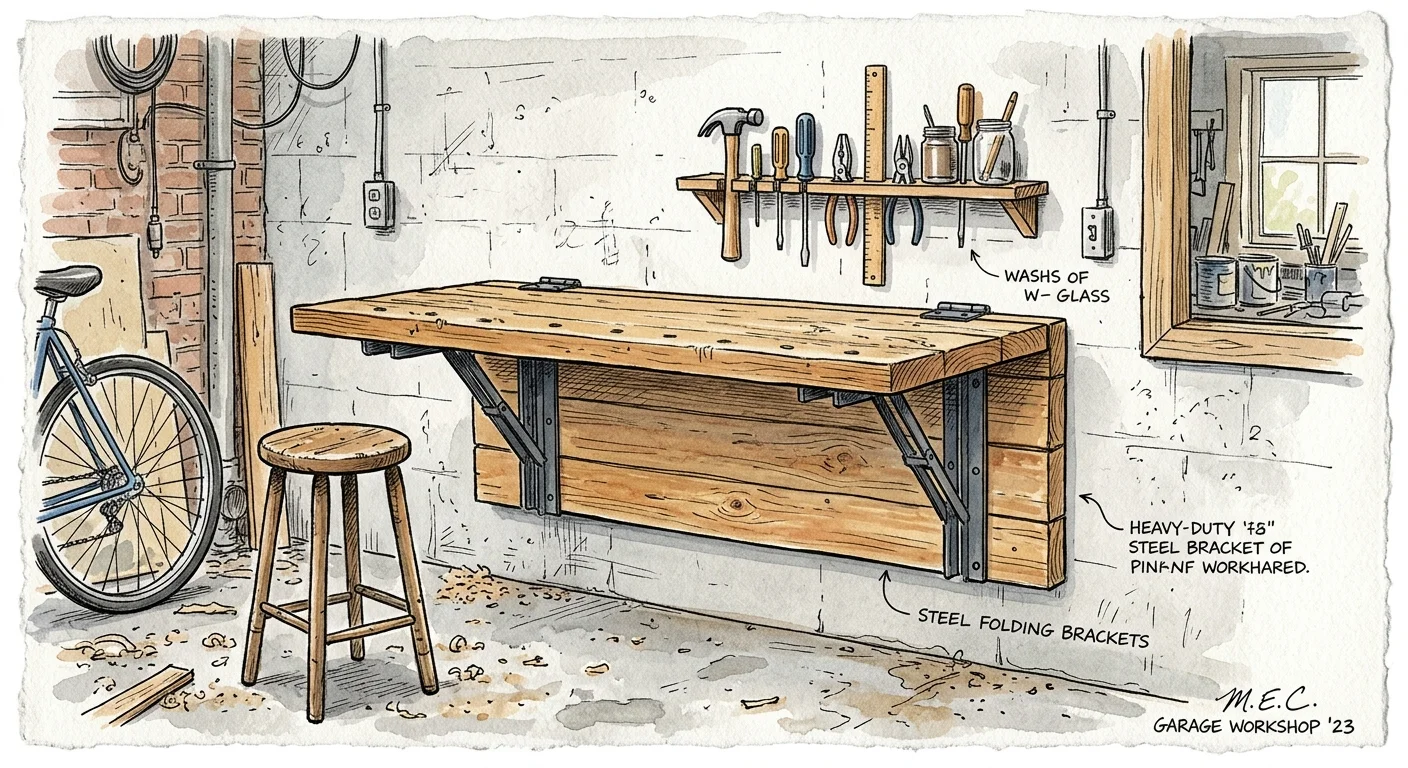
A traditional stationary workbench permanently claims twelve to fifteen square feet of floor space—even during weeks when you complete no home improvement projects. A wall-mounted drop-leaf or folding workbench provides a sturdy workspace when you need it and drops flush against the wall when you finish.
Construct a folding workbench using heavy-duty locking folding brackets mounted directly into wall studs, paired with a solid 3/4-inch plywood top or butcher block surface. Ensure the locking mechanisms support at least 300 pounds of downward force. When folded down, these tables protrude only two to three inches from the wall, leaving your floor open for parking cars or storing rolling tool chests underneath.

08 Reclaim Dead Space with Corner Shelving
Garages feature four corners that frequently go completely unused or collect random piles of clutter. Standard rectangular shelving units leave dead triangular space behind them in corners. Installing custom triangular floating corner shelves maximizes every square inch of available wall space.
You can easily build corner shelves out of single sheets of 3/4-inch plywood supported by 2×2 wood cleating screwed into wall studs. Corner shelves serve as ideal holding areas for small paint cans, oil jugs, car detailing supplies, and spray cans. Keeping these smaller items neatly tucked into corners prevents clutter from spreading onto larger main shelving units.
09 Craft DIY Long-Handled Tool Holders from PVC Pipe
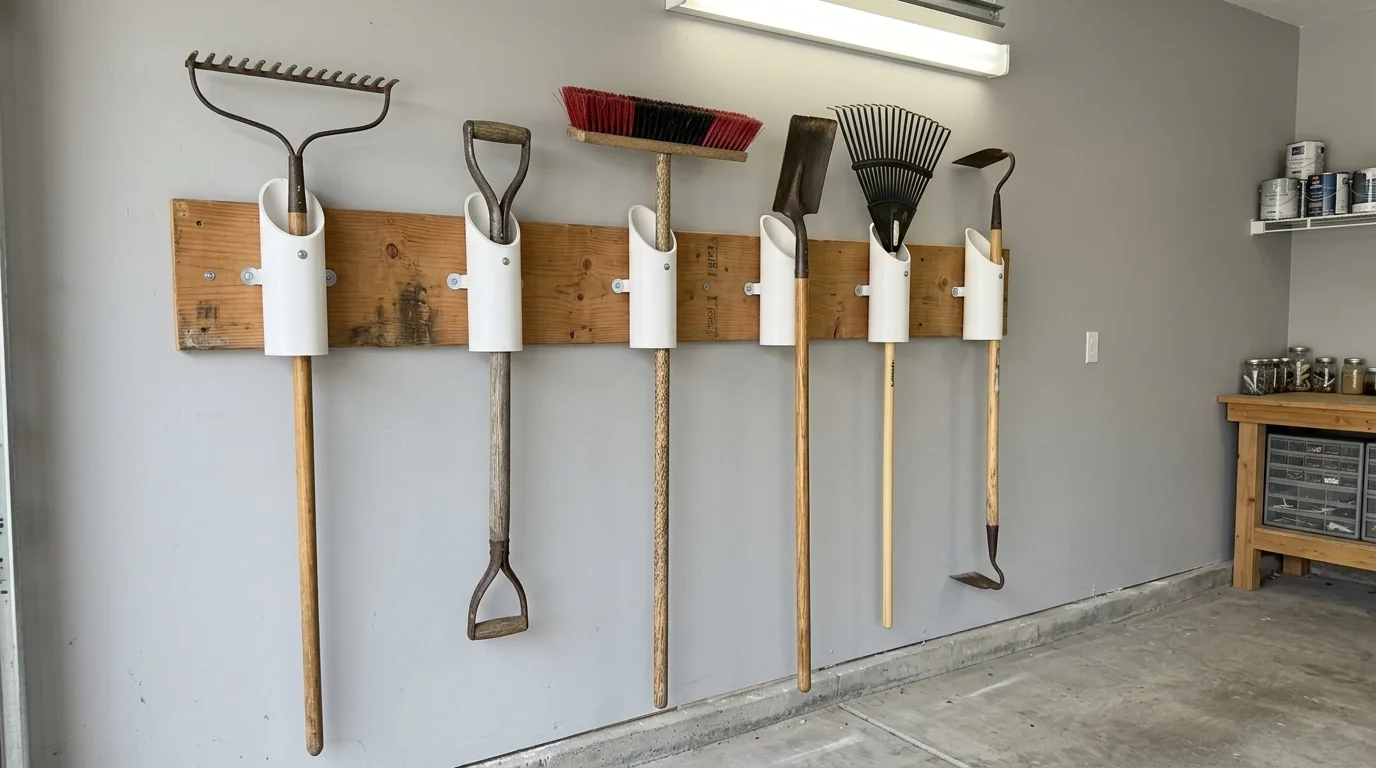
Long-handled lawn tools like rakes, shovels, hoes, and brooms constantly tip over and slide along garage walls. You can craft a custom, inexpensive tool organizer using standard 2-inch or 3-inch PVC drain pipe.
Cut the PVC pipe into 6-inch to 8-inch individual sections using a miter saw or handsaw, cutting the top edge at a 45-degree angle for easy insertion. Screw these pipe sleeves onto horizontal 2×4 wood mounting strips secured to your wall studs. Slide the long handles of your garden tools down through the PVC rings; the tools remain upright, neatly spaced, and easy to grab without causing an avalanche of handles.
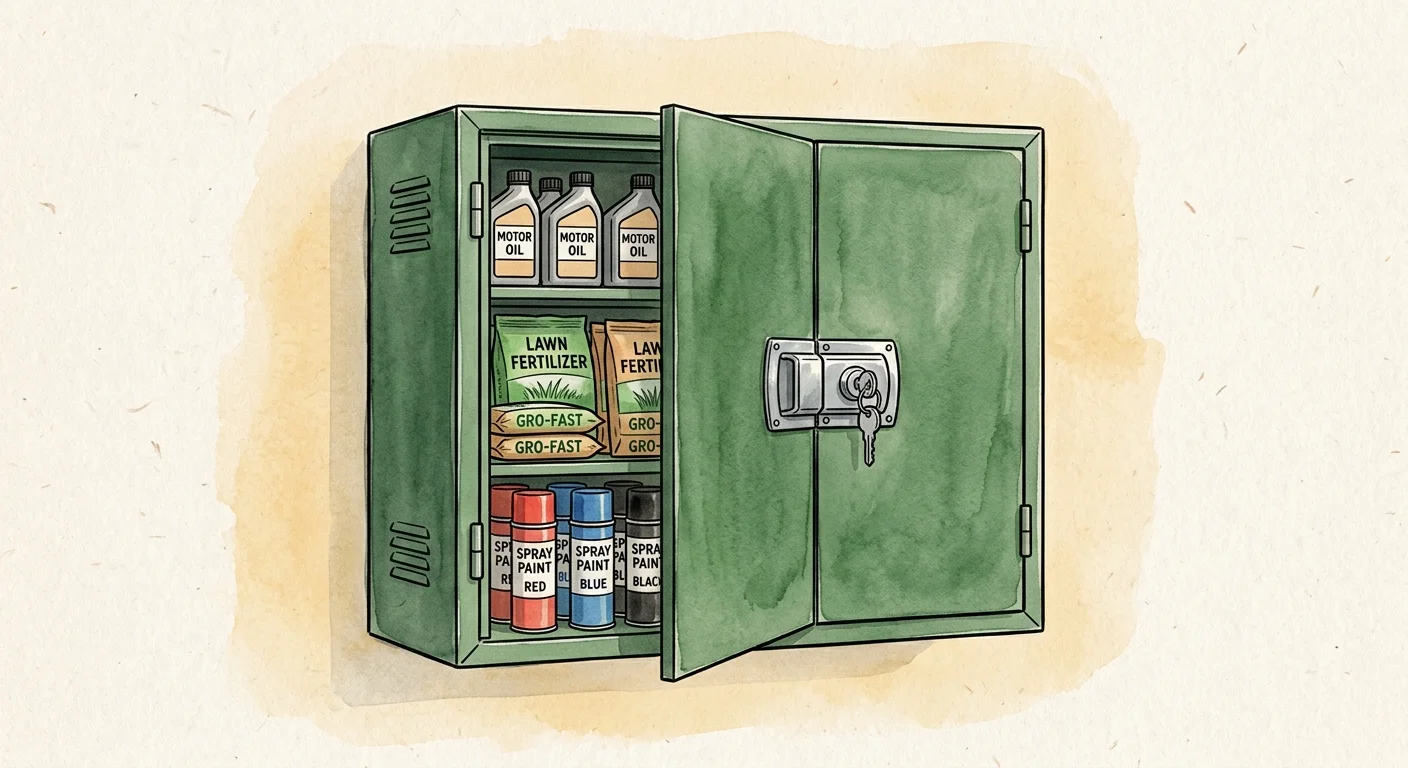
10 Secure Hazardous Chemicals in Ventilated Cabinets
Storing paint cans, motor oil, lawn fertilizers, and pesticides on open shelves creates safety hazards for children and pets; extreme temperature fluctuations can also degrade chemicals over time. Storing these materials inside a dedicated, locked metal cabinet keeps hazardous chemicals safe and organized.
According to safety advice provided by the U.S. Environmental Protection Agency on chemical safety, storing household chemicals off the ground in cool, dry, locked environments prevents soil contamination, toxic exposure, and accidental poisoning. Never store propane tanks inside an enclosed garage; keep propane cylinders outside in well-ventilated areas to prevent dangerous gas accumulation near water heater pilot lights or electric motor sparks.

Garage Organization Budgeting: DIY vs. Professional Costs
Organizing a garage requires choosing between DIY labor and hiring professional installers. Understanding common market costs helps you choose the right balance between convenience and budget when selecting garage storage solutions.
Based on national home improvement market data collected by Angi project cost data, homeowners pay an average of $1,327 to professionally organize a garage, with typical projects ranging from $505 to $2,156 depending on custom cabinet materials and square footage. Professional organizers charge hourly labor rates between $50 and $150 per hour. Completing the project yourself reduces costs substantially, allowing you to allocate funds toward premium materials like industrial slatwall panels or heavy-duty overhead ceiling racks.
| Storage Solution / Service | DIY Estimated Cost | Professional Installed Cost | Primary Storage Benefit |
|---|---|---|---|
| Overhead Ceiling Racks (2 Units) | $150 – $300 | $400 – $800 | Reclaims floor space for car parking |
| Slatwall Panel System (8×4 ft) | $100 – $250 | $350 – $700 | Provides flexible, heavy-duty vertical wall storage |
| Clear Heavy-Duty Bins (Pack of 6) | $90 – $150 | $120 – $200 | Protects items from dust, moisture, and pests |
| DIY PVC Tool Rack | $20 – $35 | N/A (Custom DIY) | Keeps long lawn tools upright and organized |
| Fold-Down Workbench | $80 – $180 | $250 – $500 | Creates temporary work area without taking floor space |
| Professional Organizer Labor | $0 | $50 – $150 / hour | Delivers custom design and hands-off decluttering |
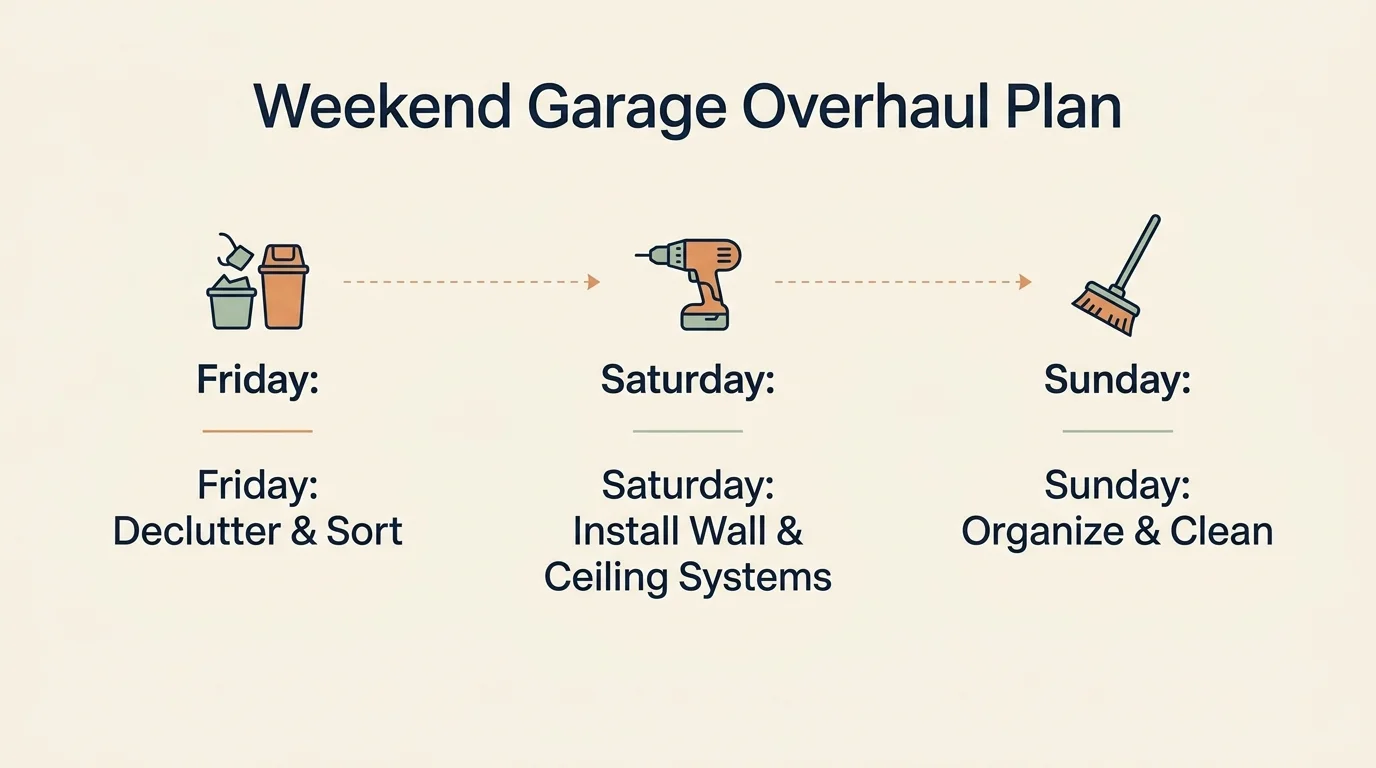
Step-by-Step Weekend Garage Overhaul Plan
Knowing how to organize a garage effectively requires a systematic approach. Executing your cleanup in structured stages prevents fatigue and keeps your project moving smoothly from start to finish.
- Empty the Garage Completely — Drag every item out onto your driveway or lawn during a clear day. Starting with a blank canvas helps you evaluate your actual total volume of possessions.
- Sort Using the Four-Category System — Divide belongings into four distinct piles: Keep, Donate, Sell, and Trash. Be ruthless; if you haven’t used an item in two years, get rid of it.
- Deep Clean the Interior Surfaces — Sweep away cobwebs, wash down drywall, and scrub oil stains from concrete floors using an industrial degreaser or pressure washer. Allow floors to dry thoroughly.
- Install Wall and Overhead Anchorage Hardware — Mount ceiling racks into joists, attach slatwall or pegboard panels to studs, and set up heavy-duty freestanding shelf units against back walls.
- Load Items Back into Designated Storage Zones — Place seasonal items in overhead racks, group tools on slatwalls, and transfer stored goods into clear labeled bins inside designated zones.
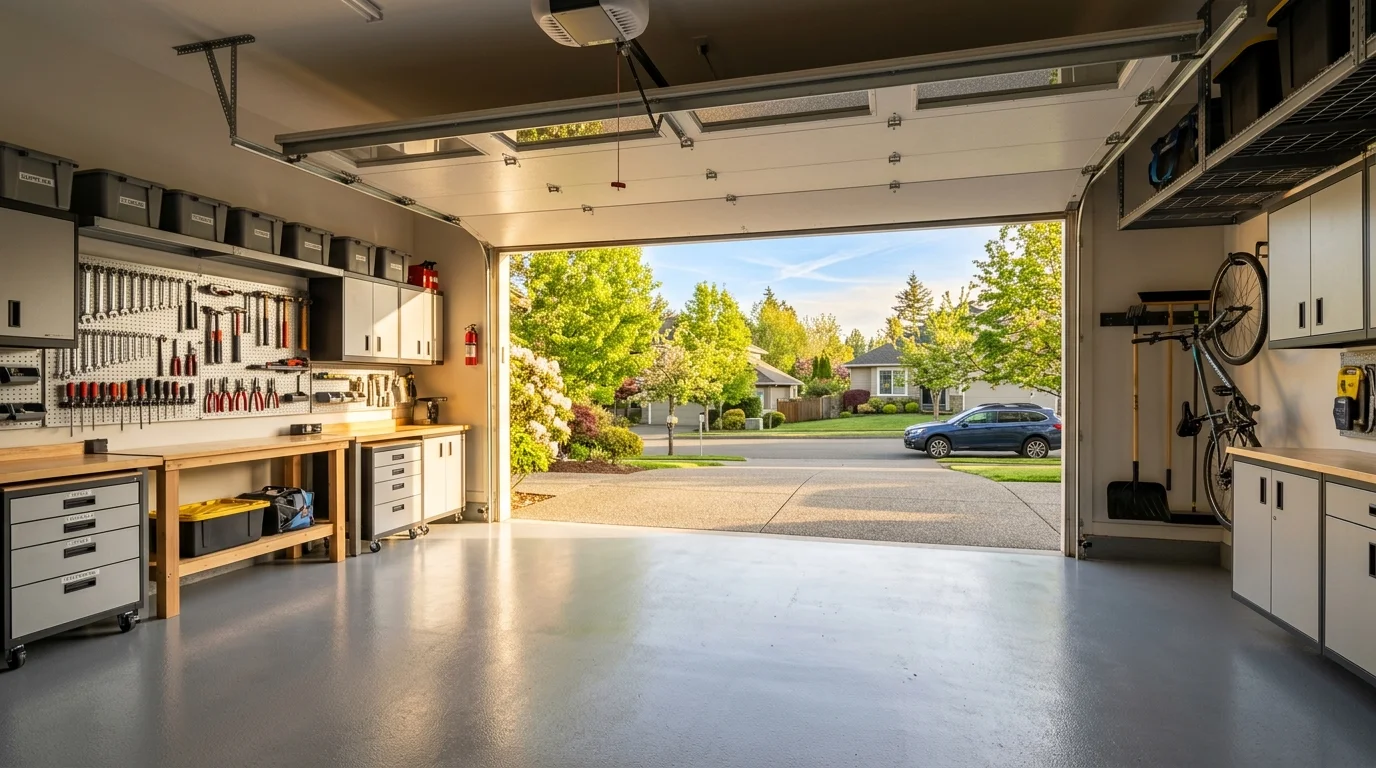
Take Your First Step Today
Pick one manageable area of your garage—such as the corner filled with long-handled garden tools—and spend 30 minutes installing a simple PVC wall holder or hanging a pegboard strip. Starting small builds immediate momentum, turning a daunting weekend project into an empowering step toward a clean, functional home.