Cooking splatters build up quickly, turning into a sticky film that traps airborne dust and grime. You can remove grease from your kitchen backsplash fast by using the right degreasing technique matched to your surface.
Professional cleaners rely on targeted chemistry rather than exhausting elbow grease to dissolve stubborn oil splatters. This smart approach protects delicate glazes and prevents cloudy residue from settling on your walls.
With a few basic household supplies, you can easily clean your backsplash and restore dull tiles to a bright, polished shine.
Why Kitchen Grease Becomes So Stubborn Over Time
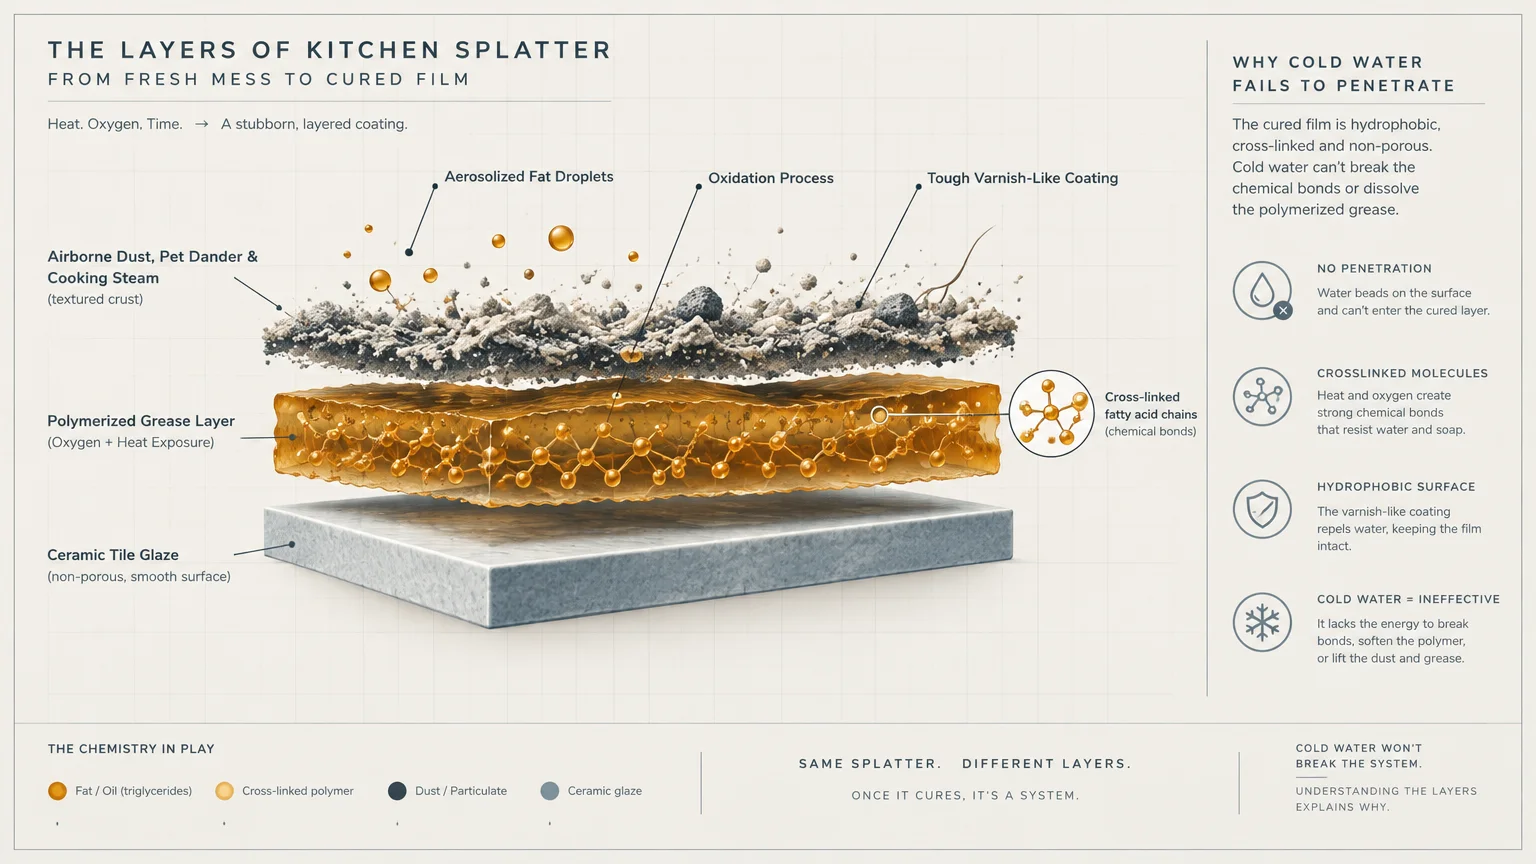
Cooking oil travels into the air whenever you sauté, fry, or sear food at high heat. Tiny aerosolized fat droplets float across the room before landing directly on your backsplash.
Once cooking oil cools on a vertical surface, it begins an oxidation process known as polymerization. Exposure to oxygen and ambient heat gradually turns liquid grease into a tough, varnish-like coating.
Airborne dust, pet dander, and cooking steam bond with this tacky film within days. The longer this mixture sits on your backsplash, the harder it becomes to dissolve.
Wiping old grease with cold water or a dry cloth only smears the oily layer around. You need active cleaning agents that can penetrate the cross-linked oil molecules and suspend them for easy removal.
The Science of Kitchen Grease Cleaning
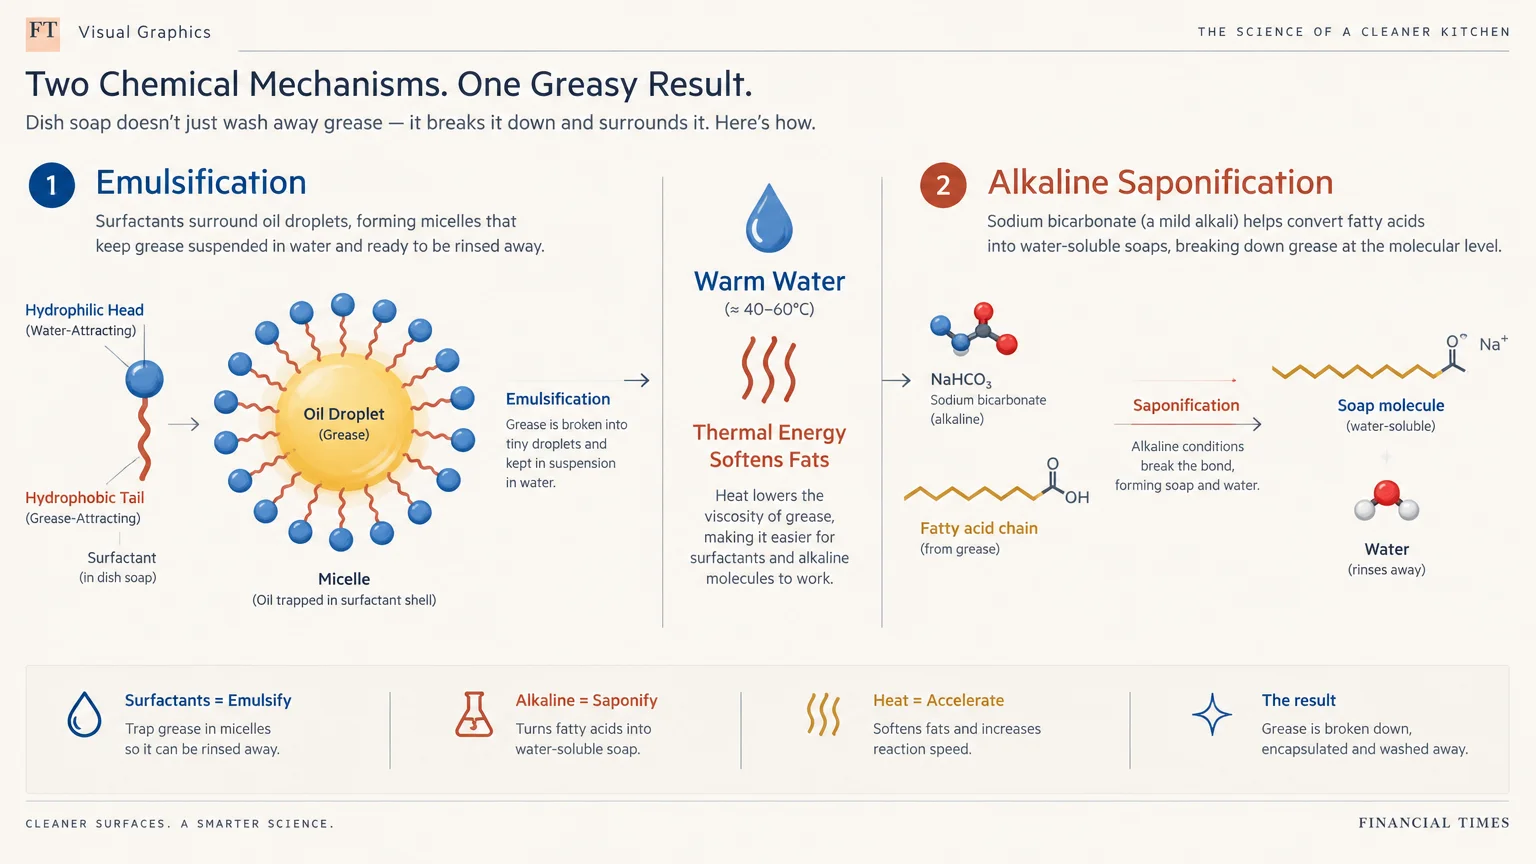
Effective degreasing relies on two chemical principles: emulsification and alkaline breakdown. Grease consists of hydrophobic fatty acid chains that naturally repel plain water.
Surfactants in dish soap possess two distinct ends: one that binds to water and one that binds to grease. These molecules surround oil droplets, lifting them off the tile surface so warm water can wash them away.
Alkaline cleaners like baking soda provide gentle chemical saponification. Mild alkaline compounds convert animal fats and plant oils into water-soluble soaps without eating away at tile finishes.
Thermal energy also plays a major role in your success. Warm water softens solid fats, allowing detergents to penetrate deeper and work significantly faster.
Essential Tools and Supplies for the Job
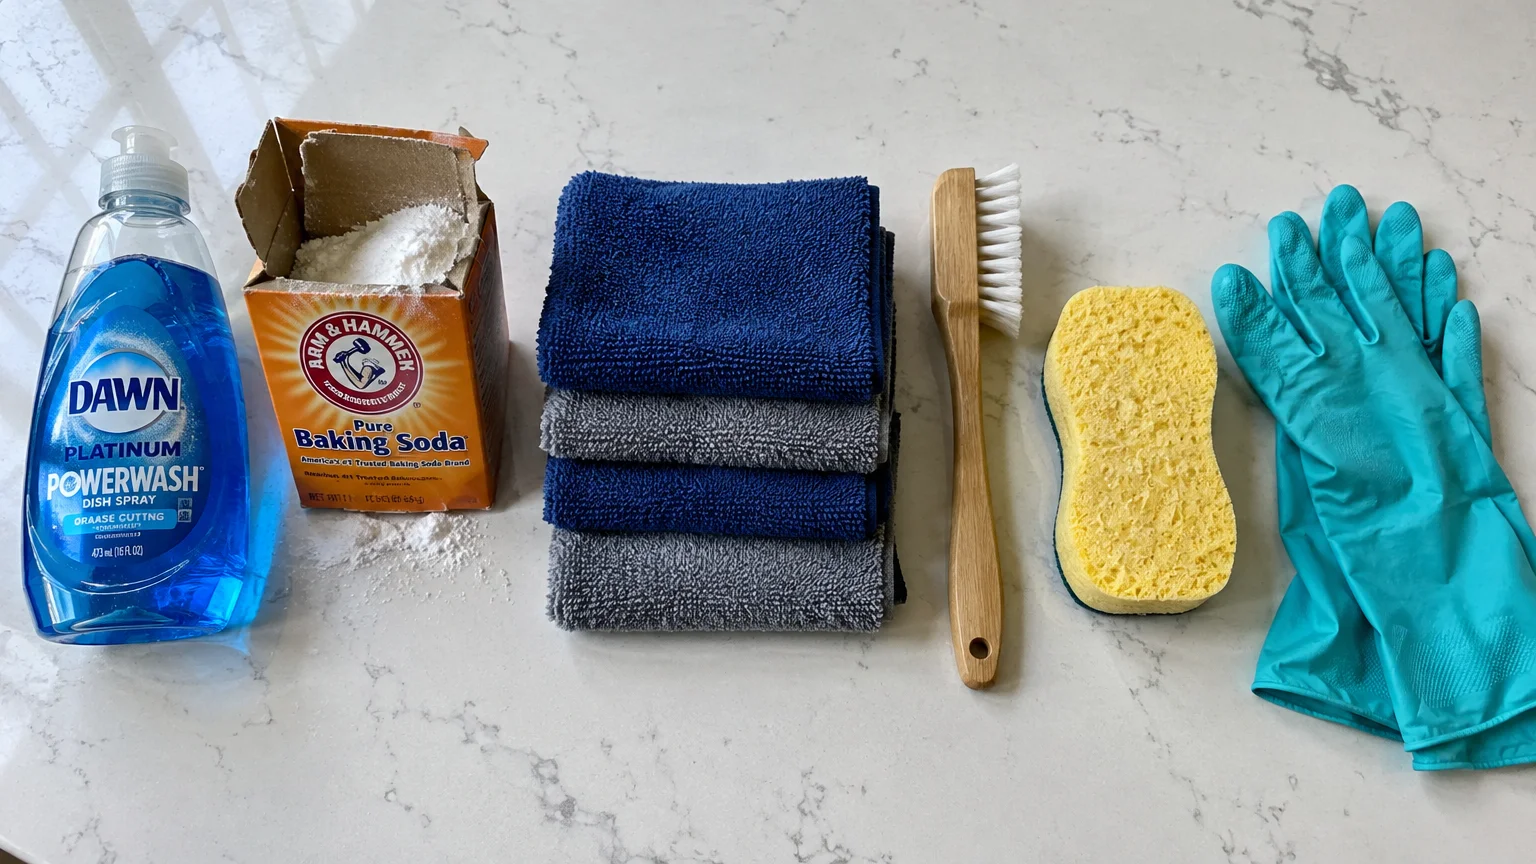
Using the proper cleaning gear prevents scratches and cuts your scrubbing time in half. You do not need expensive specialized equipment to achieve professional results.
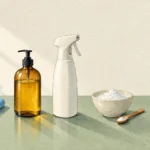
- High-quality dish soap: Look for concentrated grease-cutting liquid soaps designed to lift heavy food oils.
- Baking soda: Mildly abrasive and naturally alkaline, sodium bicarbonate boosts cleaning power safely.
- Microfiber cloths: Keep at least four plush microfiber towels on hand for applying cleaner, wiping grime, and buffing surfaces.
- Soft-bristle nylon brush: A soft toothbrush or dedicated grout brush cleans recessed crevices without scratching glaze.
- Non-scratch sponge: Dual-sided sponges with a cellulose face and a gentle scrubbing back work best.
- Protective gloves: Nitrile or rubber cleaning gloves keep hot water and concentrated detergents off your skin.
If you prefer commercial products, select formulations evaluated under the EPA Safer Choice standard. These certified degreasers break down grease effectively without harsh volatile organic compounds or corrosive fumes.
The Step-by-Step Professional Method to Degrease Tile
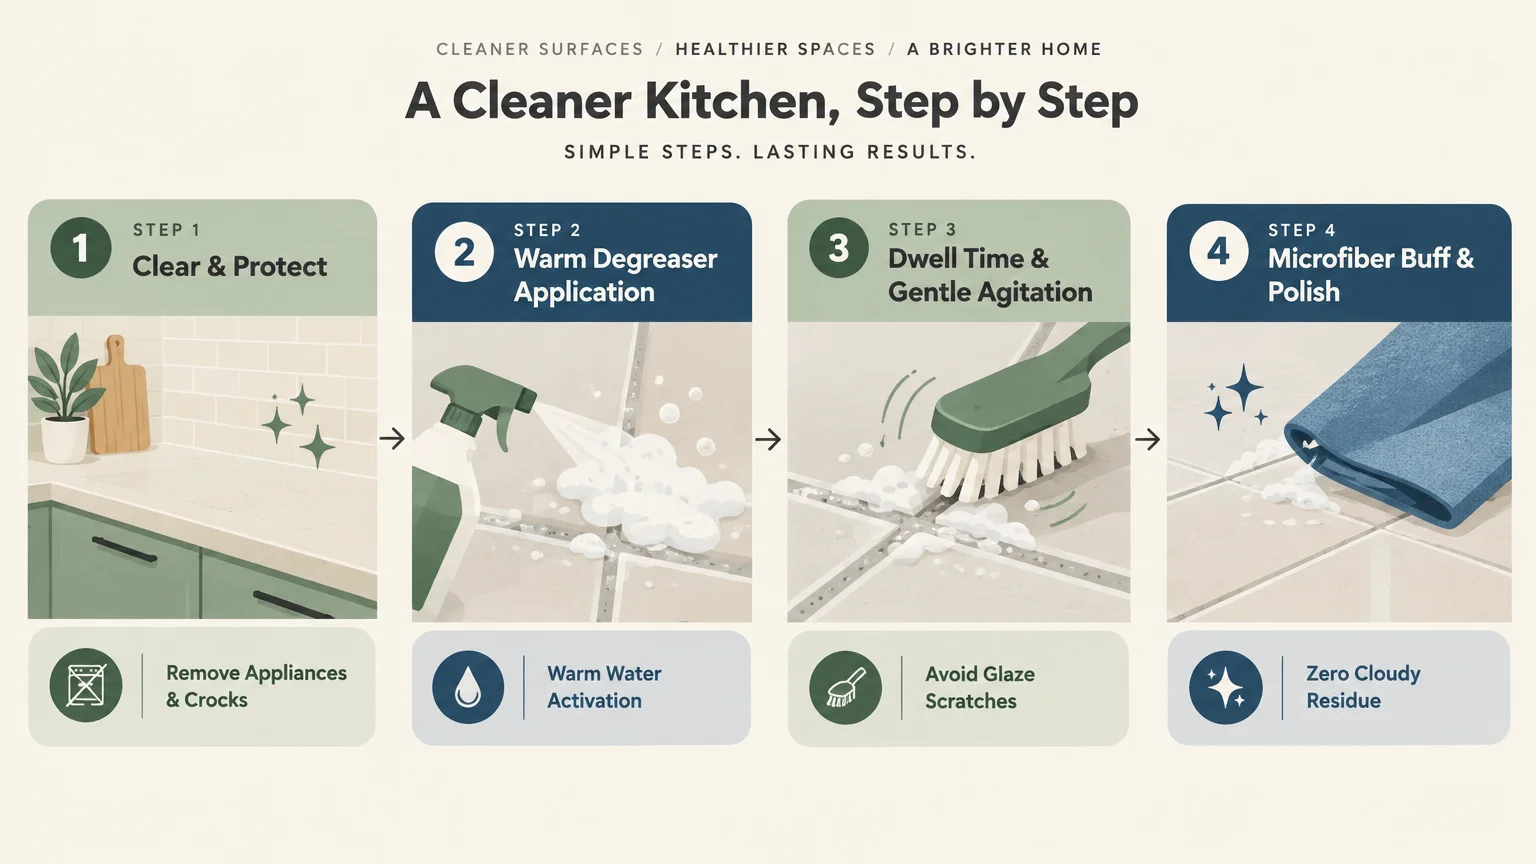
Follow this proven sequence to degrease tile backsplashes efficiently without spreading oil across your counters. This master method works on standard glazed ceramic and porcelain tiles.
Step 1: Clear and Protect Your Workspace
Remove small appliances, spice racks, and utensil crocks from the counters beneath the backsplash. Store them across the room so grease splatters do not settle on clean items.
Lay an old bath towel or silicone counter mat along the base of the wall. This protective layer catches drips, prevents puddle formation, and safeguards your countertop caulking.
Step 2: Steam-Soften the Grease Layer
Dunk a microfiber cloth into very warm water, wring it out slightly, and hold it firmly against the greasy backsplash. Hold the damp cloth in place for thirty seconds per section.
The moist heat loosens congealed vegetable oils and softens hardened sauce spots. This quick softening step reduces the amount of scrubbing you need to do later.
Step 3: Apply Your Cleaning Solution
Mix two cups of warm water with one tablespoon of concentrated dish soap in a bowl. For heavy grease buildup, stir in two tablespoons of baking soda to create a runny paste.
Dip your non-scratch sponge into the soapy mixture and spread it evenly across the tiles. Ensure the solution covers both the tile faces and the surrounding grout lines.
Step 4: Allow Adequate Dwell Time
Let the cleaning solution rest on the backsplash for three to five minutes. Cleaning professionals call this dwell time, and it is the secret to effortless cleaning.
Dwell time allows surfactants to loosen the bonds holding polymerized grease to the wall. Never let the cleaning solution dry completely during this waiting stage.
Step 5: Agitate in Small Circles
Work your non-scratch sponge across the tiles using gentle, overlapping circular motions. Apply light pressure to lift the emulsified grease slurry away from the surface.
Use your soft-bristle nylon brush to work the soapy foam into the textured grout channels. Avoid using stiff metal bristles that can permanently gouge or chip the grout.
Step 6: Rinse with Clean Warm Water
Soak a fresh microfiber towel in clean warm water and wring it out completely. Wipe the backsplash from top to bottom to collect the loosened grease and soap foam.
Rinse the towel frequently in clean water as you work across the wall. Leaving soap residue behind will attract airborne cooking dust and create a dull haze.
Step 7: Buff Dry to a Streak-Free Shine
Take a completely dry microfiber cloth and buff the tiles dry using broad, sweeping strokes. Drying prevents mineral spotting from tap water and restores a reflective gleam.
Step back and inspect the backsplash from multiple angles under good kitchen lighting. Touch up any stubborn missed spots with a small dab of dish soap on a damp cloth.
How to Clean Backsplash Materials Safely
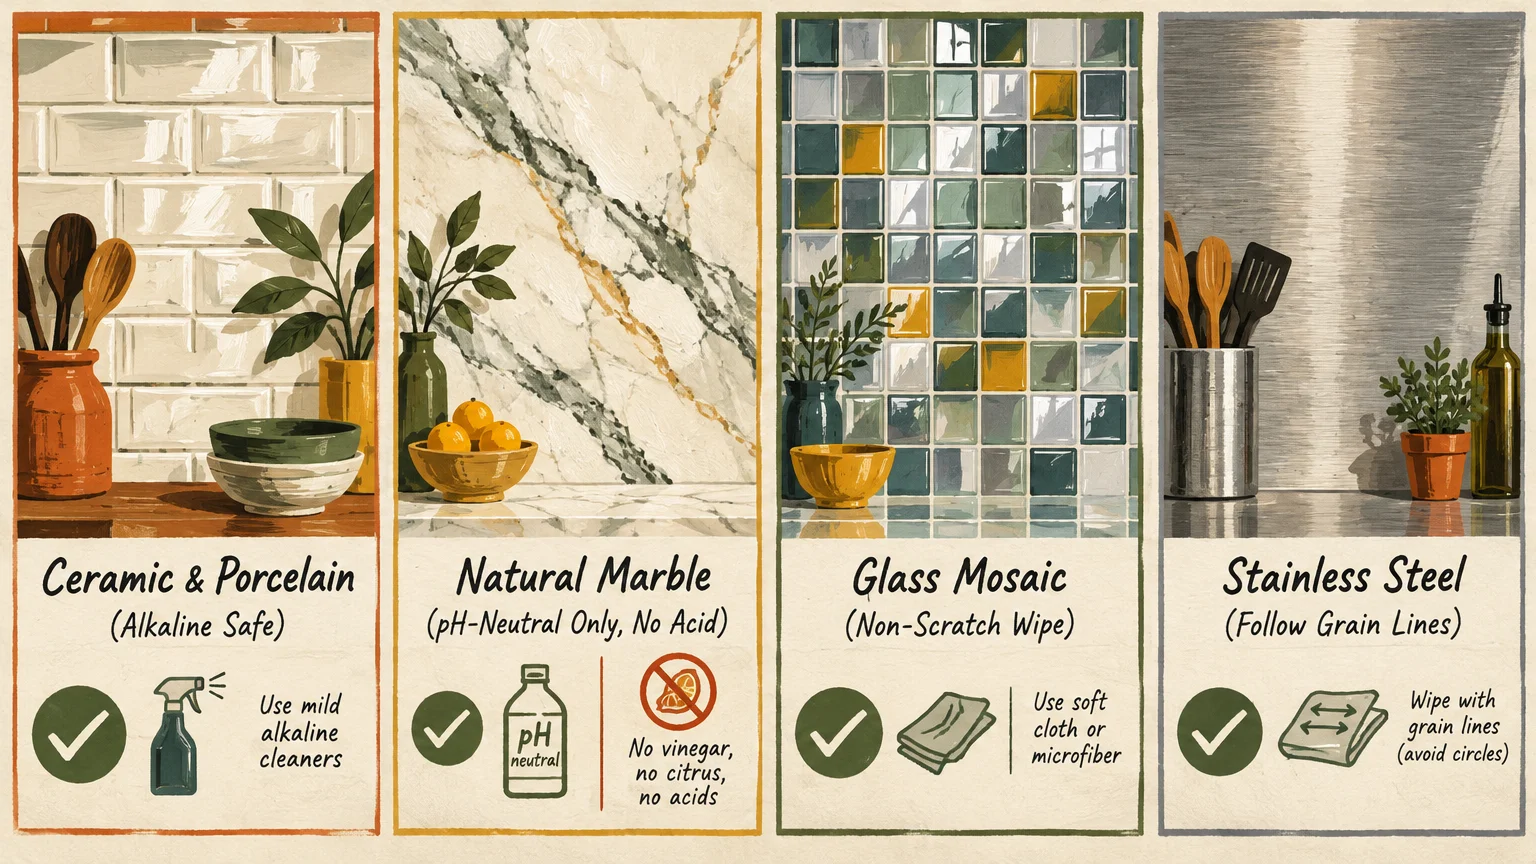
Not every backsplash can handle the same cleaning agents. Using the wrong cleaner can etch polished stone, dissolve adhesive backings, or scratch high-gloss metals.
Glazed Ceramic and Porcelain
Glazed ceramic and porcelain tiles are among the easiest surfaces to degrease. Their non-porous glass glaze tolerates mild alkaline soaps, warm water, and gentle scrubbing sponges easily.
Avoid using abrasive scouring powders or steel wool on glazed ceramics. Harsh abrasives create microscopic scratches that capture future grease splatters and dull the original gloss.
Natural Stone: Marble, Granite, Slate, and Travertine
Natural stone requires specialized care because acidic cleaners cause permanent chemical etching. Never use vinegar, lemon juice, or harsh commercial oven cleaners on natural stone backsplashes.
Clean stone surfaces with warm water and a dedicated pH-neutral stone cleaner. You can also review maintenance guidelines published by the Natural Stone Institute to ensure your cleaning routine preserves delicate stone minerals.
Wipe stone gently with soft microfiber cloths, and avoid allowing standing water to pool along unsealed edges. Reapply a high-quality penetrating stone sealer every twelve months to repel fresh oil splatters.
Glass Tile and Mirrored Panels
Glass tiles look gorgeous, but they reveal grease streaks and finger smudges instantly. They tolerate mild dish soap well, but they scratch easily if cleaned with abrasive powders.
Wash glass tiles with warm soapy water, rinse thoroughly, and finish with a 50-50 mix of distilled water and isopropyl alcohol. Buff the surface with a lint-free waffle-weave microfiber towel for a crystal-clear reflection.
Stainless Steel and Metal Sheets
Metal backsplashes demand gentle handling to prevent unsightly scratches and water stains. Always look for the directional grain in stainless steel panels before you start wiping.
Apply warm water mixed with dish soap using a soft cloth, rubbing strictly in the direction of the grain. Rinse thoroughly and dry immediately to prevent stubborn mineral deposits.
To eliminate lingering streaks on stainless steel, apply two drops of mineral oil to a dry cloth. Buff the metal gently along the grain to restore a uniform, protective luster.
Peel-and-Stick Tiles and Vinyl Backsplashes
Adhesive peel-and-stick tiles offer a quick kitchen update, but harsh solvents can dissolve their glue. Avoid saturating the seams with large volumes of standing water.
Dampen a microfiber cloth with warm water and a small drop of dish soap. Wipe the surface gently, taking care not to catch or peel back tile edges.
Dry the vinyl tiles immediately with a soft towel so moisture never seeps behind the backing. Avoid heat guns or boiling water, which can soften the vinyl and loosen the adhesive layer.
Deep-Cleaning Stubborn Grout Lines
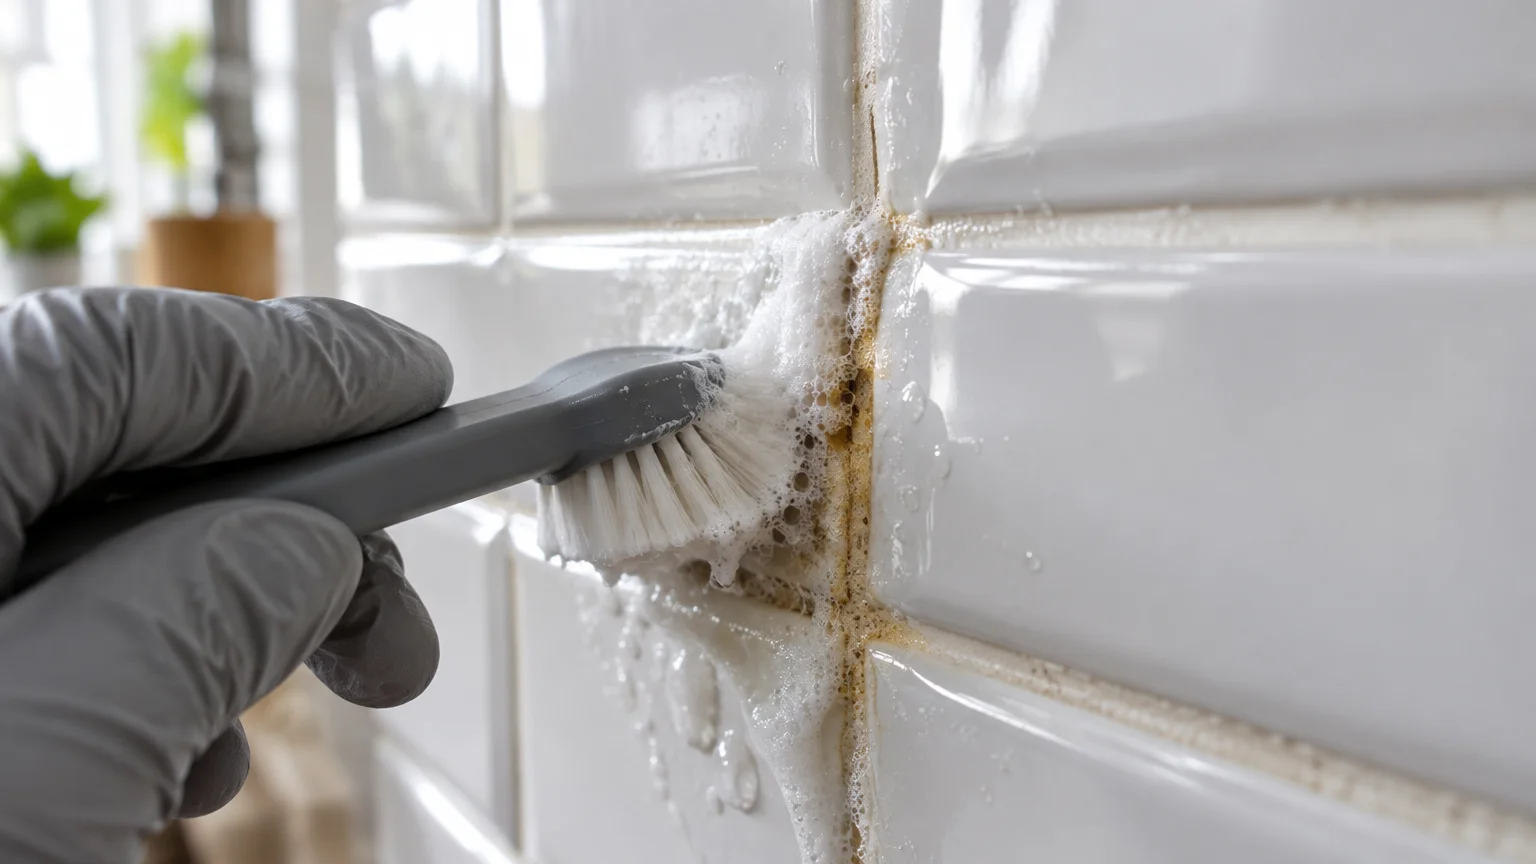
Grout is inherently porous, acting like a mineral sponge that absorbs cooking oils and aerosolized fats. Over time, grease causes grout channels behind your stove to turn dark and discolored.
To lift embedded grease, mix three parts baking soda with one part warm water into a thick paste. Spread the paste generously along your grout lines using a gloved fingertip.
Spray the paste lightly with warm water to keep it moist, then let it rest for ten minutes. The baking soda draws trapped grease out of the porous cement structure through capillary action.
Gently scrub the grout lines using a soft-bristle nylon toothbrush moving in small back-and-forth strokes. Rinse the area thoroughly with a damp microfiber cloth to remove all chalky residue.
Once your grout dries completely, seal it with a penetrating grout sealer. Sealing fills the microscopic pores in the cement, forcing grease splatters to sit on top where they wipe away effortlessly.
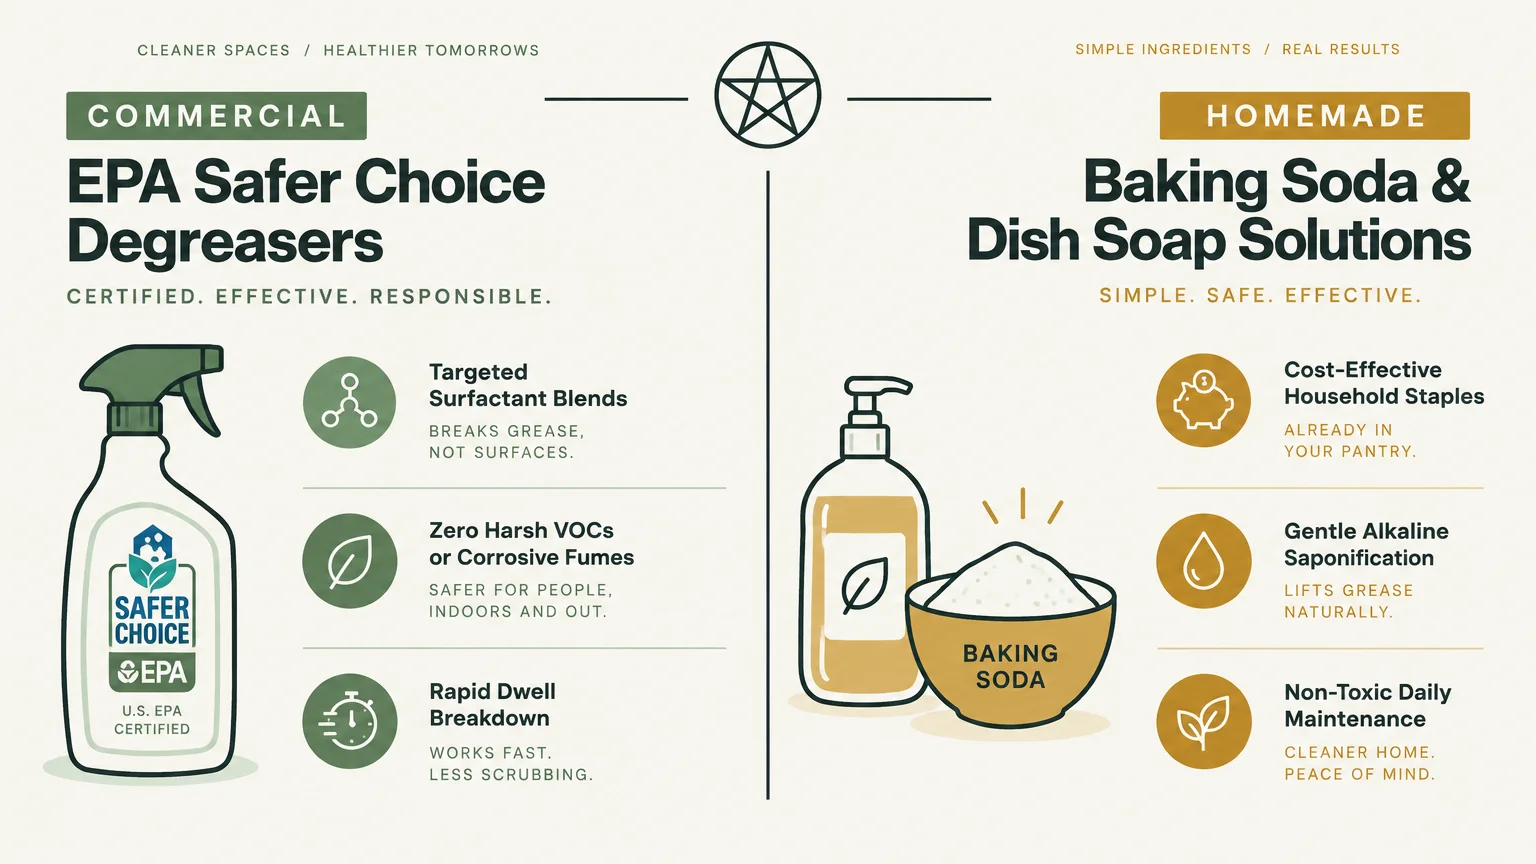
Commercial Degreasers vs. Homemade Solutions
Choosing between store-bought cleaners and pantry staples depends entirely on the thickness of the grease layer. Both approaches offer distinct advantages when used correctly.
Homemade solutions relying on warm water, dish soap, and baking soda handle routine kitchen grease cleaning beautifully. They cost pennies per use, emit zero toxic fumes, and pose minimal risk to surrounding finishes.
Commercial degreasers excel against heavy, blackened grease that has baked onto tiles for years. These products contain potent solvents that dissolve stubborn polymerized bonds in under two minutes.
When selecting a commercial degreaser, avoid industrial products formulated with butyl cellosolve or concentrated sodium hydroxide. Choose biodegradable, plant-based citrus degreasers for standard residential kitchen cleaning.
Critical Safety Rules for Kitchen Degreasing
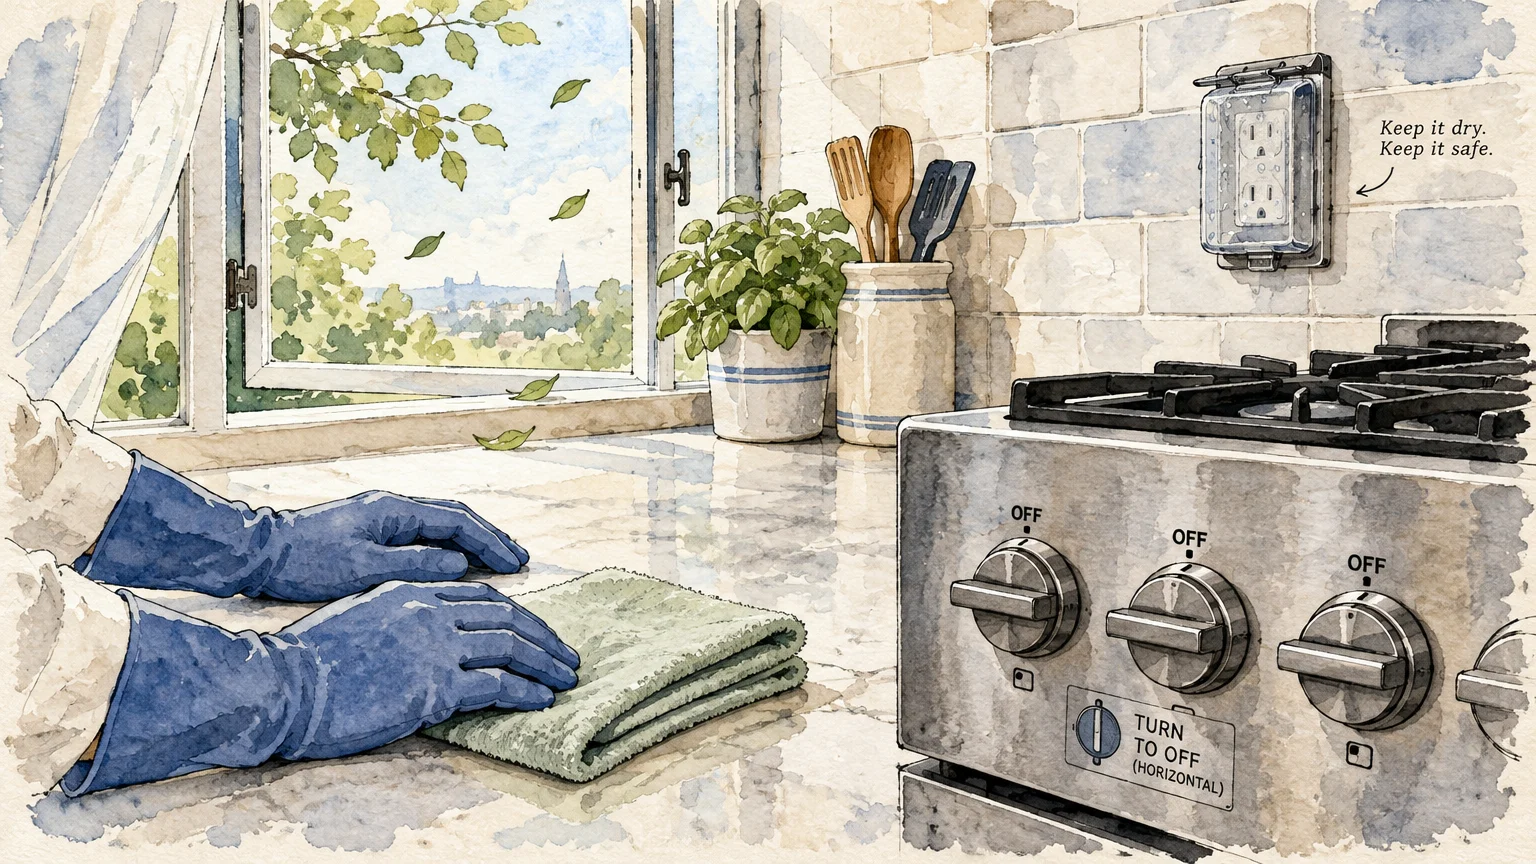
Cleaning heavy grease involves warm liquids, concentrated soaps, and proximity to kitchen appliances. Taking a few basic precautions ensures a safe, stress-free cleaning session.
Turn off your range burners and ensure the cooktop is completely cold to the touch before cleaning. Never spray cleaning solutions over hot gas pilot lights or warm induction glass.
Always maintain adequate kitchen ventilation while cleaning. Turn on your range exhaust hood and crack open a nearby window to circulate fresh air through the room.
Never mix different commercial cleaning chemicals together under any circumstances. Review cleaning and sanitizing guidelines from the Centers for Disease Control and Prevention (CDC) regarding the dangerous fumes produced by accidental chemical reactions.
Mixing chlorine bleach with ammonia, vinegar, or acidic degreasers creates toxic chloramine gas. Stick to one cleaner at a time, and rinse the wall thoroughly between applications.
Take care when working around electrical outlets and light switches mounted on your backsplash. Never spray liquid cleaners directly onto faceplates; spray your cloth lightly instead and wipe carefully around the covers.
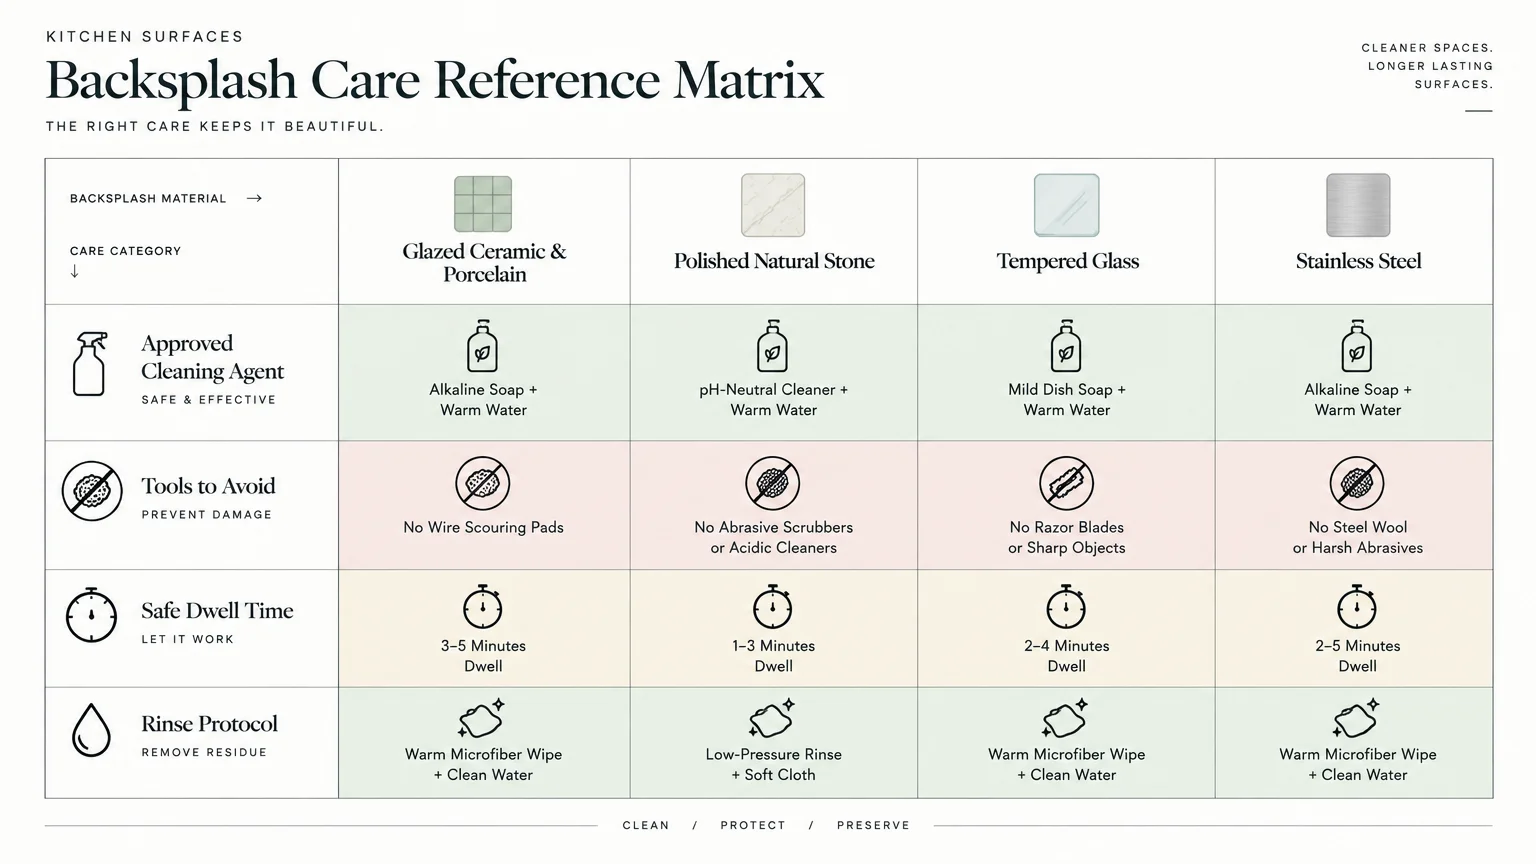
Backsplash Material Cleaning Reference Guide
Use this reference table to match your backsplash material with the safest cleaner and tool. Selecting the right combination prevents accidental etching, scratching, and dulling.
| Backsplash Material | Recommended Degreaser | Products to Avoid | Recommended Tool | Special Care Note |
|---|---|---|---|---|
| Glazed Ceramic Tile | Warm water and concentrated dish soap | Abrasive scouring powders, wire brushes | Non-scratch sponge, microfiber cloth | Rinse thoroughly to prevent soapy haze. |
| Porcelain Tile | Baking soda paste and warm soapy water | Steel wool, hydrofluoric acid | Nylon grout brush, microfiber towel | Highly durable; handles warm water soaking well. |
| Natural Marble and Limestone | pH-neutral stone cleaner | Vinegar, lemon juice, bleach, acidic degreasers | Soft plush microfiber cloth | Acid etches calcite minerals permanently within seconds. |
| Granite and Slate | Diluted dish soap or stone wash | Harsh scouring pads, ammonia | Cellulose sponge, dry buffing cloth | Reseal annually to stop grease penetration. |
| Glass and Mirror Tile | Dish soap followed by diluted rubbing alcohol | Coarse abrasive powders, scouring pads | Waffle-weave microfiber cloth | Buff dry immediately to prevent water spots. |
| Stainless Steel Panels | Warm soapy water or citrus degreaser | Chlorine bleach, steel wool pads | Soft microfiber cloth | Always wipe parallel to the metal grain. |
| Peel-and-Stick Vinyl | Mild dish soap diluted in lukewarm water | Heavy chemical solvents, hot steam | Damp microfiber cloth | Avoid soaking edges to protect adhesive backing. |
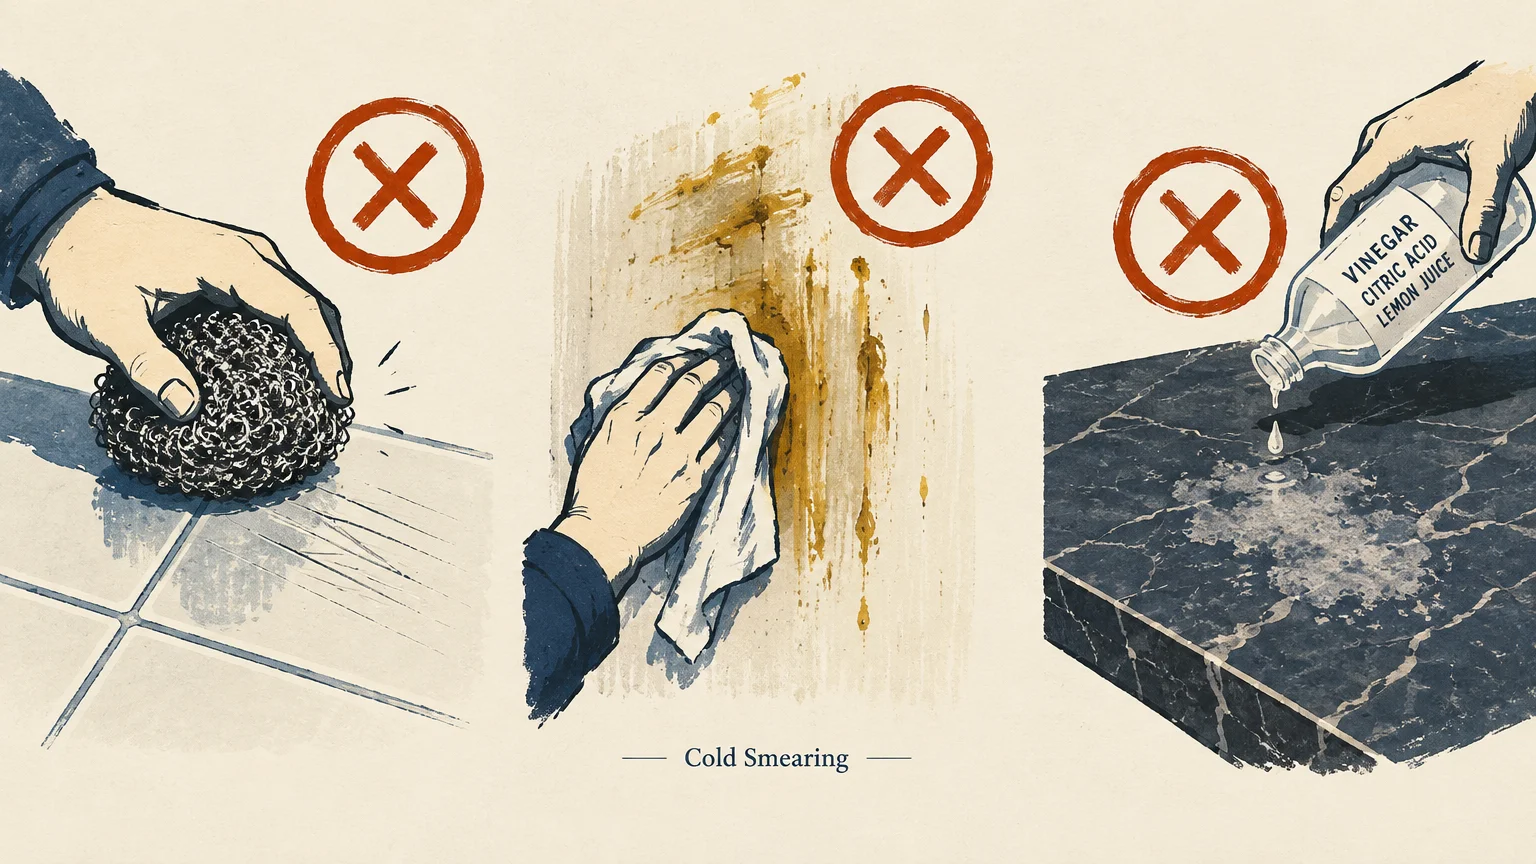
Common Mistakes That Damage Kitchen Backsplashes
Even well-intentioned cleaning can damage your walls if you use improper techniques. Avoiding these common mistakes protects your investment and keeps tiles looking new.
Using green abrasive scouring pads on glazed surfaces is a frequent error. These pads contain tiny mineral abrasives that scratch tile glazes and permanently cloud glass finishes.
Applying distilled white vinegar to marble or travertine backsplashes causes irreversible damage. Vinegar reacts chemically with calcium carbonate in the stone, creating dull, etched circles that require professional repolishing.
Skipping the clean-water rinse leaves a microscopic film of surfactant soap on the wall. This sticky film acts like a magnet, catching airborne dust and making your backsplash greasy again within days.
Scrubbing dry tile surfaces without a liquid lubricant grinds sharp surface dust into the tile glaze. Always wet the surface with warm soapy water before applying mechanical scrubbing pressure.
Pro Kitchen Cleaning Tips for Low-Effort Maintenance
Preventing heavy grease buildup is far easier than scrubbing baked-on oils every few months. Incorporating simple habits into your routine keeps your kitchen looking fresh with minimal work.
Use a fine-mesh stainless steel splatter screen over frying pans whenever you cook with oil. Splatter screens trap up to ninety percent of escaping fat droplets while allowing cooking steam to vent freely.
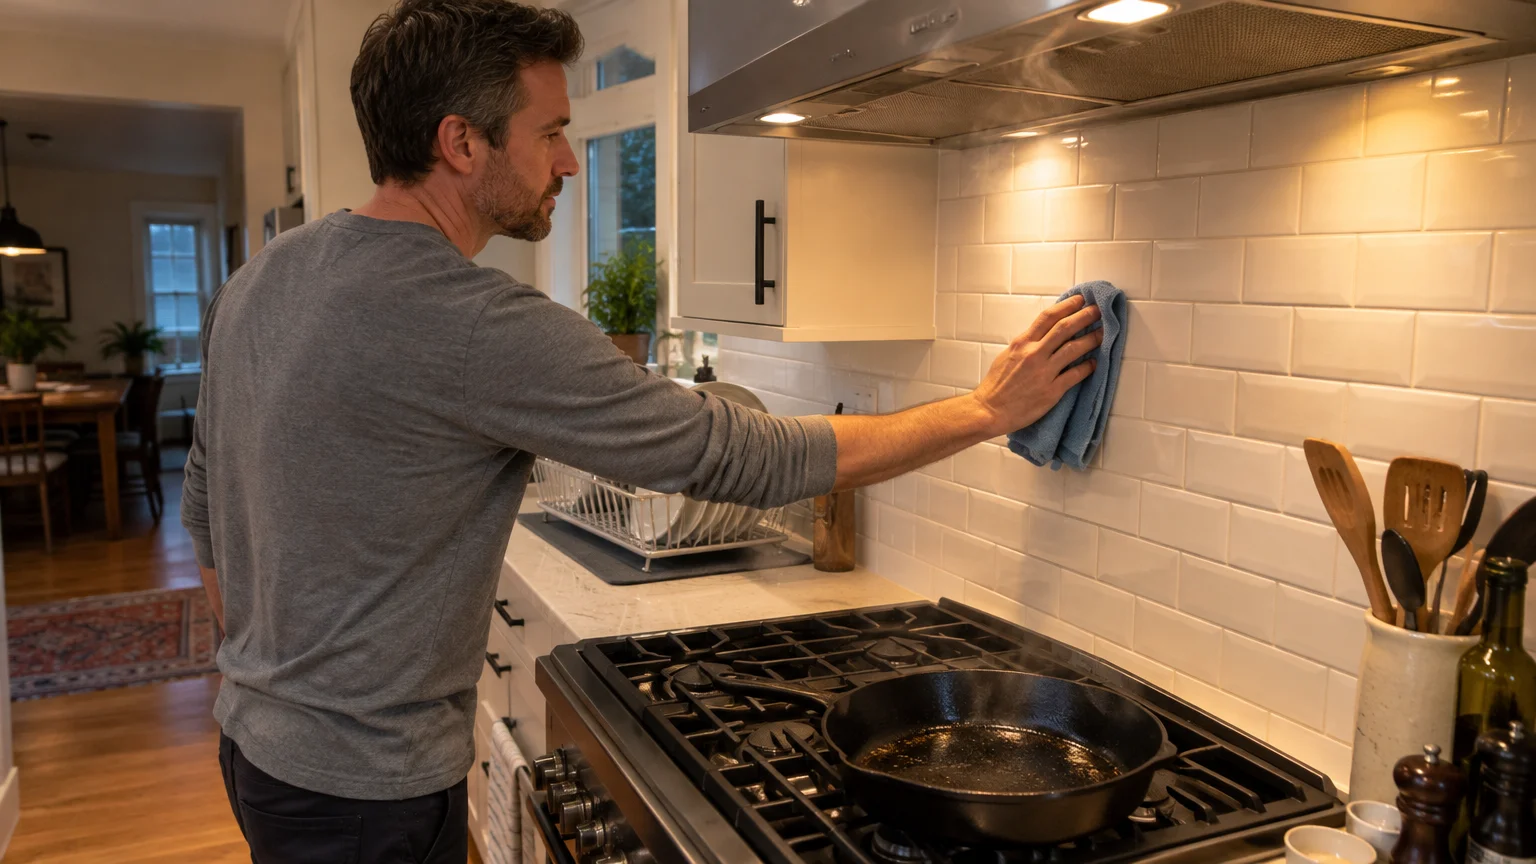
Establish a 30-second wipe-down habit immediately after cooking dinner. While the stove cools, wipe the backsplash behind your cooktop using a damp microfiber cloth with a drop of dish soap.
Wiping fresh grease takes seconds because the oil has not yet cooled, oxidized, or cross-linked into varnish. A quick nightly pass eliminates the need for exhausting deep-cleaning marathons down the road.
Keep your range hood exhaust fan running on medium or high whenever you cook on the front burners. The fan creates an airflow barrier that pulls aerosolized oils out of the kitchen before they settle on the wall.
Complete Backsplash Degreasing Checklist
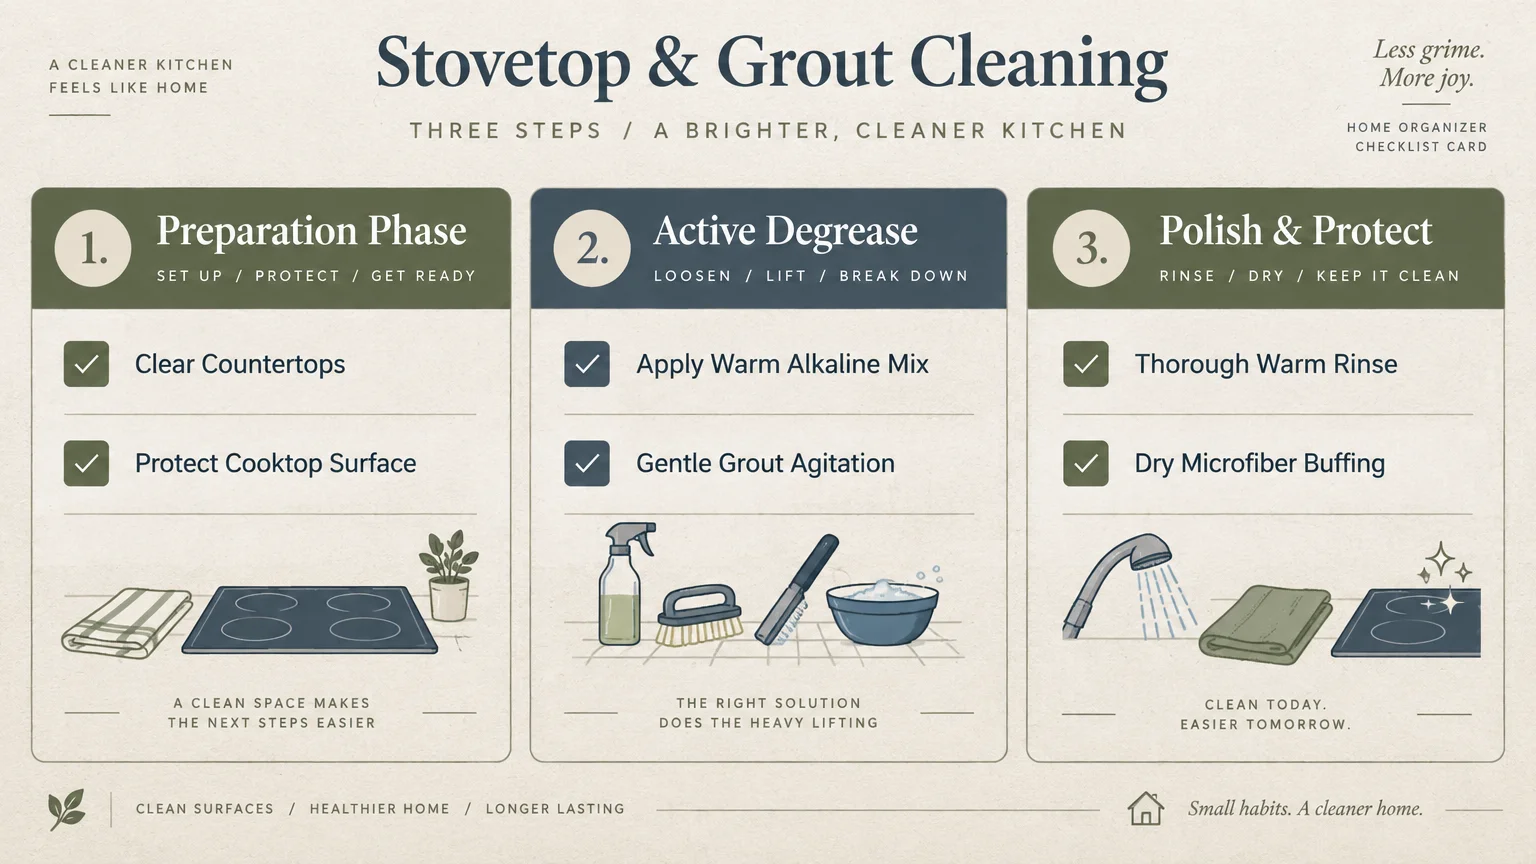
Keep this checklist handy whenever you tackle seasonal kitchen grease cleaning. Working through these phases ensures thorough, organized results from start to finish.
- Phase 1: Preparation
- Clear all countertop appliances, boards, and canisters away from the wall.
- Place a thick towel or mat over the counter seams to absorb liquid runoff.
- Ensure cooktop burners and surrounding surfaces are completely cold.
- Open a window or run the exhaust fan for active ventilation.
- Phase 2: Cleaning Execution
- Pre-soften thick grease spots using a hot, damp microfiber towel.
- Apply your material-safe degreasing solution across tiles and grout.
- Allow three to five minutes of dwell time so surfactants break down oils.
- Scrub tiles gently with a non-scratch pad using circular motions.
- Agitate grout joints with a soft-bristle nylon brush.
- Phase 3: Rinsing and Finishing
- Wipe away all dirty soap slurry using a clean, damp microfiber cloth.
- Rinse the cloth repeatedly in clean warm water until residue stops appearing.
- Buff the entire backsplash with a dry microfiber cloth to eliminate streaks.
- Inspect the wall under good task lighting for missed oil splatters.
- Replace appliances and store cleaning gear after surfaces dry completely.
Practical Next Steps for a Sparkling Backsplash
Take five minutes today to inspect the backsplash directly behind your primary cooking burner. Run a clean paper towel across the tile surface to check for hidden sticky film.
Gather a microfiber cloth, warm water, and two drops of dish soap to tackle the area behind your stove tonight. Clearing fresh splatters now ensures your kitchen stays clean, calm, and effortless to manage.