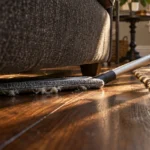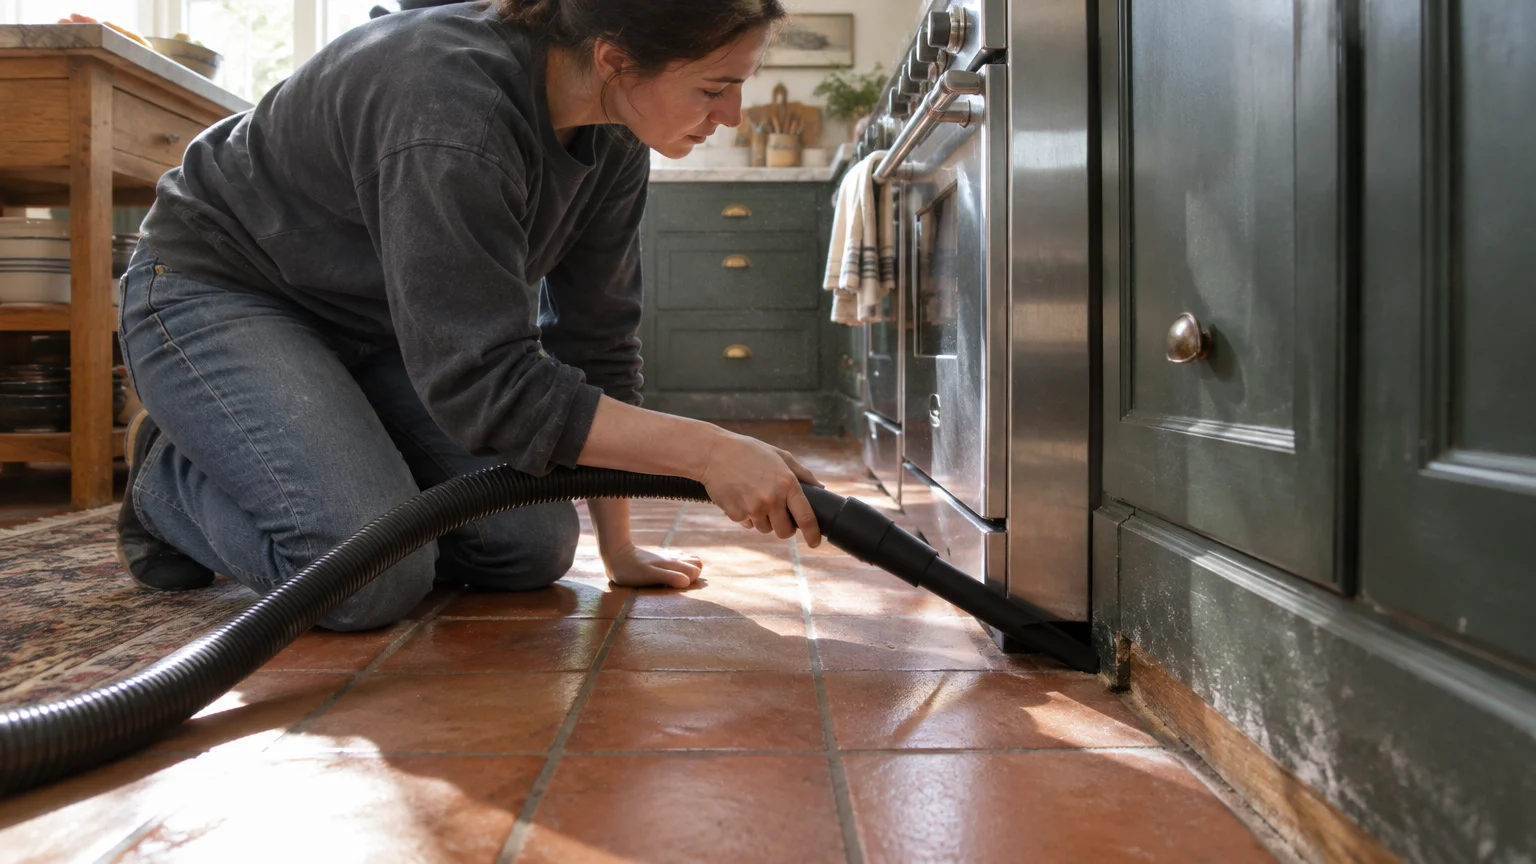
You can eliminate grease, pet hair, and hidden crumbs behind your major appliances without risking back strain or gouging your flooring. Reaching these narrow gaps requires only a few slender tools and smart household techniques.
Pulling heavy appliances away from the wall often dislodges delicate water lines and tears linoleum. Learning how to clean around them in place protects your kitchen finishes while restoring airflow to your coils.
Use this guide to clear out trapped debris, dissolve sticky residues, and safeguard your appliances in less time than moving them requires.
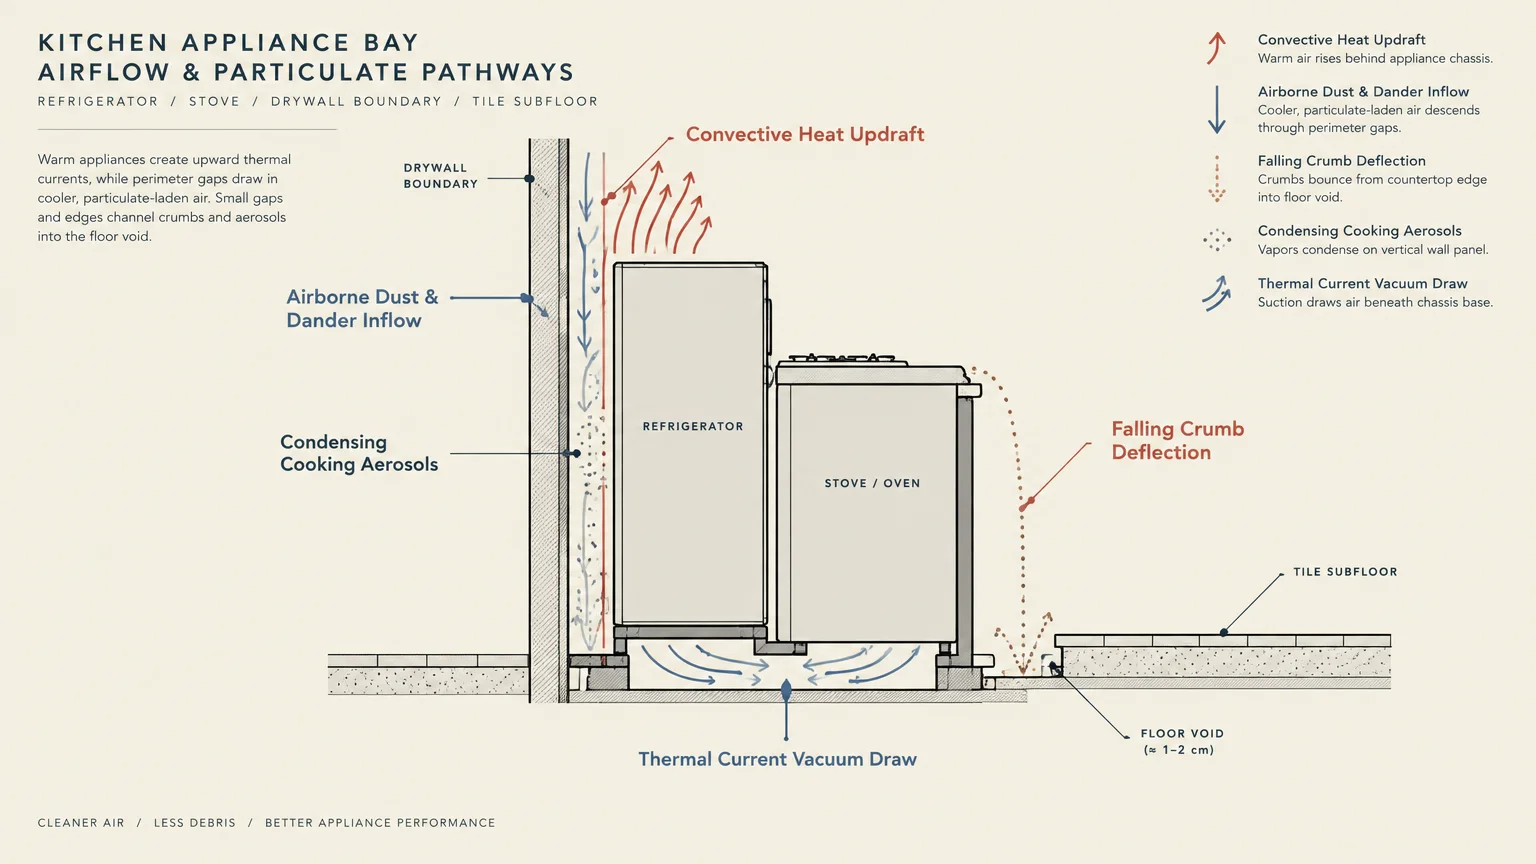
Why Dirt Accumulates in Appliance Gaps
Refrigerators and ranges generate steady convective heat that draws airborne particles into their surrounding gaps. This thermal current pulls dust bunnies, loose pet dander, and cooking aerosol deep beneath the chassis.
Kitchen crumbs bounce easily off baseboards and countertops, slipping directly into the narrow perimeter crevices. Once settled, these food particles create an attractive food source for common household pests.
Grease vapors from stovetop cooking also float outward and condense upon nearby cool surfaces. This adhesive film bonds loose dust to the wall and appliance side panels, creating a stubborn grime layer.
The U.S. Environmental Protection Agency notes that indoor dust reservoirs can collect biological allergens, including pest residues. Clearing these dark voids directly improves your home’s overall indoor air quality.
The Hidden Risks of Moving Heavy Appliances
Dragging a multi-hundred-pound appliance across your kitchen introduces immediate mechanical and structural risks. Modern luxury vinyl plank, ceramic tile, and finished hardwoods scratch easily under concentrated wheel pressure.
Refrigerators equipped with automatic ice makers rely on delicate quarter-inch copper or plastic water supply tubing. Sliding the unit forward can kink or fracture these lines, triggering slow water leaks inside the subfloor.
Gas stoves connect to your fuel supply via flexible corrugated metal conduits. Repeatedly pulling a range away from the wall stresses these pipe joints, increasing the danger of a hazardous gas leak.
Electric ranges draw heavy amperage through thick four-prong cables that plug into recessed wall receptacles. Jerking the chassis can bend plug terminals or loosen the structural electrical box inside your wall.
Cleaning these zones while the units remain stationary eliminates unnecessary physical hazards. You protect your kitchen infrastructure while achieving a thorough, sanitary result.
Essential Tools for Cleaning Tight Spaces
Reaching deep crevices requires specialized, low-profile implements designed to bypass tight clearance margins. Standard broom handles and rigid vacuum wands simply cannot navigate these narrow gaps.
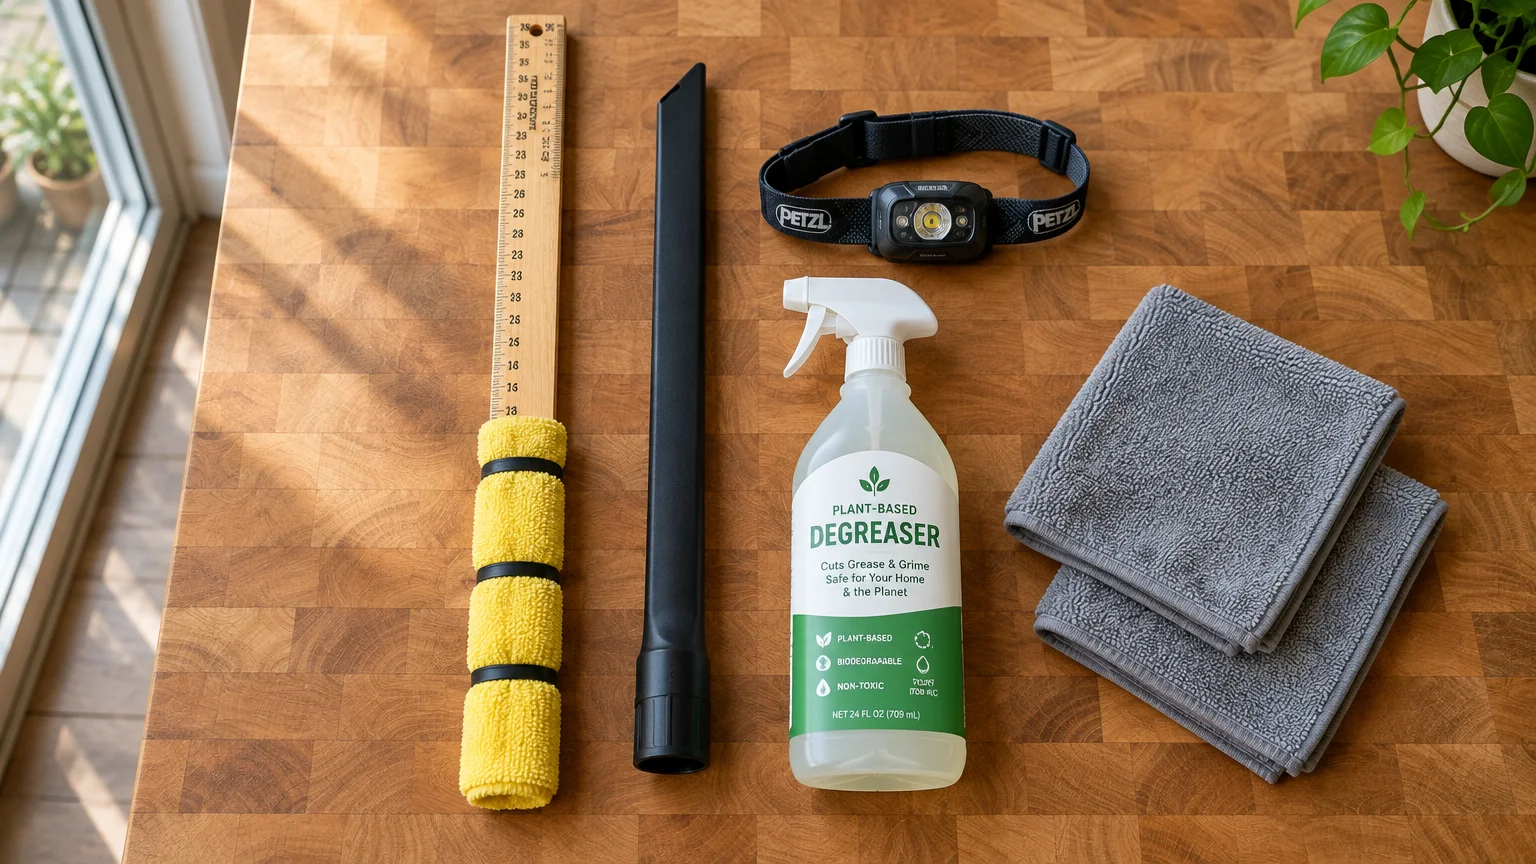
Invest in a flexible, flat microfiber gap duster featuring a bendable core. These ultra-thin tools slip into gaps narrower than half an inch and capture loose debris via static charge.
A long crevice vacuum attachment made of flexible rubber allows your vacuum cleaner to pull suction around corners. Look for wands measuring at least twenty-four inches in length for complete under-unit reach.
A standard yardstick or wooden meter stick provides an exceptional base for custom DIY cleaning devices. You can wrap these sturdy wooden slats with damp cloths to swab tight floor cavities.
Equip yourself with an intense handheld flashlight or an adjustable LED headlamp. Illuminating the void prevents you from snagging hidden electrical cords or sensor wiring during cleaning.
Keep a supply of strong heavy-duty rubber bands and multiple high-pile microfiber cloths ready on your workstation. The rubber bands anchor your cleaning towels firmly onto long sticks without slipping off mid-swipe.
Tool Comparison for Appliance Crevice Cleaning
| Tool Type | Primary Use | Maximum Reach | Surface Compatibility |
|---|---|---|---|
| Flat Microfiber Wand | Side gaps and wall dusting | Up to 36 inches | Painted drywall, enamel, stainless steel |
| Flexible Vacuum Crevice Hose | Dry crumb and pet fur extraction | 24 to 36 inches | Subflooring, floor tiles, wire framing |
| Coil Cleaning Condenser Brush | Refrigerator mechanical coils | 26 to 30 inches | Steel tubing, aluminum fins, rear grill |
| Wrapped Wooden Yardstick | Mopping wet spills and grease | 36 inches | Hardwood, vinyl plank, glazed ceramic |
| Flattened Cardboard Tube | Budget-friendly dry vacuuming | 12 to 18 inches | Baseboards, floor gaps, cabinet bases |
How to Clean Under and Behind Your Refrigerator
Begin your refrigerator cleanout by addressing the lower front access panel. Most contemporary refrigerators feature a snap-on plastic kick plate along the front bottom perimeter.
Grasp the bottom grille at both ends and pull outward firmly to unsnap its retaining clips. Some older models might require loosening two Phillips-head mounting screws located near the bottom corners.
Set the detached plastic grille into your sink and scrub it thoroughly with warm water and liquid dish soap. Let the grille dry completely while you proceed to clean the open mechanical floor cavity.
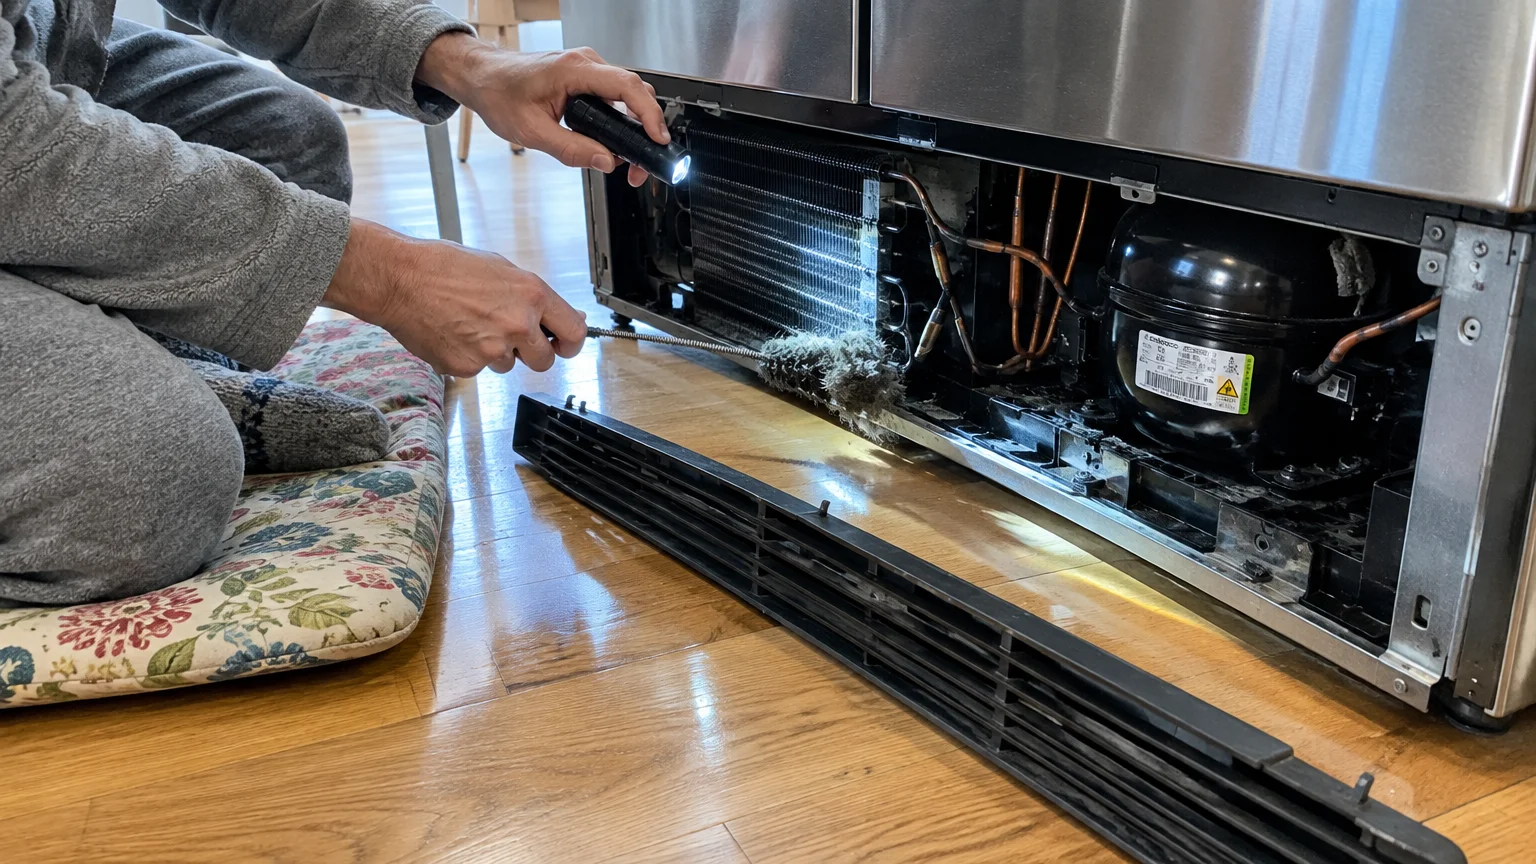
Aim your flashlight beneath the front edge of the refrigerator chassis. You will see accumulated pet hair, lost bottle caps, and thick carpet-like dust blankets settled around the structural frame.
Attach your long, flexible crevice tool to your vacuum hose. Turn the vacuum suction to high and slowly feed the tube into the open front chambers, taking care to avoid dislodging small electrical wiring.
Switch to a dedicated refrigerator coil brush, which features cylindrical nylon bristles mounted on a twisted wire core. Leading manufacturers like GE Appliances recommend cleaning condenser coils regularly to maintain cooling efficiency and prevent compressor failure.
Gently thread the coil brush between the metal condenser loops beneath or behind the unit. Spin the handle between your palms to gather loose lint onto the textured bristles, then withdraw and vacuum the brush.
After vacuuming the lower floor, prepare your microfiber dusting wand to tackle the narrow vertical side margins. Lightly mist the duster head with plain water so it attracts dust without dripping moisture down your walls.
Slide the flat wand vertically down the narrow gap separating your refrigerator cabinet from the neighboring countertop. Work your way down from top to bottom using long, steady vertical strokes.
If you encounter dried juice or condiment spills beneath the front leveling feet, wrap a damp microfiber cloth around a yardstick. Secure the cloth firmly with three rubber bands to prevent the fabric from bunching inside the cavity.
Dampen the wrapped cloth with warm water containing three drops of concentrated grease-cutting dish soap. Slide the stick beneath the unit, press downward against the floor, and scrub back and forth to dissolve stubborn sticky spots.
Dry the floor area beneath the front frame using a second dry cloth secured to your yardstick. Replace the clean, dry front kick plate by aligning the plastic tabs and pressing until they snap securely into position.
The Stove Drawer Secret for Deep Under-Oven Cleaning
The vast majority of freestanding electric and gas stoves hide a convenient secret: the bottom drawer provides open access to the floor. Homeowners often treat this chamber strictly as storage without realizing it detaches completely.
Empty all baking sheets, muffin tins, and roasting pans out of the bottom drawer and set them on your table. Clearing this weight allows the drawer glides to disengage smoothly without bending their internal metal tracks.
Pull the bottom drawer outward until it reaches its built-in safety stopping point. Lift the front face of the drawer upward at a forty-five-degree angle to clear the roller wheels from the tracks.
If your range features side glide levers, depress the small plastic latch on the left track while raising the latch on the right. Pull the drawer straight out toward your body and set it completely aside.
With the drawer removed, you now have a direct, unobstructed portal reaching the entire floor beneath your oven cavity. This open void exposes months or years of accumulated crumbs, dried grease, and lost utensils.
Shine your flashlight into the rear chamber to assess the location of your utilities before inserting any tools. You will spot the wall power outlet and either a power cord or a flexible yellow gas line.
Insert your vacuum wand across the exposed flooring, capturing dried crumbs, fallen pasta, and dry dust debris. Maintain a three-inch safety perimeter around your flexible gas connector to prevent accidental scratching or knocking.
Dissolving Sticky Cooking Grease Under the Stove
Dry vacuuming removes loose food debris, but cooking grease demands active chemical breakdown. Grease settled under cooking ranges typically mixes with pet hair and dust, creating an adhesive, leather-like film.
Avoid using harsh aerosol oven cleaners or caustic lye-based degreasers on the open kitchen floor. These strong chemicals produce suffocating vapors and can corrode the zinc coating on the stove’s structural steel frame.
Mix two cups of very hot tap water with one tablespoon of concentrated dish detergent and one-quarter cup of washing soda. This mild alkaline solution emulsifies solidified cooking oils without generating toxic chemical fumes.
Dip a microfiber cloth into your cleaning solution and wring it out until it remains damp but stops dripping. Wrap this damp towel around your cleaning stick or long-handled squeegee, securing it tightly with rubber bands.
Slide the saturated towel under the range base and lay it flat against sticky floor patches. Allow the warm cleaning solution to dwell on the grease residue for five to ten minutes to soften stubborn oils.
Apply firm downward pressure on your stick while dragging the cloth forward across the floor tiles. The abrasive loops of the microfiber cloth will lift the liquefied grease and trap it within the fabric fibers.
Rinse your cloth in clean warm water, re-secure it to your stick, and execute a second pass to remove soap film. Residual detergent left on the floor can attract new dirt rapidly if not properly rinsed away.
Align the drawer wheels with the chassis slide rails, lift the front slightly, and slide the drawer smoothly back into place. Test the drawer movement twice to confirm the tracking wheels seat securely inside their metal guides.
Step-by-Step Appliance Cleaning Checklist
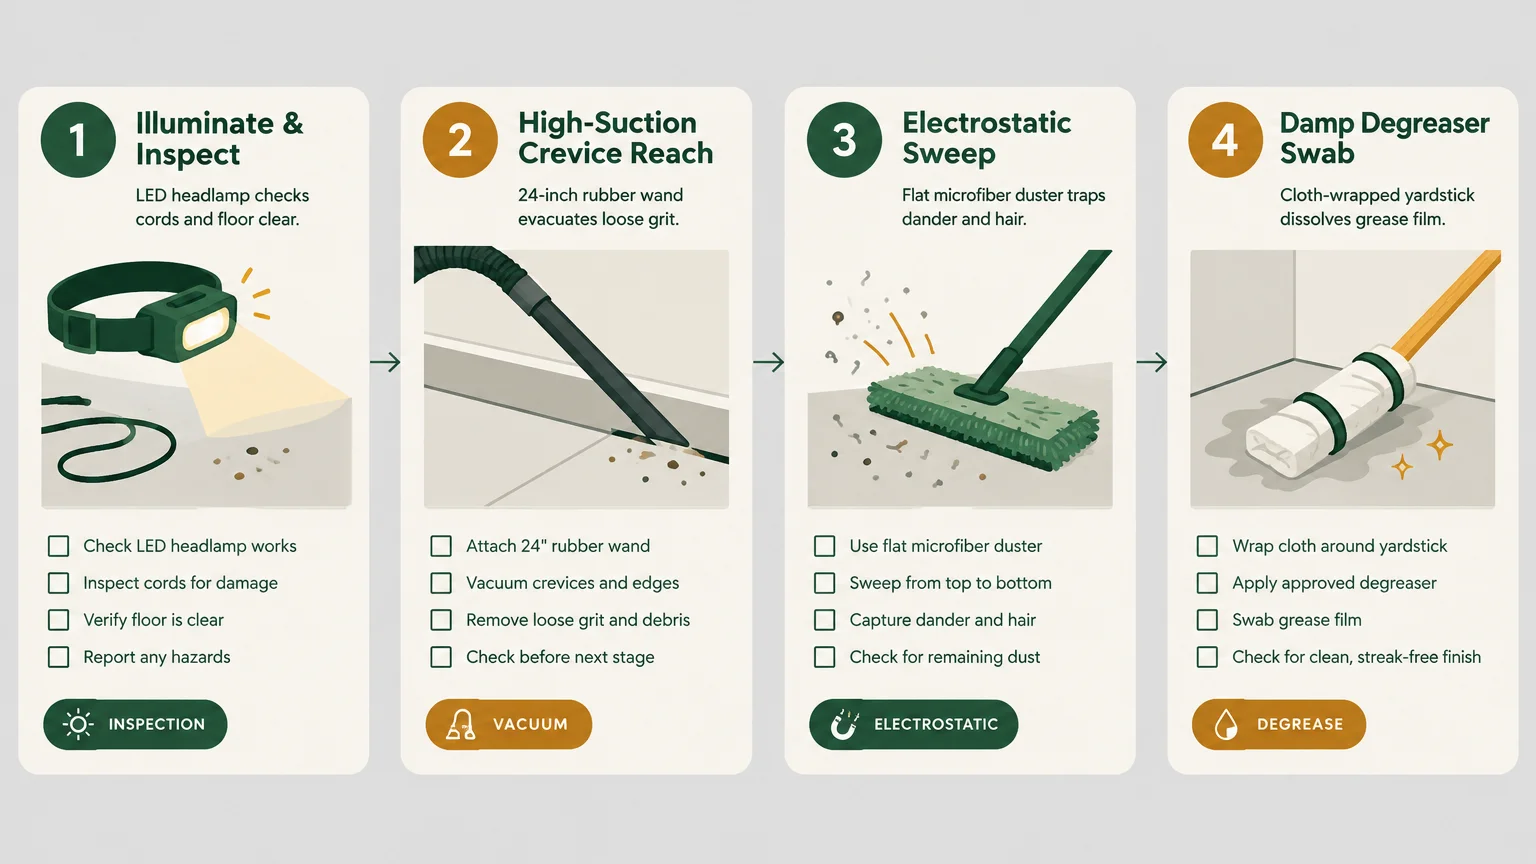
- Turn off power to the refrigerator or range at the circuit breaker if reaching near exposed electrical terminals.
- Clear nearby counter space to give yourself ample elbow room for maneuvering long tools.
- Pop off the lower refrigerator kick grille and wash it separately in warm, soapy water.
- Vacuum loose debris under the refrigerator using a twenty-four-inch flexible crevice hose.
- Clean the condenser coils using an elongated cylindrical coil brush to maintain appliance cooling efficiency.
- Wipe the side exterior panels of the refrigerator using a low-profile microfiber gap duster.
- Mop beneath the refrigerator frame using a yardstick wrapped in a damp, soapy microfiber towel.
- Empty and remove the bottom stove storage drawer to expose the full floor cavity underneath.
- Vacuum all loose crumbs, charred food remnants, and dust from the exposed oven subfloor.
- Apply a warm dish soap and washing soda solution to sticky floor grease and allow a seven-minute dwell time.
- Scrub the floor under the stove using your wrapped stick, followed by a clean water rinse swipe.
- Reinstall the stove drawer on its tracks and snap the front refrigerator grille back onto its housing.
Tackling the Counter-to-Stove Gap
The thin vertical void between your kitchen countertop and the side of your range collects high volumes of food debris. Spilled liquids, cooking oils, and flour slide down these cabinet sides during daily food preparation.
Do not attempt to scrape this crevice with steel butter knives or metal spatulas. Rigid steel tools will chip porcelain enamel coatings, gouge solid surface countertops, and peel delicate laminate cabinet veneer.
Use an ultra-thin wooden ruler or an old plastic gift card wrapped in an alcohol-moistened cleaning wipe. The thin plastic edge flexes against irregular surfaces while applying firm, scraping friction to dried spills.
Work from the back wall toward the front edge of the stove in small, controlled four-inch segments. Wipe the tool on a clean paper towel after each stroke to prevent dragging collected grease further down the cabinet.
If hardened spills resist your scraper, apply a few drops of warm water mixed with dish soap into the gap. Allow the liquid to penetrate the dried spill for three minutes before resuming with your wrapped plastic scraper.
After clearing the vertical side panels, slide your flexible microfiber duster completely down to the floor level. Sweep the duster forward along the floor edge to catch any dislodged crumbs that tumbled down during scraping.
Preventing Chemical Hazards in Enclosed Spaces
Cleaning confined spaces behind heat-producing appliances requires strict attention to chemical safety. Mixing random household cleaning agents inside poorly ventilated appliance alcoves can trigger dangerous chemical reactions.
Never combine household chlorine bleach with vinegar, ammonia, or acidic degreasers. The Centers for Disease Control and Prevention warns that mixing bleach with acids produces toxic chlorine gas that damages respiratory tissues.
Avoid spraying flammable solvent degreasers, aerosol spot lifters, or high-proof rubbing alcohol near gas appliances. Gas ranges maintain standing pilot lights or electronic spark igniters that can instantly ignite volatile airborne vapors.
Always ventilate your kitchen space thoroughly while performing deep grease-dissolving maintenance. Run your overhead exhaust fan on high and open an adjacent window to ensure steady cross-ventilation during cleaning.
Rely primarily on neutral or mildly alkaline detergents like common concentrated liquid dish soaps. These surfactant-rich formulas safely break oil surface tension without generating hazardous off-gassing or etching painted metal finishes.
DIY Tools You Can Assemble at Home
You can create highly effective, professional-grade appliance cleaning tools using common household items you already own. These simple adaptations cost almost nothing while delivering custom dimensions tailored to your kitchen layout.
Transform an ordinary cardboard gift-wrap tube or paper towel cylinder into an ultra-slim vacuum crevice adapter. Slip one end over your circular vacuum wand and secure it firmly with durable duct tape.
Flatten the remaining length of the cardboard tube with your hands until it measures less than half an inch thick. This slender paper tube bends around tight appliance legs while focusing vacuum suction directly onto localized debris.
You can also construct a sturdy vertical wall mop using a standard flat wooden yardstick. Slide an old cotton athletic sock over the end of the stick, pulling it taut along the wood shaft.
Mist the sock exterior with an all-purpose surface cleaner until damp to the touch. The tight knit of the cotton sock grips grime, while the thin profile of the ruler slips behind appliances effortlessly.
When the sock accumulates soil, simply peel it off, invert it, or toss it directly into your washing machine. This washable method eliminates disposable wipe waste while keeping maintenance costs exceptionally low.
Preventing Debris Buildup Around Kitchen Appliances
Preventative barriers significantly reduce the volume of dirt that settles into inaccessible appliance gaps. Installing smart protective accessories cuts your ongoing cleaning workload down to a fraction of the time.
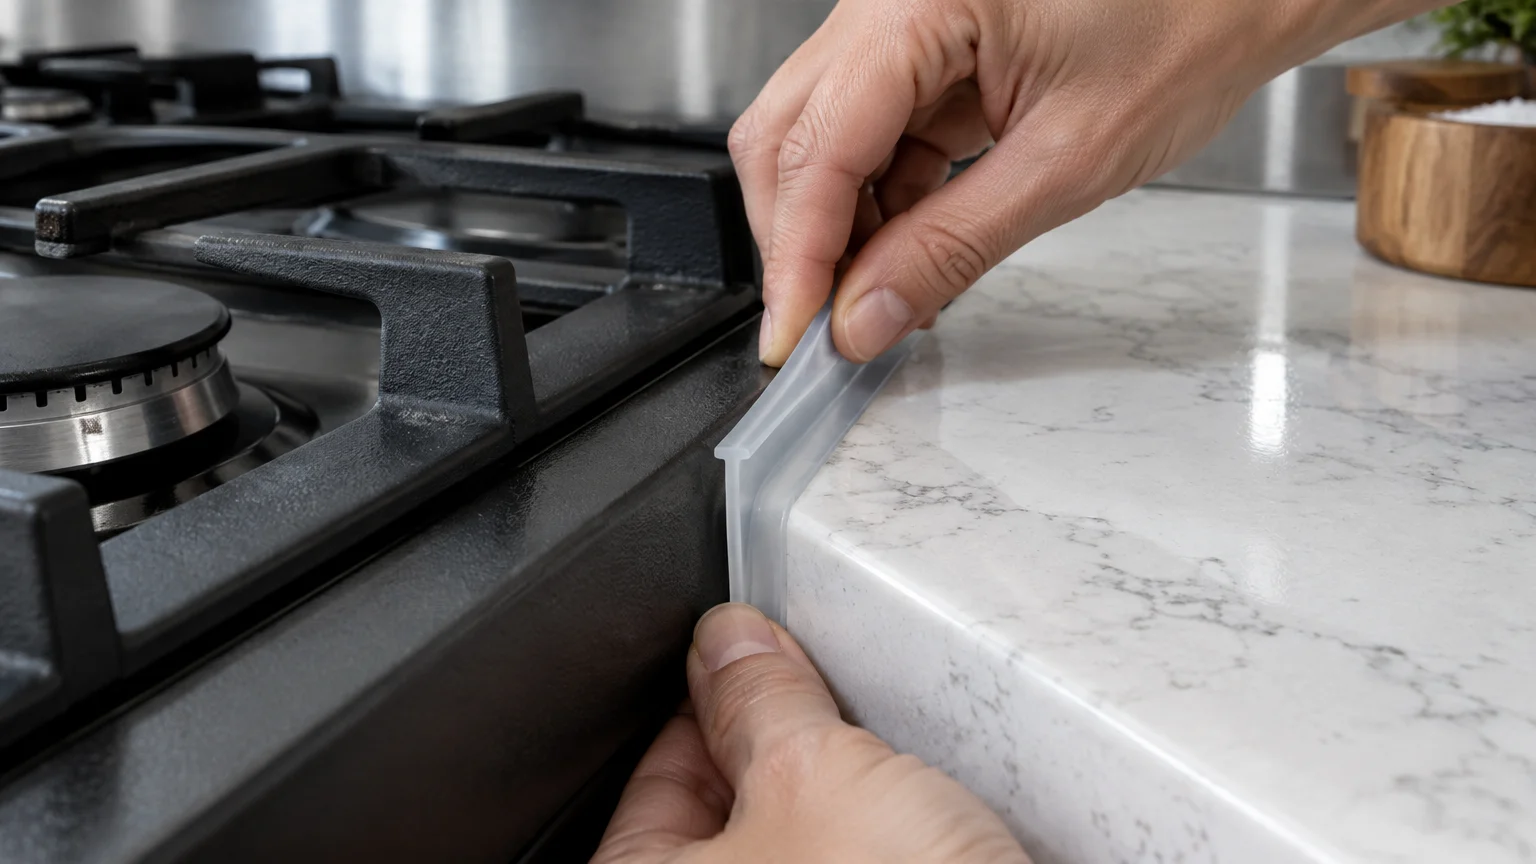
Install flexible silicone T-shaped gap guards between your kitchen countertops and the sides of your stove. These heat-resistant silicone strips bridge the open divide, creating an impermeable bridge that prevents crumbs from falling downward.
Select gap covers that match your countertop finish, choosing from matte black, crisp white, translucent, or brushed metallic tones. The pliable silicone material resists heat up to four hundred degrees Fahrenheit and washes easily in your sink.
Consider placing thin foam or rubber dust seals beneath the front perimeter of your refrigerator chassis. Securing a low-profile sweep along the lower opening halts tumbling pet hair without obstructing necessary cooling airflow.
Inspect your range hood grease filters monthly to capture cooking oils at their primary exhaust source. Clean, functioning metal baffle filters pull vaporized oil out of your air before it can settle behind appliances.
Seasonal Appliance Area Maintenance Schedule
Establishing a regular cleaning schedule prevents light dust accumulation from hardening into difficult, sticky grease films. Consistent upkeep ensures your major kitchen appliances operate safely and at peak electrical efficiency.
| Frequency | Target Appliance Area | Primary Cleaning Action | Recommended Tools |
|---|---|---|---|
| Every 2 Weeks | Countertop-to-stove side gap | Surface crumb sweep and spot wipe | Silicone scraper or wrapped ruler |
| Monthly | Under-stove floor cavity | Drawer removal and floor vacuuming | Vacuum hose with flat crevice tool |
| Quarterly | Under-refrigerator floor | Kick plate removal and dry sweep | Flexible vacuum wand and flashlight |
| Bi-Annually | Refrigerator condenser coils | Mechanical lint and hair brushing | Long cylindrical coil brush |
| Annually | Rear wall and perimeter floor | Damp microfiber degreasing swipe | Wrapped yardstick and mild dish soap |
Safety Protocols When Working Around Major Utilities
Working in tight appliance gaps requires active awareness of electrical wiring and utility connections. Careless tool insertion can damage safety components and create hazardous conditions inside your kitchen.
According to safety alerts from the U.S. Consumer Product Safety Commission, damaged electrical cords and lint buildup near heat sources represent significant residential fire hazards. Never use sharp metal probes or wire hangers that could puncture flexible insulation.
Never spray liquid cleaning solutions directly toward the back wall behind either the stove or refrigerator. Mist your cloths lightly before inserting them to ensure excess moisture does not run into electrical wall outlets.
If you notice the scent of sulfur or rotten eggs while working near your gas range, stop immediately. Do not flip light switches or operate vacuum cleaners; evacuate the house immediately and notify your gas utility company.
Inspect the flexible refrigeration copper tubing and compressor drain pan with your flashlight before poking underneath. Ensure your cleaning wands slide smoothly beneath these vital components without snagging on drain tubes or electrical harnesses.
If an obstruction resists your cleaning stick, withdraw the tool immediately to inspect the blockage visually. Forcing an implement past a mystery resistance point can puncture plastic water lines or pull ground wires loose.
Your Practical Next Step
Take five minutes today to open your stove’s bottom storage drawer and lift it out from its tracks. Vacuum the exposed floor cavity directly to instantly remove the hidden crumbs and dust resting beneath your oven.