
You can avoid costly repair visits and double the operational lifespan of your major home machines with a few deliberate chores. Simple appliance maintenance cleaning tips keep internal motors cool, electrical lines safe, and utility bills predictably low.
Replacing a damaged refrigerator or washing machine costs thousands of dollars today. Establishing consistent habits that extend appliance life preserves your household budget while sparing you sudden weekend plumbing emergencies.
This practical appliance care guide shows you how twenty minutes of routine care shields your hardest-working machinery from preventable mechanical failure.
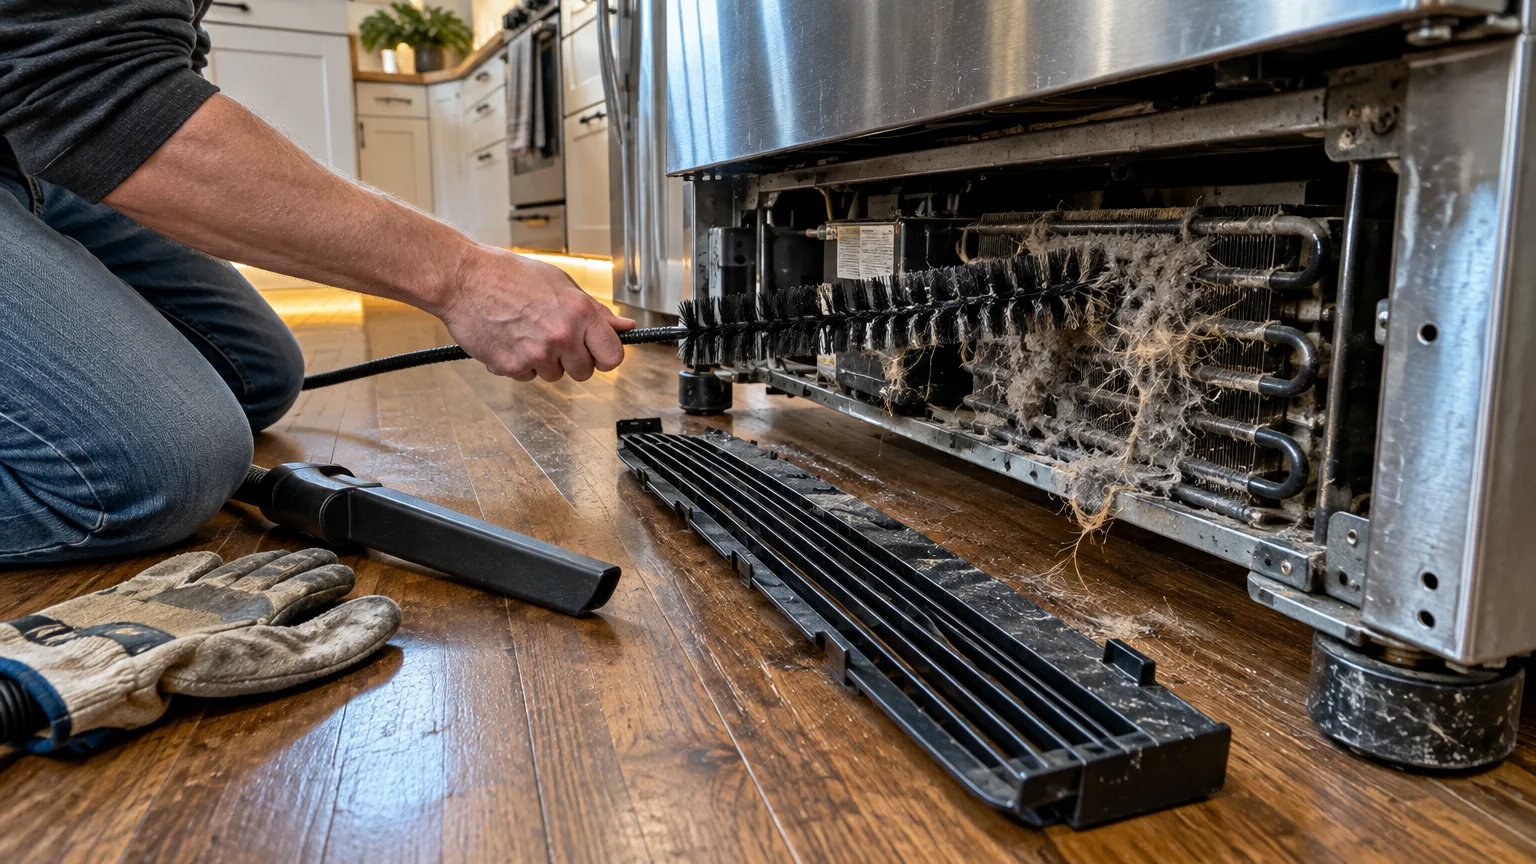
01 Clear Dust and Pet Hair from Refrigerator Condenser Coils
Refrigerator condenser coils release heat drawn from the insulated interior cabin. When dust and pet hair insulate those metal loops, the compressor works twice as hard to maintain cold temperatures.
A strained compressor consumes excessive electricity and often suffers fatal mechanical burnout years before its expected lifespan.
According to efficiency guidelines from ENERGY STAR, clean coils help maintain peak efficiency and lower your monthly electric utility bill.
Pull your refrigerator away from the wall or unsnap the lower front protective toe grille.
Use a narrow coil brush and a vacuum crevice tool to dislodge and capture accumulated debris.
Performing this task every six months keeps the compressor running quietly at comfortable operating temperatures.
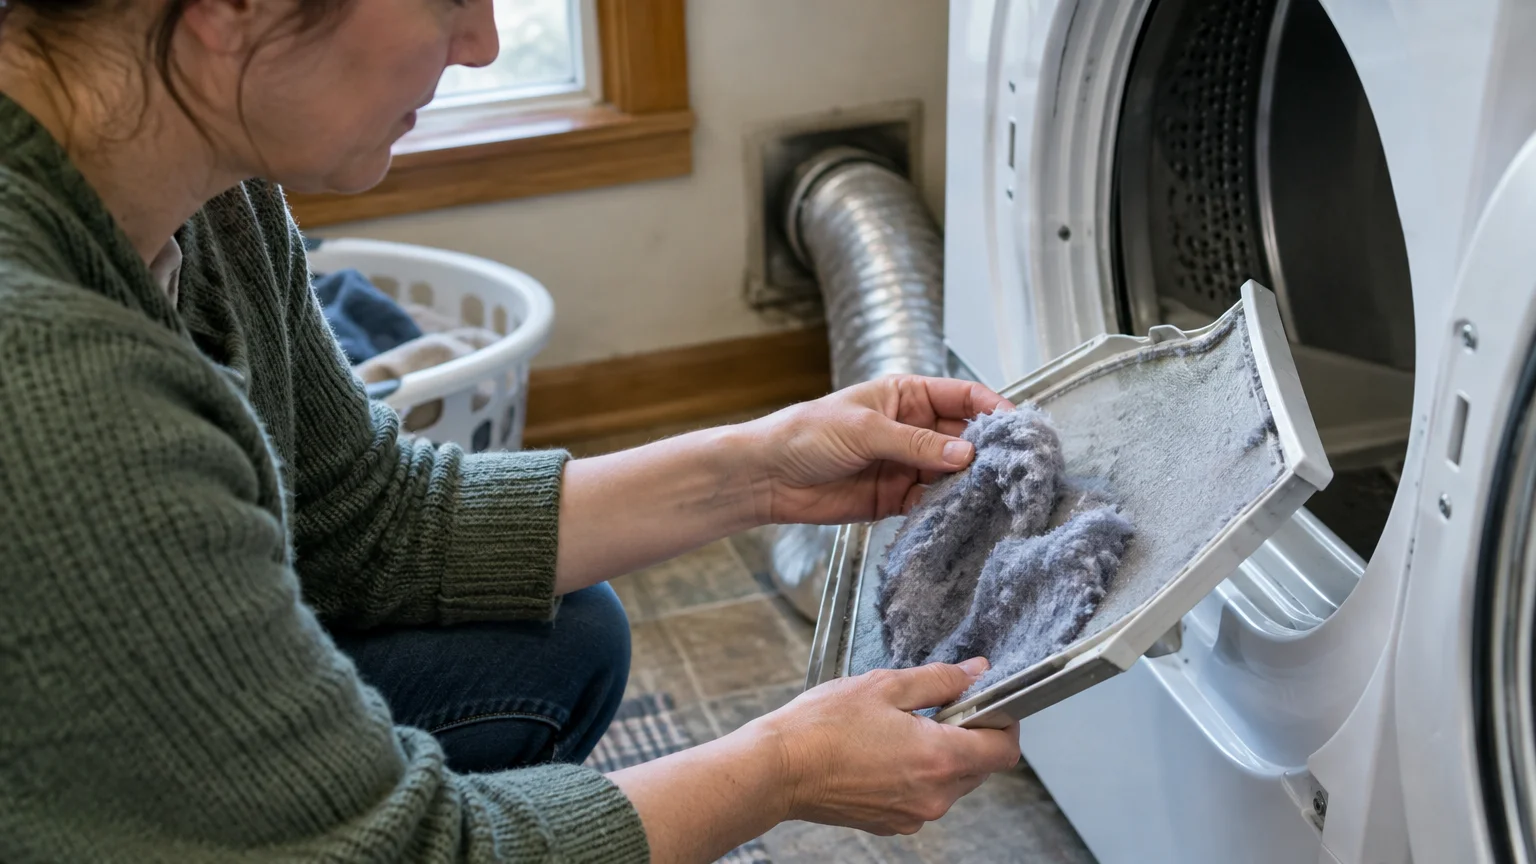
02 Purge Built-Up Lint from Dryer Filters and Exhaust Ducts
Most homeowners clear the lint trap before starting a cycle; however, microscopic fibers inevitably slip past the mesh frame. Over time, combustible fuzz coats your internal blower wheel and packs tight inside the rear vent ducting.
The National Fire Protection Association reports that failure to clean lint from dryer vents remains the leading cause of household dryer fires.
Beyond the fire risk, restricted exhaust airflow traps scorching air inside the drum, destroying heating elements, cycling thermostats, and thermal fuses.
Wash your removable mesh lint filter with warm water and liquid dish soap every few months to remove invisible fabric softener film.
Once a year, disconnect the exterior rigid metal duct and run a rotating rotary brush down its entire length.
A clean vent line shortens drying cycles, saving both your clothing fabrics and your appliance motor from thermal exhaustion.
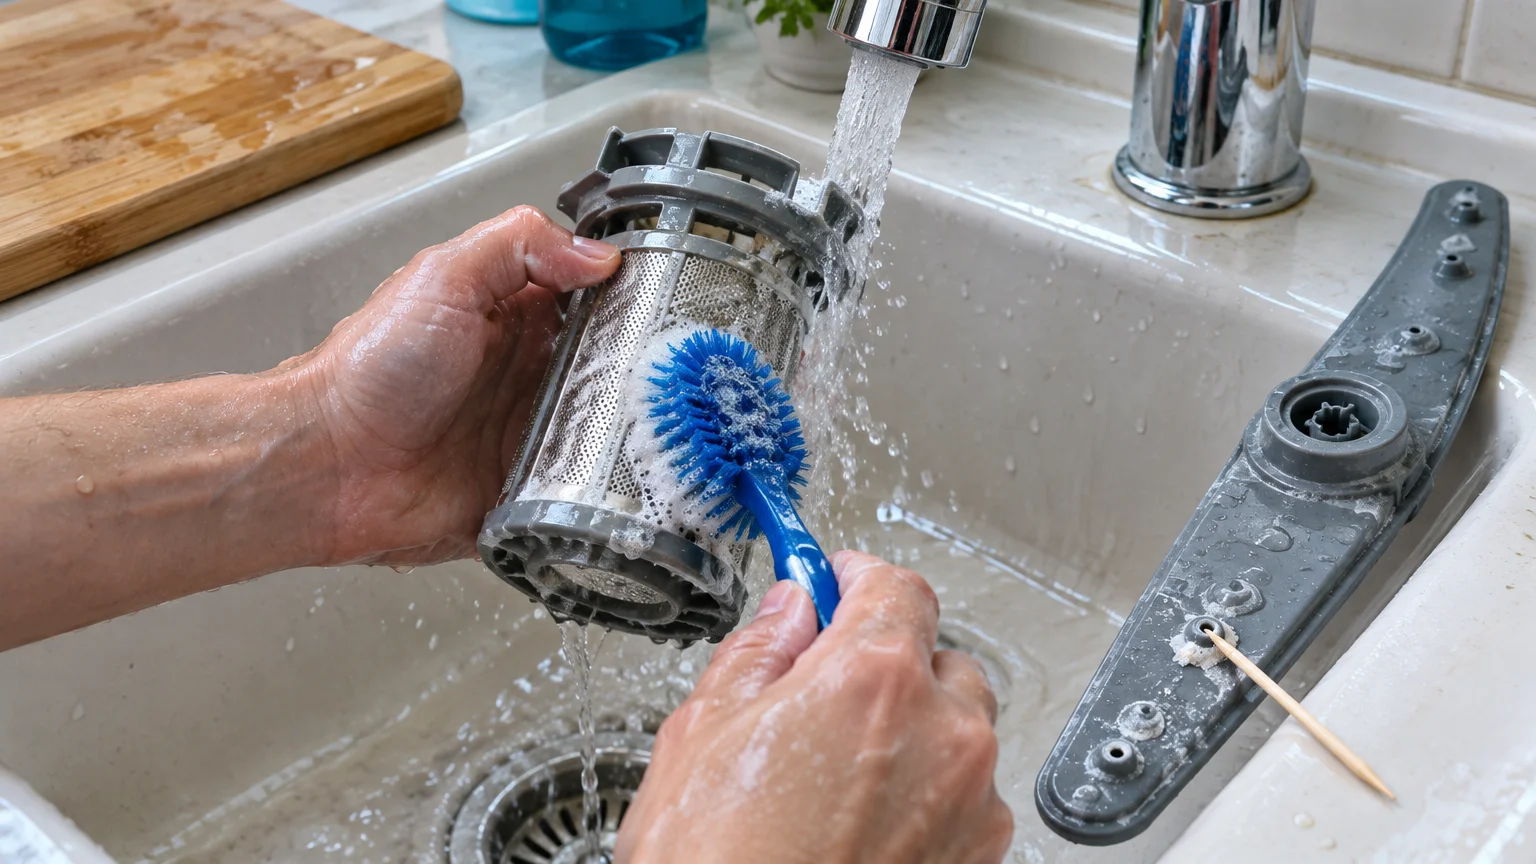
03 Descale Dishwasher Spray Nozzles and Sump Basin Filters
Dishwashers process greasy food scraps and hard water minerals during every wash cycle. Without proactive care, lime scale clogs the miniature spray jets, while greasy debris chokes the drainage pump filter.
When water pressure drops across blocked spray arm nozzles, wash performance degrades and forces you to run redundant cycles.
Locate the cylindrical filter assembly at the bottom of the tub, twist it counterclockwise, and lift it out.
Scrub the fine mesh screen under hot running water using an old nylon dish brush and mild dishwashing liquid.
Inspect the tiny holes along both spray arms; poke through any calcified mineral obstructions using a wooden toothpick.
Run an empty sanitize cycle with an interior descaling powder or two cups of distilled white vinegar once a month.
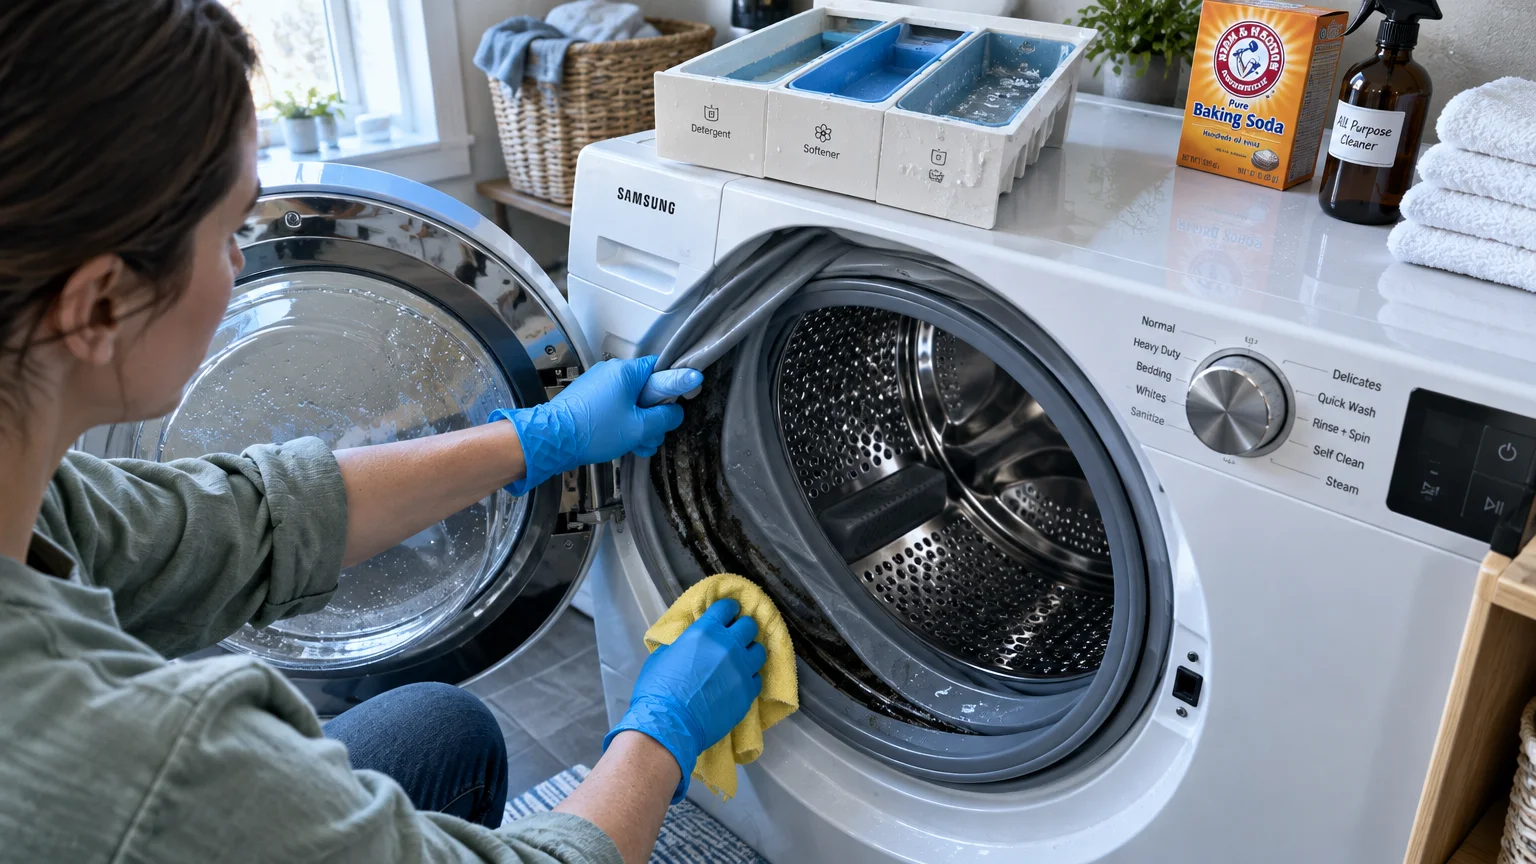
04 Sanitize Washing Machine Door Gaskets and Detergent Drawers
Modern front-loading washers rely on thick rubber door bellows to seal water safely inside the stainless drum. Unfortunately, residual laundry detergent and fabric softener create a slimy film that feeds mold and black mildew.
Trapped moisture degrades the synthetic rubber compound, causing brittle tears that lead to catastrophic floor leaks.
Wipe down the flexible rubber gasket folds with a microfiber cloth dipped in diluted oxygen bleach after laundry days.
Remove the slide-out detergent dispenser drawer to scrub away gummy residue that fosters bacterial growth and blockages.
Run a monthly maintenance wash at the highest water temperature available using an approved washing machine cleaner tablet.
Leave the machine door cracked open between cycles to encourage rapid internal evaporation and eliminate sour odors.
05 Degrease Range Hood Filters to Protect the Exhaust Blower
Cooking releases airborne atomized grease that coats your cabinetry, walls, and ceiling surfaces. Your range hood filter intercepts this airborne oil before it reaches the blower motor and exterior wall flapper.
Saturated aluminum mesh filters restrict incoming airflow, forcing the fan motor to overheat while fighting severe aerodynamic resistance.
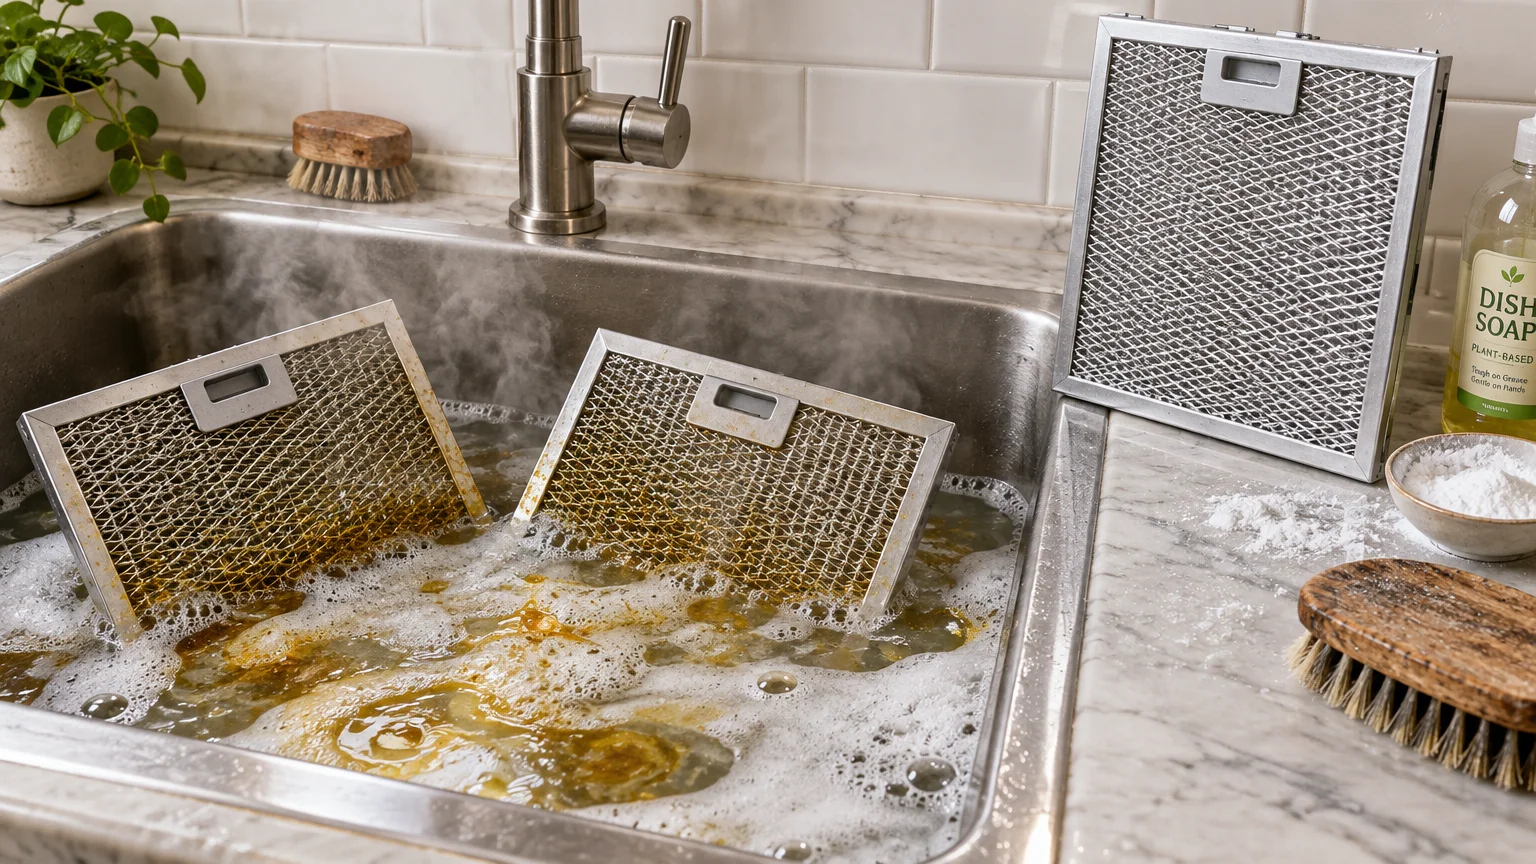
Submerge your metal grease filters in a sink basin filled with boiling water, baking soda, and grease-cutting dish soap.
Let the filters soak for twenty minutes so the alkaline solution dissolves stubborn, sticky animal fats and plant oils.
Rinse the screens thoroughly with hot tap water, shake dry, and allow them to air-dry completely before reinstalling.
Clean filters protect the exhaust motor windings from premature heat failure and lower kitchen fire hazards significantly.
06 Flush Corrosive Sediment from Your Domestic Water Heater
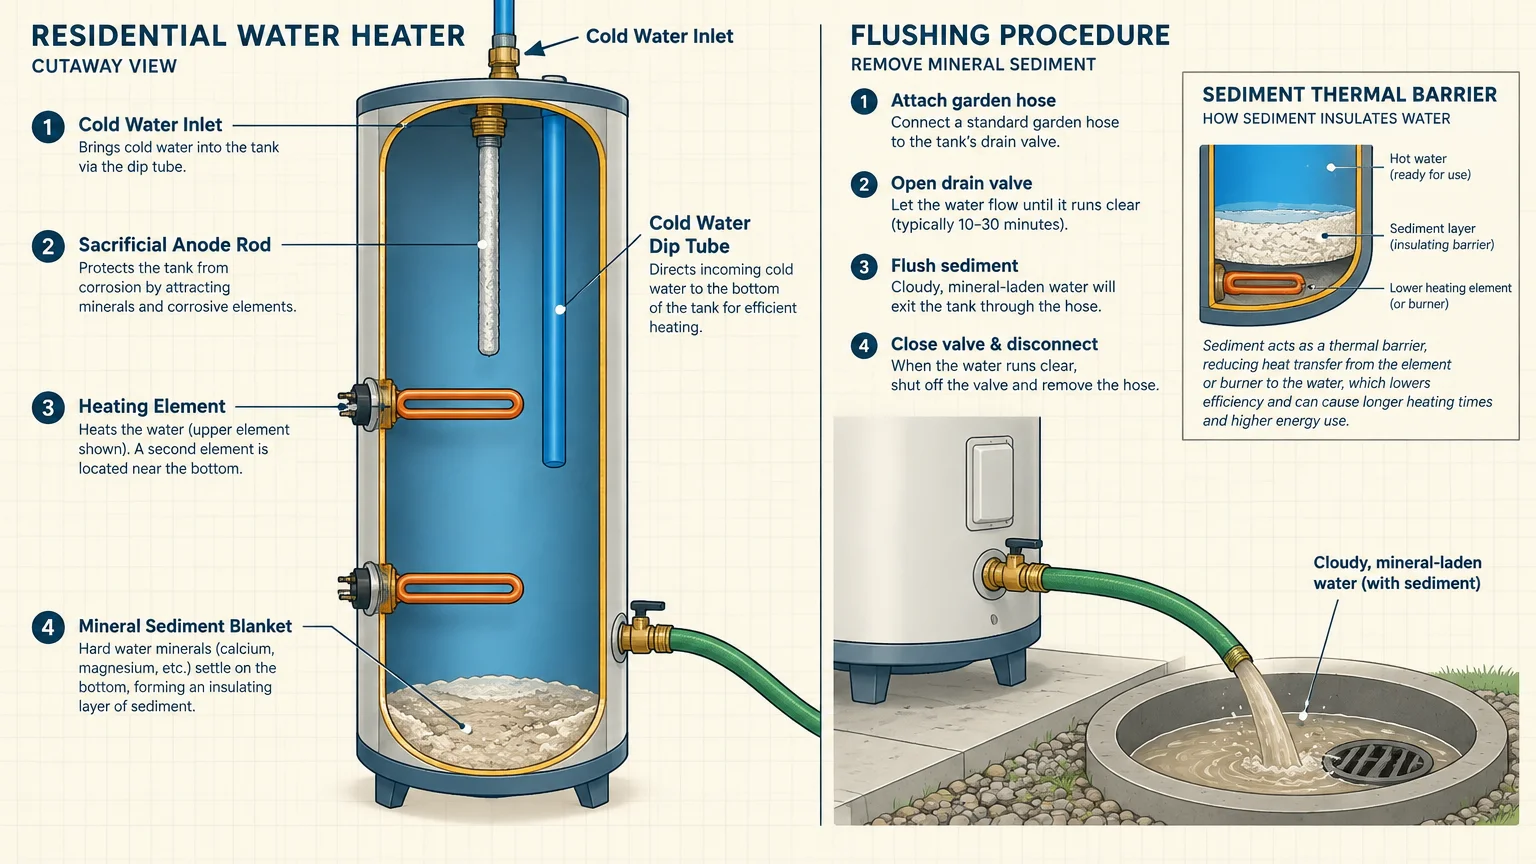
Municipal water supplies carry dissolved calcium carbonate and magnesium that settle to the bottom of water storage tanks. Over time, this calcified blanket acts as an insulating barrier between the gas burner and water supply.
The tank bottom overheats, weakening the steel jacket and accelerating internal rust until the vessel ruptures.
If you run a tankless unit, narrow copper heat exchanger channels scale up quickly, triggering system shutdown error codes.
Connect a standard garden hose to the drain valve at the tank base and direct it into a floor drain.
Flush several gallons out until the discharge water runs completely clear of sandy sediment flakes.
Annual flushing extends the tank life past ten years and eliminates popping or rumbling sounds during active heating cycles.
07 Wipe Microwave Cavities and Inspect the Mica Waveguide Cover
Food splatters inside a microwave do more than smell unpleasant when reheated. Baked-on sauce droplets absorb microwave radiation during subsequent heating cycles, creating concentrated thermal hotspots along the enamel walls.
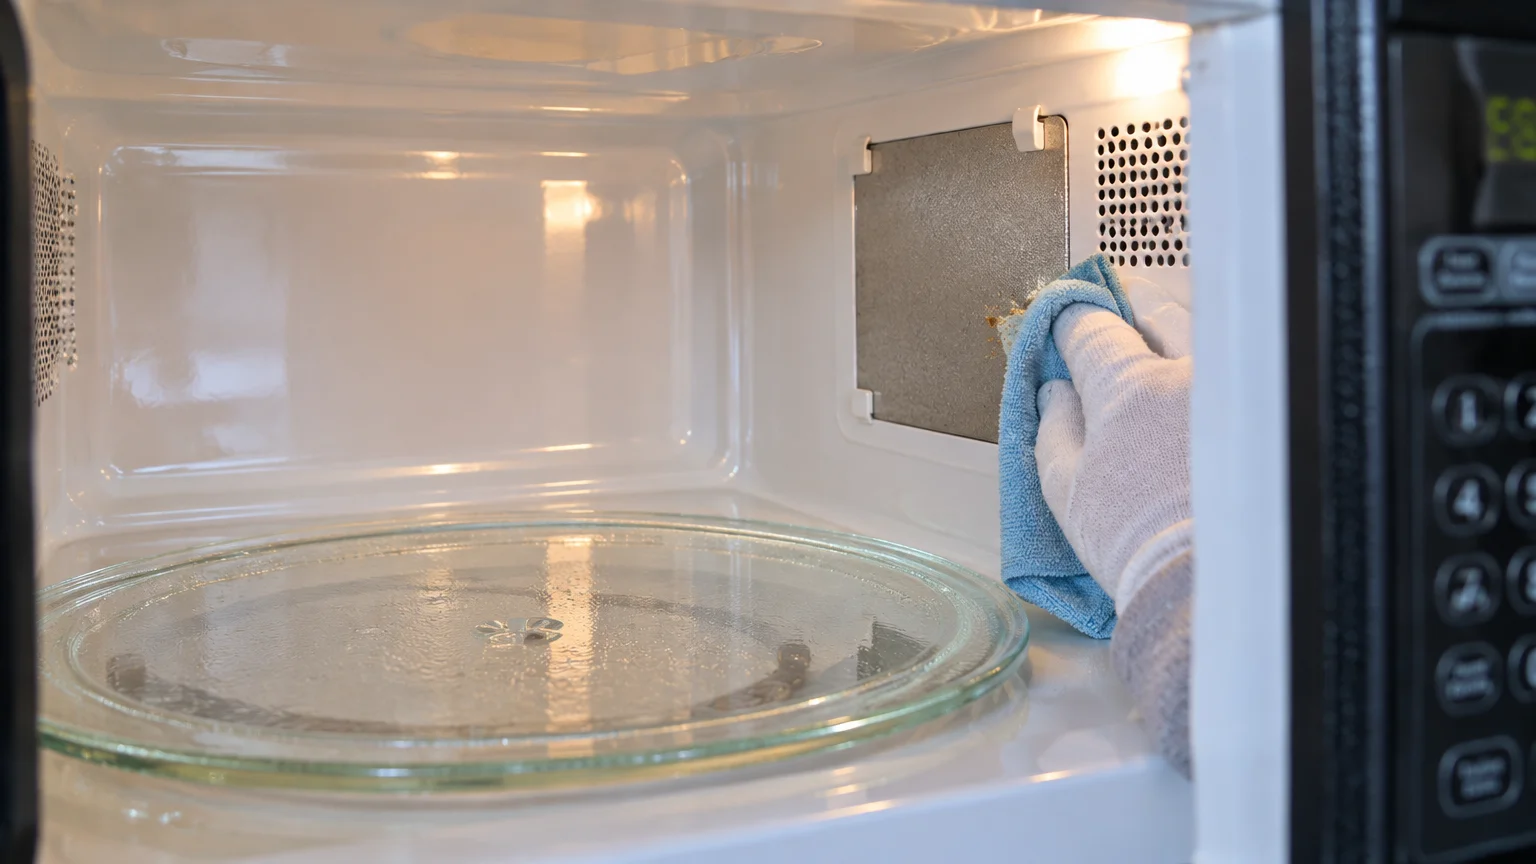
If food debris coats the delicate mica waveguide cover, high-voltage electrical arcing can scorch the magnetron tube permanently.
Technical resources from the Association of Home Appliance Manufacturers emphasize keeping microwave cavities clean to prevent arcing and component failure.
Place a microwave-safe bowl containing two cups of water and lemon slices inside the unit.
Heat the water on high for five minutes, letting steam soften hardened grease before wiping surfaces with a soft rag.
Check the cardboard-like waveguide panel on the interior right wall; replace it immediately if it shows burn marks.

08 Descale Internal Heating Elements in Coffee Makers and Kettles
Coffee makers funnel water through miniature aluminum or copper boiler tubes that measure barely a quarter-inch wide. Mineral scale precipitates onto these hot surfaces, restricting water flow and forcing the thermal pump to struggle.
Hard scale buildup makes the heating element burn hotter to reach brewing temperatures, ultimately blowing the internal thermal fuse.
Oily coffee residues also back up into internal check valves, causing bitter flavor profiles and premature pump failure.
Run a solution of equal parts filtered water and white vinegar through a complete brewing cycle every sixty days.
Follow this descaling pass with two fresh water cycles to flush lingering acidic odors from the pump tubing.
This two-step maintenance routine keeps brewing temperatures near ideal levels and prevents unexpected morning appliance failures.

09 Clean Oven Gaskets and Remove Crumbs from Heating Elements
The flexible silicone or woven fiberglass gasket around your oven door holds intense heat inside the baking chamber. When burnt grease and sauce crust on the seal, the material stiffens, loses elasticity, and cracks.
Damaged door gaskets let heat escape continuously, forcing heating elements or gas burners to run constantly to maintain temperatures.
Independent equipment evaluations from Consumer Reports reveal that poor oven seals distort baking temperatures and inflate residential energy consumption.
Gently sponge the perimeter gasket with warm water and mild dish soap, avoiding aggressive scrubbing that frays woven fibers.
Vacuum loose carbonized food crumbs beneath lower bake elements to prevent electrical shorts and hot spot blistering.
Keeping your oven cavity clean protects internal convection fans and prevents expensive sensor replacements down the road.
Master Appliance Maintenance Schedule
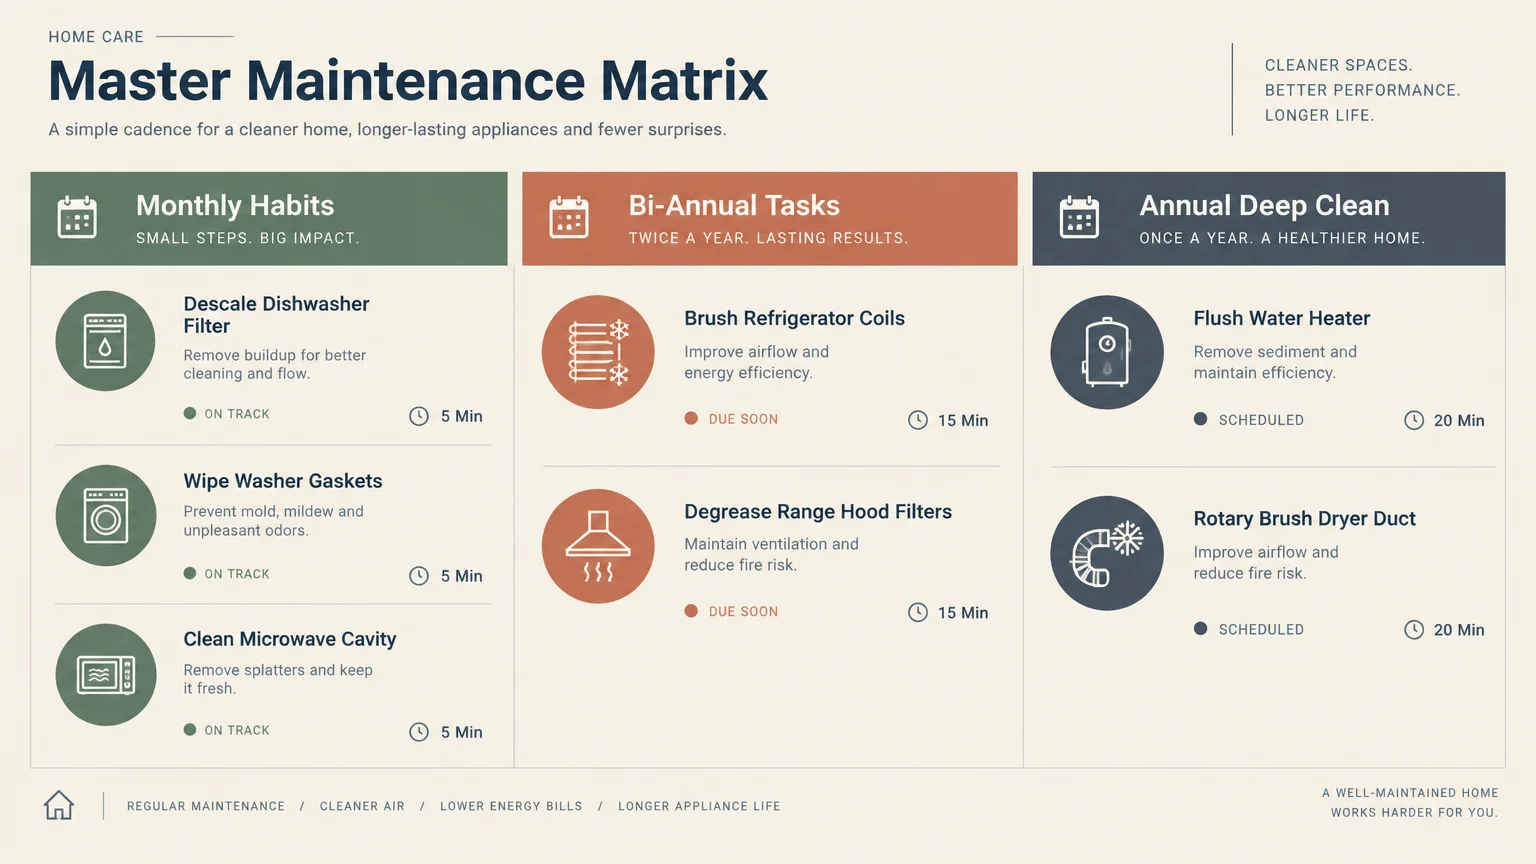
Sticking to a structured routine prevents forgotten chores from turning into catastrophic component failures.
Refer to this simple reference table to plan your seasonal and monthly home maintenance tasks effectively.
| Appliance | Recommended Cleaning Frequency | Target Component | Primary Breakdown Prevented |
|---|---|---|---|
| Refrigerator | Every 6 Months | Condenser Coils and Fan | Compressor Motor Burnout |
| Clothes Dryer | Every 3 to 12 Months | Lint Filter and Exhaust Duct | Thermal Fuse Blowout and House Fire |
| Dishwasher | Monthly | Sump Basin Filter and Spray Arms | Drain Pump Burnout and Clogged Nozzles |
| Washing Machine | Monthly | Rubber Door Bellows and Detergent Tray | Bellows Tearing, Mildew, and Floor Flooding |
| Range Hood | Every 2 to 3 Months | Aluminum Baffle Filters | Blower Motor Heat Exhaustion |
| Water Heater | Annually | Bottom Tank Reservoir | Tank Floor Rusting and Catastrophic Rupture |
| Microwave Oven | Weekly to Monthly | Cavity Walls and Waveguide Plate | Electrical Arcing and Magnetron Failure |
| Drip Coffee Maker | Every 60 Days | Internal Aluminum Boiler Tubes | Scale Clogging and Thermal Element Burnout |
| Bake and Convection Oven | Quarterly | Door Gasket and Cavity Base | Heat Bleed, Sensor Wear, and Uneven Baking |
Consistently following this schedule protects your manufacturer warranties and keeps machinery operating at factory specifications.

Essential Tools for Your Appliance Maintenance Kit
You do not need expensive specialized equipment to execute these cleaning tips for longer lasting appliances.
Storing a dedicated maintenance kit in your utility closet makes monthly appliance upkeep effortless and quick to complete.
- Condenser coil brush: A long, bendable bristle brush designed to reach narrow cavities underneath and behind refrigerators.
- Rotary vent cleaning kit: Flexible extension rods with a circular bristle head that connects to a cordless drill for duct sweeping.
- Microfiber cleaning cloths: Lint-free rags that pick up grease and moisture without scratching sensitive appliance finishes.
- Wooden toothpicks and soft nylon brushes: Gentle detailing tools for clearing calcified water jets without widening delicate plastic openings.
- Distilled white vinegar and baking soda: Safe, economical household cleaning agents that dissolve mineral scale and neutralize organic odors.
- Appliance descaling tablets: Formulated chemical cleansers engineered to dissolve limescale inside high-efficiency washing machines and dishwashers.
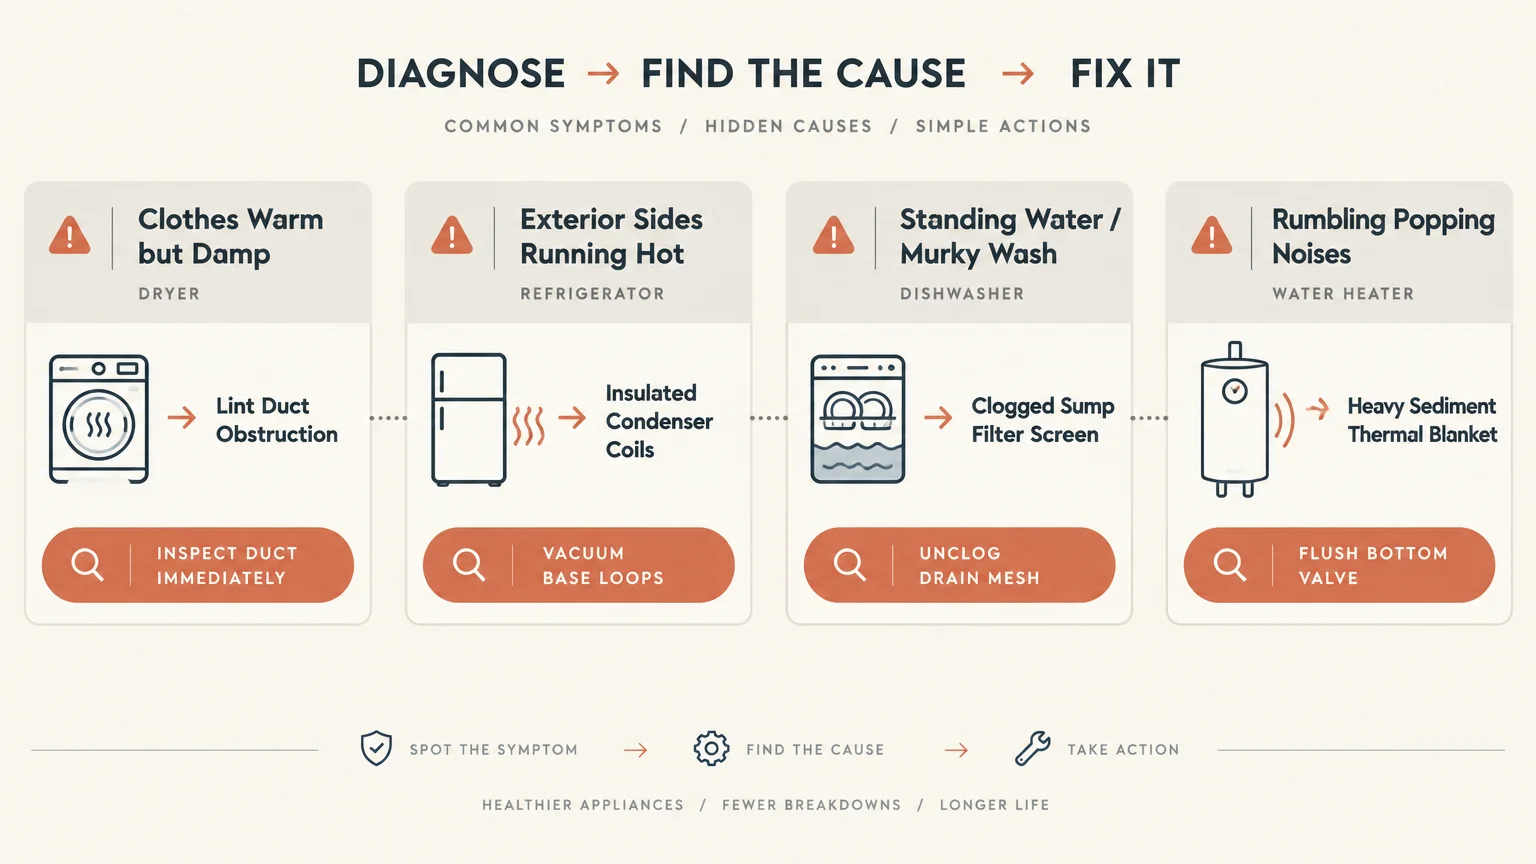
Warning Signs That Call for Immediate Appliance Cleaning
Catching early warning signs allows you to prevent appliance breakdown cleaning crises before internal components undergo permanent physical damage.
Listen closely to the subtle sounds and mechanical behaviors your machines exhibit during normal everyday operation.
A refrigerator motor that hums continuously for hours usually signals choking, dust-covered condenser coils.
Clothes taking more than fifty minutes to dry indicates dangerous lint blockages inside your exhaust vent.
Pungent, sour odors radiating from your washing machine or dishwasher indicate bacterial biofilm accumulation behind hidden baffles.
Persistent popping or rumbling sounds inside a hot water heater confirm heavy calcified sediment baking along the tank floor.

How to Build an Effortless Appliance Care Routine
Attempting to deep clean every appliance in a single weekend often causes unnecessary fatigue and frustration.
Spreading these simple maintenance habits across your yearly household routine makes home management painless and manageable.
- Pair appliance chores with existing calendar events, such as changing smoke detector batteries or turning back clocks for daylight saving time.
- Assign specific monthly tasks to designated weekends; for example, clean your dishwasher filter on the first Saturday of each month.
- Keep necessary tools, such as your coil brush and descaling solutions, within immediate reach inside the laundry room or pantry.
- Involve other household members by assigning quick, age-appropriate duties like wiping oven gaskets or dusting exhaust vents.
- Log completed service dates on a small note taped inside your utility cabinet door to track your maintenance progress.
Small, steady efforts yield far greater equipment reliability than occasional frantic emergency cleanups.
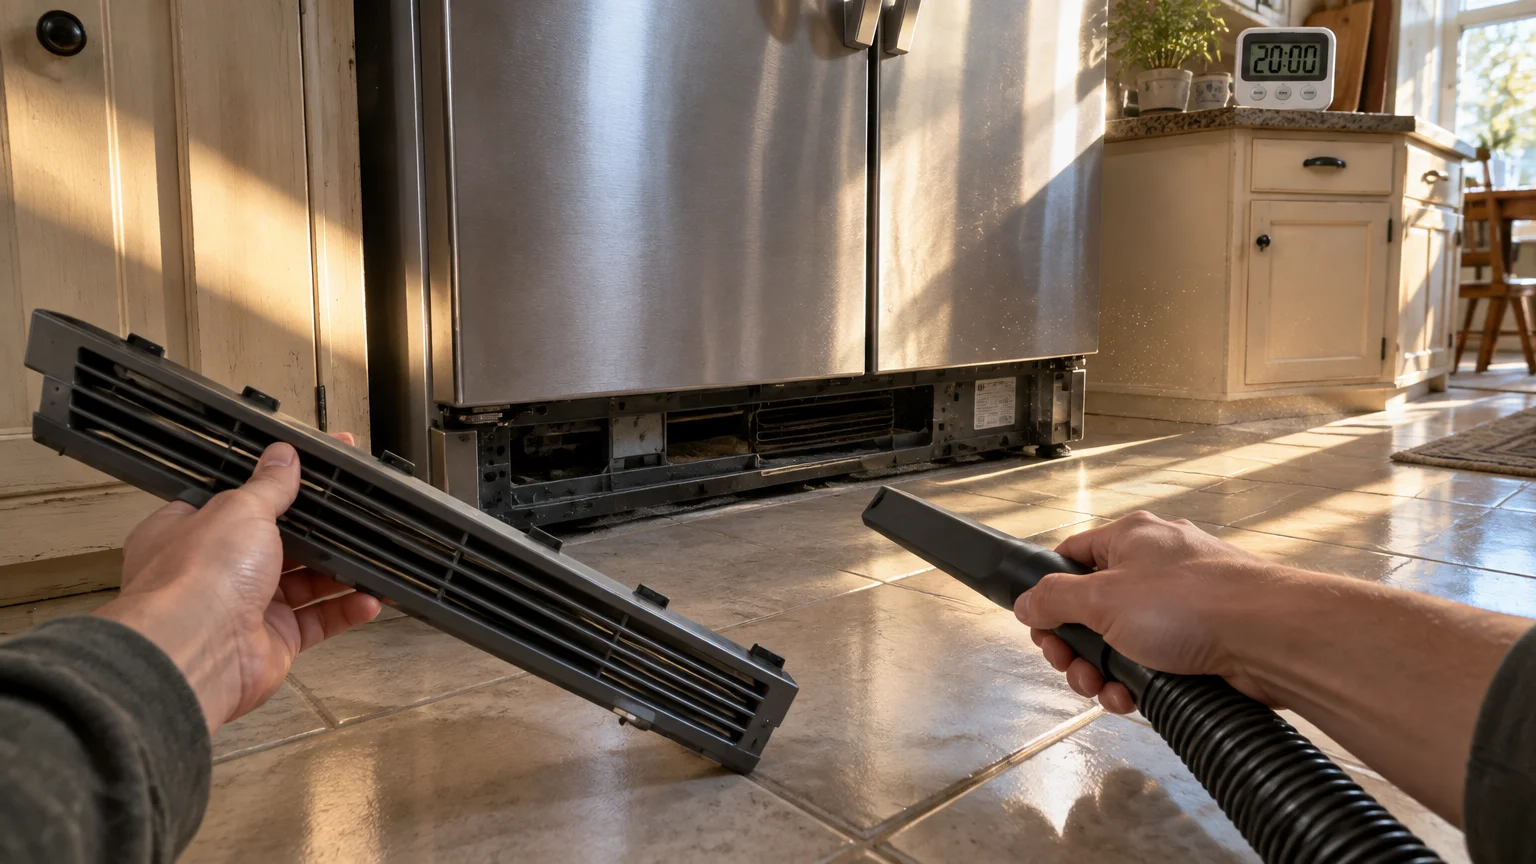
Your Immediate Appliance Maintenance Action Step
Pick just one high-impact chore from this appliance care guide to tackle this coming weekend.
Inspecting your refrigerator coils or cleaning the dishwasher drain filter takes less than twenty minutes from start to finish.
Grab a flashlight and check underneath your refrigerator today to evaluate how much dust has collected around the coils.
Taking consistent care of your machinery protects your peace of mind and keeps thousands of dollars in your pocket.