You can keep your kitchen spotless without accidentally stripping protective sealers or etching delicate stone. A few common cleaning habits quietly cause permanent scratches, dull spots, and corrosion across expensive countertops and appliances.
Choosing the right cleaning products for each surface preserves your investment and saves you costly repair bills. You will keep your kitchen sparkling while protecting every countertop and cabinet from premature wear.
Here are seven costly kitchen cleaning mistakes that damage surfaces, along with simple, surface-safe techniques you can adopt today.
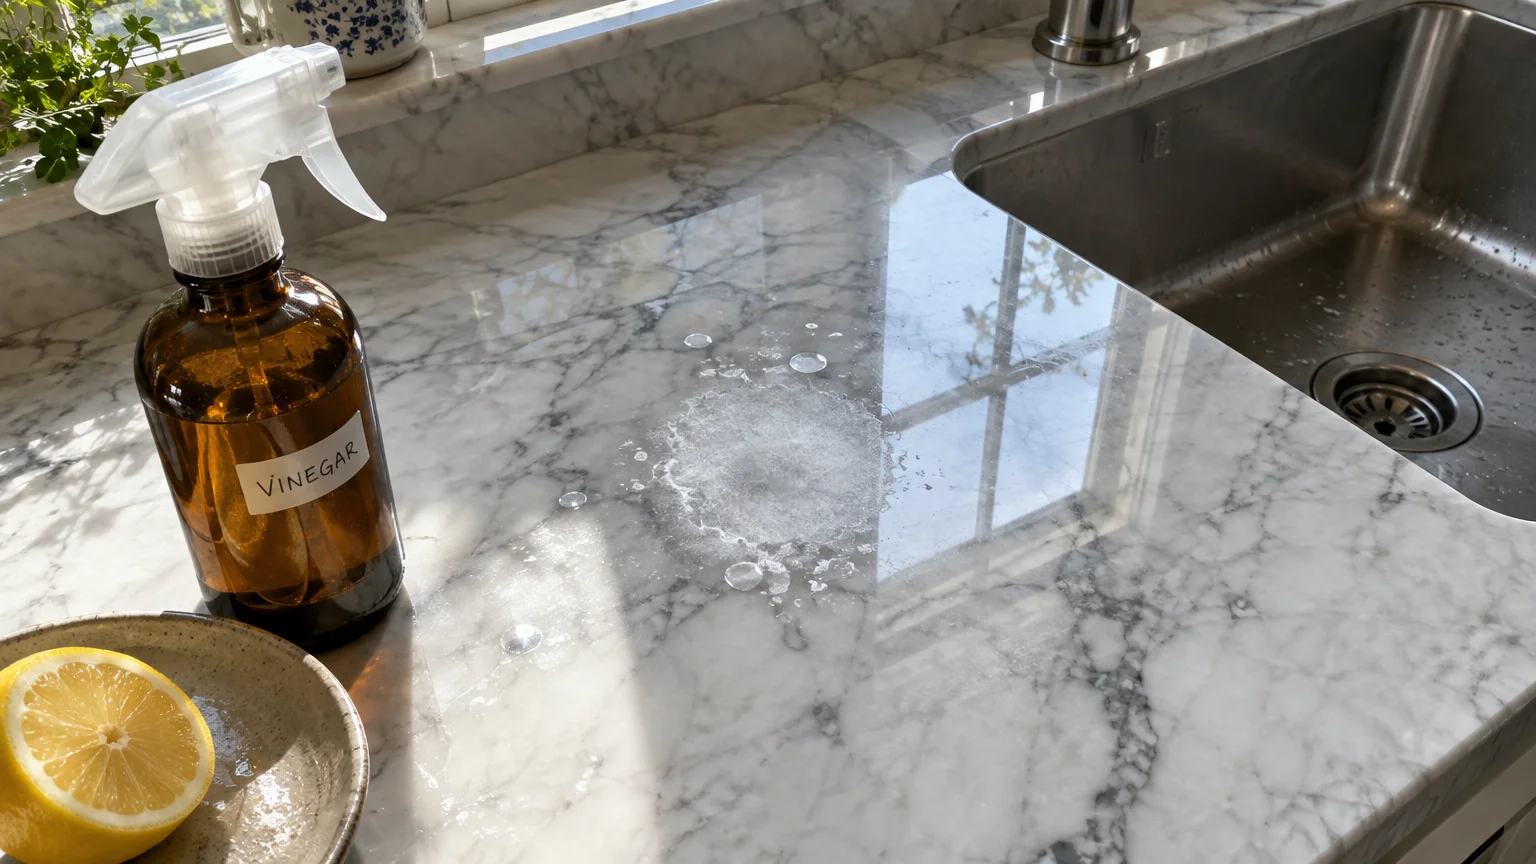
01 Using Vinegar and Lemon Juice on Natural Stone
White vinegar and fresh lemon juice hold a revered place in green cleaning routines. Unfortunately, splashing acidic liquids onto natural stone creates chemical damage within seconds.
Natural stones like marble, limestone, and travertine contain high concentrations of calcium carbonate. Acidic solutions dissolve this mineral on contact—a destructive process known as chemical etching.
Etching removes the polished shine of your stone and leaves behind dull, cloudy light spots. These marks are physical burns in the stone rather than surface stains, meaning no amount of scrubbing can wipe them away.
Granite contains less calcium carbonate than marble, yet acidic cleansers still pose severe hazards. Frequent exposure breaks down the protective impregnating sealer that prevents deep grease and moisture stains.
According to the Natural Stone Institute, homeowners should only clean natural stone surfaces with neutral, gentle cleaners to prevent chemical deterioration. Acidic solutions shorten the lifespan of high-end stone installations.
Avoid commercial multi-surface sprays containing citrus oils or vinegar when treating stone countertops. Even mild organic acids will degrade polished surfaces over repeated applications.
The Safe Stone Cleaning Method
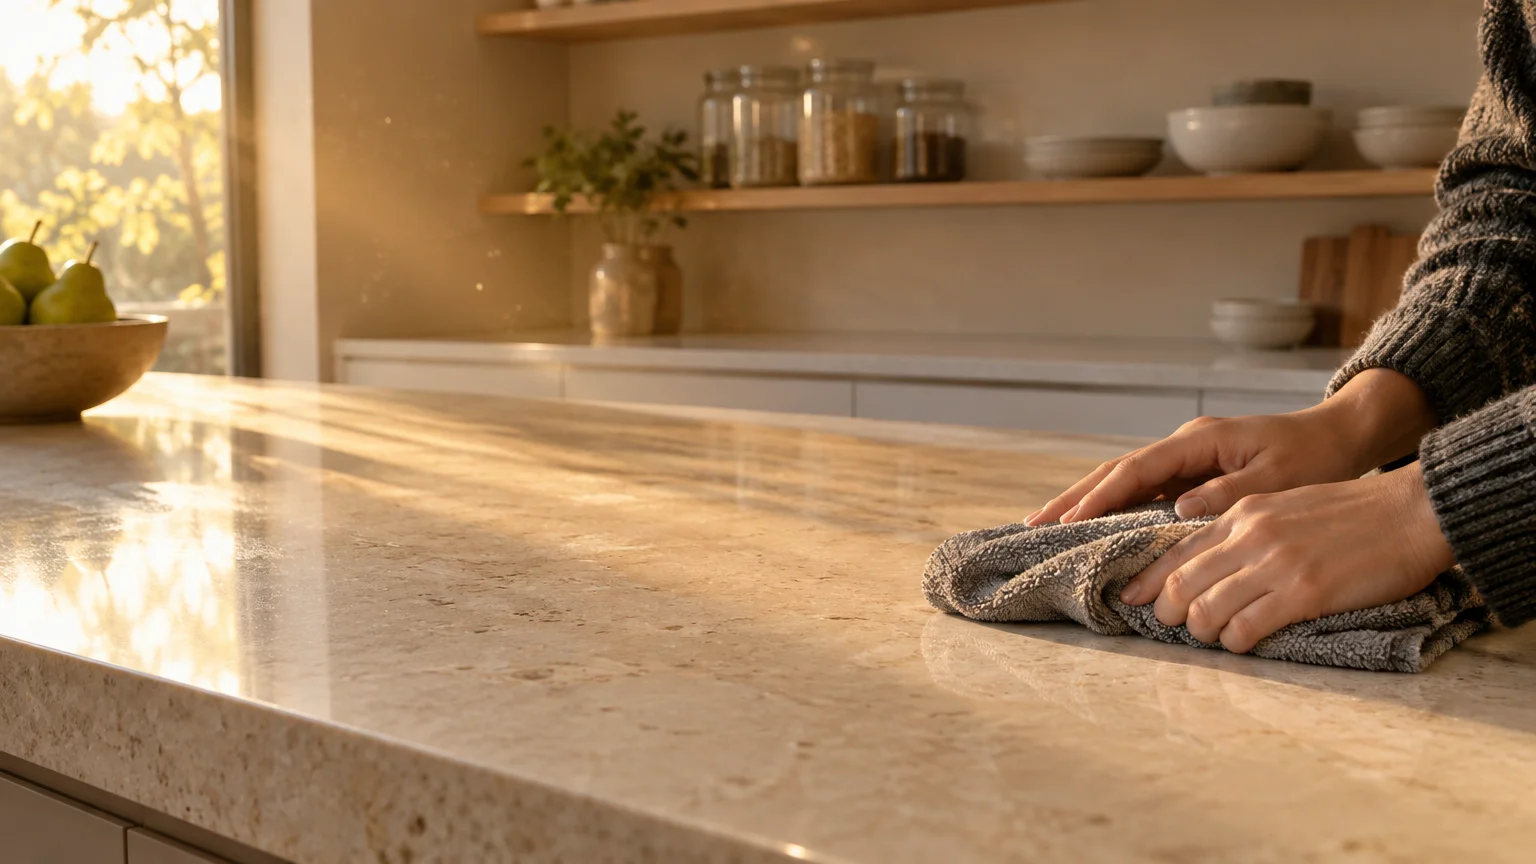
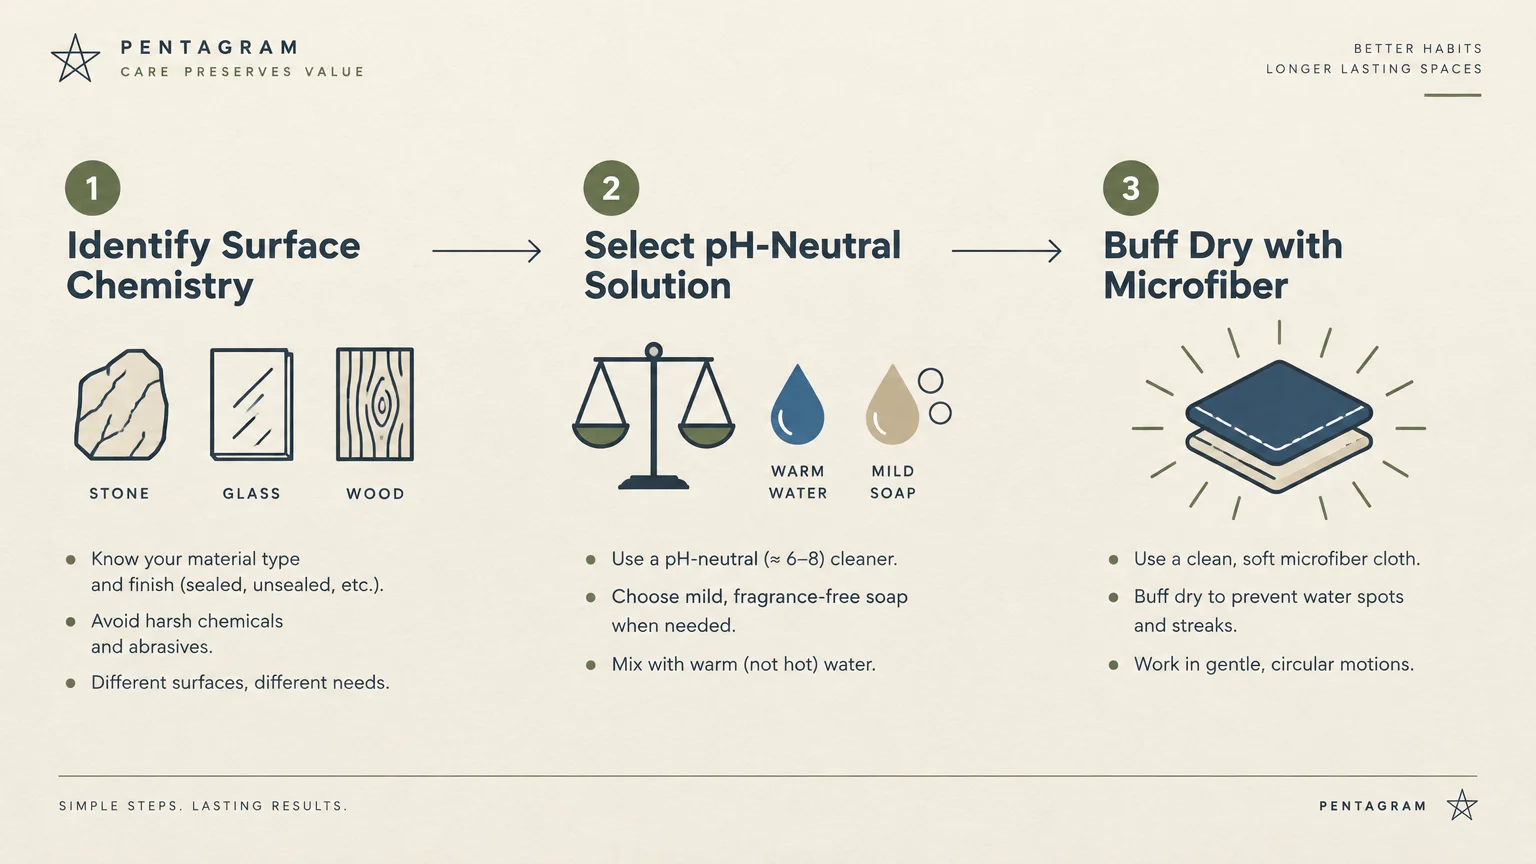
Rely on warm water and a few drops of mild, pH-neutral dish soap for everyday cleanups. This gentle surfactant lifts oils and food debris without interacting with the stone’s minerals.
Dampen a soft microfiber cloth with the soapy water and wipe down the counter using smooth, circular motions. Rinse the cloth with clear water to lift away lingering soap residue.
Dry the surface thoroughly with a clean, dry microfiber towel. Buffing the stone dry prevents hard water mineral marks from dulling your polished finish.
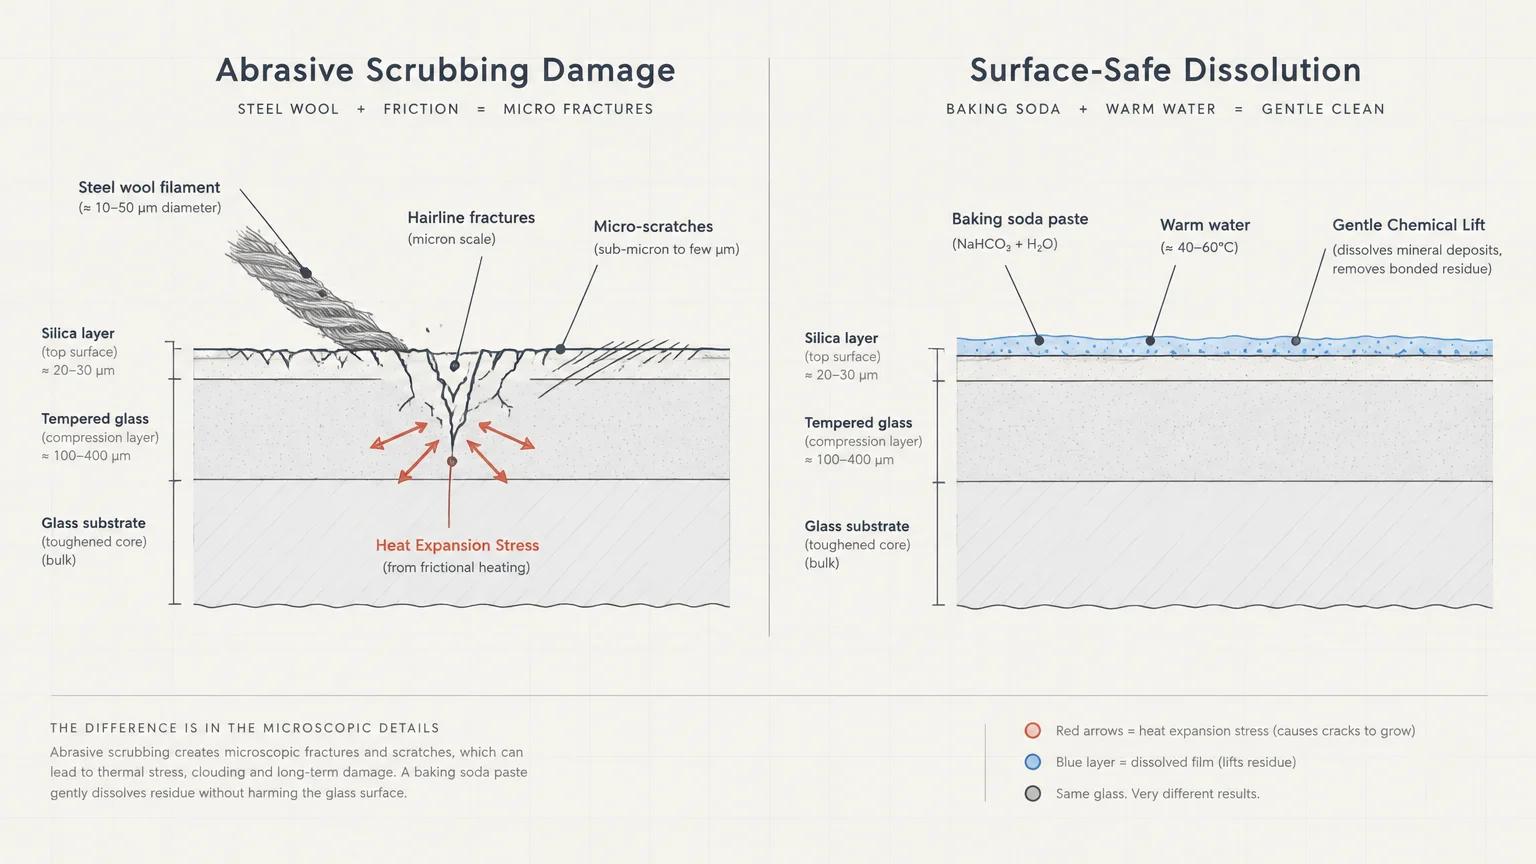
02 Scrubbing Glass Cooktops with Abrasives and Steel Wool
Smooth glass-ceramic cooktops give modern kitchens a sleek, streamlined appearance. However, burnt-on boil-overs frequently tempt homeowners to reach for heavy-duty scrubbing pads and abrasive scouring powders.
Steel wool, stiff scouring sponges, and abrasive silica powders create microscopic scratches across the tempered glass surface. These hairline abrasions destroy the smooth optical clarity of your cooktop and trap grease.
Worse, repeated thermal expansion weakens scratched glass over time. The high heat generated by burners causes micro-fissures to spread, raising the risk of sudden surface fractures during cooking.
Preventing these kitchen cleaning mistakes protects the structural integrity of your appliance. Abrasives do fast work on stubborn messes, but they permanently destroy smooth glass finishes.
Appliance manufacturers, including GE Appliances, explicitly warn against using metal pads or coarse scouring powders on smooth cooktop glass. Gentle chemical breakdown works far better than aggressive mechanical scraping.
The Safe Cooktop Cleaning Method
Allow the cooktop to cool completely before applying any liquid or cleaning agent. Spraying cold liquids on hot tempered glass can trigger thermal shock and crack the cooktop.
Apply a specialized, non-abrasive cooktop cleaning cream directly onto stubborn burnt residues. Let the cream sit for ten minutes to soften carbonized food deposits.
Gently glide a single-edge razor blade across persistent spots at a flat 45-degree angle. Keep the blade moist and steady to shave away debris without scratching the glass.
Wipe the surface clean with a damp microfiber cloth. Buff the glass with a dry cloth until it gleams.
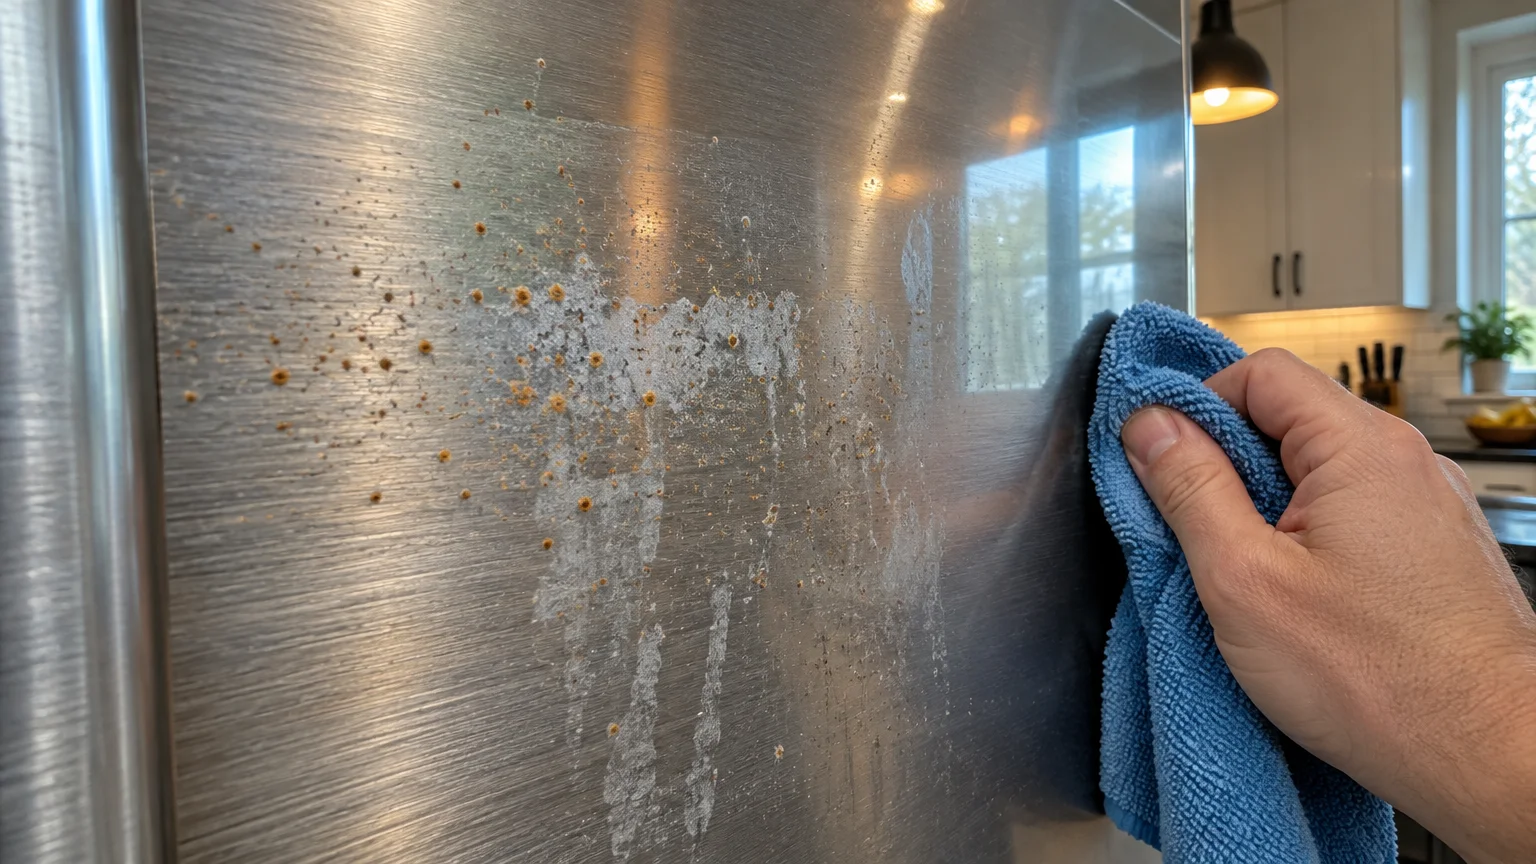
03 Spraying Chlorine Bleach on Stainless Steel Appliances
Chlorine bleach is a powerful disinfectant, but it is one of the worst cleaning products for stainless steel surfaces. Bleach strips away the invisible barrier that keeps your appliances rust-free.
Stainless steel resists corrosion because it contains chromium, which reacts with oxygen to form an ultra-thin, protective passive layer. Chlorides in bleach chemically attack this chromium barrier.
Once bleach breaches this barrier, it causes irreversible pitting corrosion. You will notice tiny dark specks, cloudy discoloration, and eventually reddish rust streaks forming along your refrigerator and sink.
The Specialty Steel Industry of North America cautions that chlorides cause catastrophic pitting and stress cracks in stainless alloys. Bleach should never remain in prolonged contact with stainless steel fixtures.
Splattering bleach inside a stainless steel sink while sanitizing cutting boards presents equal danger. Trapped bleach puddles under rubber sink mats will pit the metal within hours.
The Safe Stainless Steel Method
Wipe down your appliances using warm water mixed with gentle liquid dish soap. Always rub in the direction of the metal grain to prevent subtle surface haze.
Rinse the surface with a damp cloth soaked in clean water to remove any soap film. Soap residue can attract dust and show fingerprints if left behind.
Apply two drops of food-grade mineral oil or a designated stainless steel polish to a clean microfiber cloth. Buff the metal along the grain to restore its rich luster and resist future fingerprints.
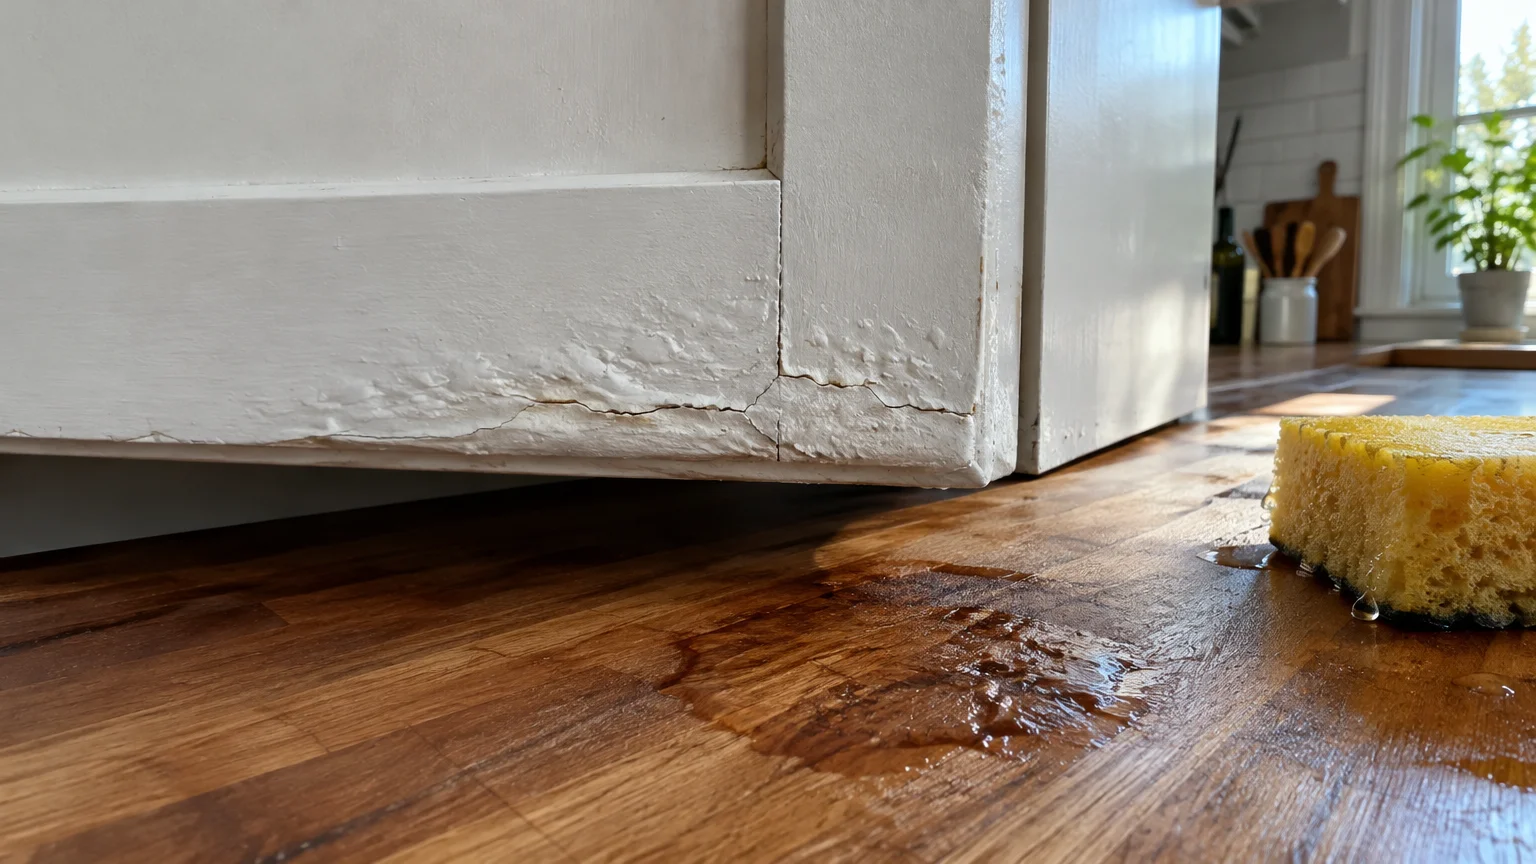
04 Drenching Wood Cabinets and Butcher Blocks with Excess Water
Wooden kitchen cabinets and butcher-block islands introduce warm, organic texture to your home. Unfortunately, treating wood with wet sponges and soaking buckets leads to structural failure.
Wood naturally expands when absorbing moisture and contracts as it dries out. Saturating cabinet doors causes the wood grain to swell, loosening joinery and cracking exterior paint or varnish.
Excess water also seeps into the seams of wood veneers and engineered core materials. This moisture triggers edge-banding delamination and leaves unsightly bubbles beneath your cabinet finish.
Butcher blocks suffer even worse damage when soaked during cleanup. Standing water dissolves food-safe mineral oil finishes, warping the wood staves and opening glue joints where bacteria thrive.
Harsh degreasers present another serious threat to wooden kitchen components. Caustic, alkaline chemicals dissolve the protective clear coats that shield cabinet paint from moisture and kitchen grease.
The Safe Wood Cleaning Method
Mix two cups of warm water with a single teaspoon of mild dishwashing liquid. Submerge a microfiber cloth and wring it out until it is barely damp.
Wipe cabinet doors and drawer fronts gently, focusing on areas near handles where skin oils gather. Clean small sections at a time so water never pools along edges.
Immediately dry each section with a soft, absorbent towel. Never allow cabinets to air-dry naturally after routine wiping.
For butcher blocks, scrape away food remnants with a flat bench scraper. Rub the block with mineral oil once a month to repel liquids and prevent wood splits.
05 Applying High-Alkaline Degreasers to Quartz Countertops
Engineered quartz countertops have earned a reputation for exceptional durability. Because quartz resists stains better than untreated marble, many people assume it can handle aggressive chemical cleaners.
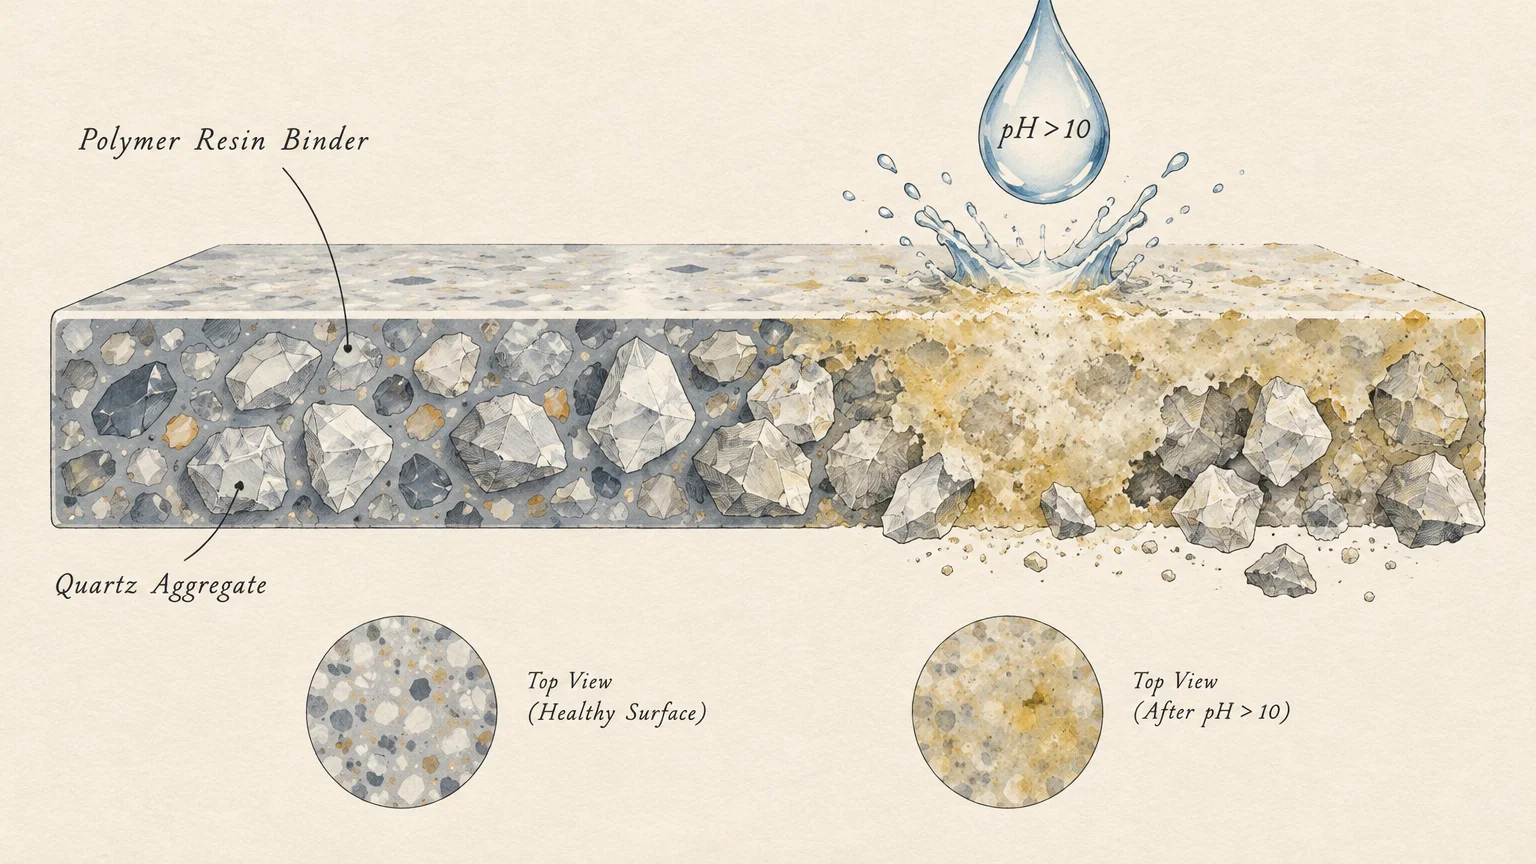
That assumption causes expensive damage. Engineered quartz consists of approximately 90 percent crushed mineral quartz bound together with 10 percent polymer resins and pigments.
Those polymer resins react poorly to high-pH chemicals, harsh industrial degreasers, and caustic oven cleaners. Strong alkaline formulas chemically burn and degrade the synthetic binders holding the slab together.
The result is permanent chemical discoloration that resembles cloudy, dull white rings or faded patches. These chemical burns penetrate into the resin matrix and cannot be polished out at home.
Bleach and high-pH cleaning products also damage countertops during cleaning by dissolving the color pigments mixed into the resin. Once the resin loses its luster, the surface feels rough and absorbs stains easily.
The Safe Quartz Cleaning Method
Stick to mild dish soap and warm water for everyday spills and meal prep cleanup. This basic combination breaks down grease safely without altering the resin composition.
Remove dried, sticky food residues by soaking them under a warm, damp cloth for five minutes. Scrape softened residues away using a flexible plastic putty knife rather than metal blades.
If you encounter greasy films, use a 70 percent isopropyl rubbing alcohol solution mixed with equal parts water. Rubbing alcohol disinfects and cuts oils without harming polymer binders.
06 Scrubbing Tile Grout with Wire Brushes and Harsh Acids
Backsplashes and tiled floors collect grease splatters, sauce drips, and soapy grime over time. Attempting to scour discolored grout lines with stiff wire brushes and toilet bowl cleaners destroys your installation.
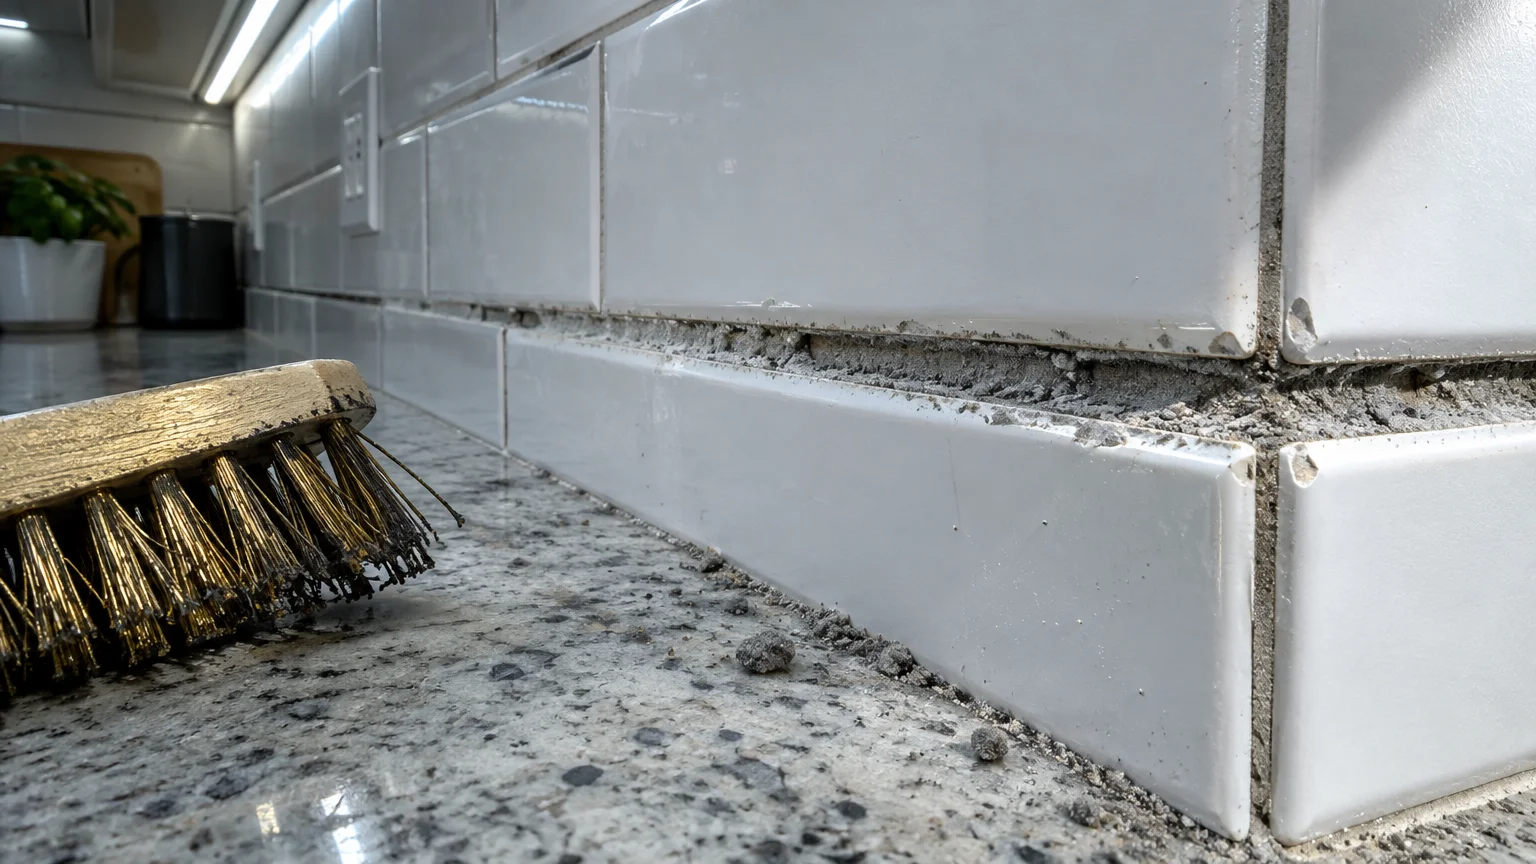
Cementitious grout is porous and naturally alkaline. Applying harsh acidic bathroom cleaners or concentrated muriatic acid dissolves the cement binder, causing the grout to crumble into powder.
Steel-wire scrub brushes accelerate this destruction through mechanical abrasion. Stiff metal bristles gouge deep ruts into the grout and chip the glazed edges of ceramic and porcelain tiles.
Once the grout layer erodes, cooking moisture and grease penetrate behind the tiles. This moisture intrusion rots the drywall backing and loosens tiles from the wall.
Proper kitchen surface care requires balancing dirt removal with structural preservation. You can brighten grout lines dramatically without resorting to corrosive acids or destructive metal bristles.
The Safe Grout Cleaning Method
Create a cleaning paste using equal parts baking soda and hydrogen peroxide. This bubbling paste lifts organic stains and grease without dissolving cement bonds.
Apply the paste along grout lines and let it sit for ten minutes to penetrate deep discoloration. The oxygenating reaction breaks down grime naturally.
Scrub the grout lines using a soft nylon bristle brush or an old toothbrush. Nylon bristles dislodge dirt effectively without scratching adjacent tile glazes.
Wipe the paste away with a damp sponge and dry the area with a towel. Apply a penetrating grout sealer once a year to keep oil and stains on the surface.
07 Letting Disinfectants Air-Dry on Touchscreens and Protective Coatings
Kitchens harbor bacteria, making regular sanitization an essential part of meal preparation. However, letting chemical disinfectants pool and air-dry on modern appliances creates unsightly, permanent damage.
Many smart refrigerators, ranges, and microwave displays feature sensitive digital touchscreens. These panels carry delicate anti-glare and oleophobic coatings designed to resist oil from your fingers.
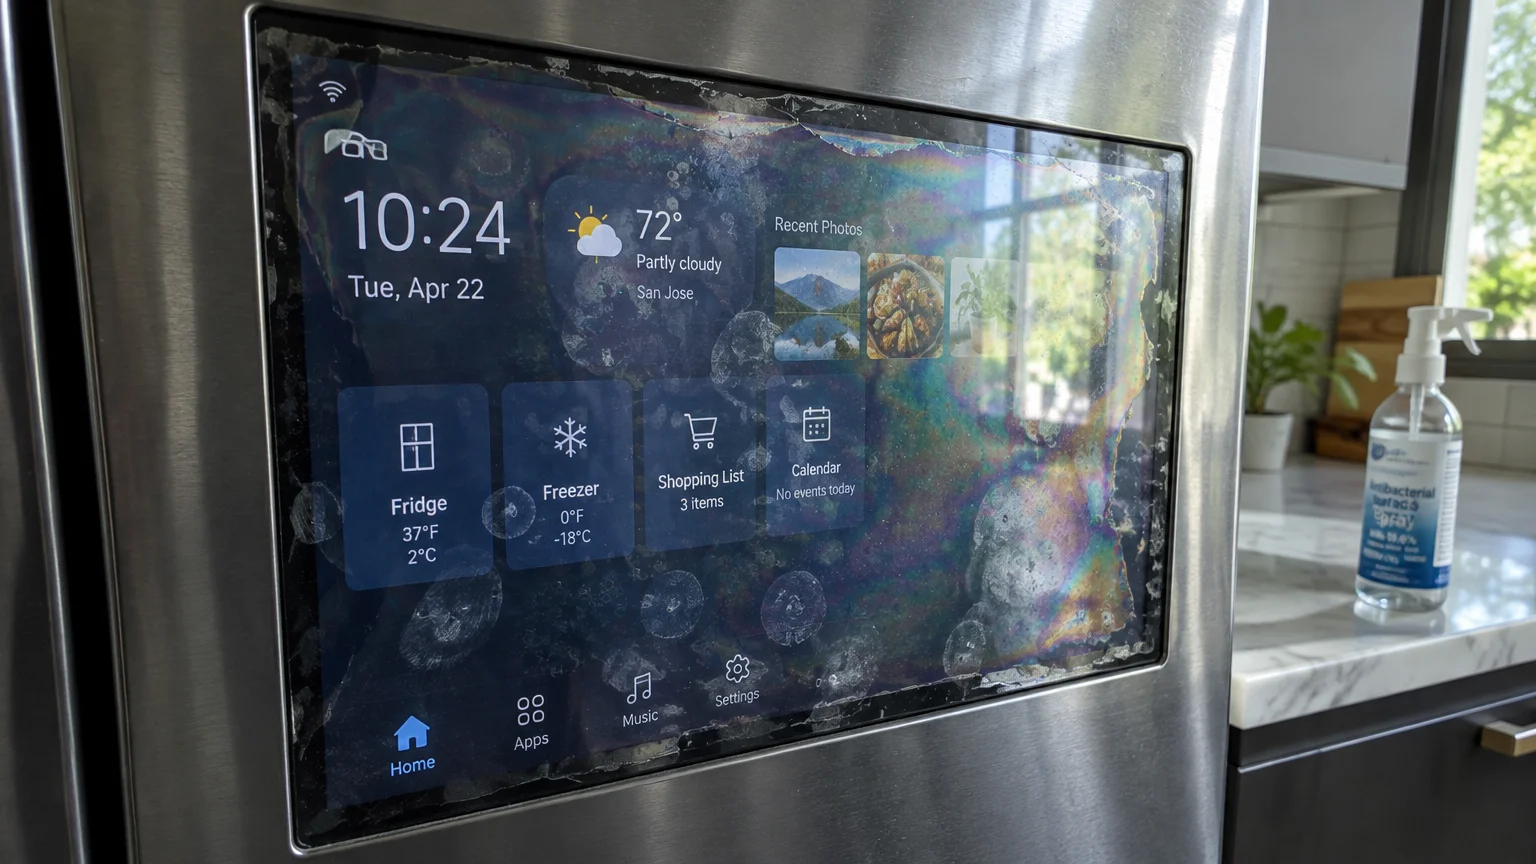
Quaternary ammonium compounds and alcohol found in common disinfectant wipes degrade these thin screen coatings. When disinfectant puddles dry naturally, concentrated chemical residues pit the display surface and leave milky streaks.
Liquid disinfectant also seeps beneath glass control panels and capacitive touch buttons through capillary action. Trapped moisture corrodes underlying circuit boards, resulting in costly electronic repairs.
Guidance from the Environmental Protection Agency emphasizes following exact product contact times for sanitization. Never allow excess liquid to pool around seams, control panels, or appliance handles.
The Safe Disinfectant Method
Spray your disinfectant onto a clean microfiber cloth rather than aiming directly at appliance surfaces. This practice prevents liquid drips from running behind buttons and touchscreens.
Wipe the handle, control knob, or exterior panel evenly to distribute the disinfectant. Keep the surface visibly damp for the required dwell time listed on the product label.
Wipe the surface completely dry with a second clean microfiber cloth once the dwell time ends. Removing leftover chemical residue keeps touchscreens clear and protects delicate anti-fingerprint finishes.
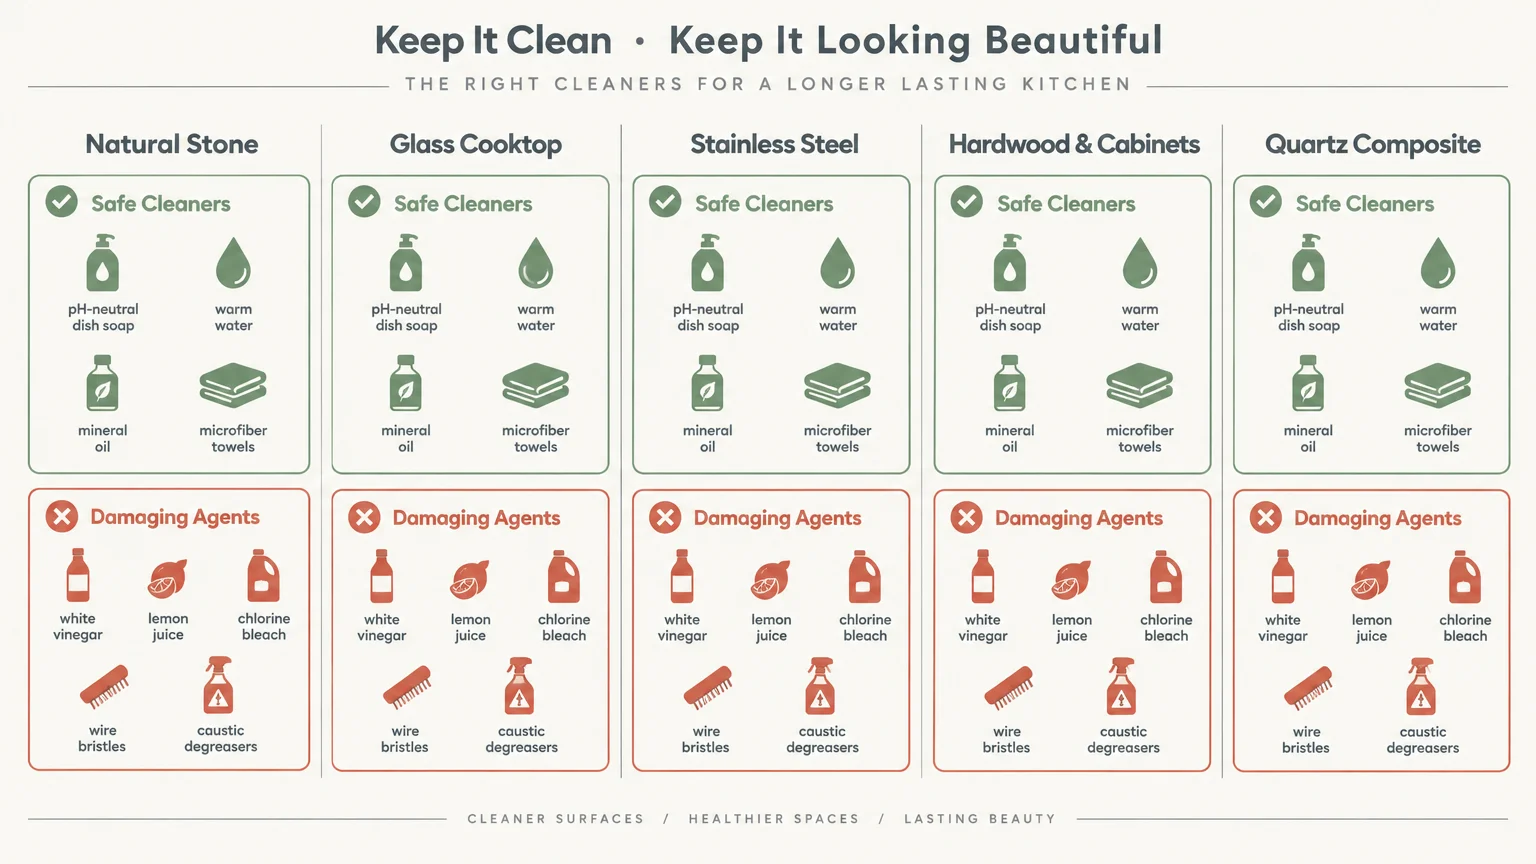
Kitchen Surface Care: The Safe Cleaner Cheat Sheet
Review this quick-reference guide to select the safest cleaning solution for every major material in your kitchen. Matching the right tool to the surface prevents accidental wear.
| Kitchen Surface | Damaging Cleaners to Avoid | Recommended Safe Cleaners | Safe Tools |
|---|---|---|---|
| Granite & Marble | Vinegar, lemon juice, bleach, ammonia | pH-neutral dish soap, dedicated stone cleaner | Soft microfiber cloth |
| Glass Cooktops | Steel wool, abrasive scouring powders | Cooktop cleaning cream, baking soda paste | Razor blade (45° angle), non-scratch sponge |
| Stainless Steel | Chlorine bleach, scouring pads, chlorides | Mild dish soap, mineral oil, stainless polish | Microfiber cloth (wipe with grain) |
| Wood Cabinets | Harsh degreasers, excessive water, ammonia | Dilute dish soap, oil soap | Damp wrung-out cloth, dry buffing towel |
| Engineered Quartz | Oven cleaner, high-alkaline degreasers, bleach | Warm water with mild soap, diluted alcohol | Microfiber towel, plastic scraper |
| Tile Grout | Wire brushes, concentrated muriatic acid | Baking soda and hydrogen peroxide paste | Soft nylon brush, grout brush |
| Appliance Screens | Direct spray, pooling disinfectant, window spray | Cloth-applied dilute alcohol, screen cleaner | Dry optical microfiber cloth |
A Checklist for a Calmer, Surface-Safe Cleaning Routine
Simplifying your kitchen care routine saves physical energy and keeps surfaces looking brand new. Use this straightforward checklist to streamline your daily cleanup without risky chemical cocktails.
- Audit your cleaning cabinet: Remove acidic multi-surface sprays from areas near natural stone and quartz counters.
- Adopt the two-towel technique: Always pair a damp washcloth with a dry buffing towel to eliminate standing moisture on wood and metal.
- Retire abrasive scrub pads: Replace green scouring pads and wire brushes with soft microfiber towels and non-scratch scrubbers.
- Check product labels for pH balance: Use pH-neutral formulas for daily wipe-downs to protect protective sealers and factory clear coats.
- Wipe spills immediately: Cleaning tomato sauce, coffee, and lemon juice quickly reduces the need for aggressive scrubbing later.
- Spray the cloth, not the surface: Protect appliance electronics by applying liquids directly onto towels before wiping.

Protect Your Kitchen Surfaces Today
Walk into your kitchen right now and check the ingredients on your daily cleaning spray. If it contains vinegar, citrus oil, or chlorine bleach, set it aside from your stone counters and stainless steel appliances.
Swap those harsh chemicals for a simple bottle of pH-neutral dish soap, warm water, and fresh microfiber cloths. This small adjustment preserves your kitchen finishes, protects your home investment, and keeps daily cleanup simple.