
You can brighten every room in your home instantly by clearing the dull film that settles over your overhead lighting. Clean light fixtures emit more illumination and prevent settled debris from baking onto warm glass.
When you adopt simple, proactive habits, you eliminate the need to climb ladders for difficult, time-consuming scrubbing sessions. A few deliberate changes keep dust from accumulating in the first place.
These ten actionable habits will simplify your routine, protect your home, and ensure you enjoy dust-free light fixtures throughout every season of the year.
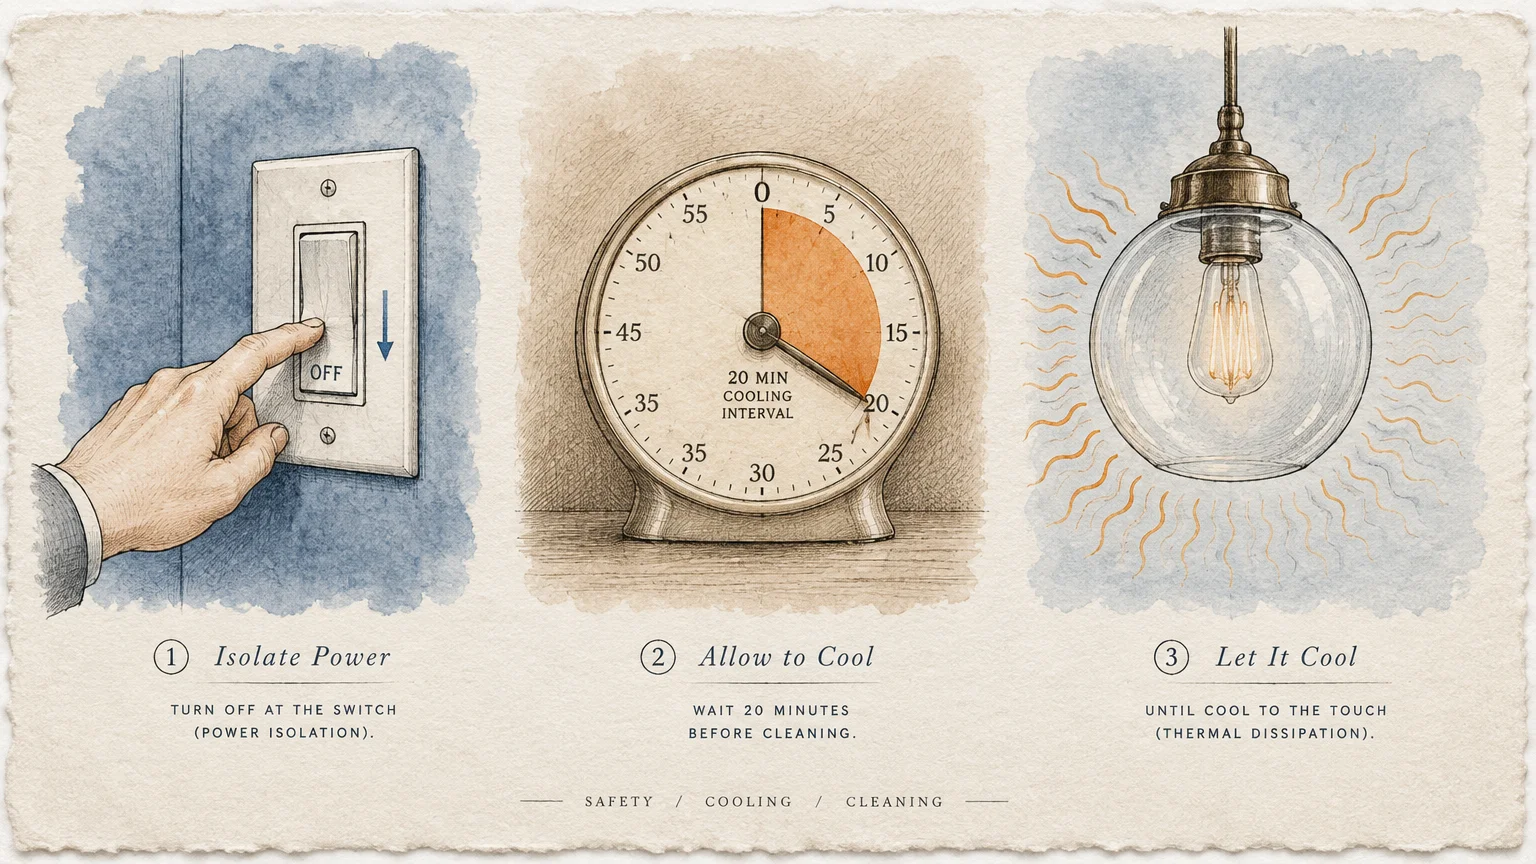
01 Power Down and Let Fixtures Cool Completely
Always flip the wall switch off before you reach for any cleaning tool. For fixtures wired to smart automation, consider shutting off the circuit breaker for total peace of mind.
Safety organizations like the Electrical Safety Foundation International emphasize that touching energized sockets poses serious shock hazards. Taking a brief moment to isolate power protects you from accidental contact.
Hot bulbs also present a major physical risk to both your hands and your fixture components. Halogen and incandescent bulbs generate intense surface heat that can burn skin within a fraction of a second.
Spraying cool cleaning liquids or applying damp cloths onto hot glass creates severe thermal shock. The sudden temperature plunge can cause fragile glass shades or incandescent bulbs to shatter instantly.
Operating heat bakes airborne dust directly onto glass diffusers and decorative metal hardware. Letting your fixture cool ensures dust particles remain loose and significantly easier to lift away.

02 Dust from High to Low in Every Room
Gravity dictates where dislodged dust travels whenever you clean your living spaces. When you clean ceiling lights after wiping baseboards and vacuuming rugs, you create extra work for yourself.
Make overhead lighting the very first target in your room-cleaning sequence. Any loose particles that escape your cleaning cloth will settle onto uncleaned surfaces below.
Work methodically from the ceiling canopy down through the hanging chain, shade, and lower finial. This downward flow guarantees that falling particles never land on freshly polished surfaces.
Once your ceiling lights and hanging pendants are clean, move downward to wall sconces, shelving, and tabletops. Finish by vacuuming the floor to capture all the settled debris permanently.

03 Trade Feathers for Electrostatic Microfiber Cloths
Traditional feather dusters look classic, but they do little more than scatter dust into the air. The displaced debris floats briefly before settling right back onto the fixtures you just wiped.
High-density microfiber cloths rely on split synthetic fibers that generate a natural electrostatic charge. This static cling attracts and locks in fine debris instead of sweeping it into the surrounding room.
Choose cloths with a dense, waffle-weave or plush terry texture for smooth glass globes and lacquered brass. These weaves lift fine grit without scratching delicate clear finishes or protective metallic coatings.
For intricate scrollwork or patterned metal cages, flexible microfiber mitts offer superior finger dexterity. You can simply wrap your fingers around curves and rods to wipe away buildup in a single motion.
04 Change HVAC Air Filters to Reduce Floating Debris
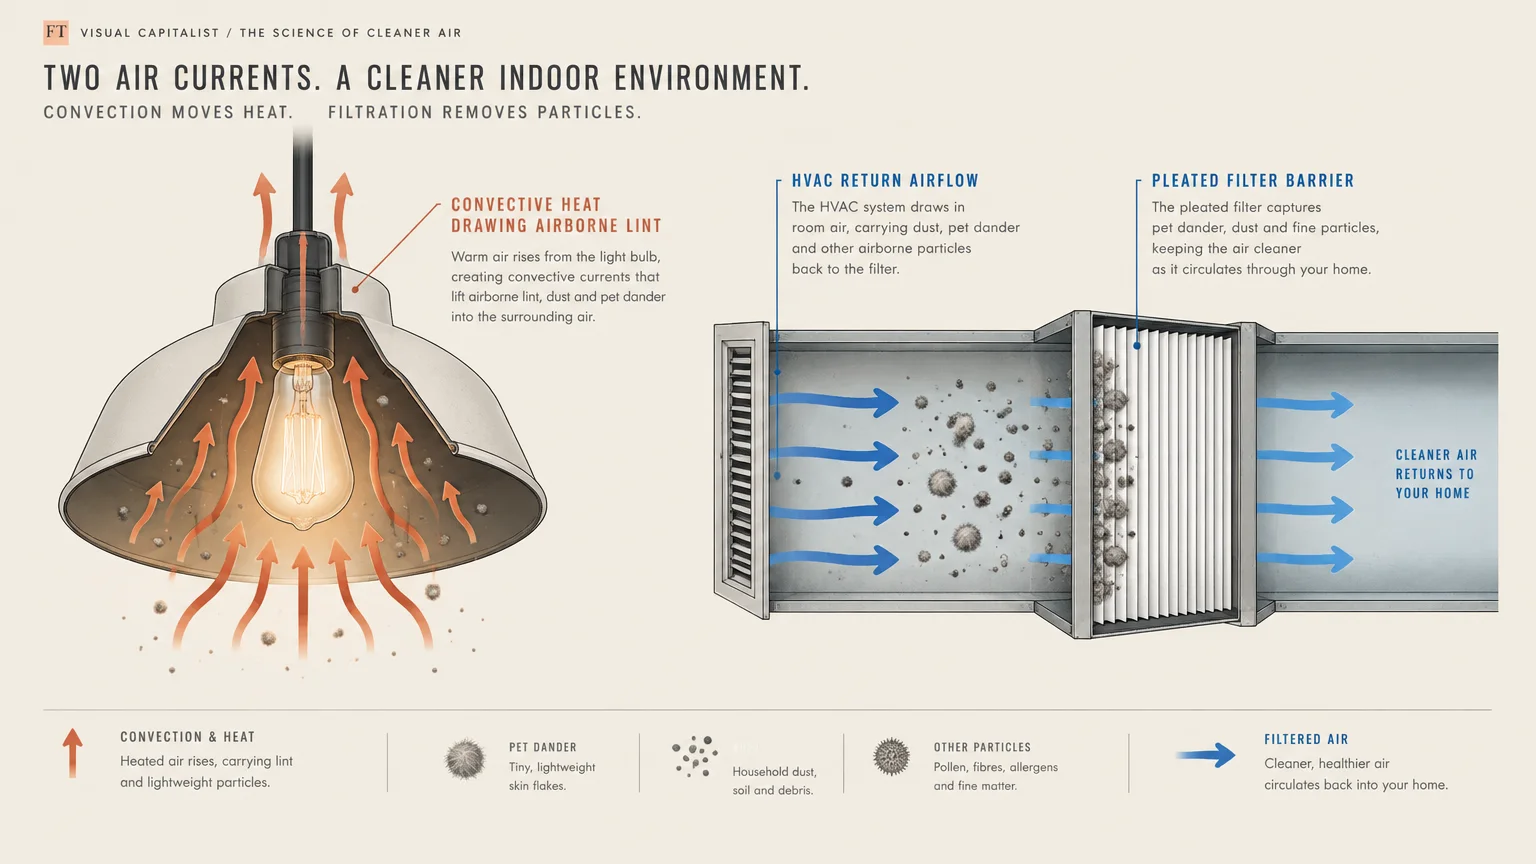
Airborne dust inevitably finds its way to light fixtures through natural household air currents. Convective heat rising around operating bulbs actively draws floating lint, pet dander, and skin cells toward the fixture.
The U.S. Environmental Protection Agency notes that proper air filtration significantly reduces indoor airborne particulate matter. High-efficiency filters intercept dust before it circulates into your fixtures and decorative lighting.
Inspect your central heating and cooling filters monthly, replacing them as soon as dark gray buildup appears. Fresh filters keep air moving freely while stripping dust out of your living environment.
Pay close attention to return air grilles located near recessed ceiling lights or hallway flush mounts. Keeping these vents clean prevents turbulent air currents from depositing dark dust rings on adjacent ceilings.
05 Perform a 30-Second Weekly Sweep with an Extendable Pole
Light fixture cleaning becomes daunting only when dust sits long enough to blend with humidity and kitchen grease. Over several months, dry dust transforms into a stubborn, sticky film that requires vigorous scrubbing.
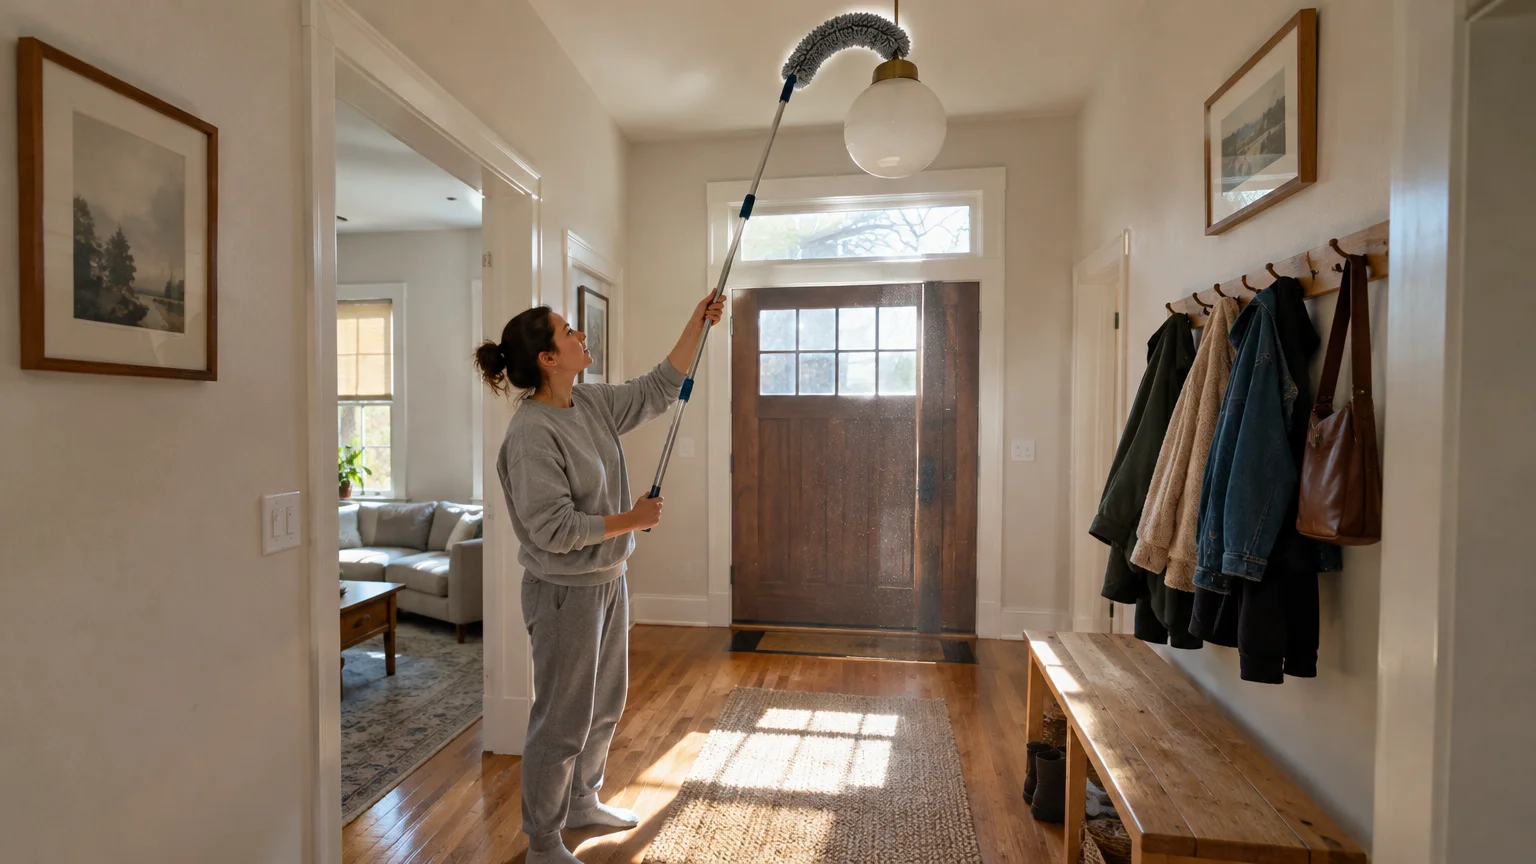
You can eliminate deep cleaning entirely by introducing a brief weekly dusting habit. A quick 30-second maintenance sweep removes dry particles before they bond with ambient airborne oils.
Invest in an extendable pole equipped with a bendable microfiber duster head. An adjustable telescoping handle allows you to reach high ceiling fixtures while keeping both feet safely planted on the floor.
Angle the flexible duster head to match the contour of recessed cans, glass domes, and pendant rims. A gentle pass around the perimeter dislodges fresh dust before it settles into a dense blanket.
06 Wipe Down Light Bulbs to Restore Illumination
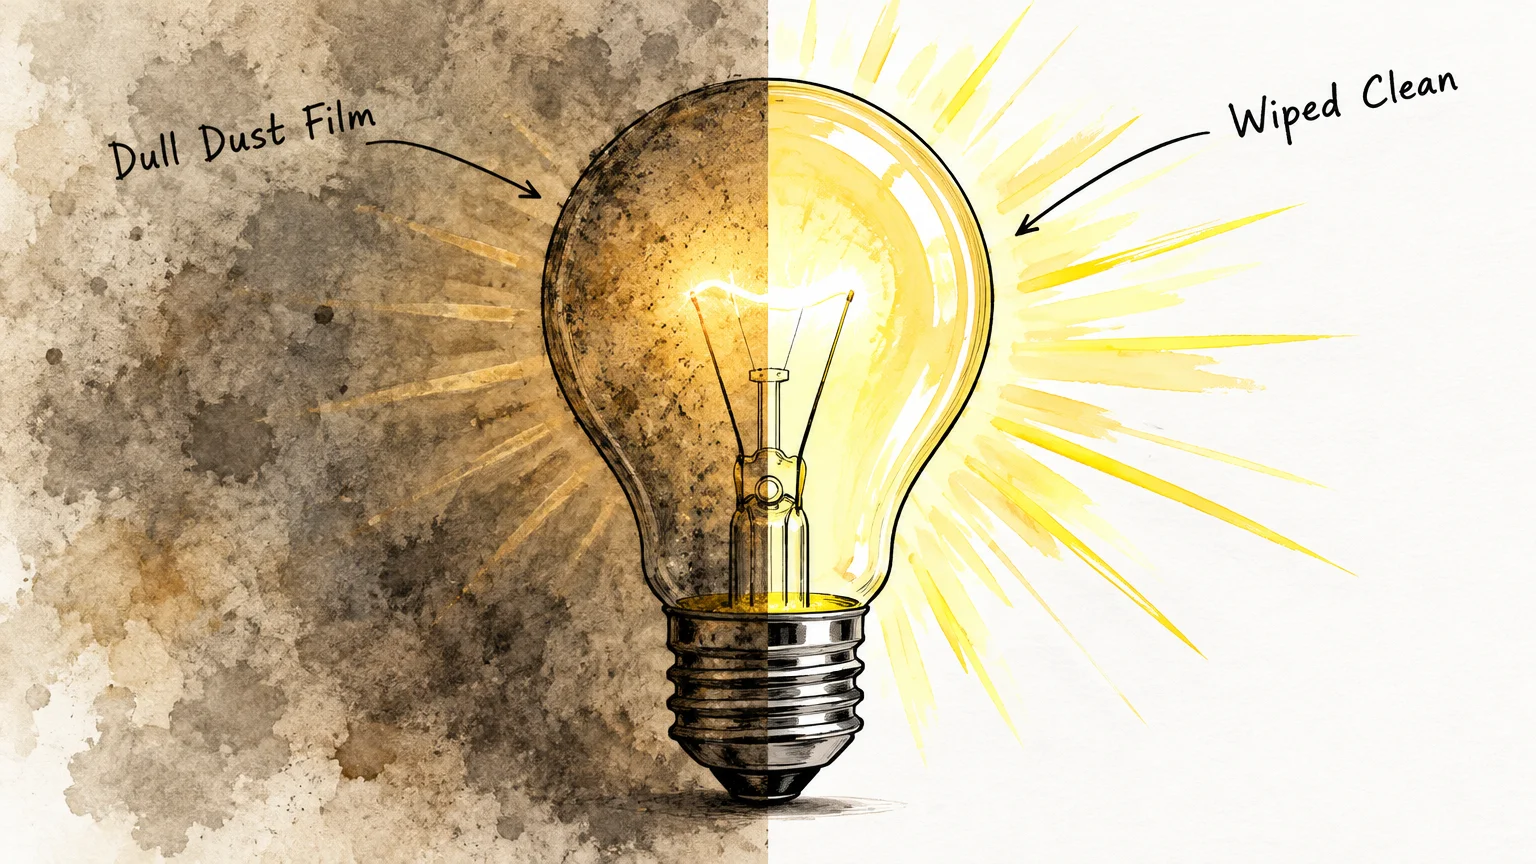
Even if your outer decorative shades look clean, dust on light bulbs drastically reduces room brightness. A heavy layer of household dust can absorb a surprising amount of emitted light.
According to the U.S. Department of Energy, clean lighting fixtures and bulbs operate at peak efficiency. Removing grime restores your design lumens without raising your monthly utility consumption.
Accumulated dust acts as an insulating blanket that traps heat against the bulb socket and internal electronics. In LED bulbs, excessive heat buildup degrades delicate driver circuitry and shortens the bulb lifespan.
Once the fixture is completely cold, wipe each bulb gently using a clean, dry microfiber cloth. Never spray water or cleaning solution directly onto bulb bases or inside electrical sockets.

07 Master Chandelier Cleaning with the Two-Glove Technique
Chandelier cleaning is notoriously intimidating due to dozens of delicate crystal prisms and intricate metal arms. Taking the entire fixture down or detaching each crystal individually consumes hours of tedious effort.
Professional cleaners rely on the white glove method to clean hanging chandeliers quickly in place. Put on a pair of clean white cotton or lint-free microfiber dusting gloves.
Dampen the fingertips of your dominant hand with a mixture of one part isopropyl alcohol and three parts distilled water. Keep your non-dominant hand completely dry to stabilize and buff each crystal piece.
Gently grasp each crystal drop between your damp fingers to dissolve film, then buff it dry with your opposite hand. This streamlined motion leaves crystals gleaming while preventing fingerprint smudges.
Never twist or spin a hanging chandelier while working your way around the fixture. Rotating the fixture can loosen ceiling anchor bolts and twist internal electrical wires, creating a severe fire hazard.
08 Wash Detachable Glass Shades in Mild Dish Soap
Fixtures in kitchens, dining rooms, and bathrooms collect moisture, cooking grease, and aerosol residues. In these moisture-rich environments, dry dusting alone cannot remove the tacky film covering glass diffusers.
Check your fixtures to determine if the glass bowls, pendants, or sconce shades detach easily. Most designs secure glass using simple thumb screws, threaded retaining rings, or decorative finials.
Unscrew the retaining hardware carefully with one hand while supporting the glass firmly with the other. Place the hardware in a small bowl immediately so tiny screws do not roll away or get lost.
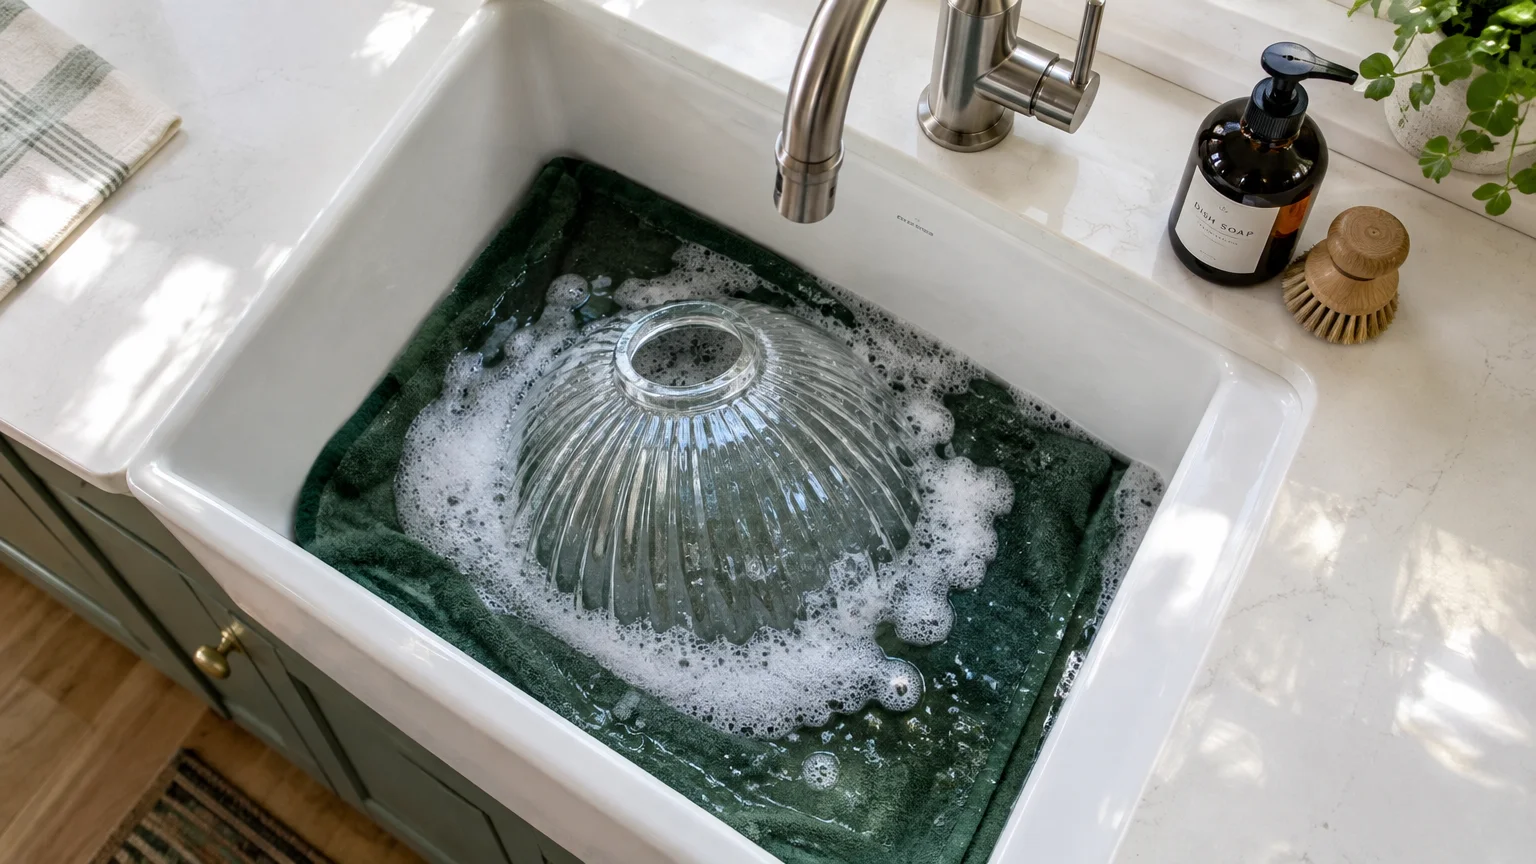
Wash the glass shades in a sink filled with warm water and a few drops of grease-cutting liquid dish soap. Use a non-scratch sponge to dissolve sticky film without abrading decorative frosted or etched patterns.
Rinse the shades in clear lukewarm water and let them dry completely on a thick microfiber towel. Reinstalling damp glass traps moisture against sockets and causes rapid new dust accumulation.
09 Clean Nearby Ceiling Fans Before They Spread Dust
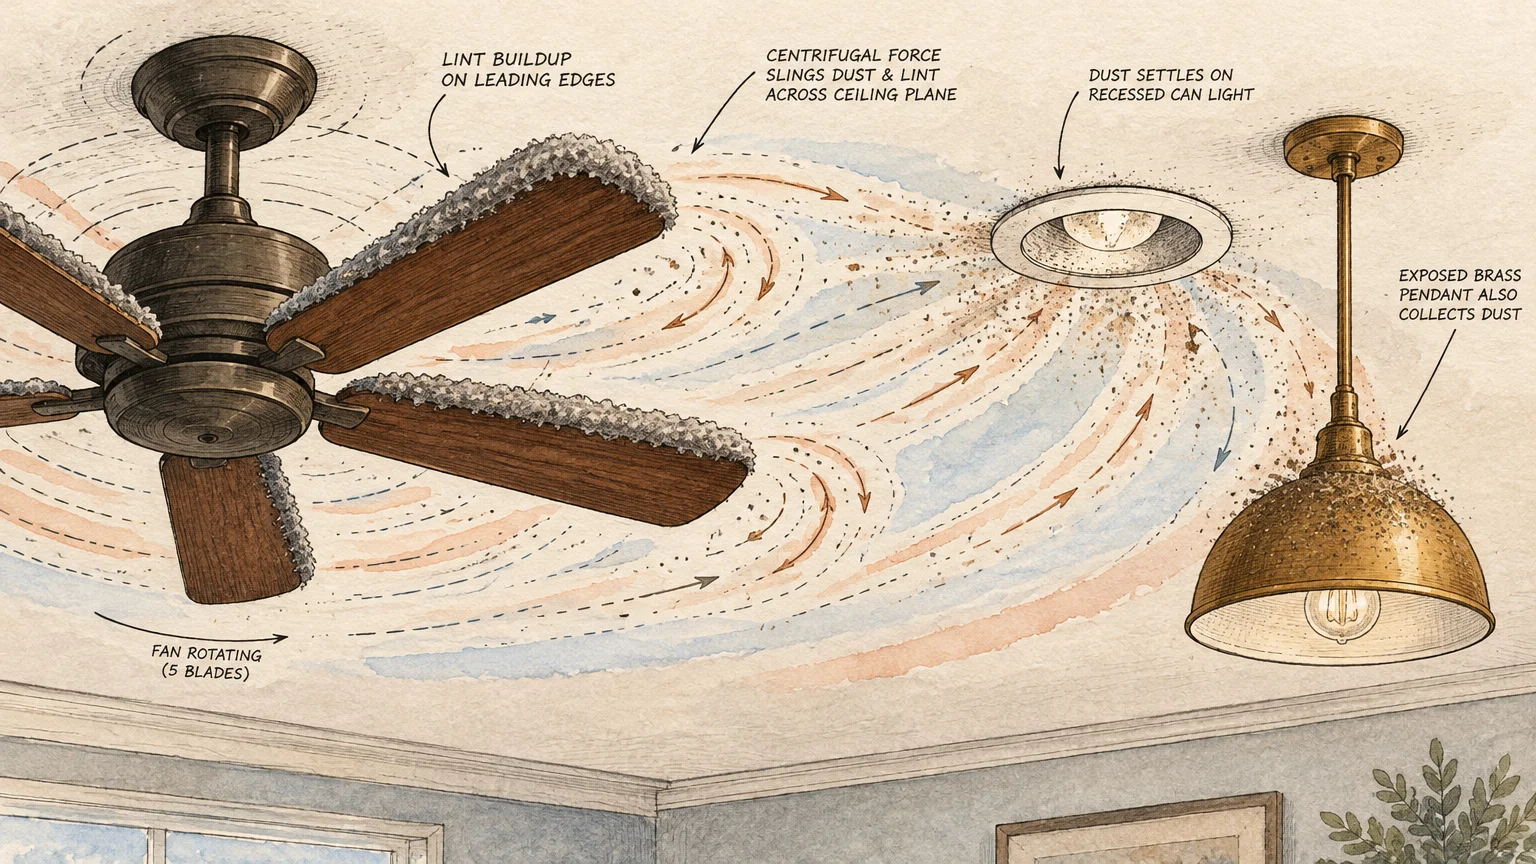
Ceiling fans and nearby light fixtures share an inseparable relationship in residential airflow patterns. As fan blades rotate, aerodynamic friction creates a static charge that pulls airborne dust onto the blade edges.
When you turn on a dusty ceiling fan, centrifugal force flings debris across the room directly onto nearby light fixtures. This constant dispersion ensures that overhead lights remain perpetually coated in grime.
Clean ceiling fan blades every two weeks using an old pillowcase slipped over each blade. Slide the fabric backward along the blade to trap every particle inside the case instead of dumping dust on your lights.
If your fan includes an integrated light kit, clean the fan blades first before touching the light globes. This simple order of operations protects the fixture from falling debris and cuts your cleaning time in half.

10 Apply an Anti-Static Barrier to Glass and Metal Surfaces
Dust does not settle on lighting fixtures through gravity alone; electrostatic charges actively pull particles toward glass and plastic. Friction from household air currents charges fixture surfaces, turning them into dust magnets.
You can dramatically reduce dust attraction by neutralizing this static charge during your regular cleaning routine. Applying an anti-static treatment creates an invisible barrier that allows dust to slip off rather than cling.
Lightly mist an anti-static dust spray onto your microfiber cloth before wiping metal canopies, rods, and glass shades. Alternatively, wipe clean exterior glass surfaces with a diluted mixture of distilled water and a few drops of fabric conditioner.
Avoid applying chemical sprays to interior sockets, unsealed metal wiring, or hot surfaces. A light exterior application keeps surfaces slick and prevents dust from anchoring between deep cleans.

Recommended Cleaning Frequency and Methods by Fixture Type
Different lighting styles accumulate debris at varied rates depending on their location and physical shape. Matching your dusting method to the specific fixture style protects fragile components and saves valuable time.
Consult this reference guide to establish an efficient maintenance cadence for every light fixture in your home.
| Fixture Type | Primary Dust Zone | Recommended Tool | Maintenance Schedule | Deep Cleaning Routine |
|---|---|---|---|---|
| Recessed Can Lights | Interior trim baffles and bulb face | Angled microfiber wand | Every 2 weeks | Vacuum baffles using a soft brush attachment; wipe bulbs dry. |
| Glass Pendant Lights | Outer shade surface and lower rim | Plush microfiber cloth | Weekly dry wipe | Dismount glass and wash in warm soapy water monthly. |
| Crystal Chandeliers | Faceted prisms, arms, and candle cups | Cotton polishing gloves | Bi-weekly dry dust | Hand-polish crystals with diluted alcohol solution twice a year. |
| Flush Mount Ceiling Lights | Interior bowl base and top mounting rim | Extendable microfiber pole | Bi-weekly perimeter pass | Remove globe, dump trapped insect debris, and wash quarterly. |
| Track Lighting | Inside mounting channel and head housings | Dry detailing brush or vacuum | Monthly dry dusting | Shut off breaker, vacuum track channel, and wipe fixture heads. |
| Wall Sconces | Top ledge of shades and wall plates | Handheld microfiber duster | Weekly dry dust | Damp-wipe decorative hardware and wash glass diffusers seasonally. |
Tailoring your routine to these fixture profiles prevents heavy buildup and keeps every room properly illuminated throughout the year.
Step-by-Step Electrical and Ladder Safety Checklist
Overhead cleaning involves elevated work and live electrical currents, making caution essential. Preparing your workspace properly eliminates fall hazards and prevents costly damage to decorative fixtures.
Review and follow these critical safety precautions every time you tackle elevated light fixture cleaning.
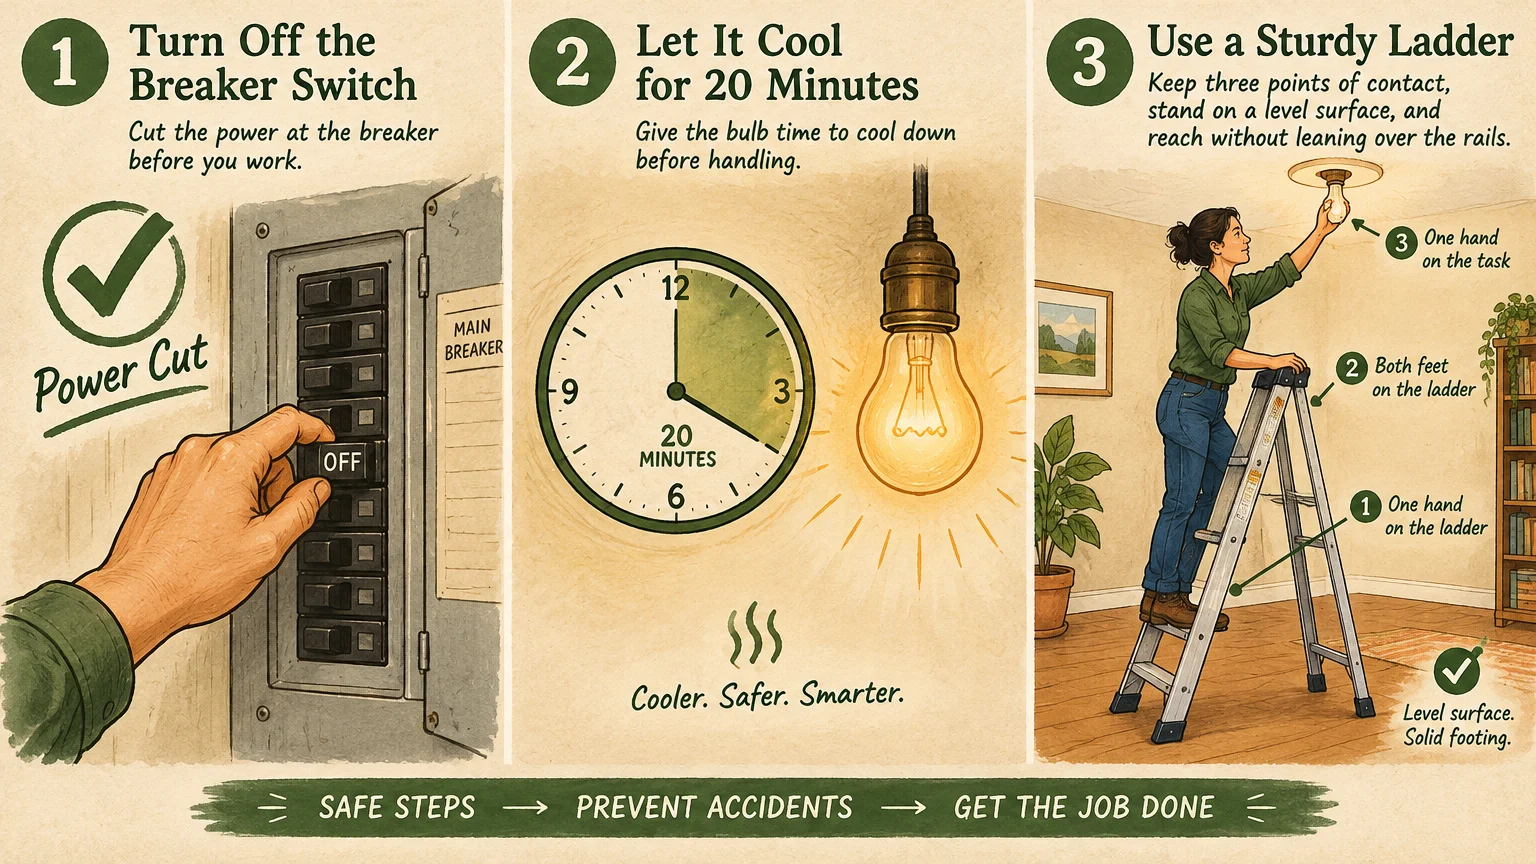
- De-energize the circuit: Shut off the wall switch and tag breaker panels for high-voltage fixtures before cleaning.
- Allow complete cooling: Give incandescent, halogen, and high-output LED bulbs at least twenty minutes to cool down entirely.
- Practice safe elevation: Follow Occupational Safety and Health Administration guidance by maintaining three points of contact on step ladders.
- Never overreach: Keep your belt buckle centered between ladder rails instead of leaning outward toward high fixtures.
- Avoid direct spraying: Mist cleaning solutions onto cloths rather than spraying liquid directly into electrical sockets or metal canopies.
- Support heavy shades: Keep two hands on glass bowls while removing thumb screws to prevent dropped glass.
- Verify complete dryness: Ensure all washed shades and cleaned parts are bone dry before restoring power to the circuit.
Taking these measured safety steps ensures that your home maintenance routine remains completely accident-free and efficient.
Your Next Step for Sparkling Overhead Lights
You do not need to clean every light fixture in your house in a single afternoon. Attempting an entire home deep clean at once leads to fatigue and skipped steps.
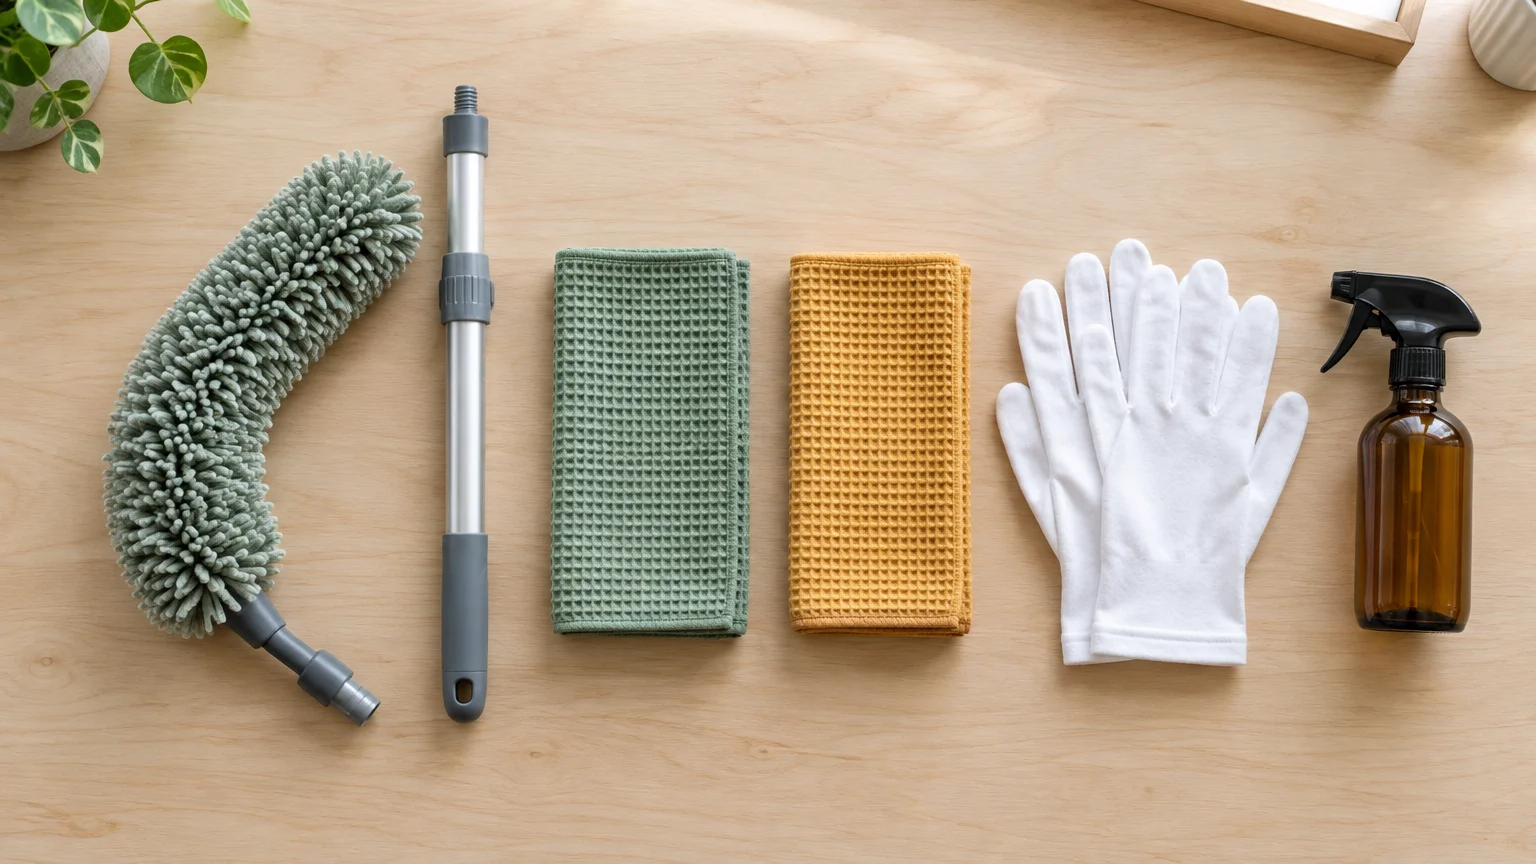
Grab an extendable microfiber duster or a soft cloth right now and inspect your primary living room fixture. Spend two minutes giving the outer shade and canopy a gentle, deliberate wipe-down.
Once you see how dramatically that single action restores clarity, work these dusting tips into your regular weekly rotation.