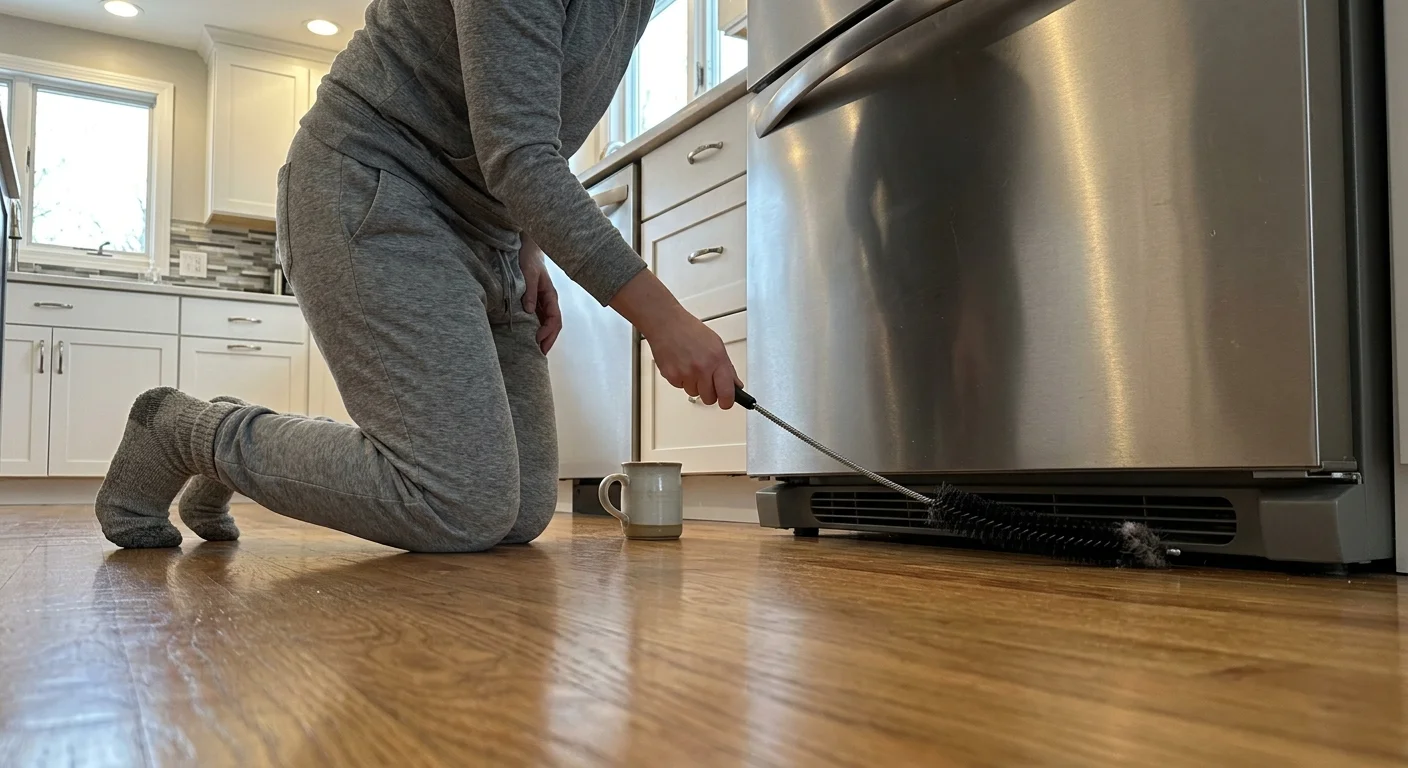
You can eliminate thick dust, pet hair, and trapped crumbs behind your refrigerator without straining your back or dragging a 300-pound appliance across your kitchen floor. Specialized tools make reaching hidden gaps effortless.
Professional cleaners bypass heavy lifting entirely by using slender, flexible implements engineered to slide beneath floor grilles, slip between narrow cabinet gaps, and clean rear coils in minutes.
Adopting these smart kitchen cleaning hacks protects your flooring from scratches, lowers your utility bills, and keeps your refrigerator running smoothly year after year.

Why Cleaning Behind Your Refrigerator Matters More Than You Think
Most homeowners treat the space behind the refrigerator as an out-of-sight, out-of-mind zone. However, neglecting this area carries real mechanical and financial costs. Your refrigerator operates continuously, drawing air across condenser coils to dissipate heat extracted from the interior compartments. As air circulates, the cooling fan acts like a magnet for airborne dust, lint, cooking grease particles, and pet fur.
According to the U.S. Energy Information Administration (EIA), residential refrigeration accounts for approximately 6% to 8% of total domestic electricity consumption, averaging between 400 and 800 kWh annually. When a thick blanket of debris coats the condenser coils, heat cannot escape efficiently. As a result, the compressor must work harder and run significantly longer cycles to maintain safe food storage temperatures.
Studies show that dirty, clogged condenser coils can increase an appliance’s energy consumption by 21% to 35%. This extra strain drives up monthly electric bills and drastically accelerates wear on vital mechanical components. Compressor replacements frequently cost between $500 and $1,200; in many cases, a premature compressor failure forces an early replacement of the entire refrigerator.
Beyond energy efficiency, cleaning behind refrigerator units eliminates health and safety hazards. Dust buildup mixed with kitchen humidity creates an ideal breeding ground for mold spores, dust mites, and bacteria. Crumbs that roll beneath the unit provide an undisturbed food supply for pests. Regular maintenance also mitigates a subtle fire hazard, as dry lint compacted around a hot compressor motor creates a combustible mix.
The ENERGY STAR Program and major appliance manufacturers recommend inspecting and cleaning your refrigerator’s condenser coils every 6 to 12 months. If you share your home with shedding dogs or cats, shorten that window to every 3 to 6 months to maintain peak performance.
The 5 Essential Refrigerator Cleaning Tools for Zero-Lift Maintenance
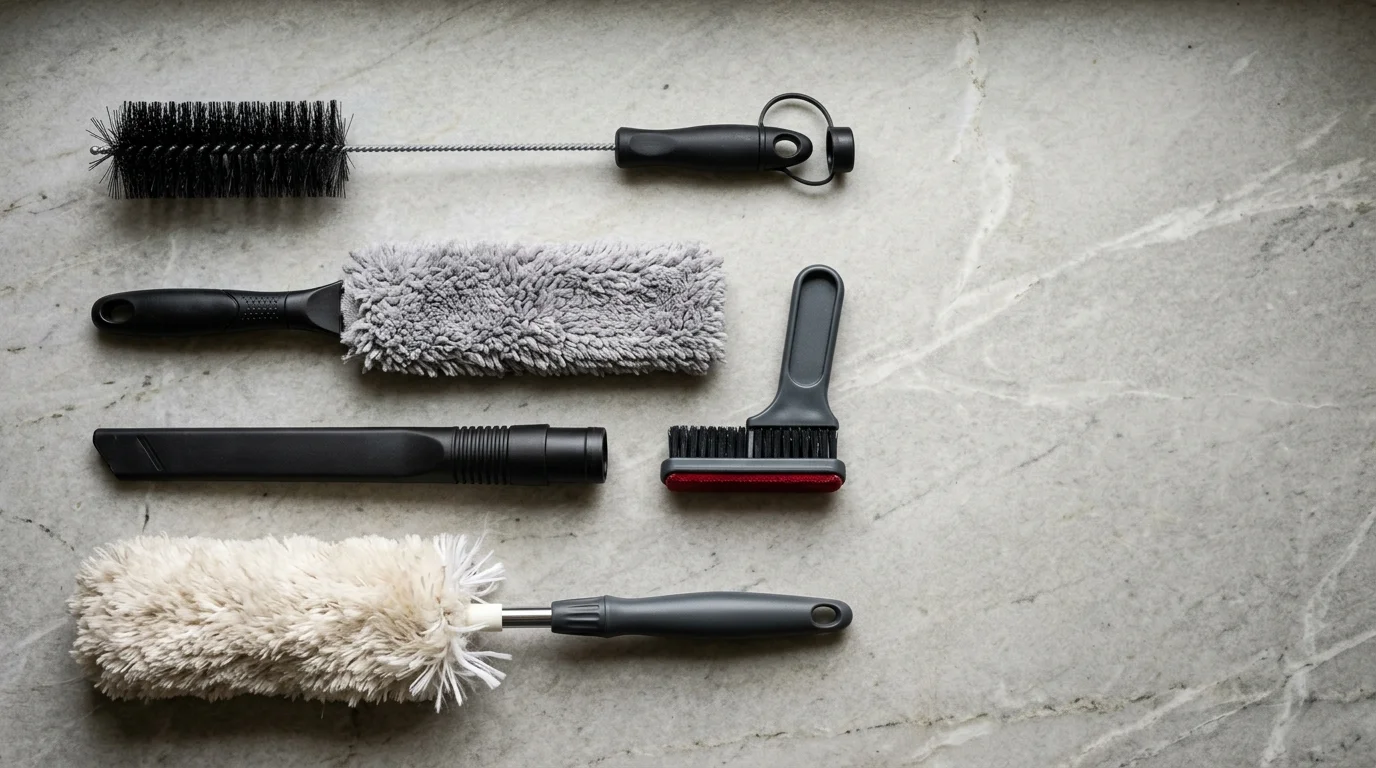
You do not need to risk thrown-out backs, strained shoulders, or scuffed hardwood floors to maintain a spotless kitchen. Professional cleaners rely on five specialized refrigerator cleaning tools to reach tight crevices from the front, sides, and top without budging the appliance an inch.
1. Flexible Long Refrigerator Coil Brush
A dedicated coil brush remains the gold standard for dislodging packed lint from metal condenser fins. Unlike standard bottle brushes, a professional-grade coil brush features a heavy-gauge wire core that bends to match the curvature of internal components while retaining sufficient rigidity to push through narrow access points.
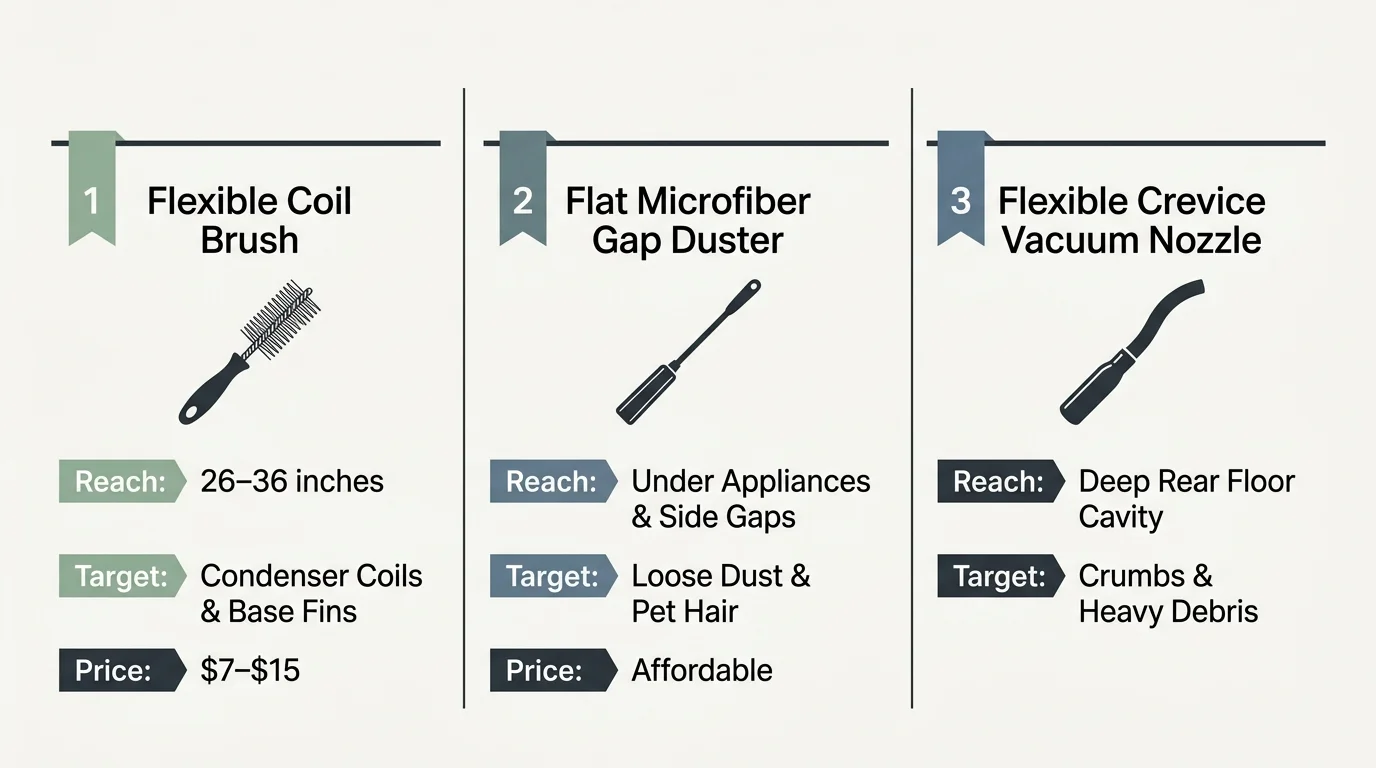
- Key Specifications: Measures between 26 and 36 inches in length, featuring stiff, scratch-resistant nylon bristles and a rubberized safety tip to prevent puncturing internal tubing.
- Typical Price Range: $7 to $15.
- Why It Works: The slender profile slips directly through the narrow slots of the lower toe-kick grille or through the gap between your cabinets and the side of the fridge. Twisting and sliding the brush breaks the static bond holding dust against the metal coil fins.
2. Ultra-Slim Flat Microfiber Gap Duster
Floor clearances beneath modern refrigerators often measure less than three-quarters of an inch, making standard broom heads and mop frames useless. An ultra-slim microfiber gap duster solves this problem with a blade-like design that glides effortlessly across flat surfaces.
- Key Specifications: Features an ultra-flat, flexible plastic paddle under 0.5 inches thick attached to an extendable pole reaching 30 to 55+ inches, fitted with a removable, washable microfiber sleeve.
- Typical Price Range: $10 to $20.
- Why It Works: Microfiber generates a natural electrostatic charge that grabs pet hair, dust bunnies, and debris instead of pushing them further under the machine. You can slide the paddle beneath the front edge and sweep it across the subfloor to pull out hidden debris in one smooth stroke.
3. Universal Long Flexible Vacuum Crevice Attachment
Standard rigid vacuum attachments lack the reach and flexibility required to navigate appliance cabinetry. A universal flexible crevice tool extends your vacuum’s suction deep into rear cavities and around structural corners.
- Key Specifications: Measures 24 to 36 inches in length, constructed from durable semi-rigid rubber or flexible thermoplastic, and includes universal adapters fitting standard 1¼-inch (32 mm) and 1⅜-inch (35 mm) vacuum hoses.
- Typical Price Range: $8 to $16.
- Why It Works: This attachment curves around internal baffles and under compressor mounts to extract the heavy lint dislodged by your coil brush. It channels concentrated suction directly to the floor pan, removing dropped food debris without requiring you to move the appliance.
4. Cordless High-Velocity Air Duster
When condenser coils sit nestled inside complex rear housing assemblies, physical brushes cannot reach every internal corner. A rechargeable high-velocity electric air duster blows concentrated streams of air through the assembly to dislodge stubborn debris.
- Key Specifications: Delivers airflow speeds between 40,000 and 100,000 RPM, equipped with narrow directional nozzles and rechargeable lithium-ion batteries.
- Typical Price Range: $30 to $50.
- Why It Works: Directing short bursts of focused air from the front base grille forces deeply lodged lint toward the open floor or rear perimeter, where your vacuum attachment can capture it immediately. Unlike disposable canned air, an electric duster maintains consistent pressure and will not spray freezing liquid propellant onto hot electrical parts.
5. Heavy-Duty Felt Appliance Sliders (For Rare Full-Access Needs)
While the four tools above handle 95% of routine maintenance with zero movement, you may occasionally need full access to inspect a water supply line or clean a major liquid spill. Heavy-duty appliance glides allow you to roll or slide a loaded refrigerator with one hand while keeping your flooring pristine.
- Key Specifications: Multi-surface glide pads featuring smooth polymer bottoms for carpets or thick compressed felt cushions for hardwood, luxury vinyl plank (LVP), and tile floors.
- Typical Price Range: $10 to $25 per set of four.
- Why It Works: Placing these low-profile pads under the front leveling legs neutralizes friction. You can gently pull the unit forward along its built-in rear wheels without gouging soft wood or cracking ceramic tiles.
Comparison of the Best Hard-to-Reach Cleaning Tools
The following reference table outlines how each tool performs across key maintenance areas behind and beneath your refrigerator.
| Tool Name | Primary Target Zone | Reach & Profile | Average Price | Key Advantage |
|---|---|---|---|---|
| Flexible Coil Brush | Condenser coil fins & fan blades | 26–36 inches; 1–2 inch diameter | $7 – $15 | Scrapes stubborn, grease-bound lint off metal coils without bending delicate fins. |
| Flat Microfiber Gap Duster | Under-fridge subfloor & narrow side gaps | 30–55 inches; under 0.5 inch thick | $10 – $20 | Captures static dust and pet hair across wide floor spans without blowing dust into the air. |
| Flexible Vacuum Attachment | Floor pan, rear access plate & corners | 24–36 inches; narrow nozzle | $8 – $16 | Pulls debris directly out of the cabinet cavity into your vacuum canister. |
| Cordless Electric Air Duster | Internal motor housing & tight coil grids | Directional focused blast | $30 – $50 | Dislodges unreachable lint pockets without requiring direct physical contact. |
| Heavy-Duty Appliance Glides | Full floor access under appliance feet | Fits standard leveling legs | $10 – $25 | Allows single-person gliding without scratching delicate flooring materials. |

Step-by-Step Guide: How to Clean Behind the Refrigerator Without Moving It
Follow this straightforward, professional process to clean your refrigerator’s rear and lower zones in under 20 minutes using your hard to reach cleaning tools.
Step 1: Cut Power for Safety
Before inserting any tools into appliance housings, disconnect the refrigerator from its power source. If your wall outlet sits completely out of reach behind the appliance, turn off the dedicated circuit breaker in your home’s main electrical panel. Reviewing Electrical Safety Foundation International (ESFI) guidelines reinforces why de-energizing appliances before mechanical cleaning prevents accidental shock and protects sensitive electronic control boards.
Step 2: Remove the Base Toe-Kick Grille
Modern refrigerators house their condenser coils in one of two configurations: along the bottom underneath the food compartments or mounted against the rear exterior wall. For bottom-mounted systems, locate the plastic grille running along the bottom front edge. Most grilles snap off easily by pulling gently outward at both ends; others require removing two Phillips-head screws.
Step 3: Dislodge Packed Dust with the Coil Brush
Insert your flexible long coil brush through the front opening. Gently slide the brush between the condenser coil rows using back-and-forth strokes. Rotate the brush handle to wind loose pet hair around the nylon bristles. Avoid aggressive slamming or forcing the brush against resistance; gentle contact easily dislodges dry lint without risking damage to copper refrigerant lines.
Step 4: Vacuum the Loosened Debris
Attach the universal flexible vacuum crevice tool to your vacuum hose. Turn the vacuum on and guide the long nozzle into the bottom chamber. Systematically suction the clumps of dust pulled forward by the coil brush. Work the flexible tube around the sides of the compressor housing and along the floor pan to collect stray crumbs and insect debris.
Step 5: Sweep the Subfloor with the Flat Gap Duster
Slip the ultra-slim microfiber gap duster beneath the bottom frame. Slide the wand as far back toward the rear wall as the pole allows. Sweep in overlapping arcs from the center outward toward the sides. The static charge of the microfiber collects loose dust sheets resting on the floor. Pull the wand out periodically, shake the collected dust into a trash bin, and repeat until the wand returns clean.
Step 6: Clear the Perimeter Cabinet Gaps
Inspect the narrow vertical gaps between the refrigerator’s side panels and your kitchen cabinets. Insert the flat microfiber duster into these vertical slots, starting from the top and working downward. This step sweeps away cobwebs and floating hair settled along the exterior cabinet walls before it migrates downward to the floor.
Step 7: Reinstall the Grille and Restore Power
Wipe down the plastic toe-kick grille with warm soapy water to remove grease and dust blocking its airflow louvers. Snap or screw the dry grille back into place along the front base. Turn the circuit breaker back on or plug the unit back in, verifying that the compressor and condenser fan start up smoothly.
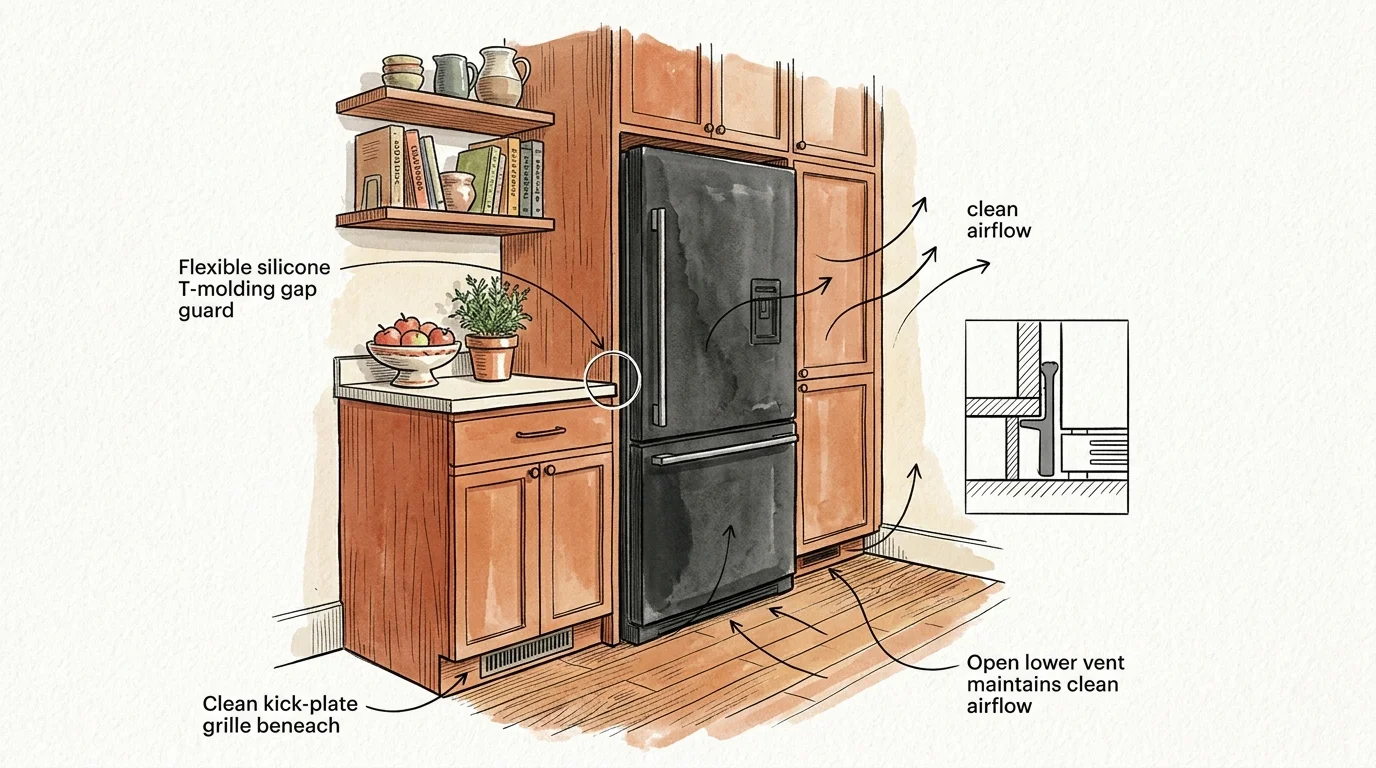
Kitchen Cleaning Hacks to Keep the Area Cleaner for Longer
Preventative measures significantly reduce the amount of dust migrating beneath and behind your appliances. Implementing a few simple kitchen cleaning hacks cuts your future cleaning time in half.
- Install Silicone Gap Guards: Place flexible silicone gap covers between your kitchen countertops and the sides of the refrigerator. These transparent strips block dropped food crumbs, liquids, and utensils from tumbling down unreachable side crevices.
- Manage Pet Hair Pathways: Pet fur naturally drifts along floor moldings and collects beneath the refrigerator due to the constant airflow of the cooling fan. Vacuum your kitchen baseboards and sweep high-traffic entryways weekly to capture shedding fur before the refrigerator fan draws it inward.
- Maintain Clean Top Surfaces: Dust accumulates heavily on top of the refrigerator. When cabinet doors open and close, drafts blow that dust off the top edges and down the back wall directly into the coils. Lay a sheet of parchment paper or washable shelf liner on top of the fridge; every few months, roll up the liner, discard the trapped dust, and lay down a fresh sheet.
- Establish a Semi-Annual Calendar Cadence: Add a recurring reminder to your digital calendar aligned with daylight saving time changes. Clearing dust twice a year ensures lint never hardens into an impenetrable, grease-laden mat.

Safety Guidelines and When to Call a Professional
While cleaning behind refrigerator coils requires zero heavy lifting, you must handle internal appliance components with care. Observe the following safety parameters during every cleaning session:
- Never Use Liquids on Internal Coils: Never spray liquid cleaners, degreasers, or water directly onto internal electrical components, wiring harnesses, or fan motors. Moisture promotes electrical shorts and corrodes metal connections. Use strictly dry mechanical methods—brushes, dusters, and vacuums—inside mechanical cavities.
- Protect Refrigerant Lines: Aluminum condenser fins bend easily, and copper refrigerant tubing carries pressurized gas. Never use metal screwdrivers, rigid coat hangers, or sharp scraping tools to poke around the compressor. Stick to nylon-bristled brushes with protected blunt tips.
- Allow Components to Cool: Compressors can reach operating temperatures exceeding 140°F (60°C). If your refrigerator ran immediately before maintenance, let the unit sit powered down for 10 to 15 minutes before touching the area around the motor.
- Recognize Warning Signs: If your refrigerator exterior feels unusually hot to the touch, if you notice clicking sounds from the compressor, or if the unit fails to hold steady temperatures despite clean coils, contact a certified appliance repair technician to inspect the start relay and fan motor.
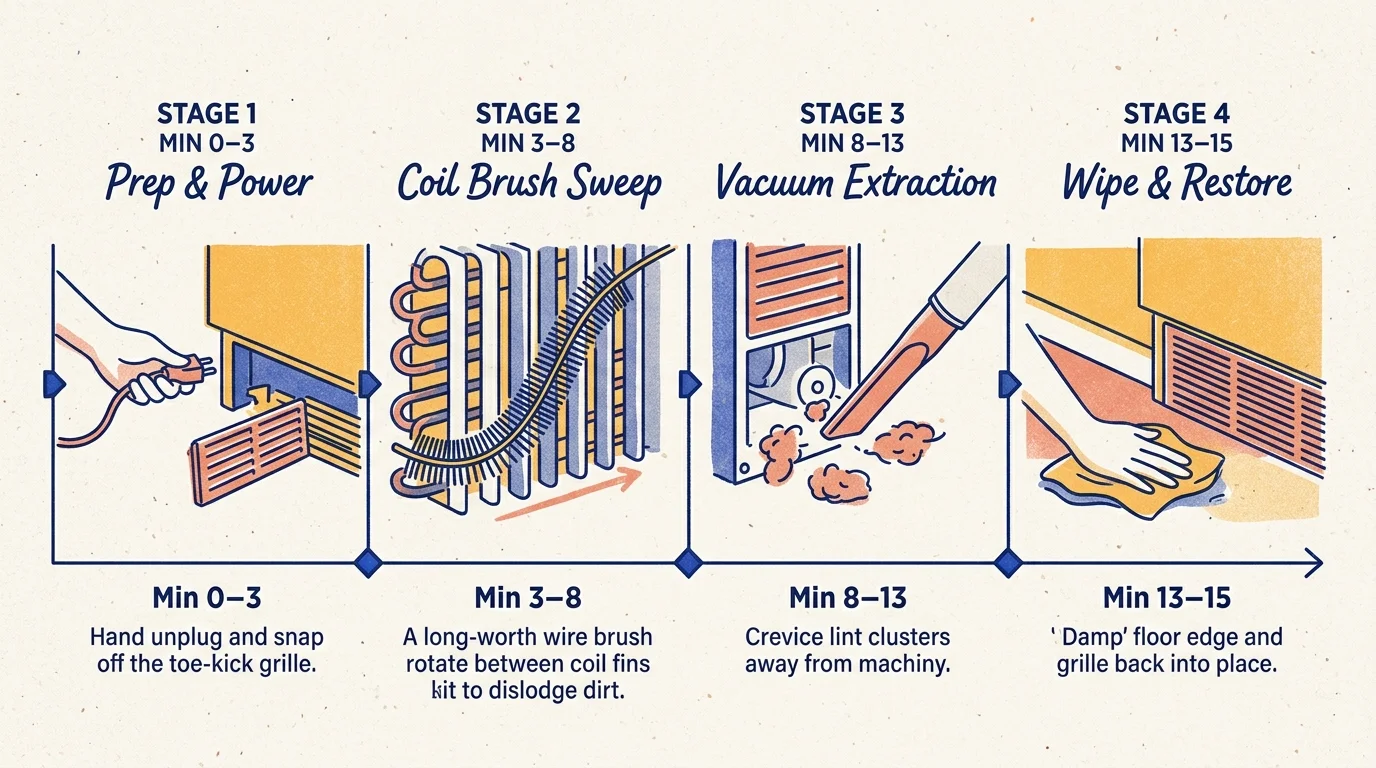
Your 15-Minute Action Plan
Maintaining a clean, efficient refrigerator does not require brute physical strength or costly service calls. By equipping yourself with a flexible coil brush, a flat microfiber duster, and a long vacuum crevice attachment, you can complete this entire maintenance routine in roughly fifteen minutes.
Take a quick look at your refrigerator’s lower base grille today. If you spot visible lint clinging to the slots, order your slender cleaning tools and schedule a quick cleaning session this weekend. Your refrigerator will run quieter, consume less electricity, and serve your household reliably for years to come.