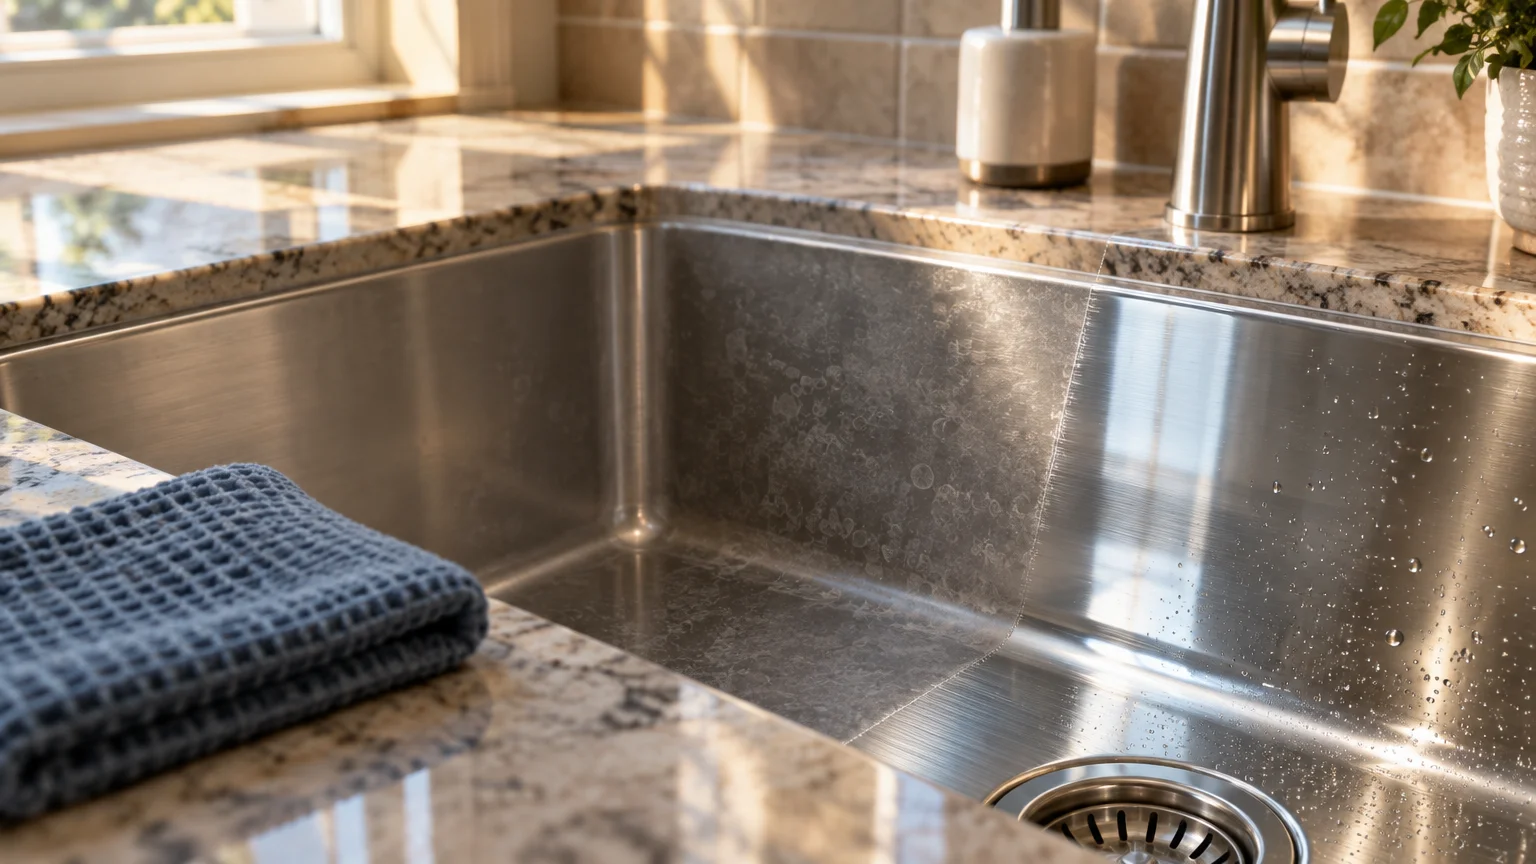
You can restore the bright, reflective gleam of your stainless steel sink without buying expensive tools or harsh chemicals. Daily washing often causes accidental damage, leaving behind a cloudy, lifeless basin.
Stainless steel relies on a microscopic shield called chromium oxide to stay bright and rust-free. When common kitchen habits strip that delicate barrier, light scatters across micro-scratches and mineral haze.
Avoiding seven common sink cleaning mistakes will immediately protect your basin and bring back its original factory shine. Here is what you should stop doing today and how to fix the dullness for good.
01 Soaking the Surface with Chlorine Bleach
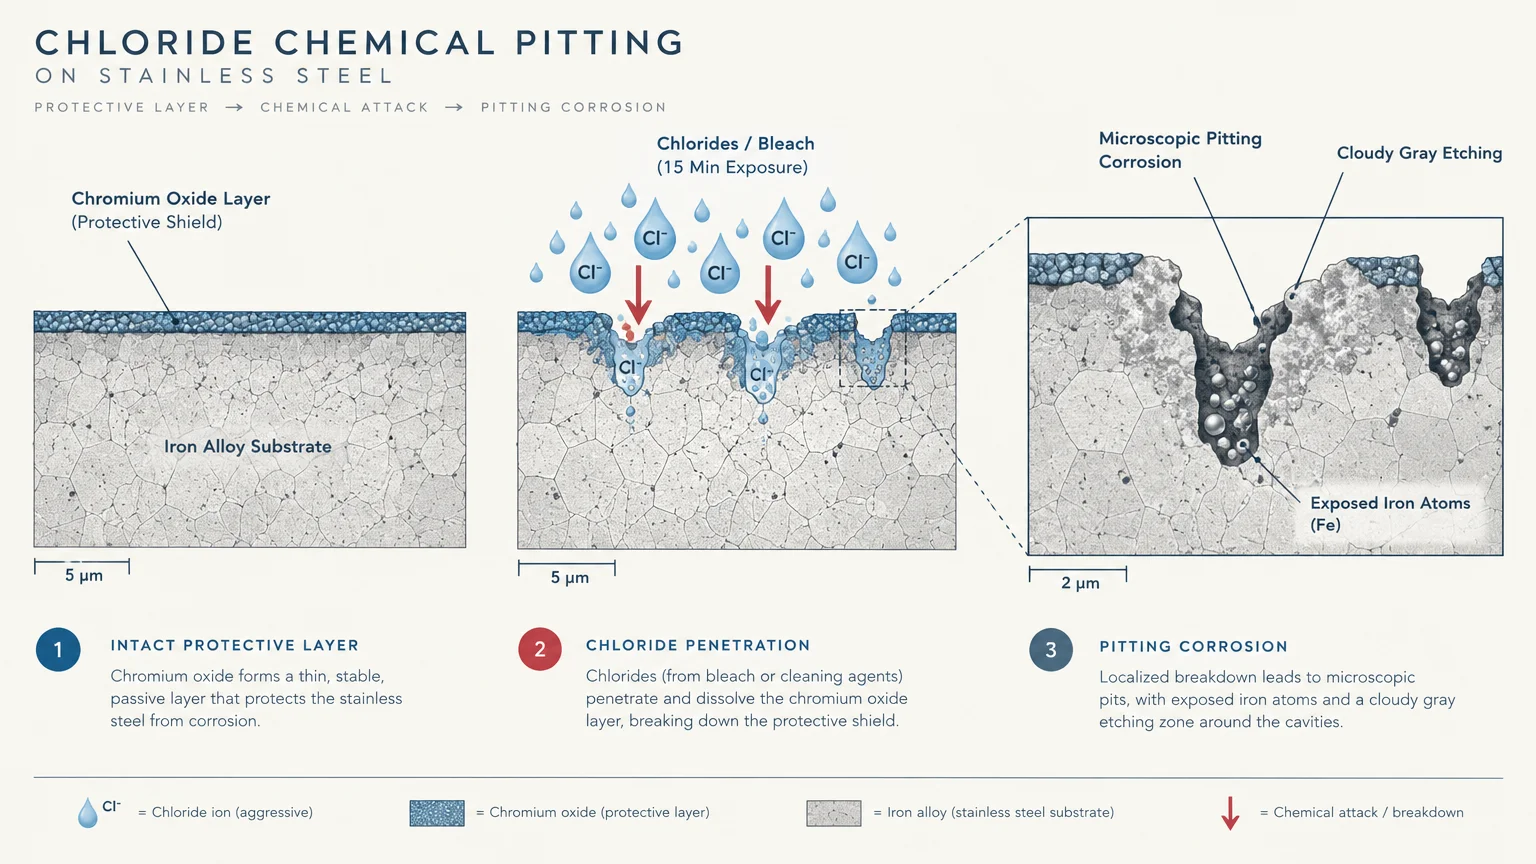
Bleach is a popular household disinfectant, but it is one of the worst substances for stainless steel sink cleaning. The chlorides in bleach actively attack the protective chromium oxide film that prevents rust.
When this barrier breaks down, the underlying iron reacts with air and moisture. The metal develops microscopic pits and a permanent, cloudy gray cast that regular washing cannot lift.
Chlorine damage happens faster than most homeowners expect. Leaving even a diluted bleach solution in your basin for fifteen minutes can etch the surface.
According to the Specialty Steel Industry of North America, chlorides cause severe pitting corrosion on stainless alloys. They recommend avoiding bleach entirely during routine maintenance.
If you must sanitize kitchen surfaces, choose safer alternatives like 70 percent isopropyl alcohol or three percent hydrogen peroxide. These disinfectants kill bacteria effectively without corroding the metal.
If bleach ever splashes into your sink, flush the basin immediately with copious amounts of cold water. Quick dilution prevents the active chlorine from bonding with the steel.
02 Scouring with Carbon Steel Wool and Wire Brushes
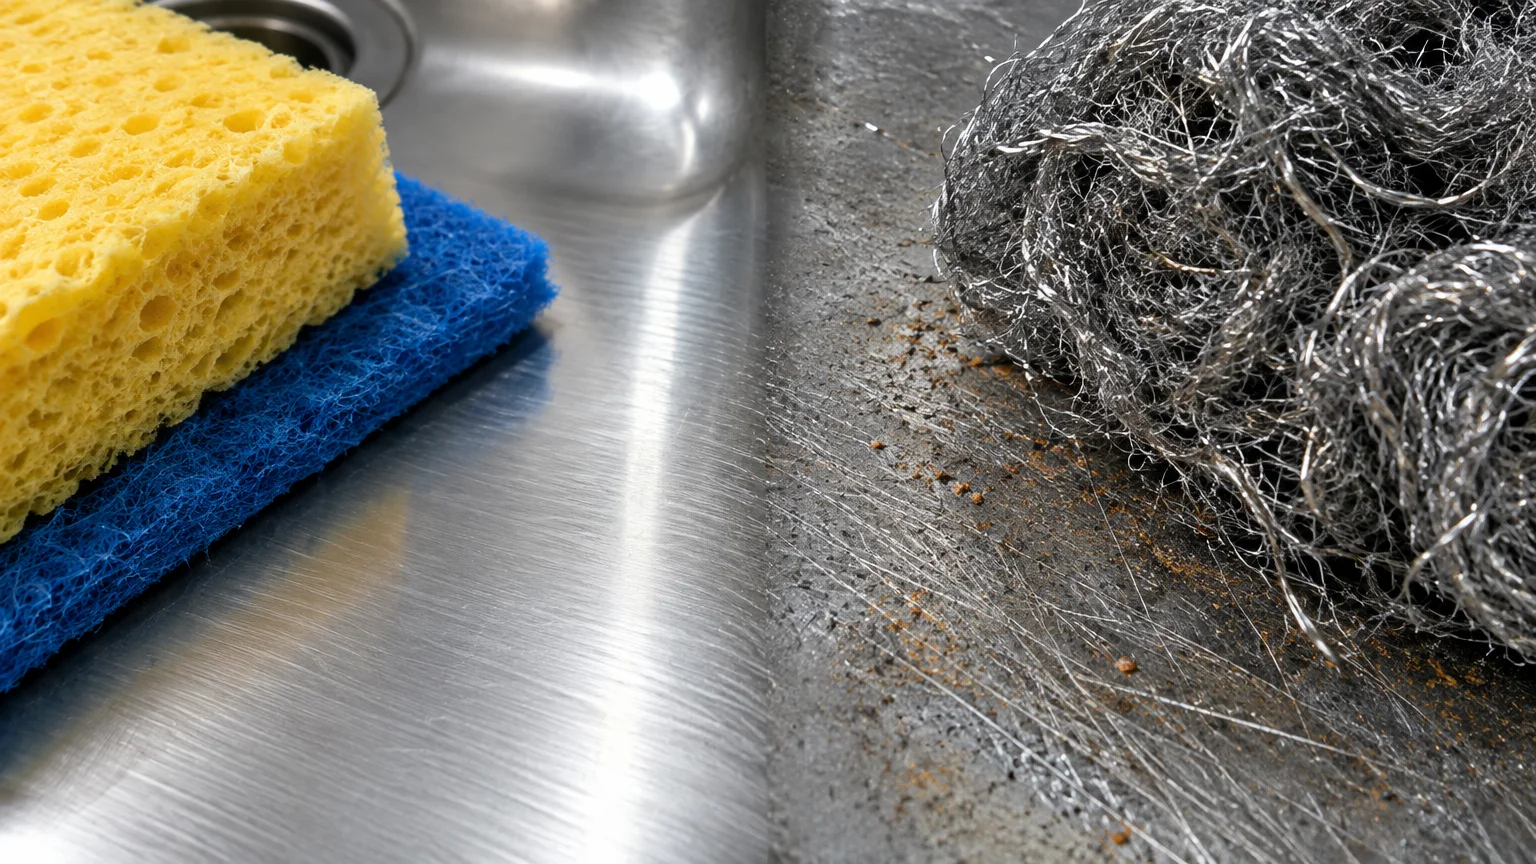
Steel wool pads and wire brushes seem ideal for lifting baked-on grease or burnt food. Unfortunately, these aggressive tools cause two distinct types of damage to stainless steel.
First, the hard carbon steel bristles carve deep trenches into the softer stainless surface. These micro-scratches scatter ambient light in random directions, transforming a reflective surface into a dull, flat gray.
Second, carbon steel wool sheds tiny iron particles that lodge directly inside the scratches. When exposed to moisture, these trapped particles rust and leave orange streaks behind.
You might assume your sink is rusting, but you are actually seeing foreign iron deposits corroding on the surface. Lifting these embedded shards requires intensive polishing and chemical treatment.
Protect your sink by choosing non-abrasive tools. Use non-scratch nylon scrubbing pads, natural cellulose sponges, or soft microfiber cloths for daily dishwashing tasks.
03 Scrubbing Against the Factory Grain
Take a close look at your basin under bright kitchen lighting. You will notice fine, uniform brush lines running across the metal surface.
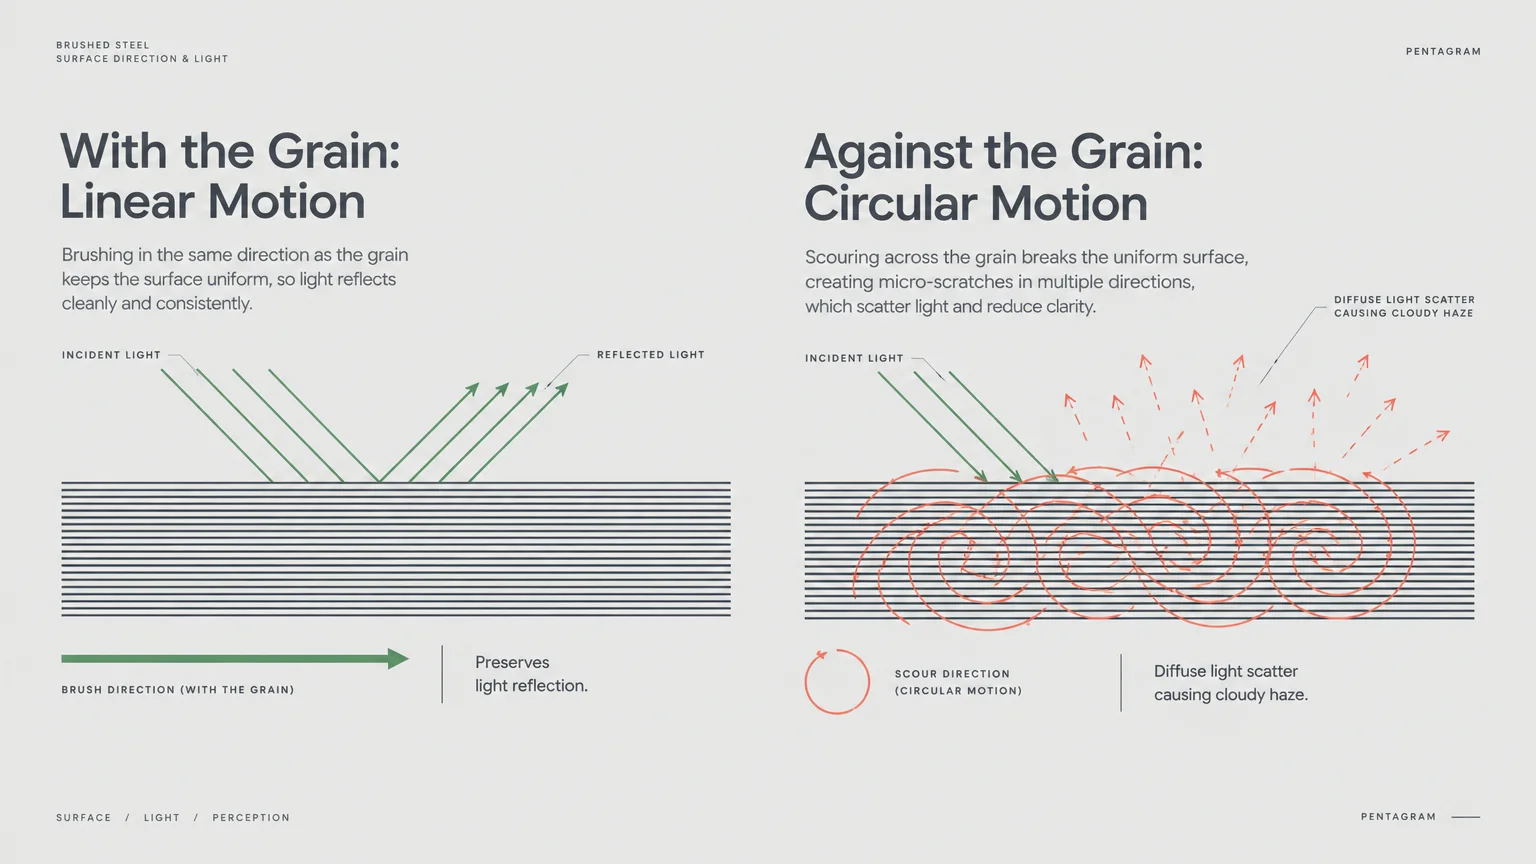
Manufacturers brush these directional grain lines into the steel during production to create a uniform finish. Working with the grain maintains this texture, while scrubbing against it causes visible harm.
Many people clean sinks using broad circular motions. This common habit drags abrasive particles across the delicate grain ridges, scratching the tops of the metal lines.
Over time, these cross-grain scratches accumulate into a cloudy, scuffed haze. Your dull stainless steel sink loses its visual depth because light can no longer bounce cleanly off the parallel grooves.
Always identify the grain direction on your sink walls and basin floor before scrubbing. Guide your sponge in straight, smooth strokes that run parallel to the grain.
04 Leaving Wet Sponges and Rubber Mats in the Basin
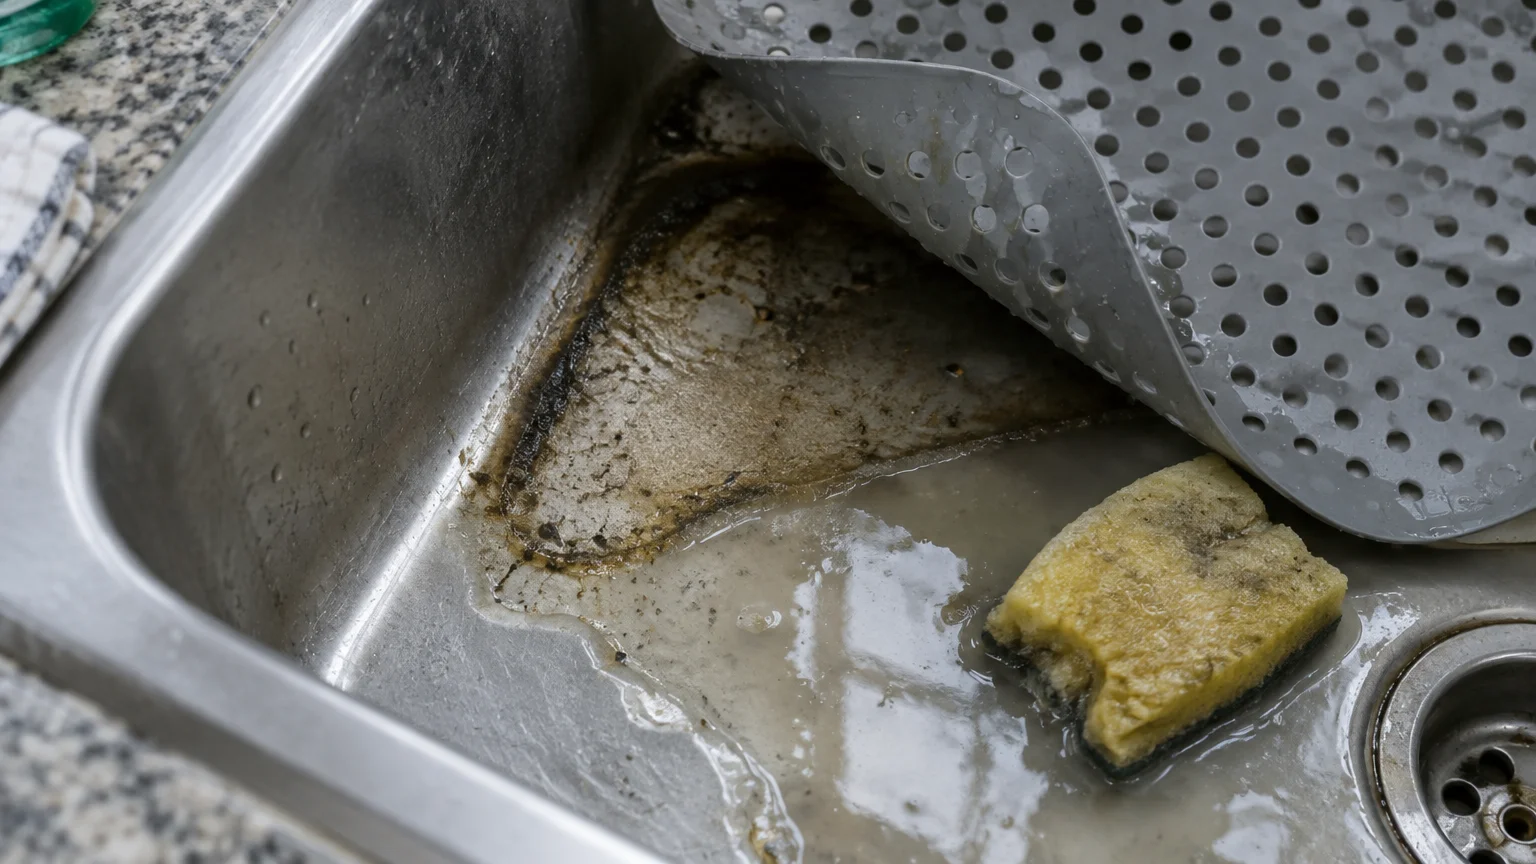
Rubber sink protectors and plastic mats cushion delicate glassware, but leaving them in the sink invites problems. They trap standing water, grease, and food acids against the basin floor.
Stainless steel needs continuous contact with atmospheric oxygen to repair its protective surface film. When a wet mat or damp sponge blocks airflow, localized oxygen starvation occurs.
Without oxygen, the chromium oxide layer cannot regenerate after normal wear. Trapped moisture then allows hard water minerals and dish detergents to react directly with the unprotected metal.
This chemical reaction produces dark gray spots, stubborn water stains, and rough chalky patches. In severe cases, stagnant moisture beneath suction-cup mats leads to permanent crevice corrosion.
Remove rubber mats, sponge caddies, and dish cloths as soon as you finish cleaning. Store them in a well-ventilated drying caddy so your sink floor stays dry.
05 Using Harsh Scouring Powders and Oven Cleaners
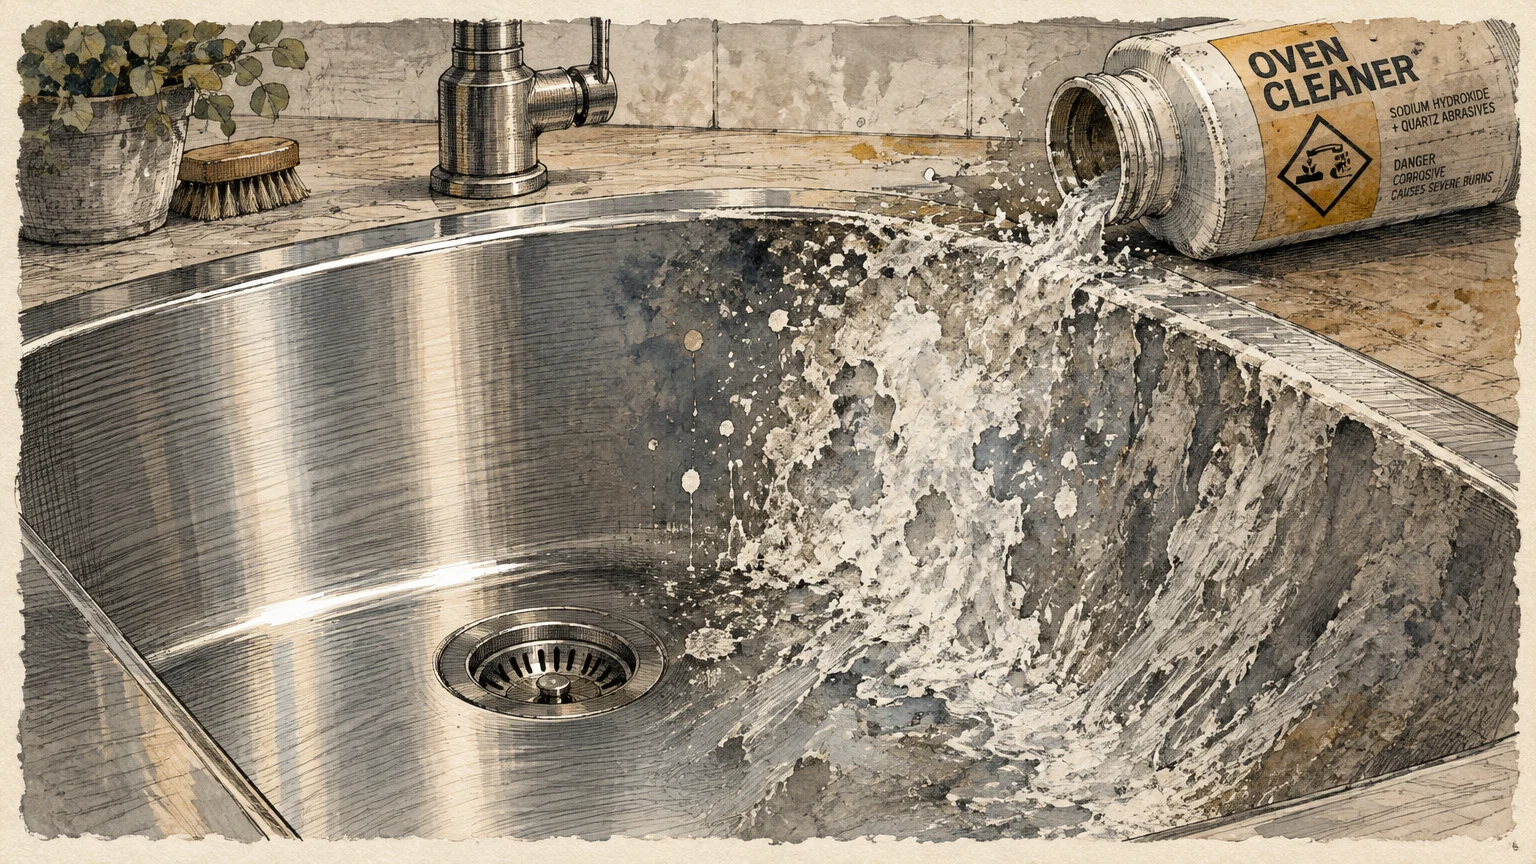
When food burns onto pans, homeowners often reach for industrial oven sprays or heavy-duty scouring powders. Allowing these aggressive chemicals to coat your sink causes immediate, severe dulling.
Oven cleaners contain sodium hydroxide, a caustic chemical that strips protective finishes and etches metal on contact. Standard scouring powders often rely on crushed silica or quartz grit that gouges the basin.
Even brief exposure to caustic sprays can transform a polished finish into a chalky, mottled surface. Once chemical etching occurs, polishing compound or professional resurfacing is required to fix the damage.
The official Elkay sink care guidelines specifically warn against using oven cleaners, concentrated acids, and abrasive scouring cleansers on stainless steel surfaces.
Choose cleaners containing oxalic acid instead, such as Bar Keepers Friend, or use plain baking soda. Oxalic acid safely dissolves stubborn mineral bonds and rust spots without scratching the underlying metal.
06 Allowing Hard Water Droplets to Air-Dry
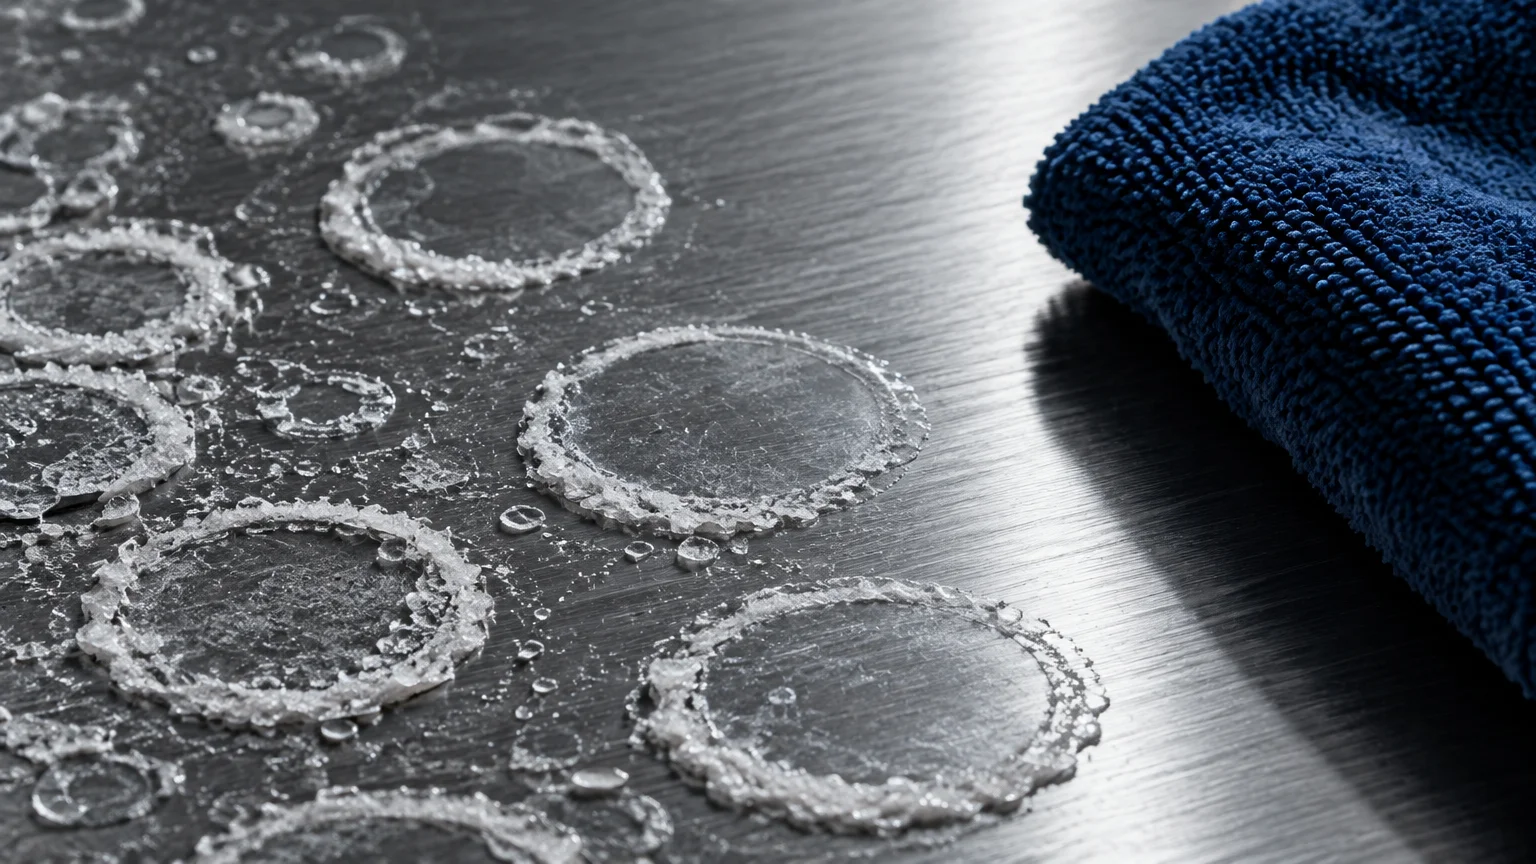
Air-drying dishes on a rack saves time, but letting water droplets evaporate inside the sink ruins its appearance. Tap water contains dissolved minerals, predominantly calcium, magnesium, and silica.
When standing water droplets evaporate, the liquid vanishes and leaves these chalky white minerals behind. Over weeks of daily use, microscopic mineral deposits bond together into an opaque layer of limescale.
This calcified film acts like frosted glass over your sink. It completely blocks the metallic luster, making a clean sink appear faded, dingy, and neglected.
Mineral deposits also create a rough, porous surface that grabs onto cooking oils and detergent scum. This compounding buildup accelerates dullness and makes weekly cleaning far more difficult.
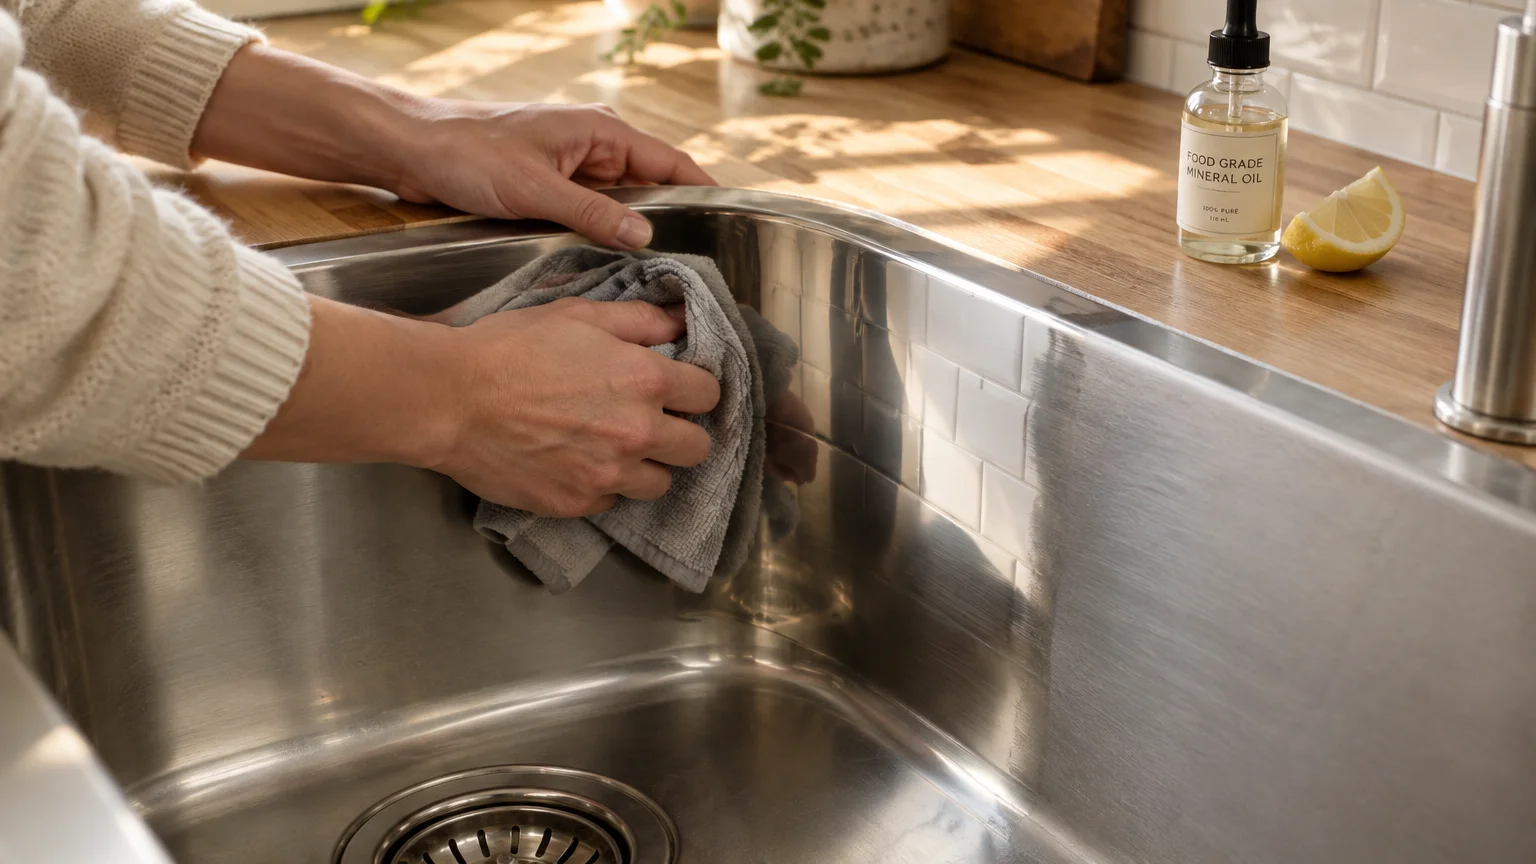
Keep a dry microfiber cloth folded near your faucet. Taking twenty seconds to wipe down the basin after your evening chores stops mineral rings before they ever form.
07 Neglecting to Polish and Condition the Metal
Thorough washing removes grease and food residue, but soap also strips away natural surface protection. Leaving the bare metal exposed leaves it vulnerable to water spots and fingerprint oils.
Many people skip conditioning because they assume stainless steel requires zero post-wash care. Without a protective barrier, the very next water splash leaves a noticeable white mineral mark.
Applying a food-grade conditioning oil creates a hydrophobic barrier across the entire basin. This thin seal forces water to bead up and roll directly into the drain instead of drying on the walls.
The oil also fills the microscopic valleys between metal grain lines, deepening visual contrast and enhancing natural shine. A few drops applied monthly make ongoing stainless steel sink care effortless.
Always choose pure, food-grade mineral oil rather than vegetable oils like canola or olive oil. Plant-based cooking oils turn rancid over time, creating a sticky residue that traps dust and grime.
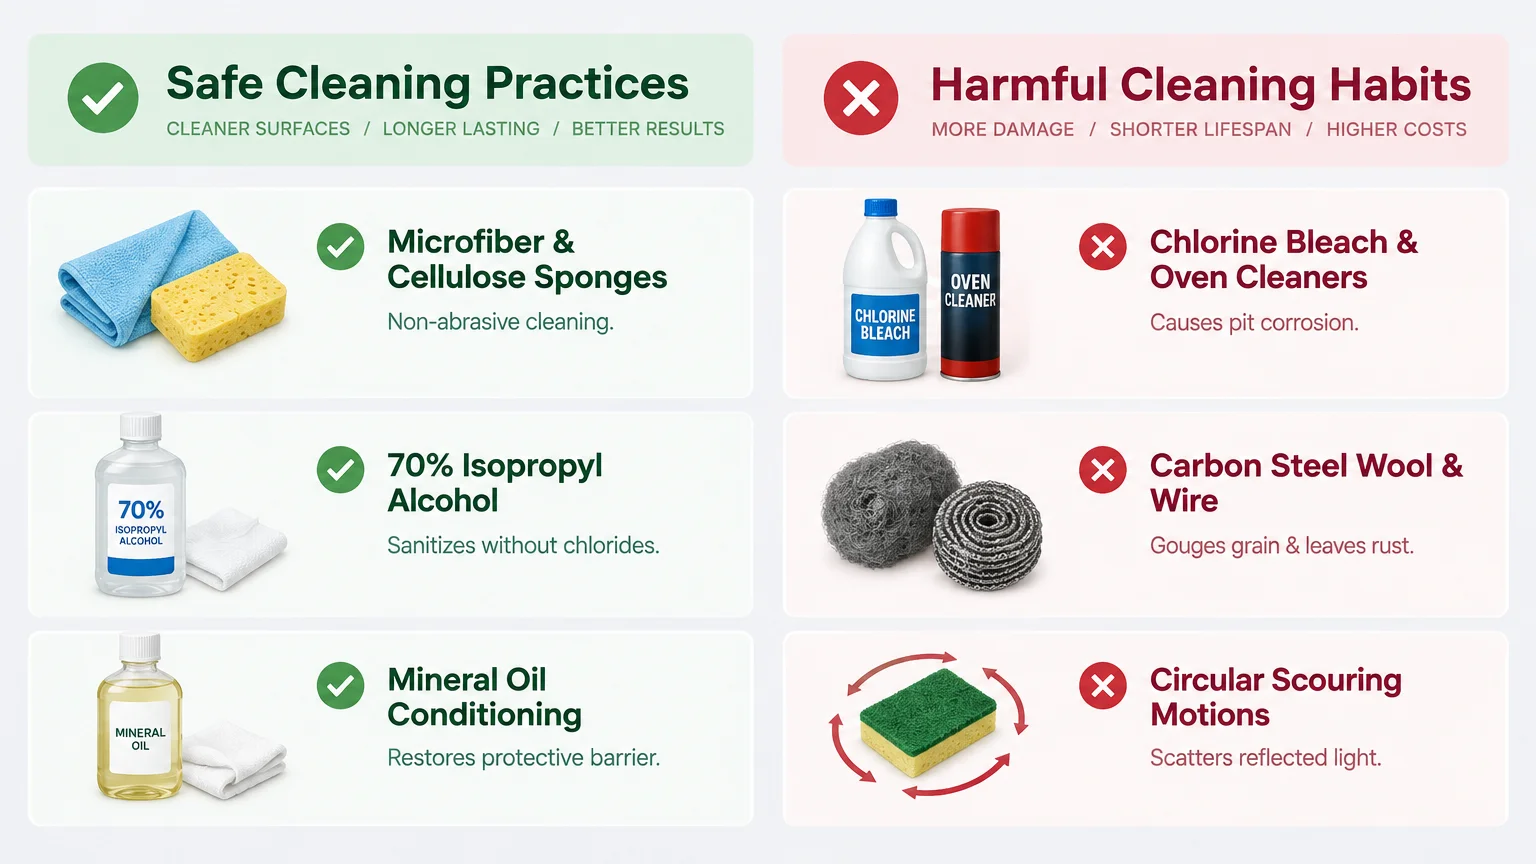
Comparing Safe and Harmful Sink Cleaning Methods
Understanding which products protect your sink and which cause damage makes daily maintenance simple. Many popular cleaning hacks do more harm than good over time.
The table below outlines common household cleaners, their risks, and the safest alternatives for long-term stainless steel sink care.
| Product or Tool | Intended Purpose | Risk Level | Effect on Stainless Steel | Recommended Alternative |
|---|---|---|---|---|
| Chlorine Bleach | Sanitizing and stain removal | High | Breaks down chromium oxide, causing pitting and dark gray discoloration. | 70% isopropyl alcohol or diluted hydrogen peroxide |
| Steel Wool / Brillo Pads | Scrubbing burnt grease | High | Scratches metal and embeds iron shards that rust rapidly. | Non-scratch nylon pads or natural cellulose sponges |
| Oven Cleaners | Degreasing cookware in sink | Severe | Caustic sodium hydroxide chemically burns and etches the finish. | Dawn dish soap and warm water soak |
| Coarse Scouring Powders | Lifting stubborn stains | Moderate | Abrasive silica particles strip the brushed grain and create a cloudy haze. | Baking soda or oxalic acid cleanser |
| Rubber Sink Mats | Scratch protection | Moderate | Traps moisture and restricts oxygen, leading to water staining and crevice corrosion. | Stainless steel bottom grid with silicone feet |
| Air-Drying Tap Water | Convenience after rinsing | Low to Moderate | Evaporating water leaves calcium and magnesium scale that creates a frosted film. | Towel-drying with a dry microfiber cloth |
Switching from harsh chemicals to gentler alternatives protects your investment. High-grade stainless sinks last for decades when you respect the metallurgy of the basin.
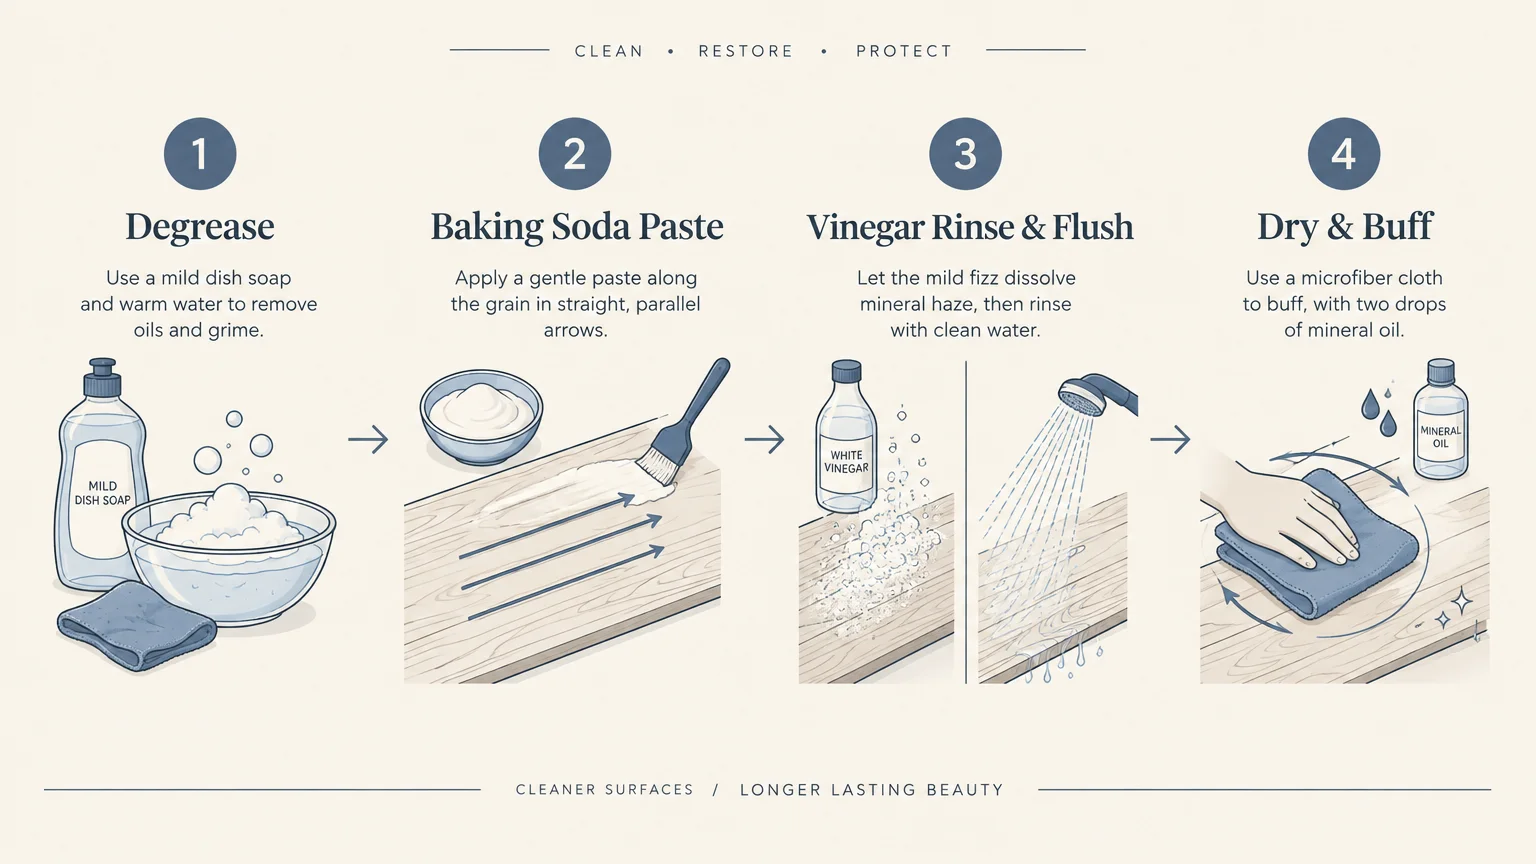
How to Restore a Dull Stainless Steel Sink: Step-by-Step
If your basin already looks cloudy or stained, a structured deep clean will revive its factory gleam. You do not need power polishers or expensive commercial equipment.
This reliable five-step restoration process strips built-up mineral scale, lifts grime, and seals the metal safely.
Step 1: Degrease the Basin Thoroughly
Begin by removing all sponges, dishes, and drain strainers from your sink. Rinse the entire basin with hot water to soften surface oils.
Squirt several drops of concentrated grease-cutting dish soap onto a damp microfiber cloth. Wash the walls, corners, and floor in straight lines along the grain.
Rinse the soap away with warm water. Degreasing ensures that subsequent cleaning agents make direct contact with mineral buildup rather than sliding off oily film.
Step 2: Dissolve Limescale with Warm Distilled Vinegar
White distilled vinegar contains mild acetic acid, which dissolves calcium carbonate without harming stainless steel. Warm one cup of vinegar in your microwave for thirty seconds.
Soak paper towels in the warm vinegar and lay them flat against the stained areas of your basin. Let them sit undisturbed for ten to fifteen minutes.
The acid breaks down the mineral bonds anchoring the limescale to your sink. Remove the paper towels and wipe the loosened scale away with a soft cloth.
Rinse the sink immediately with clean water after vinegar treatment. Never let acidic solutions dry on the steel, as prolonged contact can cause mild surface clouding.
Step 3: Deep Clean with an Oxalic Acid Paste
For stubborn water stains and dull oxidation, reach for an oxalic acid cleaner. Wet the sink surface lightly and sprinkle a small amount of powder across the metal.
Dampen a non-scratch nylon sponge and work the powder into a smooth paste. Rub gently back and forth, following the brush direction of the grain.
Oxalic acid works chemically rather than mechanically, so you do not need to apply heavy pressure. It lifts metal stains, dissolves dark spots, and brightens the alloy within two minutes.
Manufacturer recommendations from the Kohler Sink Care Guide emphasize using non-abrasive specialty cleansers to preserve brushed finishes without scratching.
Step 4: Rinse and Dry Completely
Thorough rinsing is essential whenever you use cleaning compounds on metal. Rinse every square inch of the basin with cold water until all powdery residue vanishes.
Take a clean, dry microfiber towel and wipe the entire sink until not a single drop remains. Removing standing water reveals whether any cloudy patches require a quick spot treatment.
Step 5: Buff and Seal with Food-Grade Mineral Oil
Once the steel is completely dry, pour three to four drops of food-grade mineral oil onto a fresh microfiber cloth. Avoid pouring oil directly onto the sink floor.
Wipe the oiled cloth across the metal in long, even strokes following the grain. Spread the oil thinly across the walls, rim, and basin base.
Flip your cloth to a dry side and buff the metal with light pressure. The oil fills microscopic crevices, repels water droplets, and creates a deep, radiant mirror shine.

Daily Stainless Steel Sink Care Routine
Maintaining a brilliant shine requires consistent, gentle habits rather than intense weekly scrubbing. Small daily actions prevent dirt and minerals from bonding to the surface.
Follow this practical checklist to keep your basin spotless with minimal daily effort.
- Rinse after every use: Wash away food acids, coffee, and tomato sauce immediately to prevent localized staining.
- Clear the drain daily: Empty food scraps from the sink strainer basket to eliminate odors and bacterial growth.
- Air-dry cleaning tools: Hang dishcloths over a rack and store wet sponges in an open caddy away from the sink floor.
- Wipe the basin dry at night: Use a dry microfiber cloth before bed to eliminate standing water and prevent limescale rings.
- Use a stainless bottom grid: Elevate heavy pots and pans above the sink floor to prevent impact scratches and ring stains.
- Refresh monthly with oil: Reapply a light coat of mineral oil once a month to restore water-beading performance.
Adopting these simple habits saves time and prevents you from needing harsh chemical restorers in the future.
A well-maintained sink elevates the look of your entire kitchen and simplifies cleanup after every meal.
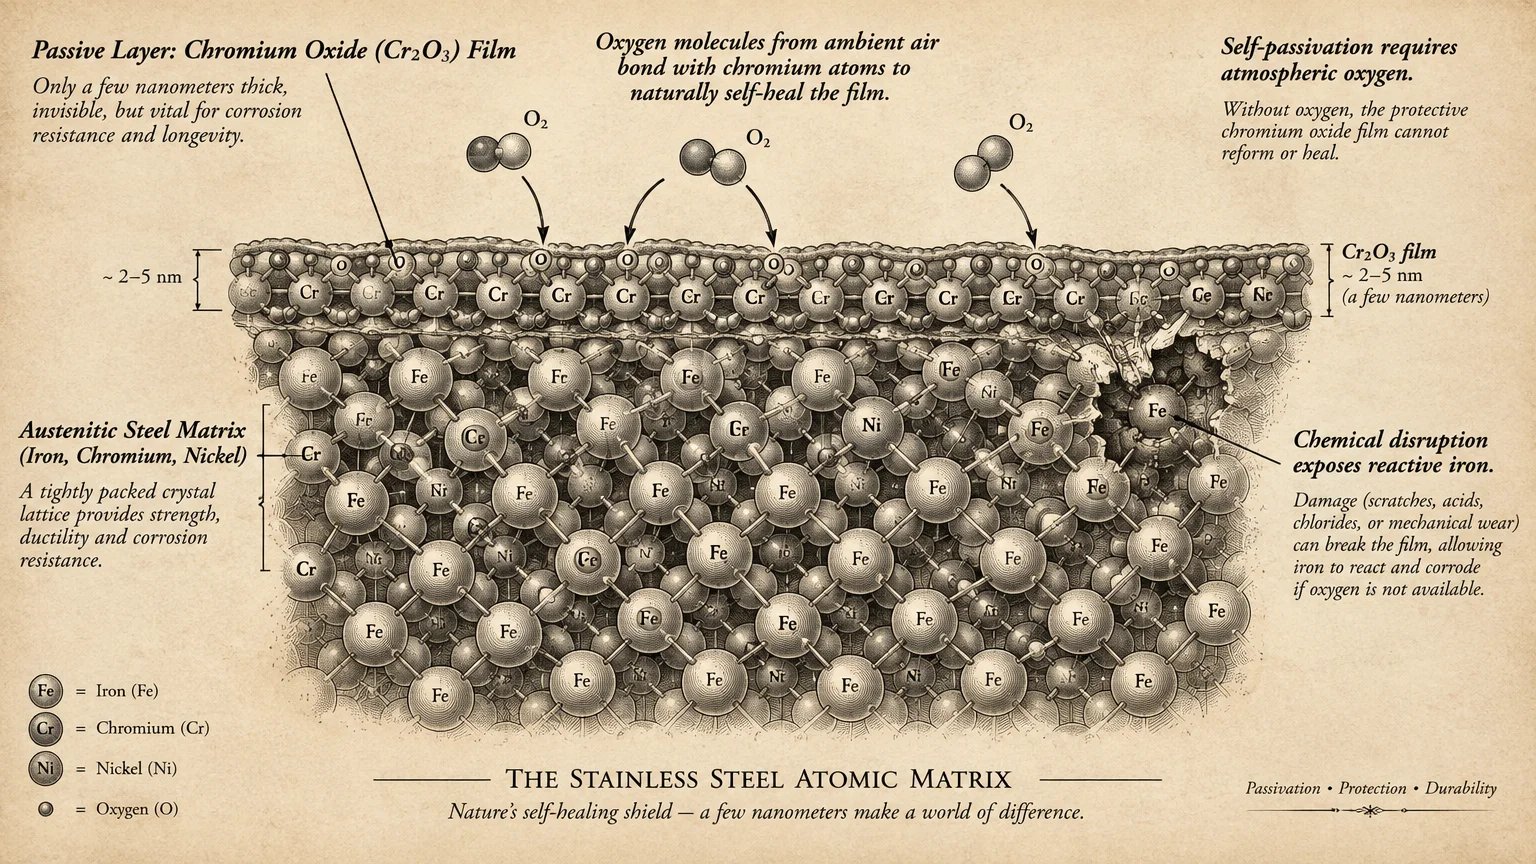
Why Stainless Steel Reacts to Improper Cleaning
Most quality residential kitchen sinks are crafted from 304-grade stainless steel. This alloy contains approximately 18 percent chromium and 8 percent nickel.
The chromium content reacts naturally with ambient oxygen to generate a self-healing film of chromium oxide. This invisible layer measures only a few atoms thick, yet it blocks rust completely.
When abrasive pads scratch this shield or harsh chemicals strip it away, the raw alloy underneath is exposed. Without adequate oxygen, the bare metal cannot rebuild its barrier.
Understanding this metallurgical reaction helps you appreciate why gentle cleaning methods work best. You are not just cleaning a surface; you are protecting an active chemical shield.
Sink cleaning mistakes happen when people treat stainless steel like cast iron or porcelain. Stainless steel requires mild chemistry and friction-free maintenance to stay beautiful.
Take Your First Step Toward a Brighter Basin
Grab a clean microfiber cloth tonight and wipe your sink basin completely dry after dinner. This thirty-second habit immediately halts hard water buildup and protects the factory finish.
If your sink already shows cloudy stains, gather some baking soda and food-grade mineral oil for a weekend refresh. With the right technique, your sink will gleam like new.