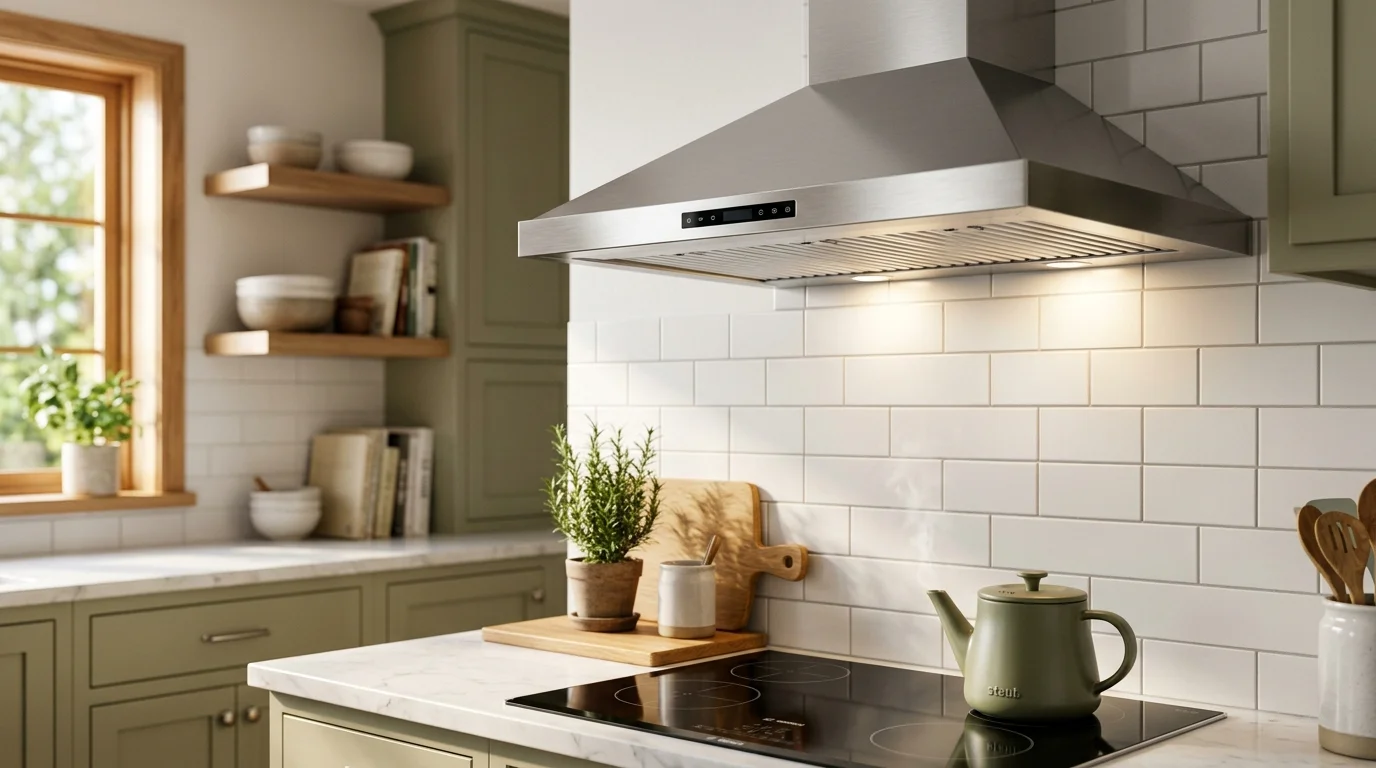
A clean range hood instantly improves kitchen ventilation, eliminates stubborn cooking odors, and prevents dangerous grease fires above your stove. You can restore a sticky, yellowed hood to a spotless shine using simple household staples.
Cooking grease vaporizes during high-heat frying and settles across your hood canopy, light fixtures, and exhaust mesh. Over time, this sticky film traps dust and reduces your exhaust fan’s airflow.
These six easy methods will help you conquer kitchen exhaust hood cleaning without harsh fumes or endless scrubbing. You will learn how to clean oven hood filters, fan housings, and exterior metals efficiently.
Why Regular Range Hood Cleaning Protects Your Home
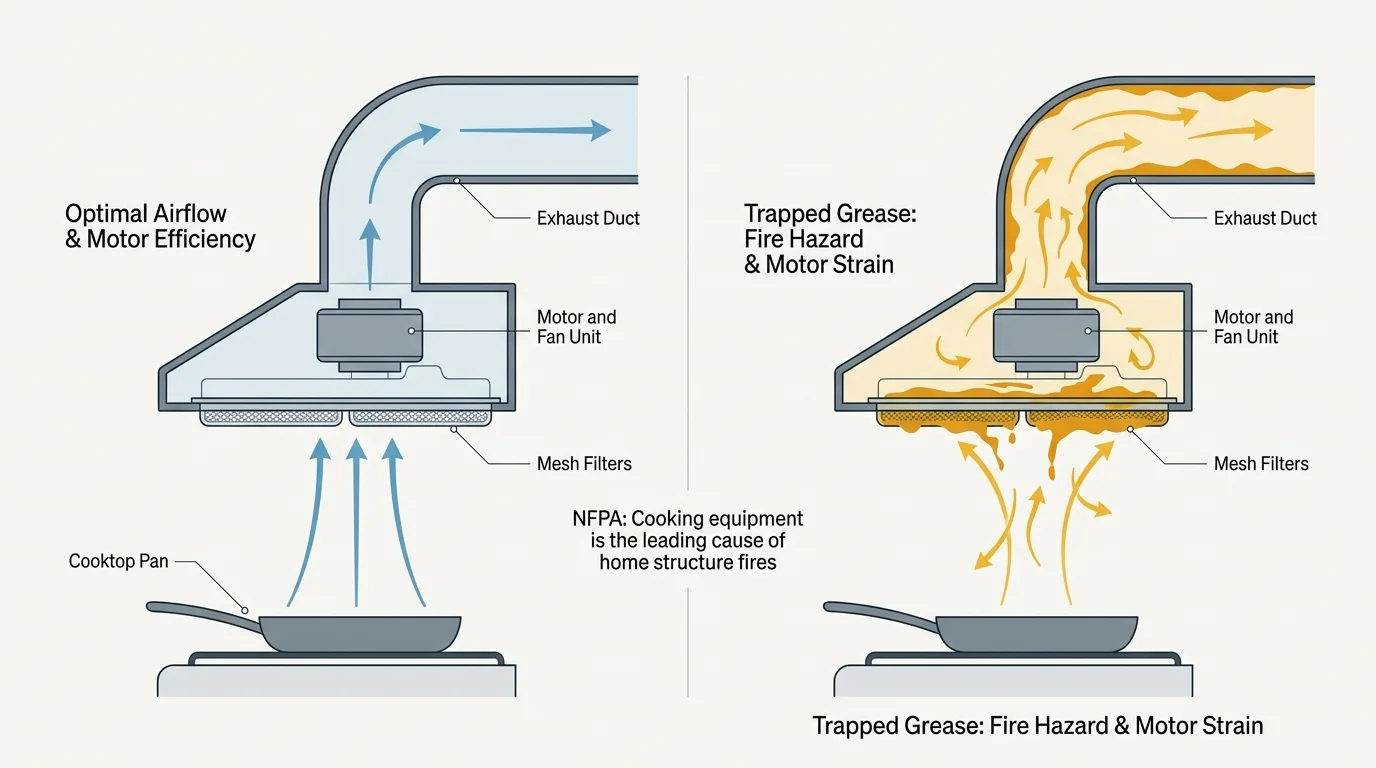
Your range hood captures airborne grease, combustion gases, and moisture produced during daily meal preparation. When grease accumulates inside the exhaust duct and filters, your kitchen ventilation system loses efficiency.
Trapped grease creates a serious household fire hazard. According to the National Fire Protection Association (NFPA), cooking equipment remains the leading cause of home structure fires and home fire injuries.
A neglected exhaust hood forces the fan motor to work harder, which raises your energy use and shortens the appliance’s lifespan. Built-up grease also drips back down onto your cooking surfaces and food.
Routine maintenance keeps your kitchen air fresh and protects your cabinetry from heat damage. Cleaning the hood every few months ensures optimal airflow and quiet operation.
Safety Precautions Before Starting
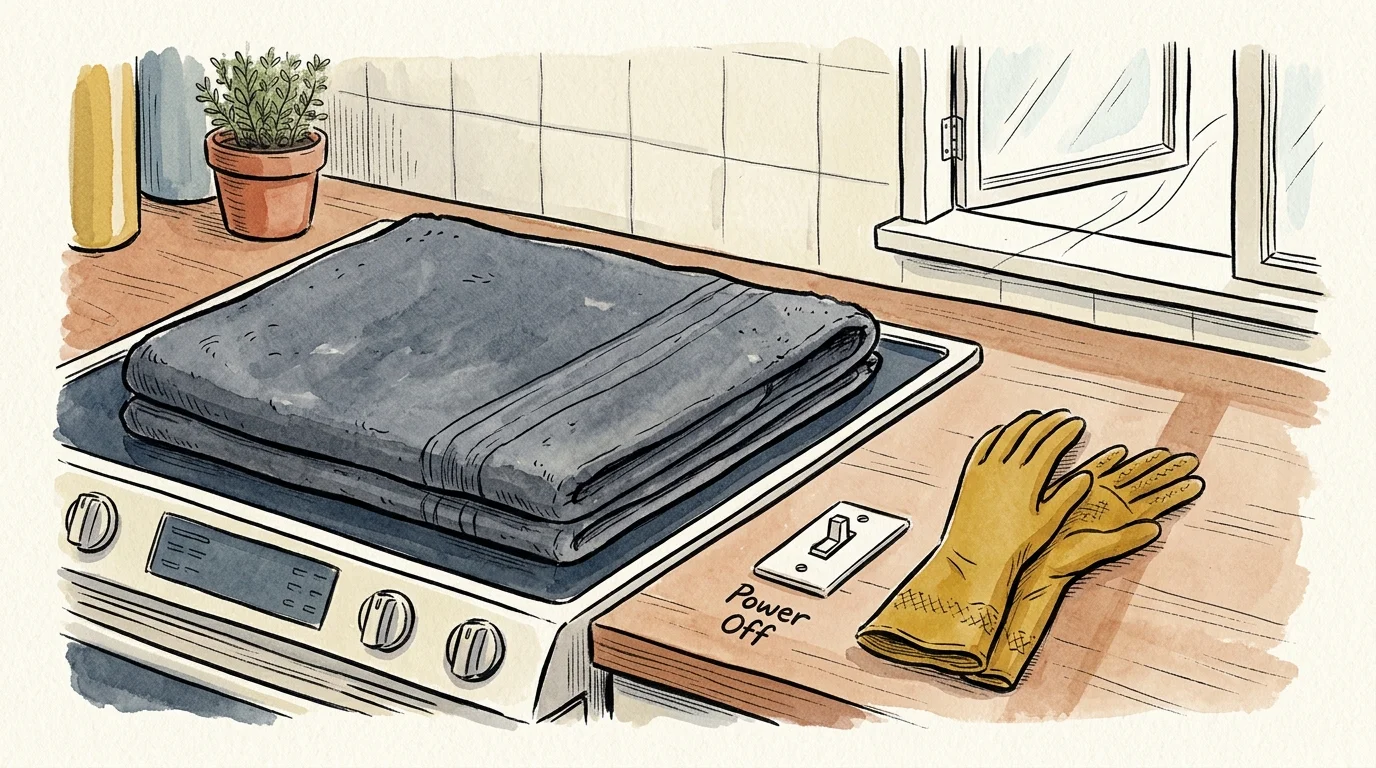
Before you remove grease from range hood components, turn off the hood power switch completely. For deep internal cleaning, flip the corresponding circuit breaker in your electrical panel.
Ensure your stovetop burners remain completely cool to the touch. Cover your cooktop with an old bath towel or heavy cardboard to catch accidental drips and protect glass surfaces.
- Wear durable rubber gloves to shield your hands from hot water and concentrated degreasers.
- Open nearby windows or run an auxiliary fan to maintain steady room ventilation.
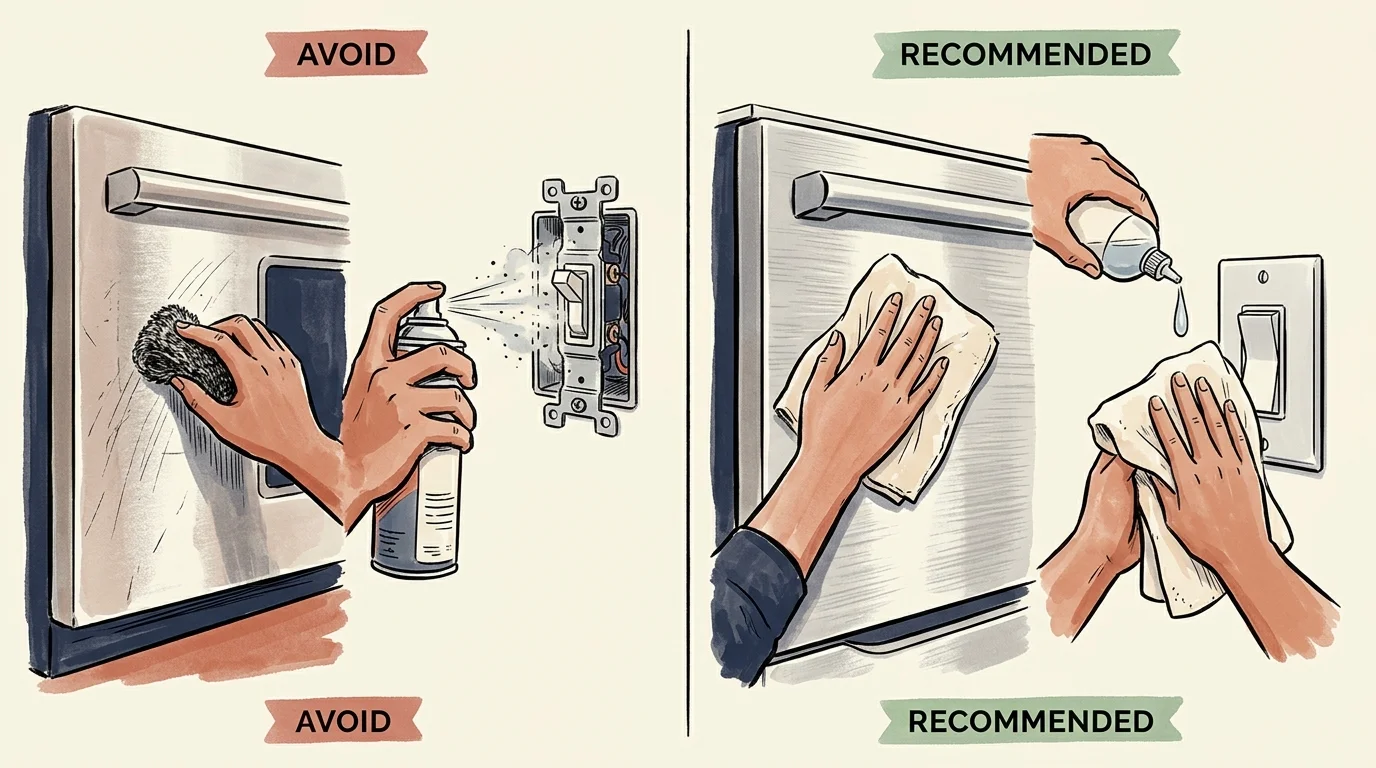
- Avoid spraying liquid cleaners directly into electrical switches, fan motors, or internal wiring.
- Inspect your metal filters for bent frames or torn mesh before washing.
Never mix chemical cleaners like ammonia and bleach. Stick to tested cleaning agents to avoid toxic fumes and surface discoloration.
Method 1: The Boiling Water and Baking Soda Soak for Mesh Filters
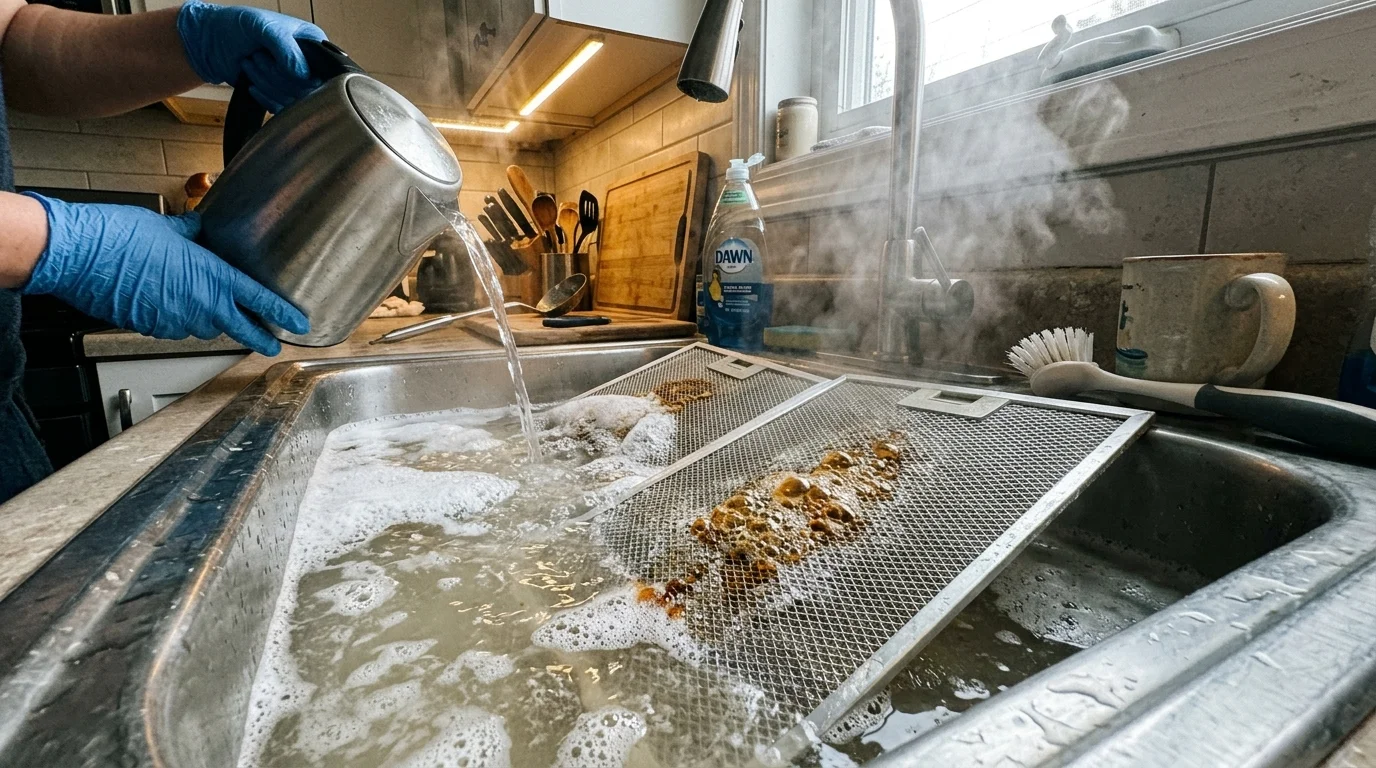
The boiling water and baking soda bath remains the gold standard for unclogging aluminum and stainless steel mesh filters. Baking soda acts as a mild alkaline salt that saponifies congealed fats, turning greasy residue into water-soluble soap.
This method dissolves thick, tacky grease trapped deep within multi-layer mesh screens without manual scrubbing. Appliance brands like GE Appliances recommend regular hot soaks to keep mesh filters breathing freely.
- Slide or unlatch the metal filters from the underside of the range hood canopy.
- Place the filters into your sink basin or a heat-safe metal roasting pan.
- Bring a large pot of water to a rolling boil on the stove.
- Pour 1/2 cup of baking soda and 1/4 cup of grease-cutting liquid dish soap into the sink basin.
- Pour the boiling water over the filters until the water fully submerges the metal mesh.
- Let the filters soak for 15 to 20 minutes while the bubbling solution loosens the grease.
- Scrub gently with a non-abrasive dish brush to remove remaining residue.
- Rinse thoroughly with hot tap water and air dry completely on a towel before reinstalling.
If your sink is too small to submerge the entire filter at once, soak one half first. Flip the filter after 10 minutes to clean the remaining side.
Method 2: Dishwasher Detergent Steam Bath for Stubborn Grime
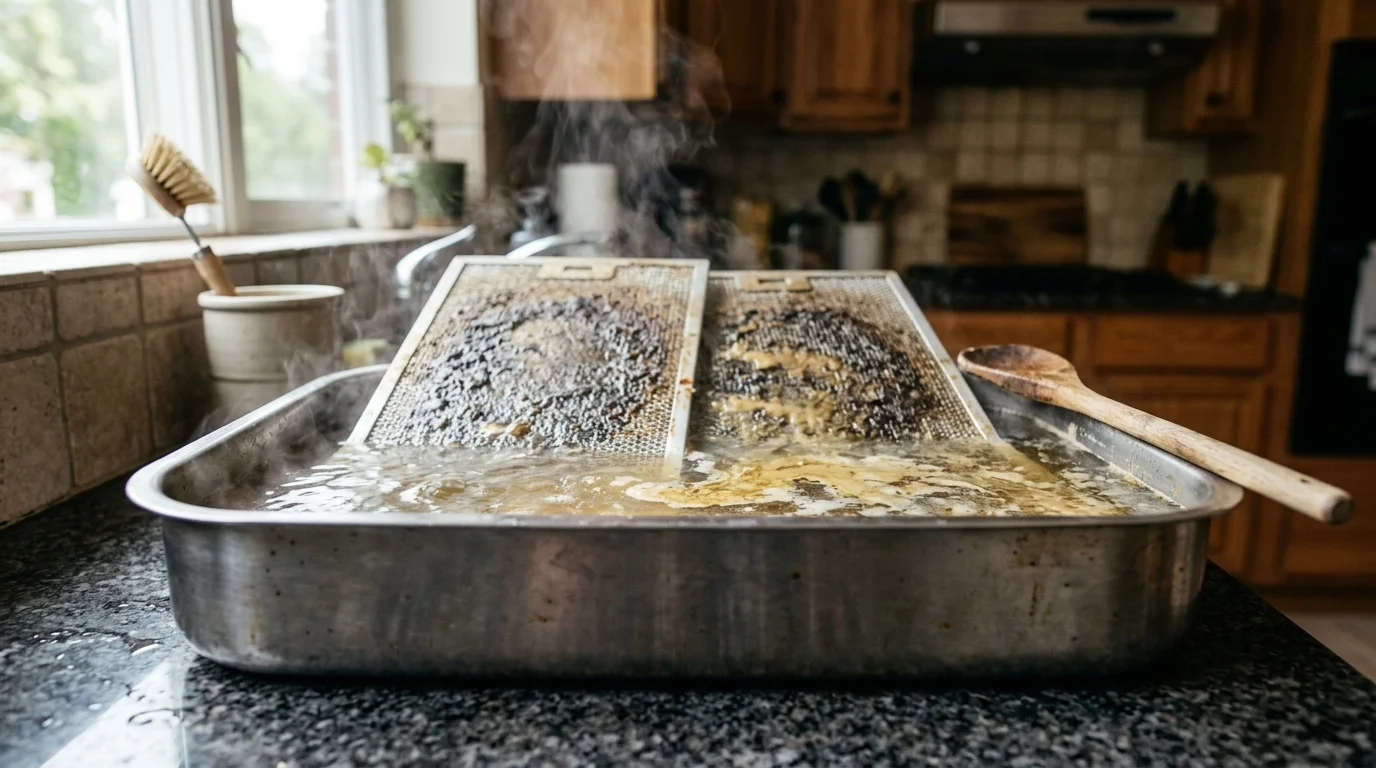
Modern automatic dishwasher detergents contain specialized enzymes and alkaline builders designed to break down baked-on animal fats and vegetable oils. A concentrated dishwasher powder bath works wonders on neglected filters.
Do not run aluminum mesh filters through a regular dishwasher cycle. The high heat and harsh wash chemicals can oxidize and tarnish bare aluminum, turning it dark grey and brittle.
Instead, fill your sink or a wide storage tote with hot tap water. Dissolve two tablespoons of powdered dishwasher detergent or one crushed dishwasher tablet into the water.
Submerge the greasy filters in the bath for 30 minutes. The active enzymes will soften stubborn grease plugs without discoloring delicate aluminum frames.
Wipe the perimeter frame with a microfiber cloth to lift dissolved grime. Rinse the filters under high-pressure warm water until all soap residue vanishes.
Method 3: Distilled White Vinegar and Warm Dish Soap Spray
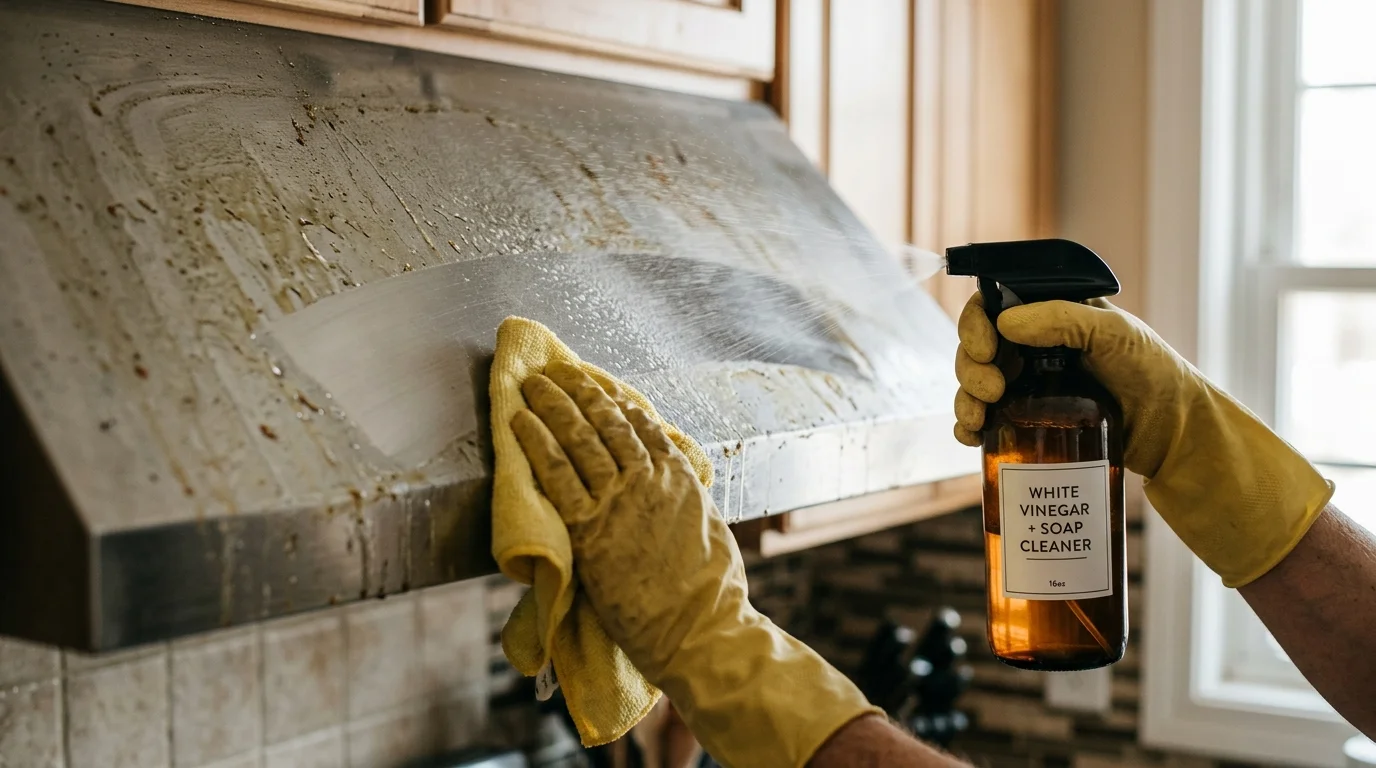
Distilled white vinegar provides a gentle, non-toxic acid solution for light grease buildup on your hood exterior. When combined with liquid dish soap, this spray cuts through daily cooking film without damaging surrounding surfaces.
This everyday cleaning spray works exceptionally well on painted metal hoods, tempered glass canopies, and plastic control panels. It leaves a streak-free shine while neutralizing lingering kitchen odors.
- Mix equal parts warm water and distilled white vinegar inside a clean spray bottle.
- Add one teaspoon of concentrated liquid dish soap and shake gently to combine.
- Mist the solution generously across the exterior canopy and underside paneling.
- Allow the liquid to sit for 5 to 7 minutes to penetrate the greasy film.
- Wipe the surface clean using a damp microfiber cloth, working along the metal grain.
- Buff the surface dry with a clean, dry microfiber towel to prevent water spots.
For textured or grooved surfaces, use an old soft-bristled toothbrush dampened with the spray. This lifts grease from tight corners, seam joints, and screw recesses.
Method 4: Commercial Degreasers for Baked-On Sludge
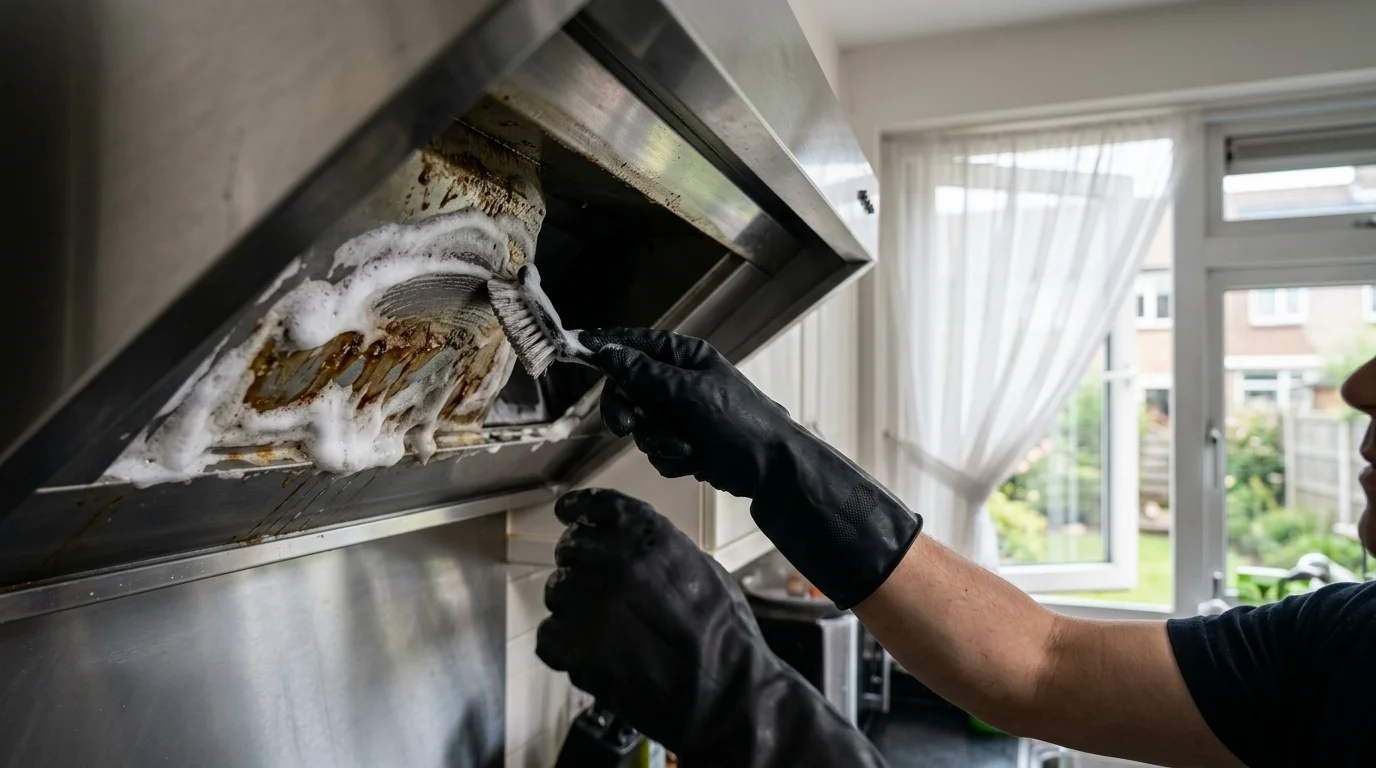
When cooking oils have baked onto your range hood over years of high-heat cooking, mild kitchen soaps may fall short. Heavy-duty commercial degreasers break molecular grease bonds rapidly.
Select a product certified by the EPA Safer Choice Program to ensure effective degreasing power without caustic solvents or toxic fumes. These formulas clean metal safely while protecting indoor air quality.
Spray the commercial degreaser directly onto the greasy canopy, avoiding digital displays and light sockets. Let the cleaner dwell for the exact duration specified on the manufacturer label.
Wipe the dissolved sludge away using disposable shop towels or microfiber cloths. Wipe down the entire surface with a clean cloth rinsed in warm water to remove residual chemicals.
Always test any commercial degreaser on an inconspicuous spot first. Some aggressive formulations can strip painted finishes or dull brushed metal.
Method 5: Mineral Oil Lift for Stainless Steel Canopies
A classic rule of chemistry states that like dissolves like. Mineral oil effortlessly loosens hardened, gummy cooking grease from stainless steel without scratching the finish.
Vegetable cooking oils go rancid and turn sticky over time, but food-grade mineral oil remains stable. It dissolves old grease while leaving a protective, fingerprint-resistant barrier.
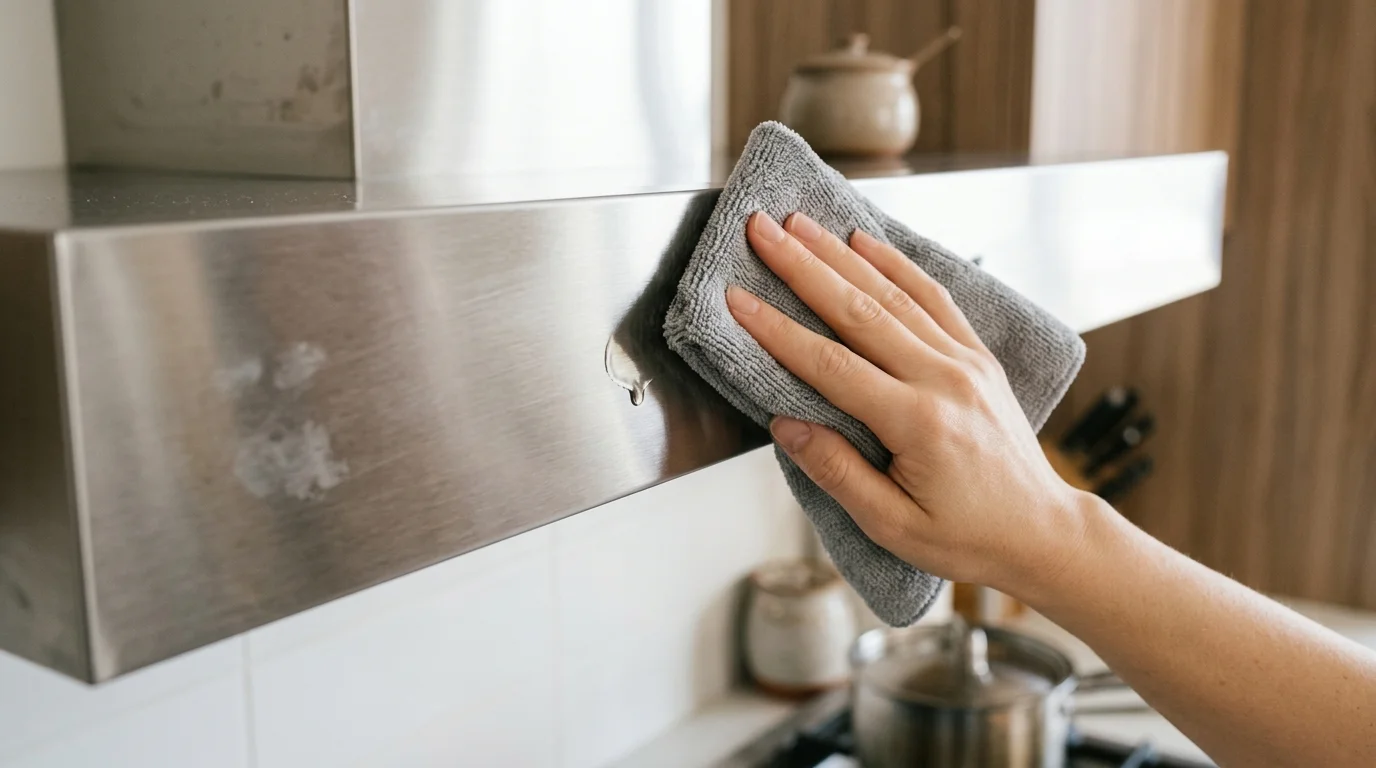
- Pour a few drops of pure food-grade mineral oil onto a dry microfiber cloth.
- Rub the cloth over the sticky areas of your stainless steel hood, moving strictly with the grain.
- Watch as the fresh oil softens and lifts the gummy grease layer.
- Wipe away the loosened grime with a clean section of the cloth.
- Wash the area with warm water and a drop of dish soap to remove excess oil.
- Buff the metal with a dry microfiber cloth for a gleaming, streak-free shine.
Avoid using abrasive scrubbing pads, steel wool, or scouring powders on stainless steel. These abrasive tools create permanent scratches that trap future grease deposits.
Method 6: Baking Soda and Dish Soap Paste for Vertical Surfaces
Liquid cleaners often run down vertical surfaces before they have time to dissolve stubborn grease. A thick baking soda paste clings directly to hood walls, undersides, and corners.
Baking soda provides gentle mechanical abrasion without scratching metal or tempered glass. Combined with concentrated dish soap, this paste cuts through gummy, dust-laden grease deposits.
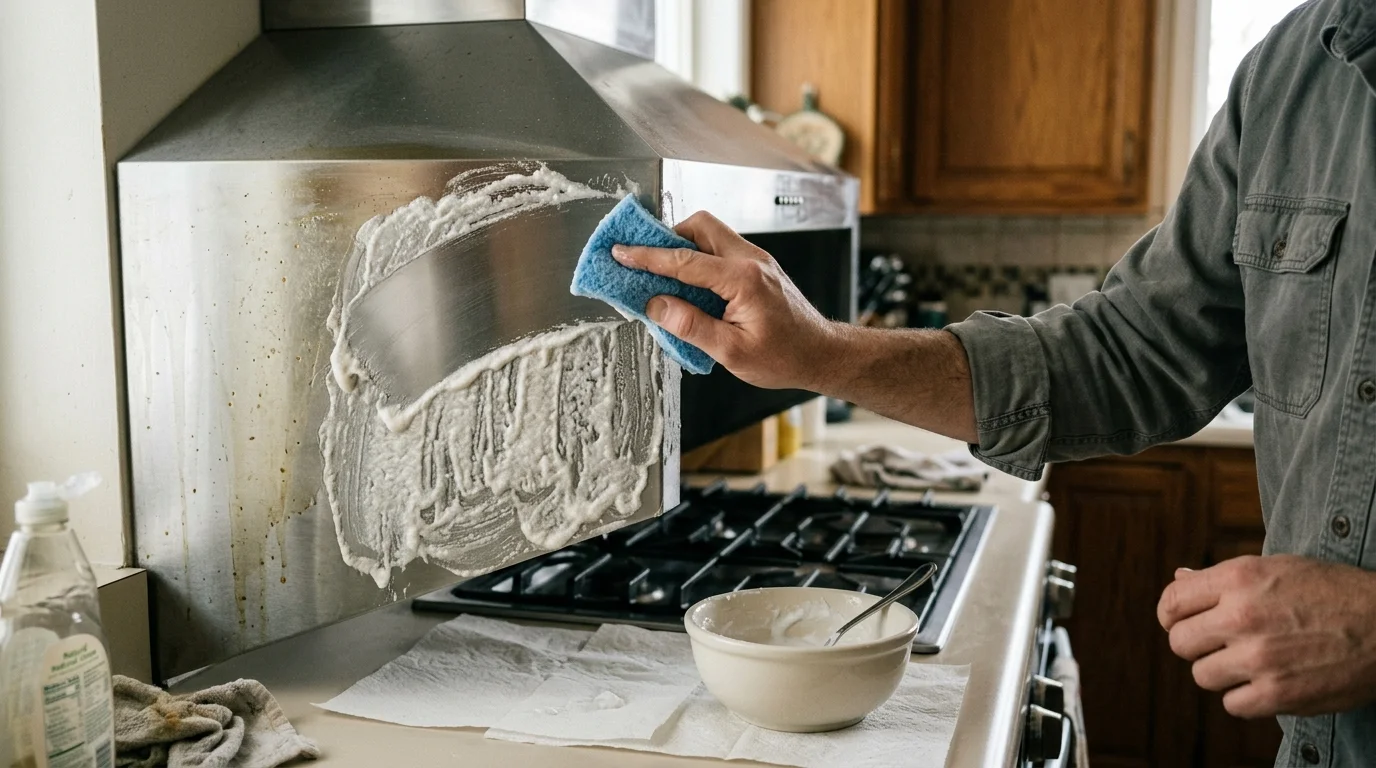
Mix 1/2 cup of baking soda with 2 tablespoons of liquid dish soap in a small bowl. Add warm water by the teaspoon until you achieve a thick, spreadable frosting consistency.
Apply the paste directly to the greasy canopy underside and hood walls using a damp sponge. Let the paste sit for 10 to 15 minutes to penetrate the grime.
Scrub gently in small circular motions using a non-scratch nylon sponge. Wipe the paste away completely with a damp microfiber cloth, rinsing your cloth frequently in clean water.
Comparing Range Hood Cleaning Methods
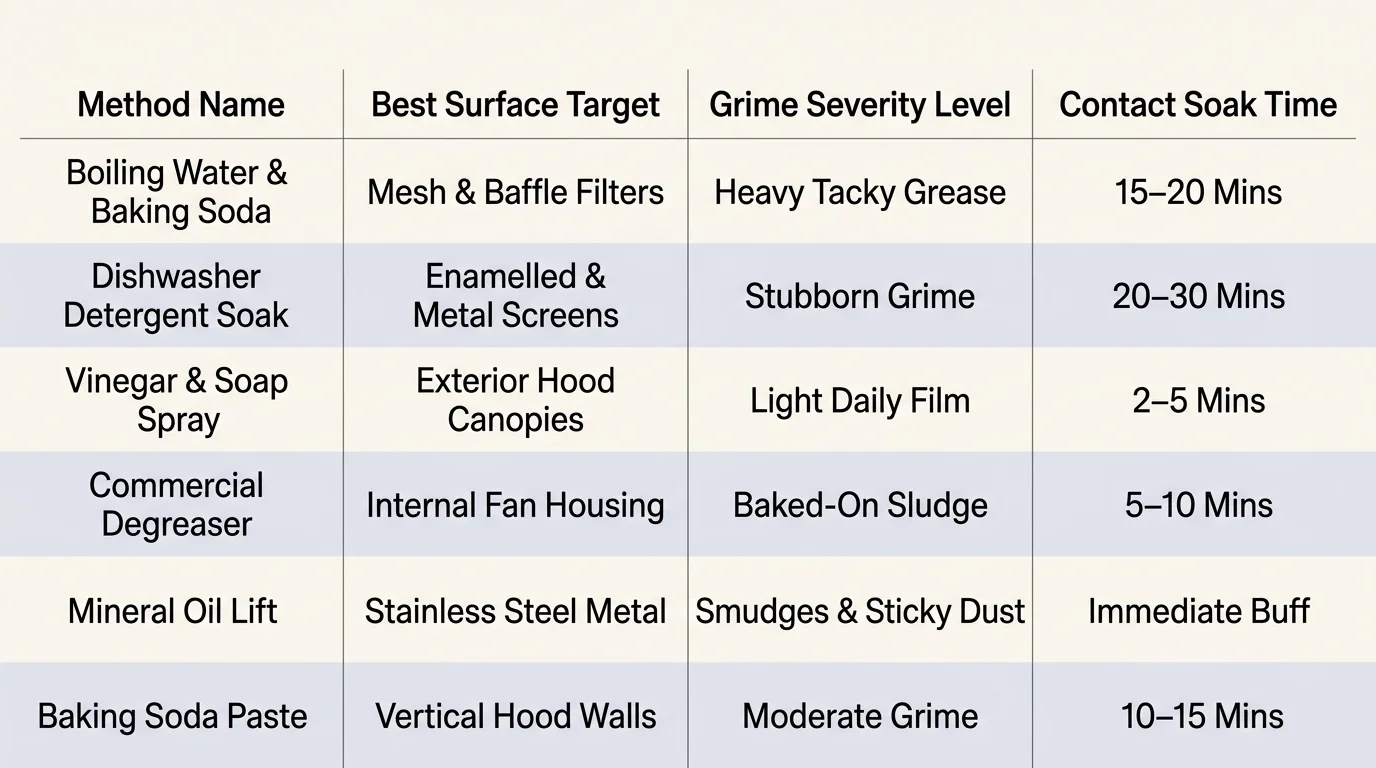
Choosing the right cleaning technique depends on your hood material and the severity of grease buildup. The table below outlines the best approach for each cleaning task.
| Cleaning Method | Best Used For | Grease Level | Safe Surfaces |
|---|---|---|---|
| Boiling Water & Baking Soda | Metal mesh & baffle filters | Heavy / Baked-on | Stainless steel, aluminum mesh |
| Dishwasher Detergent Soak | Delicate aluminum mesh | Moderate to Heavy | Aluminum, stainless steel |
| Vinegar & Dish Soap Spray | Weekly maintenance & glass | Light | Glass, painted metal, stainless |
| Commercial Degreaser | Severe duct & canopy buildup | Extreme | Stainless steel, heavy enamel |
| Mineral Oil Lift | Exterior canopy & fingerprints | Sticky / Gummy | Brushed stainless steel |
| Baking Soda Paste | Vertical walls & hood canopy | Moderate to Heavy | Stainless steel, porcelain enamel |
Match your cleaning method to the surface material to prevent cosmetic damage. Regular light cleanings will minimize the need for aggressive degreasing sessions.
How to Clean Interior Housings, Fan Blades, and Light Covers
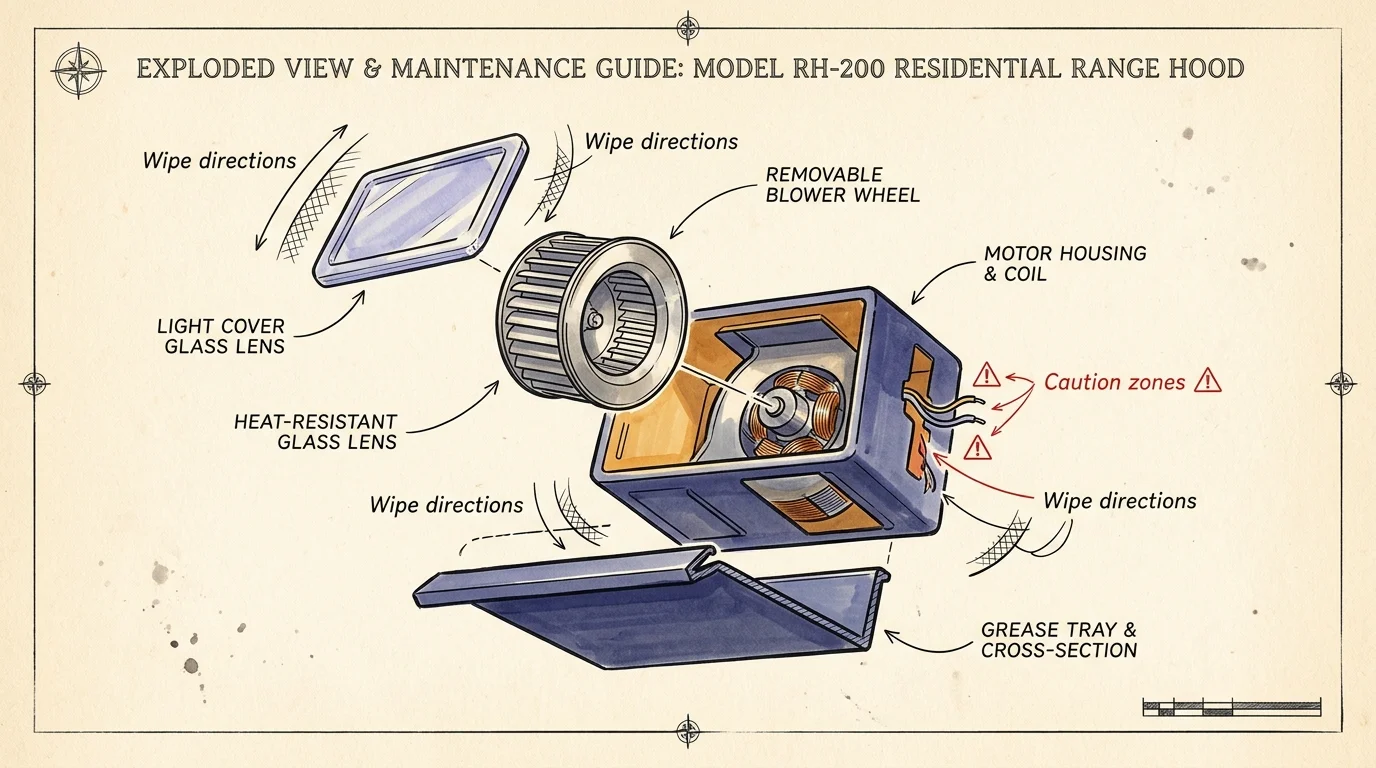
Grease also settles on the interior blower wheel, motor housing, and protective light covers. Cleaning these hidden parts restores exhaust airflow and brightens your cooktop workspace.
First, unclip or unscrew the plastic or glass light covers. Wash these covers in warm, soapy water to remove the yellow film that dims your cooktop bulbs.
Inspect the interior fan blower wheel or squirrel cage fan. If the blades carry a thick grease crust, mist a microfiber cloth with your degreasing spray and wipe each blade individually.
Never spray liquid cleaners directly into the fan motor or electrical wire harness. Moisture inside motor windings can cause short circuits and permanent motor failure.
Use a dry microfiber cloth to wipe the interior metal duct transition. Reassemble all light covers and filters once the interior housing dries completely.
What to Do with Carbon and Charcoal Filters
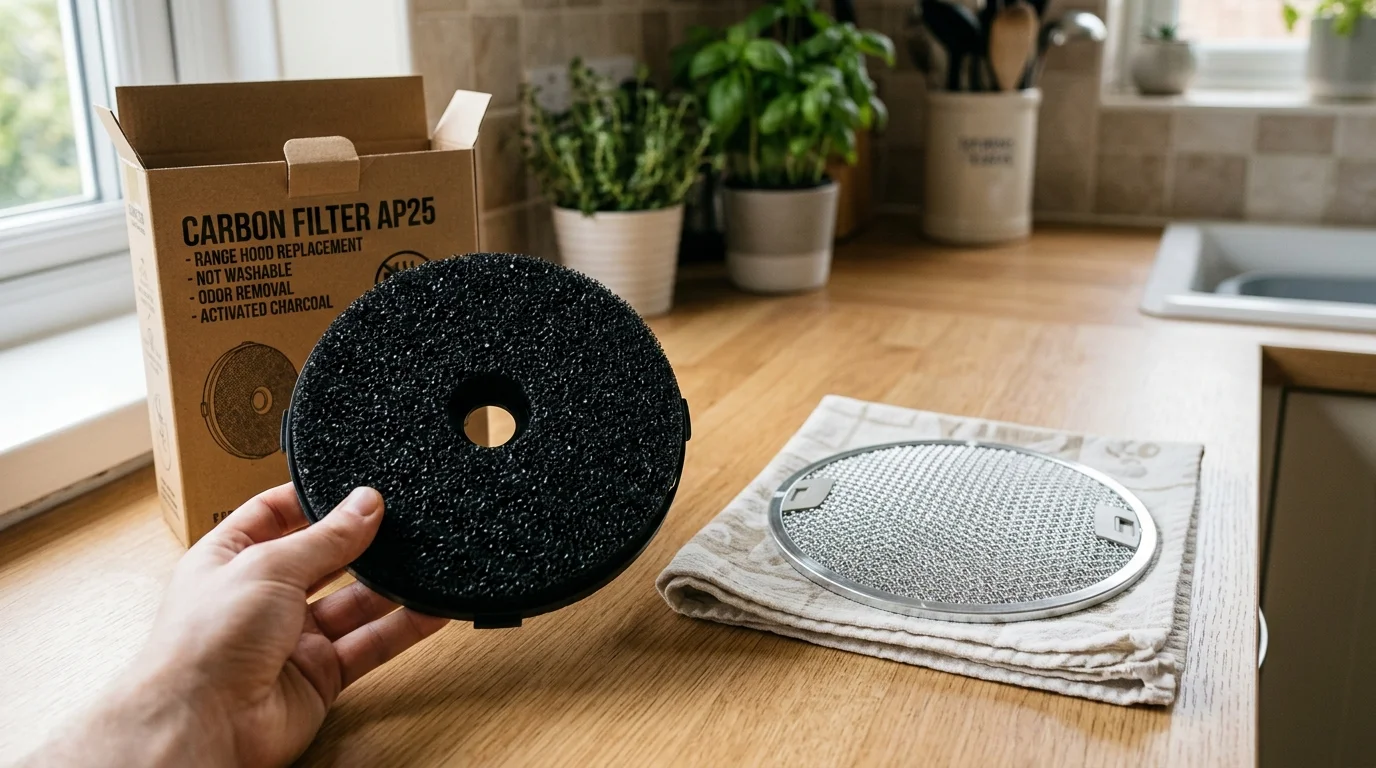
Ductless or recirculating range hoods use replaceable activated charcoal filters behind the metal mesh screens. These carbon filters trap airborne odors and volatile organic compounds before recirculating air back into the room.
Never wash charcoal or carbon filters in water. Moisture and soap ruin the porous internal carbon structure, rendering the filter completely ineffective at odor control.
Replace your disposable charcoal filters every 3 to 6 months depending on your cooking frequency. If you fry foods or cook with pungent spices regularly, replace them every 60 to 90 days.
Consult your appliance user manual to locate the exact replacement part number. Standard replacement filters snap directly onto the blower housing behind the metal grease filters.
Essential Oven Hood Cleaning Tips and Maintenance Schedule
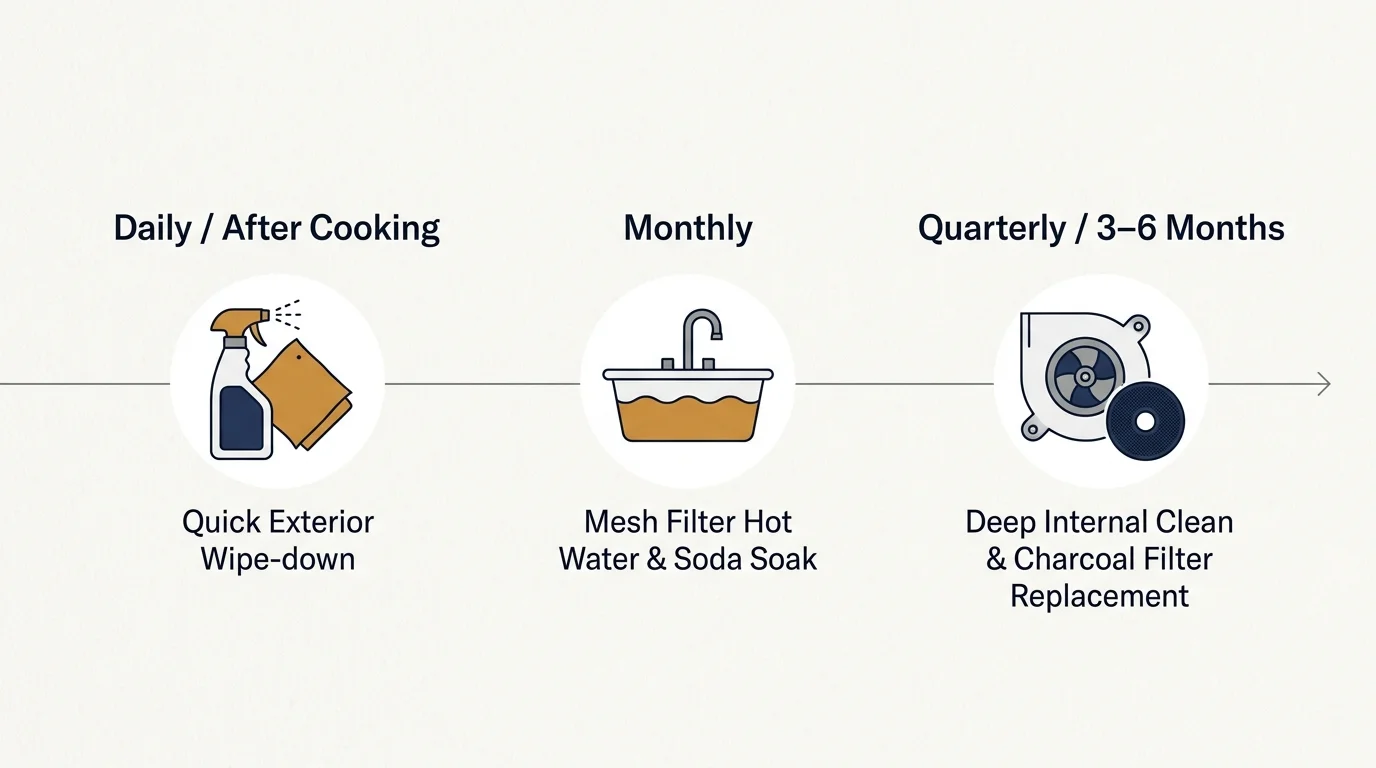
Consistent maintenance prevents sticky grease from solidifying into hard resin. Follow a structured schedule to keep your kitchen exhaust hood cleaning manageable throughout the year.
- Weekly: Wipe down the exterior canopy with a warm vinegar and dish soap spray after heavy cooking sessions.
- Monthly: Remove and soak the metal mesh filters in hot water and baking soda to prevent airflow restrictions.
- Quarterly: Clean the canopy interior, wipe the fan blades, and wash light covers.
- Biannually: Replace recirculating charcoal filters and inspect the external duct damper for smooth operation.
Wiping your hood down immediately after frying takes only 60 seconds while the grease remains warm and liquid. Waiting months allows cooking oil to polymerize into a stubborn varnish.
Always turn on your range hood fan two minutes before you begin cooking. This establishes an upward convective airflow pattern that captures grease vapors before they scatter across your kitchen.
Troubleshooting Common Range Hood Cleaning Mistakes
Many homeowners unintentionally damage their range hoods by using improper cleaning tools. Avoiding these common mistakes will keep your appliance looking pristine.
Never use steel wool, wire brushes, or harsh scouring pads on polished metal. These abrasives leave fine scratches that ruin factory finishes and collect grime faster.
Avoid harsh bleach-based cleaners on stainless steel or aluminum. Chlorine bleach causes pitting and permanent brown corrosion spots on metal surfaces.
Do not reinstall wet filters into the exhaust hood. Trapped moisture inside the duct can foster mold growth and damage internal electrical components.
Your Next Practical Step
Walk into your kitchen right now and slide the metal mesh filters out of your range hood. Look through the mesh toward a light source—if light cannot pass through freely, your filters need cleaning.
Set a pot of water on the stove to boil and give your filters a 15-minute baking soda soak today. You will immediately enjoy better ventilation and a fresher kitchen atmosphere.