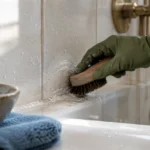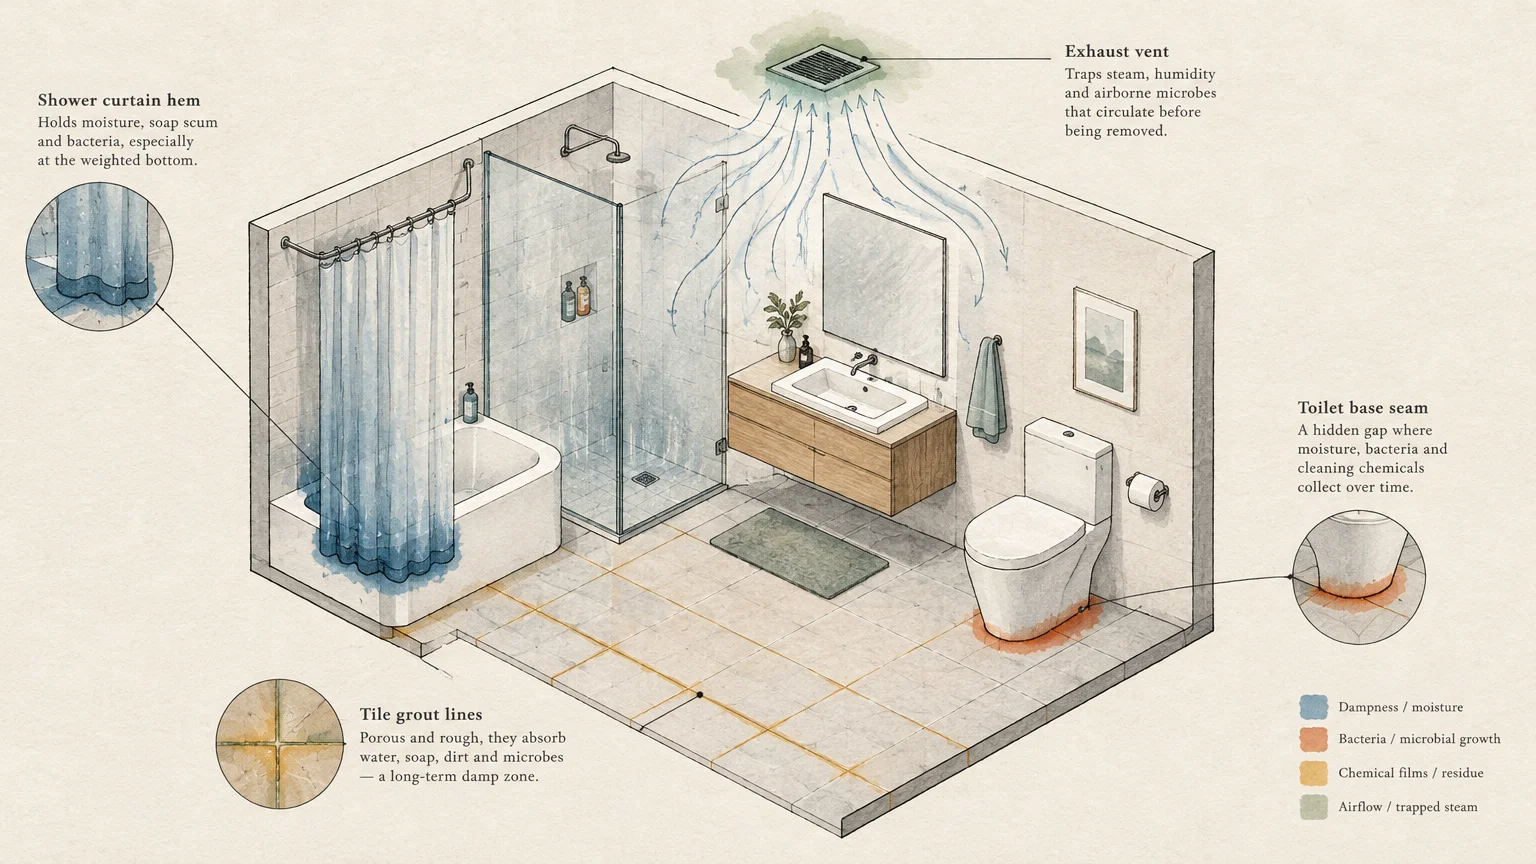
You spend valuable time scrubbing tiles and wiping mirrors, yet your bathroom never feels clean. Lingering moisture, invisible chemical film, and hidden grime traps quietly work against your daily routine.
Everyday bathroom cleaning mistakes often cause this frustrating problem by treating surface dust while leaving odor-causing bacteria behind. A few overlooked zones can easily spoil the freshness and hygiene of the entire room.
Fixing these issues does not require harsh chemical fumes or hours of extra labor. Target these ten problem areas to restore your bathroom hygiene and enjoy a space that stays fresh all week.
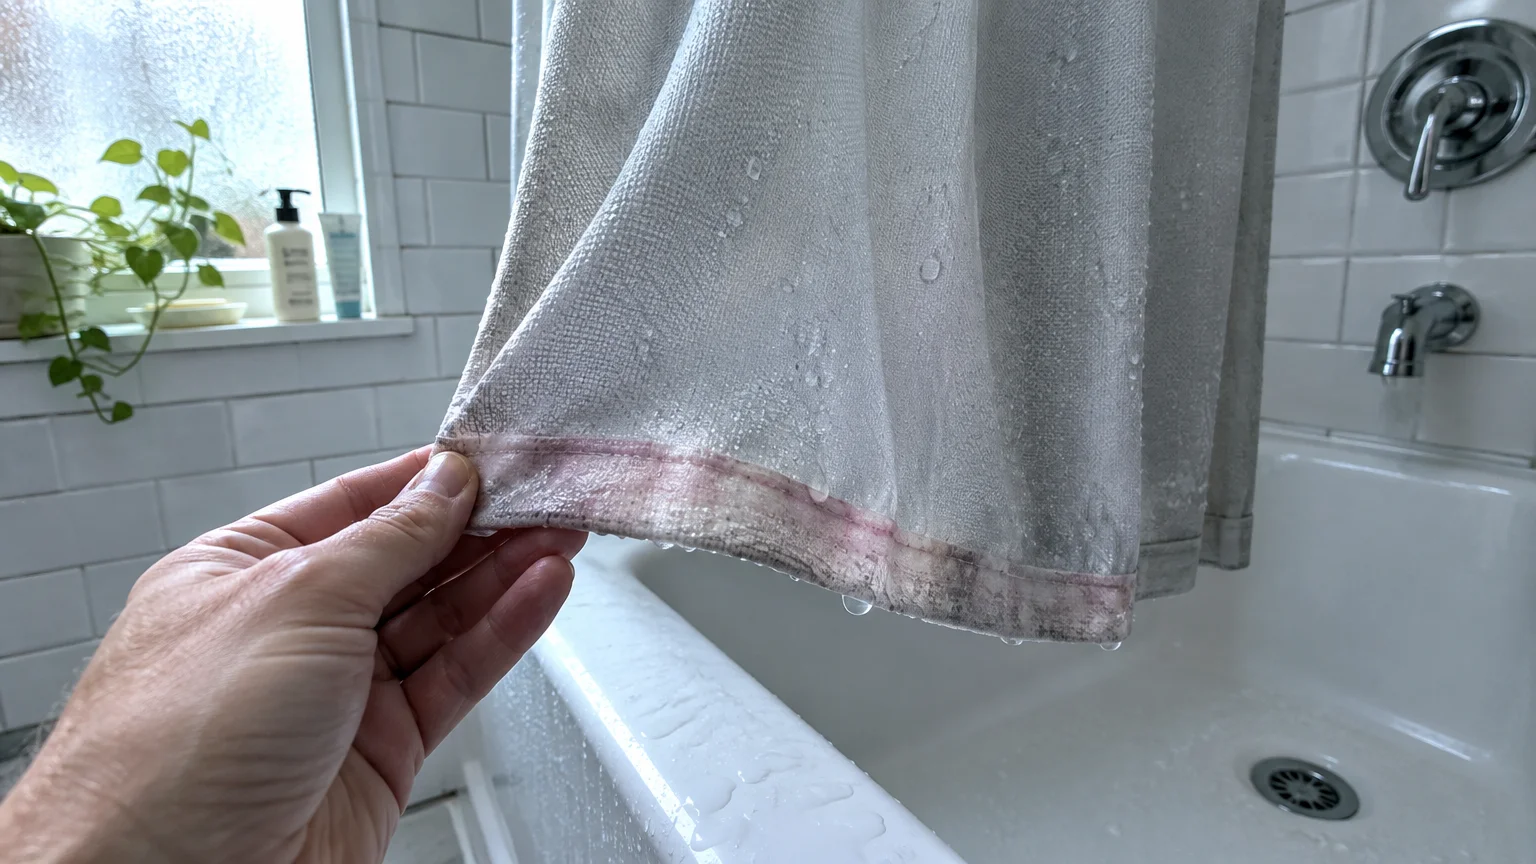
01 Shower Curtains and Liners Harboring Hidden Biofilms
Shower liners sit in a warm, wet environment every day. They quickly collect body oils, soap residue, and shed skin cells along their lower seams.
This slick combination creates the perfect breeding ground for mold and pink bacterial biofilm. Even if your tub gleams, a sour liner makes the whole room smell stale.
Plastic liners often trap water inside their folds when left bunched against the wall. The trapped moisture prevents the material from drying between showers.
- Wash fabric shower liners every month in your washing machine on a gentle cycle with warm water.
- Add a cup of distilled white vinegar to the rinse cycle to break down soap scum and deodorize fibers.
- Spread the curtain completely across the rod after every shower so air circulates freely through the folds.
- Replace cheap, brittle vinyl liners with weighted, machine-washable fabric liners that resist clinging.
Always check the bottom hem of the liner for dark speckling or pink discoloration. If washing fails to remove embedded mildew spots, replace the liner immediately.
02 Porous Grout Absorbing Dirty Water and Spills
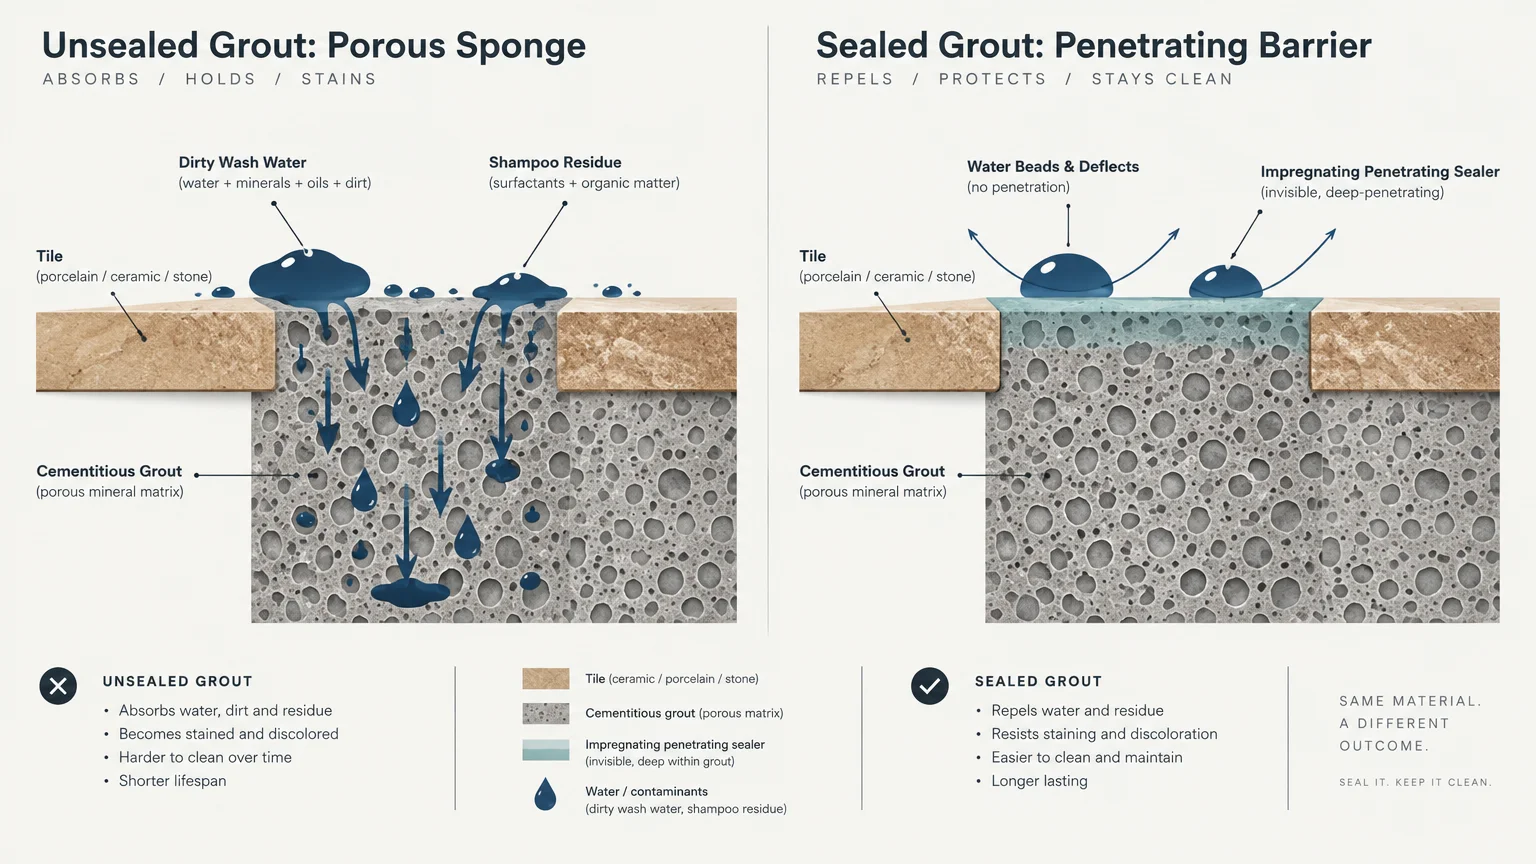
Grout is essentially porous concrete that sits between your tiles. Unsealed grout acts like a dense sponge, pulling dirty wash water, shampoo, and minerals deep into its core.
When you mop tile floors with dirty water, the grout lines absorb that murky liquid. As the moisture evaporates, oily grime and bacteria stay locked inside the pores.
Over time, this trapped dirt discolors the grout and produces faint, persistent odors. Acidic cleaners can erode unsealed grout, making the surface rougher and even more absorbent.
To safely lift embedded soil without destroying the mineral structure, use an oxygen bleach paste. Mix powdered oxygen bleach with warm water, apply it generously, and allow it to dwell for fifteen minutes.
Scrub gently using a stiff nylon grout brush rather than wire bristles. Once the lines dry completely, apply an impregnating penetrating sealer to lock out future spills.
03 Dusty Exhaust Fans Failing to Remove Moisture
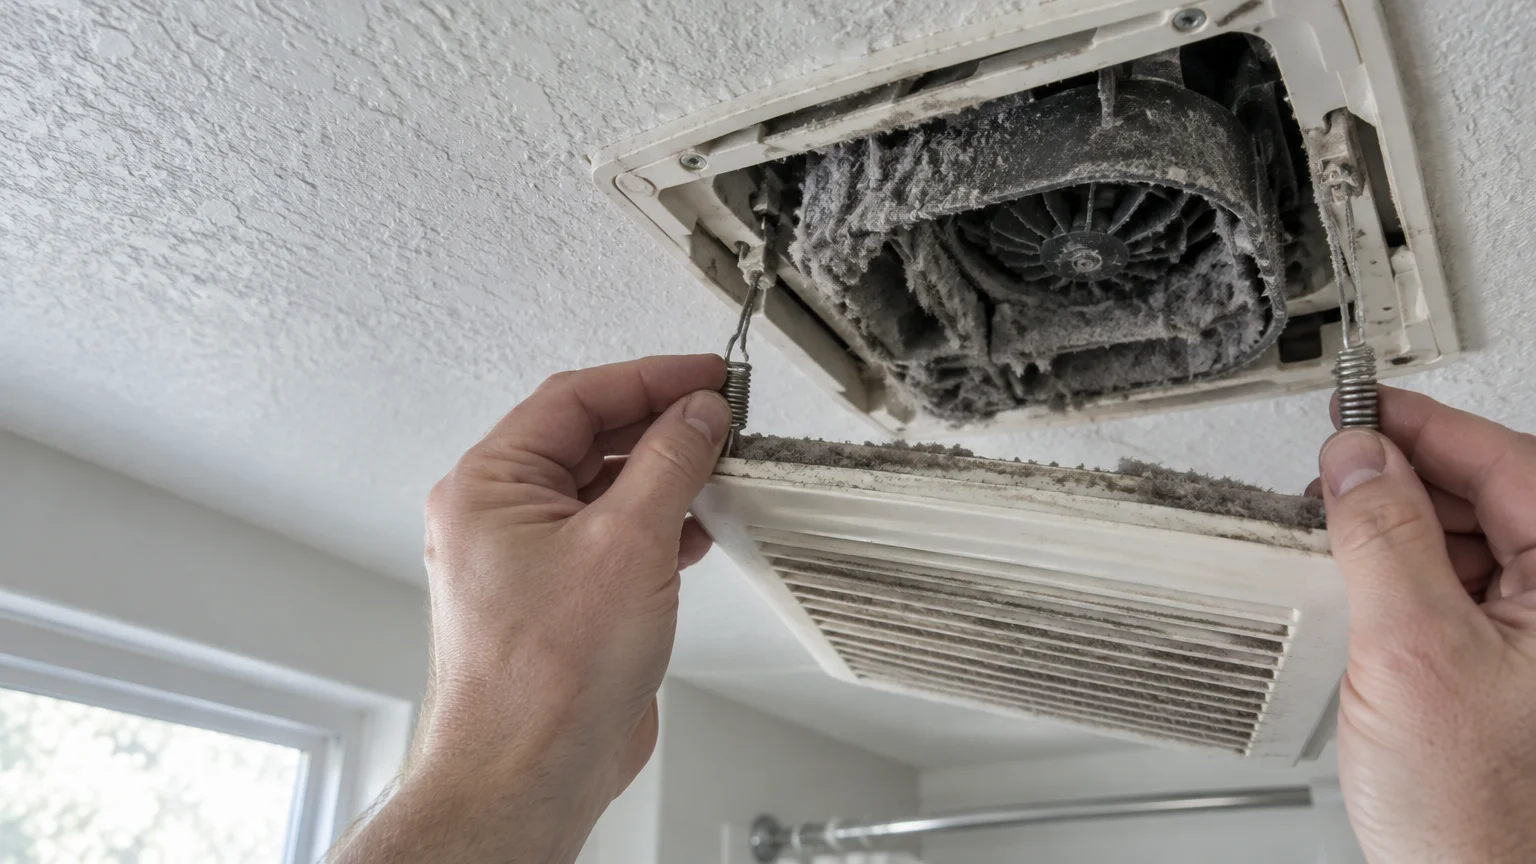
Bathroom exhaust fans pull humid air, steam, hairspray mist, and lint upward toward the ceiling. Over several months, thick lint mats against the vent cover and coats the fan motor blades.
A choked exhaust fan cannot pull moist air out of the room efficiently. Steam lingers on walls and mirrors, creating prime conditions for mildew spores to take root.
According to the U.S. Environmental Protection Agency (EPA), controlling indoor moisture is the single most effective way to prevent mold growth in living spaces.
When airflow drops, musty dampness settles across every surface. Your freshly wiped countertops and walls then capture floating dust and hold onto it.
- Switch off the power at the wall switch or circuit breaker before servicing the fan assembly.
- Pull down the plastic vent cover and squeeze the metal mounting springs to release the grill.
- Soak the plastic grill in warm, soapy dish detergent to remove greasy hairspray residue.
- Vacuum the motor housing and fan blades using a brush attachment to clear caked-on lint.
Test the fan’s suction power by placing a single sheet of toilet paper against the cover while it runs. If the airflow holds the paper firmly in place, your fan is moving air effectively.
04 Odor Pockets Trapped Under Toilet Hinges and Bolts
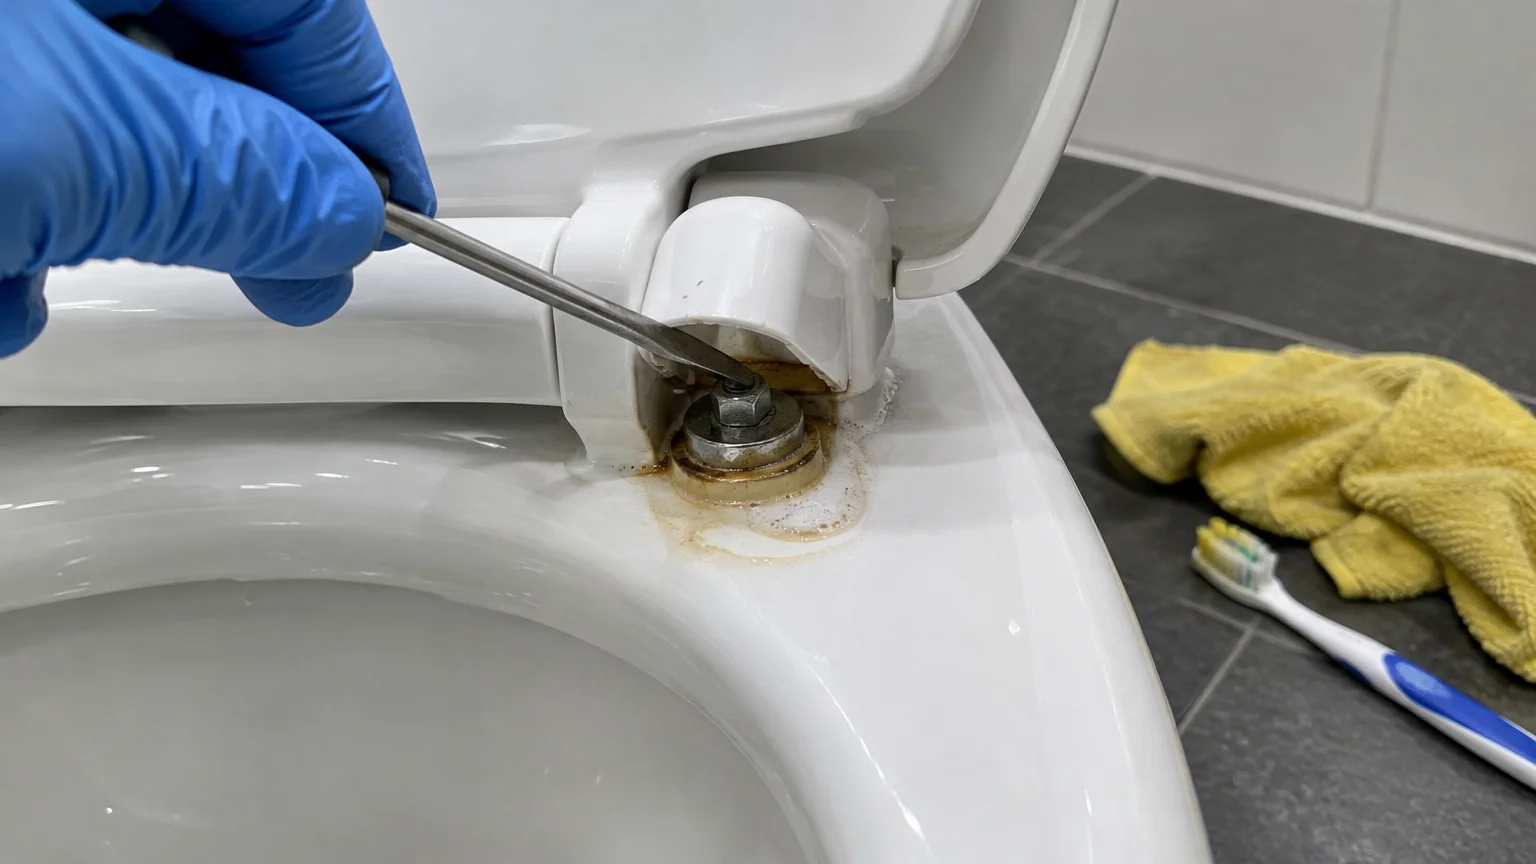
Wiping down the porcelain bowl and seat lid takes only a minute, yet unpleasant odors often remain. Liquid splatter frequently migrates beneath the plastic caps covering the toilet seat mounting bolts.
Urine and wash water seep directly under the hinge brackets where standard cleaning wipes cannot reach. This trapped moisture dries into concentrated, odor-producing salts.
The plastic bolt caps at the base of the toilet bowl hide another notorious problem spot. Moisture collects beneath these hollow covers, corroding the metal washers and trapping dirty floor runoff.
Address this issue by lifting the hinge flap covers or removing the entire seat assembly. Many modern toilet seats feature quick-release buttons that let you detach the seat in seconds.
Spray the mounting holes with an enzymatic bathroom cleaner to break down organic uric acid crystals. Wipe the area dry with paper towels before snapping the clean seat back into place.
Pry off the floor bolt caps carefully using a flathead screwdriver wrapped in a rag. Clean out any debris or standing moisture, sanitize the floor bolts, and snap the caps back on securely.
05 Rubber-Backed Bath Mats Trapping Dampness
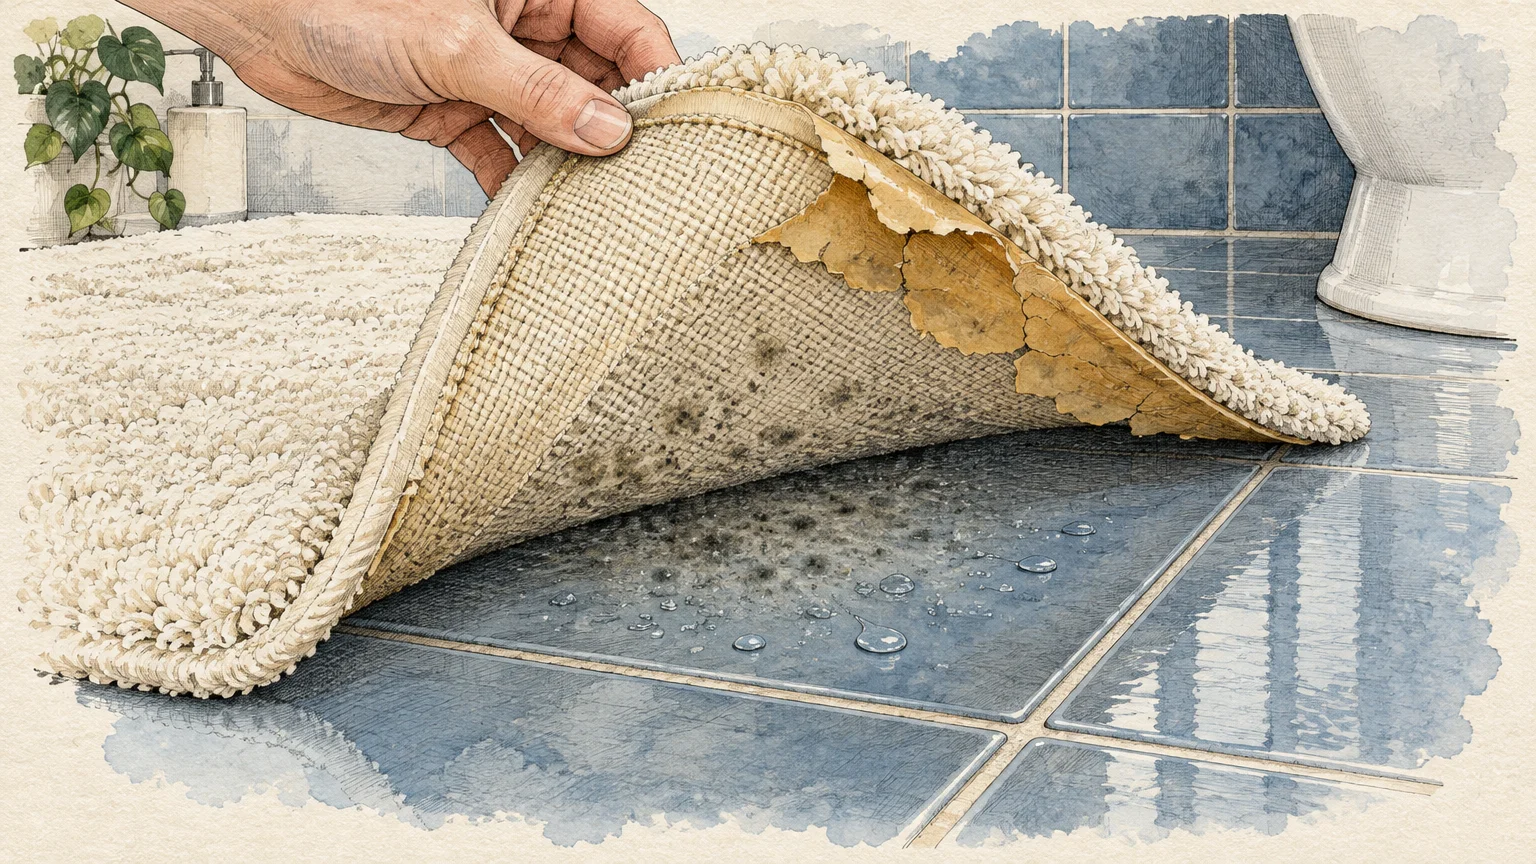
Stepping out of the shower onto a plush bath mat feels comfortable, but these rugs trap water underneath. Heavy rubber backings prevent evaporation, locking moisture directly against cold tile floors.
This dark, damp buffer zone creates ideal conditions for mildew to thrive unnoticed. The mat may look clean on top while harboring unpleasant odors on its underside.
Regular cotton or synthetic bath rugs also collect fallen hair, skin flakes, and aerosolized spray particles. Walking on a damp rug redistributes these particles across your clean floor.
- Hang your bath mat over the shower curtain rod or a towel bar after every use to allow air drying.
- Wash cloth mats weekly in hot water using a residue-free laundry detergent.
- Avoid using fabric softeners on bath mats because softeners coat fibers with an oily layer that repels water.
- Consider switching to a fast-drying natural stone diatomaceous earth bath mat that absorbs moisture instantly.
Inspect the floor beneath your bath mat regularly for cloudy condensation or tile discoloration. Keeping this zone dry prevents grout mildew and protects subflooring from long-term water damage.
06 Chemical Residue from Overusing Cleaning Products
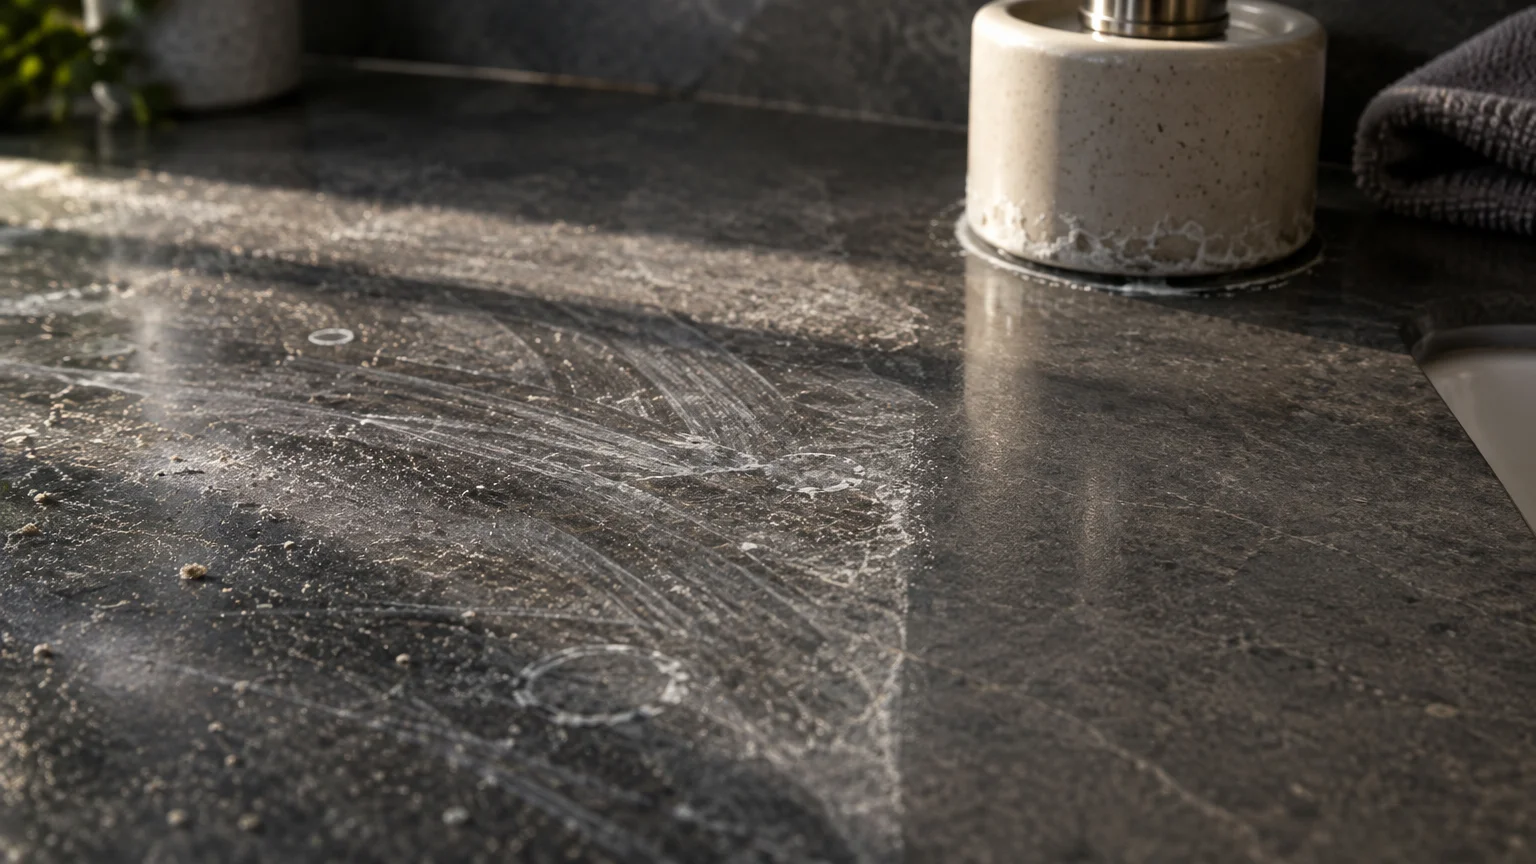
Using more cleaning product does not produce a cleaner surface. Pouring excessive soap, bleach, or scented floor cleaners onto surfaces leaves a sticky surfactant residue behind.
When cleaning sprays dry without a clear-water rinse, that microscopic film acts like a dust magnet. It traps pet dander, lint, and shoe dirt the moment someone walks into the room.
Over time, multiple layers of product build up into a dull haze on polished tiles and sink counters. This sticky coating makes clean surfaces feel tacky to barefoot touch.
To eliminate this buildup, streamline your supply caddy and prioritize thorough rinsing. Plain warm water and a clean microfiber cloth will strip away old surfactant layers effectively.
Follow label dilution rates precisely when mixing floor cleaners or multipurpose sprays. More foam simply means you will need more clean water and extra time to rinse it away.
07 Hard Water Limescale Dulling Chrome and Glass
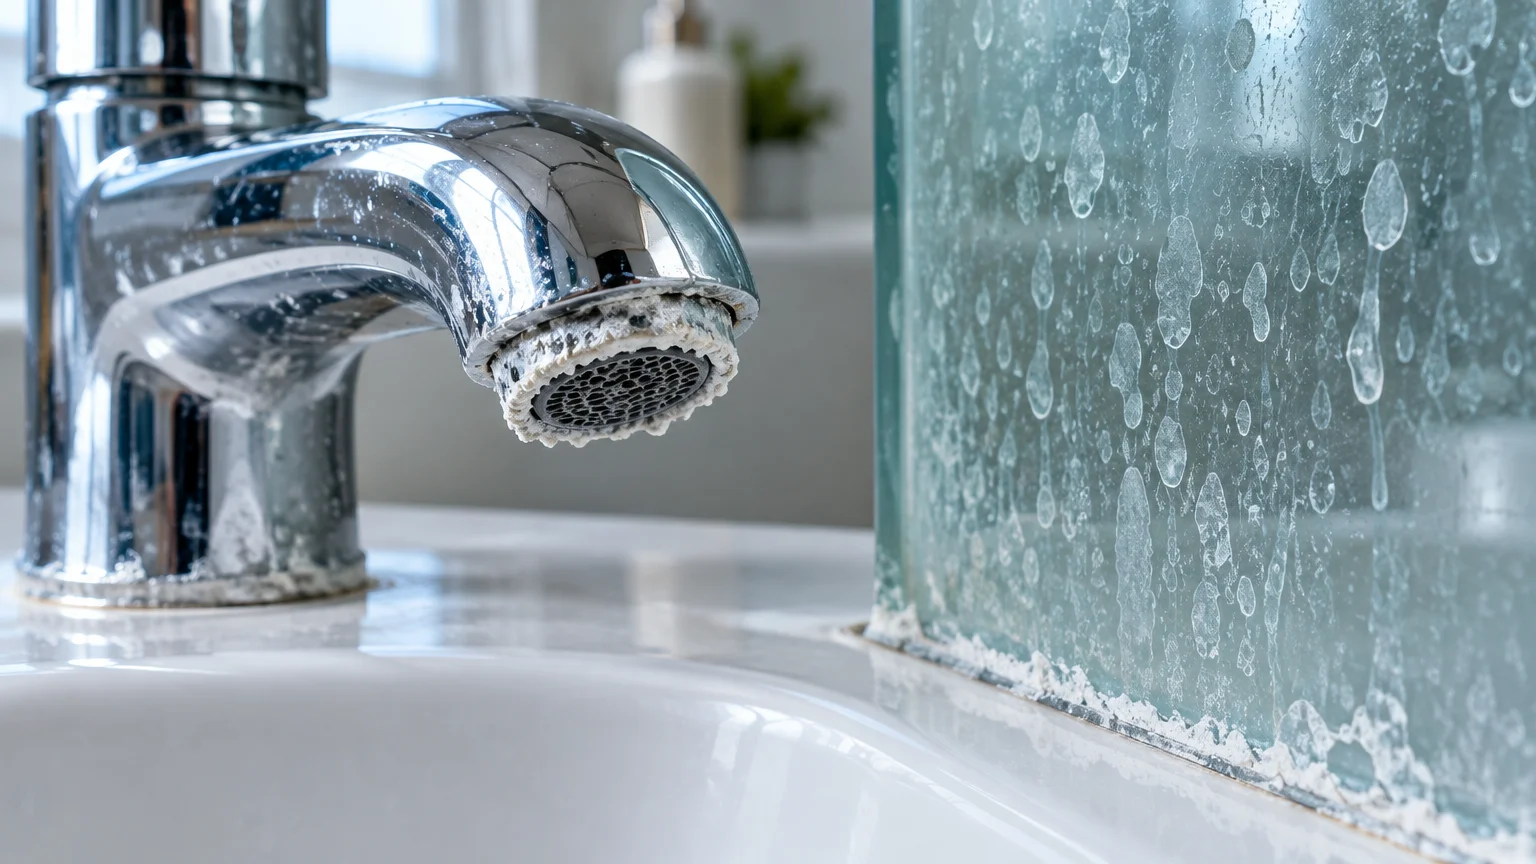
If your bathroom never feels clean despite regular scrubbing, hard water may be the real culprit. Hard water carries high concentrations of dissolved minerals like calcium and magnesium.
According to the U.S. Geological Survey (USGS), mineral-rich water leaves chalky deposits on plumbing fixtures when water drops evaporate.
These mineral deposits, known as limescale, create a cloudy white crust on faucet aerators, showerheads, and glass doors. Soap combines chemically with these minerals to form stubborn soap scum.
Standard bleach or generic disinfectants cannot dissolve these alkaline mineral bonds. You need an acidic agent to break down the calcium carbonate matrix safely.
- Saturate paper towels with distilled white vinegar and wrap them securely around crusty faucets.
- Secure a small plastic bag filled with warm vinegar over your showerhead using a heavy rubber band.
- Allow the acid to dwell for thirty to sixty minutes to dissolve the rock-hard minerals.
- Scrub the loosened deposits gently with an old soft-bristled toothbrush, then rinse with cold water.
Wipe your shower glass with a rubber squeegee after each shower to prevent water droplets from drying in place. Removing water before it evaporates stops mineral scale before it forms.

08 Inadequate Ventilation Feeding Pink Bacteria Biofilms
Many homeowners notice a pink or orange slime spreading across grout, caulking, and shower corners. This growth is not true mold, but an airborne bacterium named Serratia marcescens.
This bacterium feeds on fatty substances found in soap, shampoo, and bath oils. It thrives in humid conditions where moisture lingers on surfaces for hours.
Leaving the bathroom door and window closed after bathing creates an accidental incubator. Even a spotless shower will sprout pink film within days if humidity remains high.
Keep your exhaust fan running for at least twenty minutes after you turn off the shower water. This clears residual moisture from the air and dries out condensation on walls.
Crack the bathroom door open slightly while the fan runs to ensure sufficient airflow into the room. If your bathroom lacks an exhaust fan, run a small tabletop dehumidifier during humid seasons.
09 Reusing Dirty Tools and Creating Cross-Contamination
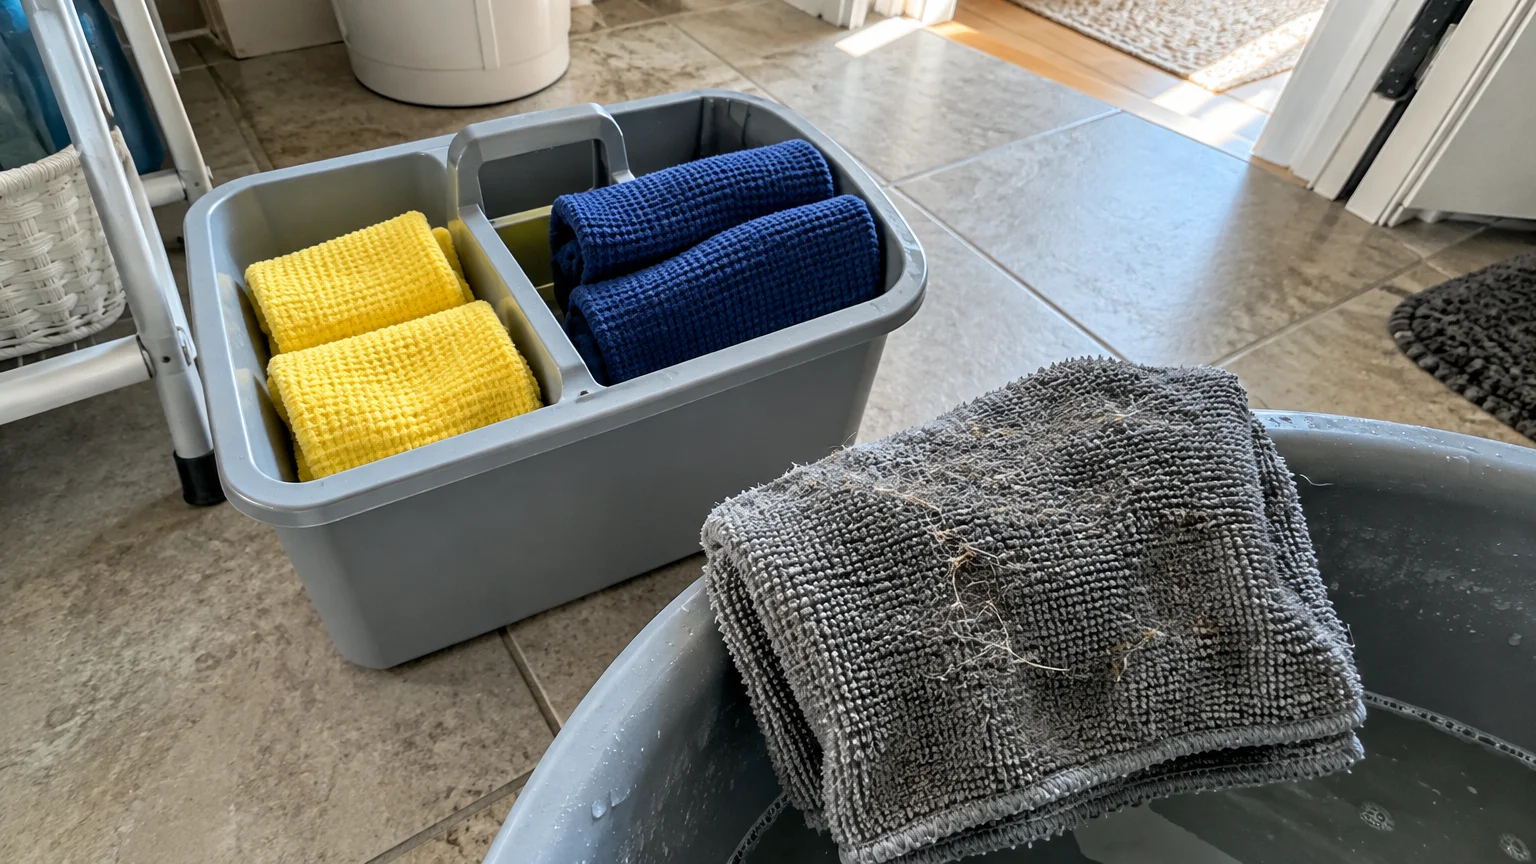
Cleaning with contaminated tools spreads grime rather than eliminating it. Wiping your bathroom sink with the same rag used around the toilet base transfers bacteria directly to handwashing areas.
The Centers for Disease Control and Prevention (CDC) emphasizes that cleaning surfaces with dedicated supplies prevents the spread of pathogens across common household areas.
Toilet brush holders are notorious bacterial breeding grounds. Storing a dripping wet brush inside an airtight holder creates an odorous soup of dirty water and germs.
Worn-out sponges also harbor millions of bacterial colonies within their damp inner pores. When you wipe a counter with an old sponge, you coat the surface with sour bacteria.
- Assign distinct cloth colors to specific zones: blue for mirrors, yellow for sinks, and red for toilets.
- Rest the wet toilet brush handle under the toilet seat so the head drips directly into the bowl for ten minutes before storage.
- Wash all microfiber cloths in hot water after every deep clean bathroom session, skipping liquid fabric softener.
- Replace kitchen-style cellulose sponges with washable, quick-drying microfiber cloths that do not trap sour odors.
Practice extreme caution with your chemical supplies to protect your respiratory health. The EPA Safer Choice program warns never to mix bleach with ammonia, vinegar, or acidic cleaners, as this produces dangerous chloramine or chlorine gas.
Always verify cleaner compatibility before tackling tough stains. Sticking to single-formula products protects your health while keeping your bathroom surfaces intact.
10 Countertop Clutter Trapping Dirt Rings and Splatters
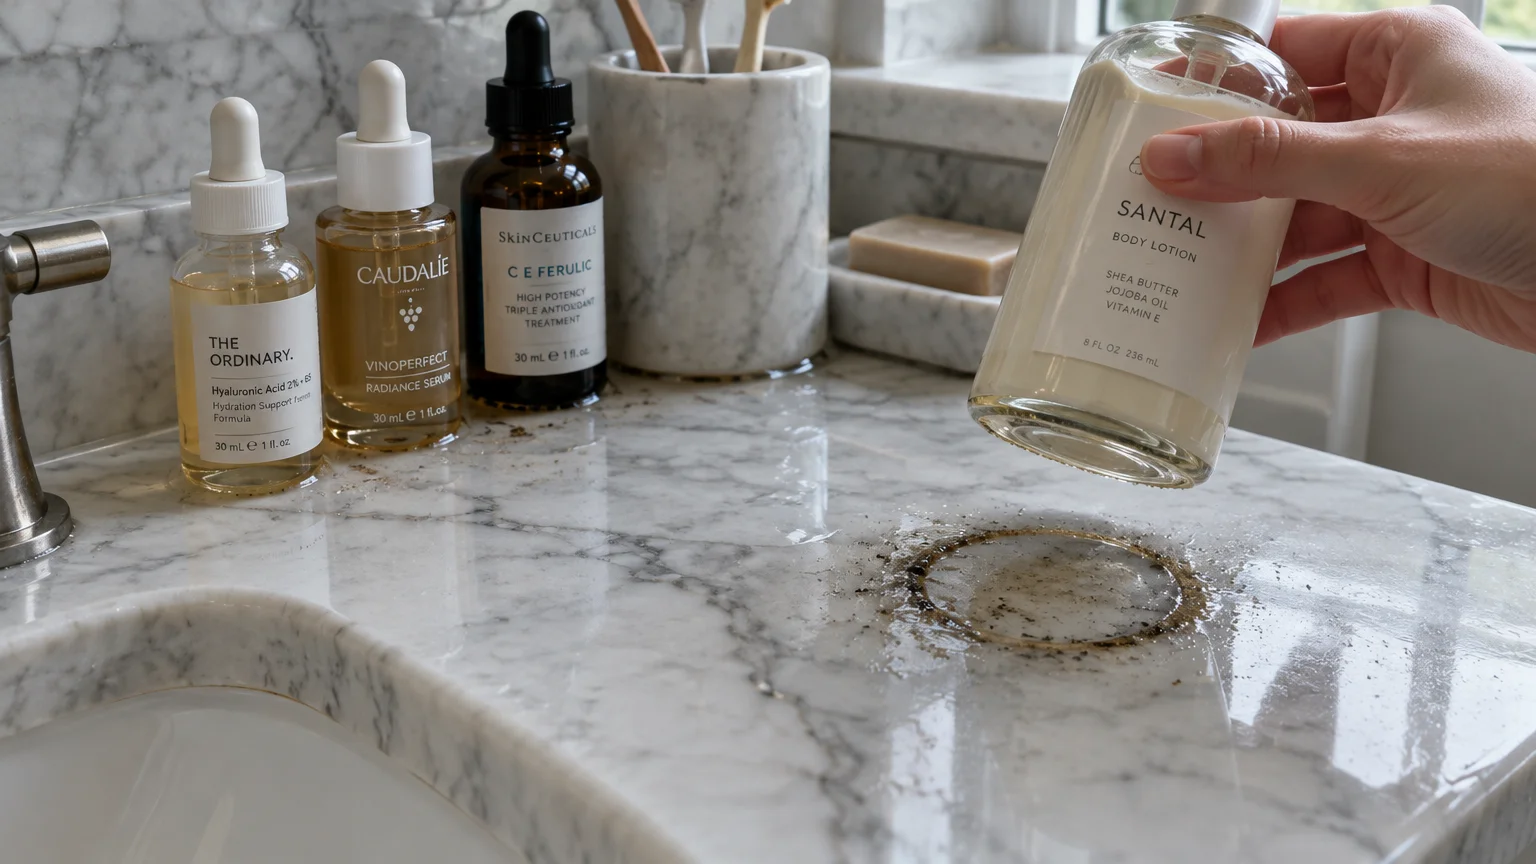
Ledges and vanity counters covered in personal care products make thorough cleaning nearly impossible. When you have to lift ten bottles to wipe a counter, daily maintenance quickly falls by the wayside.
Water, liquid soap, and toothpaste splatters run underneath bottles, pumps, and toothbrush holders. These puddles dry into sticky rings that harbor bacteria and attract stray dust.
Bottles stored along the edges of the bathtub rim trap moisture against the tile wall. This stagnant water breaks down caulking seams and encourages black mold growth.
Elevate your products away from the counter and tub deck surfaces. Install wall-mounted dispensers, hanging shower caddies, or shallow medicine cabinet organizers to clear the flat surfaces.
Store everyday items like hairbrushes and cosmetics inside vanity drawers using removable divider trays. An open, uncluttered countertop allows you to wipe down the entire surface in ten seconds.
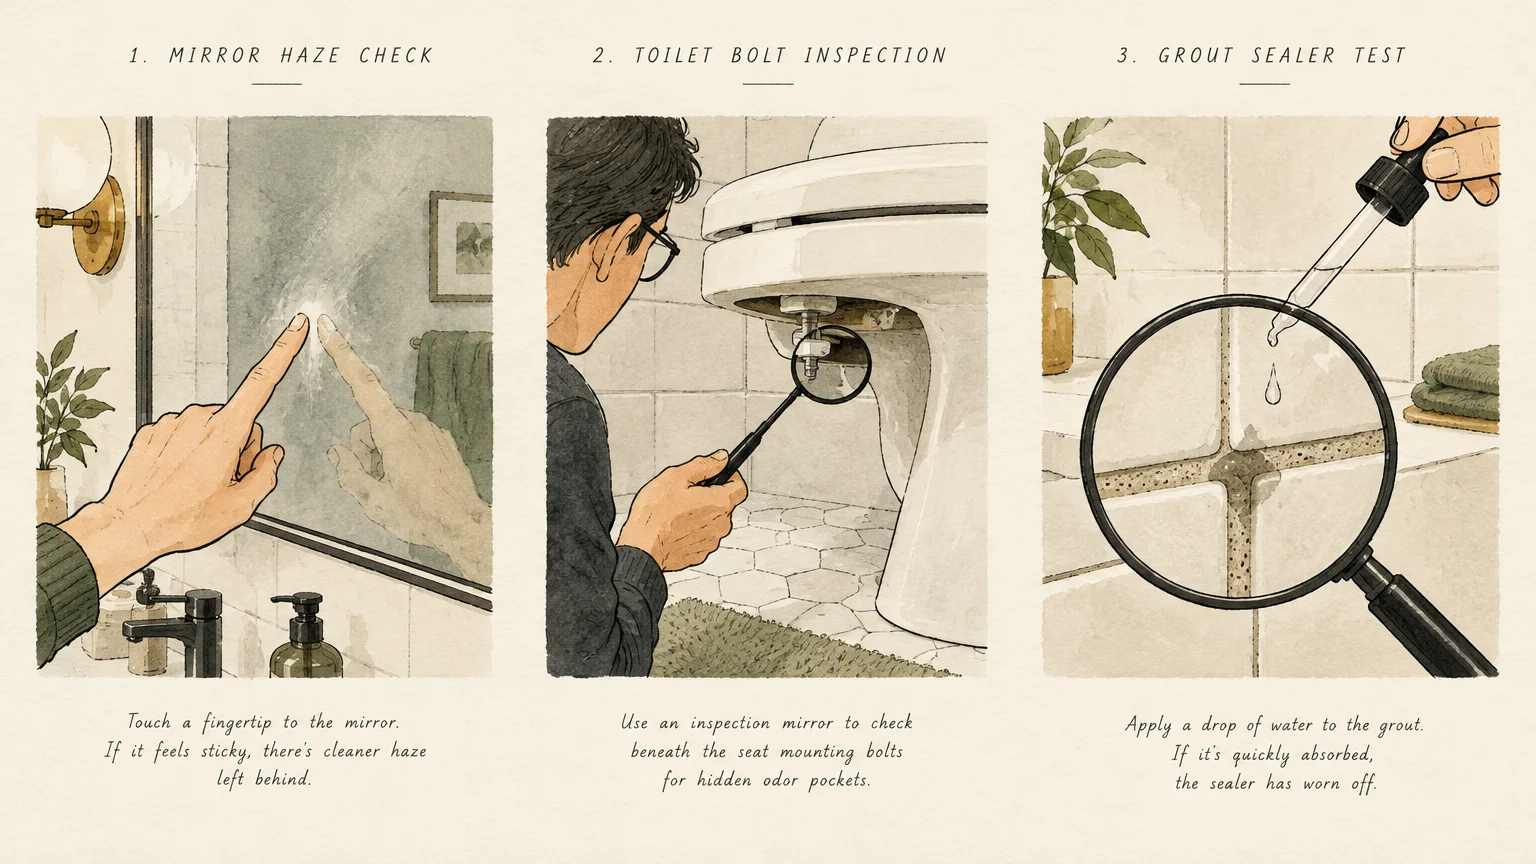
Troubleshooting Common Bathroom Cleanliness Issues
When standard wiping routines fail to deliver lasting freshness, review this reference table. Match your symptom to the root cause and apply the targeted fix.
| Visible Symptom | Underlying Cause | Practical Solution |
|---|---|---|
| Persistent sour or musty odor | Damp bath mat backing or bunched curtain liner | Wash liner in vinegar; switch to quick-drying diatomaceous mat. |
| Dull, cloudy faucet fixtures | Alkaline limescale from hard water mineral deposits | Apply vinegar-soaked cloth wraps to dissolve calcium bonds. |
| Sticky tile floors after mopping | Surfactant residue from concentrated cleaning products | Rinse with clean, hot water using a clean microfiber mop. |
| Recurring pink slime in corners | Serratia marcescens bacteria feeding on soap residue | Run exhaust fan for 20 minutes post-shower; rinse residue. |
| Urine smell around clean toilet | Splatter trapped under hinge caps and base bolt covers | Detach quick-release seat; apply enzymatic cleaner to mounts. |
| Dark spots along tile joints | Unsealed, porous grout absorbing dirty wash water | Lift dirt with oxygen bleach paste; reseal with grout sealer. |

Step-by-Step Deep Clean Routine That Lasts
Reset your space by completing a systematic deep clean bathroom routine once every few months. Working from top to bottom ensures you never wipe the same area twice.
- Step 1: Clear all surfaces. Move bath rugs, countertop bottles, and shower toiletries completely out of the room so you have full access to all flat planes.
- Step 2: Dust from high to low. Vacuum the exhaust fan grill, ceiling corners, door frames, and baseboards before introducing any liquid cleaners to the room.
- Step 3: Apply dwell-time cleaners. Spray your mineral remover or bathroom cleaner onto shower walls, tubs, and toilet bowls. Allow the formula to work for ten minutes without drying out.
- Step 4: Agitate and rinse. Scrub shower tile, tub basins, and fixtures with a soft-bristled brush, then rinse thoroughly with clean water to wash away loose grime.
- Step 5: Clean the toilet thoroughly. Wipe the tank, handle, bowl exterior, and beneath the seat hinge brackets using disinfectant and dedicated microfiber cloths.
- Step 6: Wash mirrors and glass. Spray a light mist of water or glass cleaner and buff with a tight-weave waffle microfiber towel to prevent lint streaks.
- Step 7: Mop your way out. Wash the tile floor starting from the furthest corner and working toward the doorway using a well-wrung, clean microfiber pad.
This structured sequence eliminates backtracking and prevents dirty water from contaminating freshly cleaned fixtures. Your room dries evenly and remains fresh significantly longer.

Quick Daily Habits to Prevent Grime Buildup
Maintaining high standards of bathroom hygiene does not require constant scrubbing. Adopting small daily habits stops grime from establishing a foothold in your room.
Keep a small rubber squeegee inside the shower stall. Spend thirty seconds pulling water off the shower glass and tile walls immediately after turning off the water.
Dry the area around your sink faucet using a dedicated hand towel before leaving the room. Preventing water from pooling around the faucet base stops mineral deposits from forming.
Always close the toilet lid before you flush the bowl. Flushing with the lid open launches fine aerosol droplets across counters, toothbrushes, and nearby towels.
Hang hand towels and washcloths spread wide across towel bars rather than bunching them on wall hooks. Flat towels dry twice as fast, preventing musty mildew odors from developing in the fabric.

Your Next Step
Pick one hidden problem area from this guide to tackle today. Removing the toilet seat for an enzymatic wipe-down or washing your shower curtain liner will produce an immediate boost in bathroom freshness.