You can stop spending your weekends scrubbing hardened, stubborn grease off your kitchen range. Adopting a few simple daily habits keeps your cooktop slick and spotless with almost zero hard elbow grease.
Cooking oils aerosolize during high-heat cooking, settle onto cool metal surfaces, and bake into a tough resin every time you turn on a burner. Catching that oil before it cures saves hours of frustrating work.
These ten straightforward kitchen cleaning habits protect your appliance, streamline your evening cleanup, and maintain a sparkling stovetop year-round.
Why Baked-On Grease Is Tougher Than Fresh Splatters
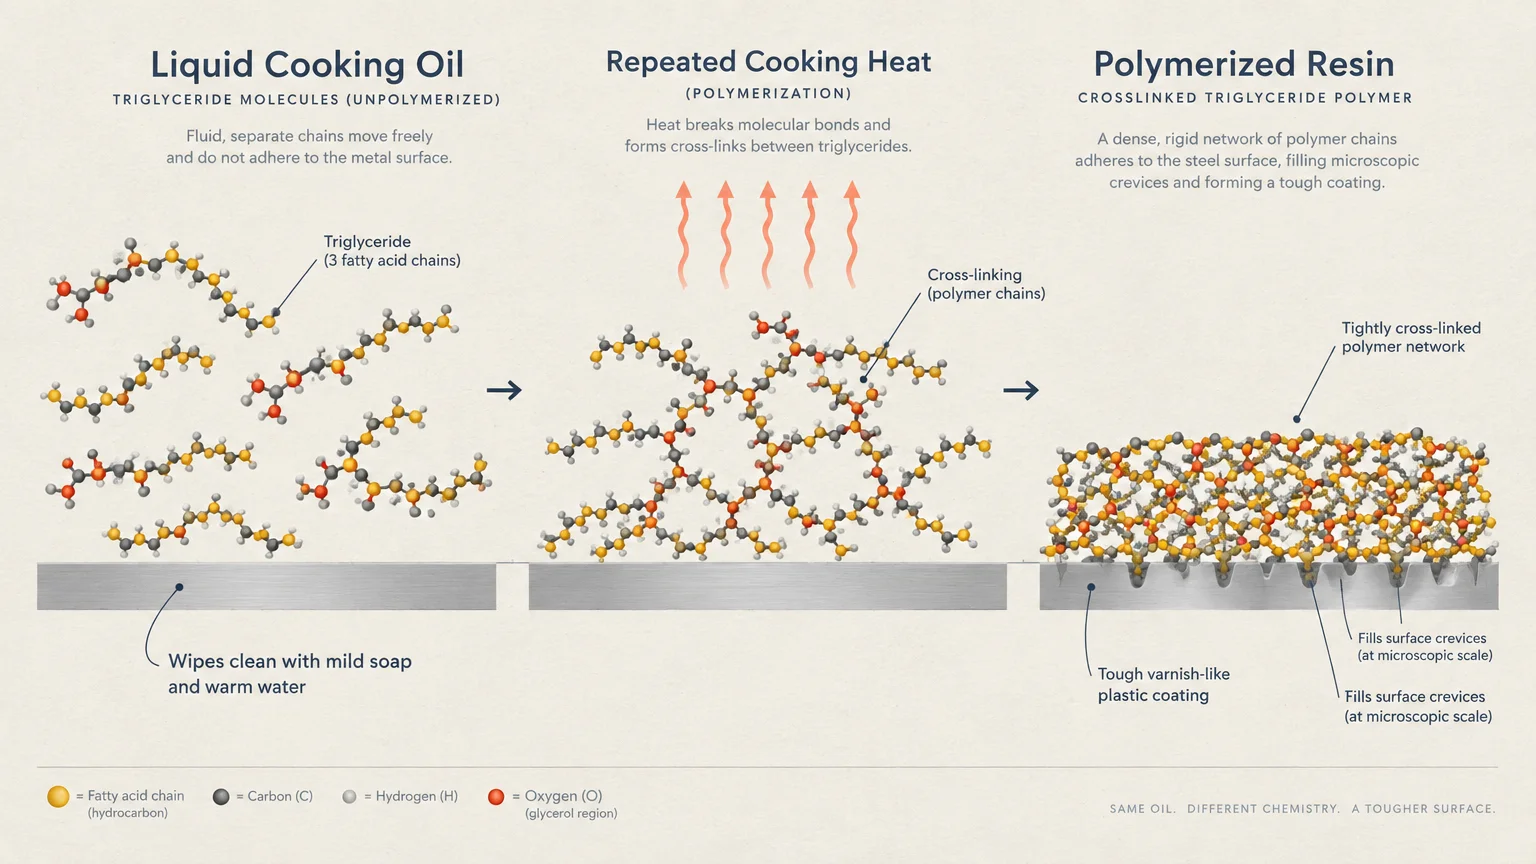
Fresh cooking oil behaves like a liquid, making it easy to wipe away with simple soap and warm water.
When exposed to repeated cooking heat, vegetable oils undergo polymerization. This chemical reaction transforms liquid fat into a tough, varnish-like plastic coating that sticks stubbornly to enamel and steel.
According to research highlighted by the EPA Safer Choice program, targeted surfactants break these hydrophobic bonds before extreme heat permanently cross-links the oil molecules.
Preventing this polymerization process requires consistent timing rather than brute physical force.
01 Wipe Splatters During the Warm Window
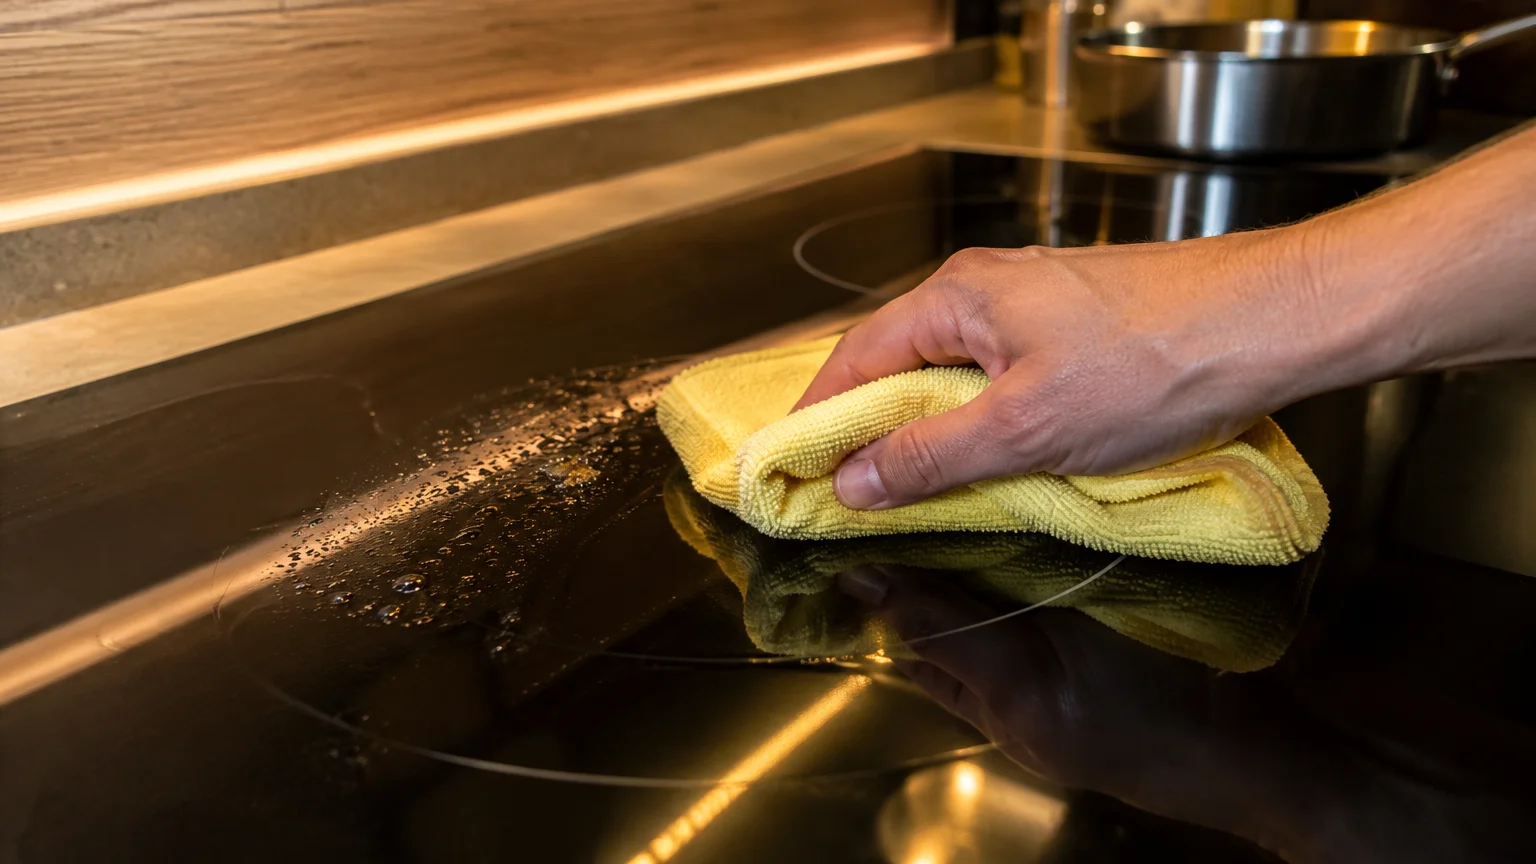
Wiping your range while it remains warm—never piping hot—is the easiest way to prevent burnt residues.
Residual surface heat keeps cooking oils fluid and lowers their surface tension. A damp microfiber cloth easily lifts these warm oils without abrasive chemicals.
Wait until electric coils or glass surfaces are safe to touch, then wipe immediately. Waiting until morning allows the oil to cool, congeal, and bond to the cooktop finish.
Keeping this habit turns range grease cleaning from a heavy chore into a ten-second motion.
02 Turn On Ventilation Before You Ignite Burners
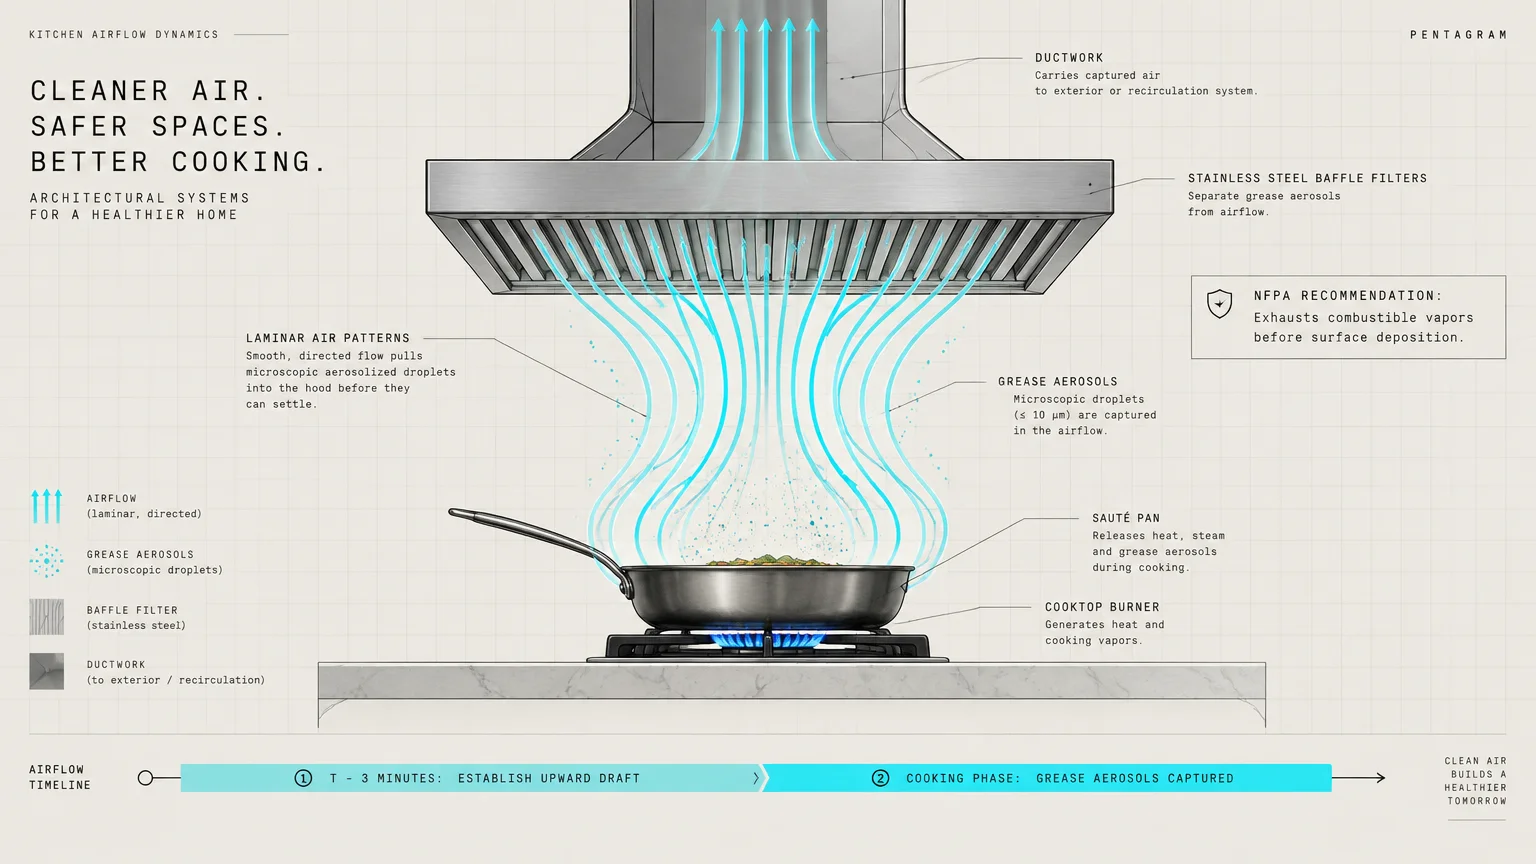
Most home cooks turn on their vent hoods only after the kitchen fills with smoke. That delay allows microscopic grease droplets to disperse throughout the room and settle onto your range.
Turn on your exhaust fan three minutes before cooking to establish an upward airflow pattern. This draft pulls rising grease aerosols directly into your filtration system.
The National Fire Protection Association (NFPA) notes that proper exhaust ventilation removes combustible grease vapors before they coat cooking equipment and become fire hazards.
Leave the exhaust running for five minutes after cooking ends to clear any lingering airborne grease.
03 Block Flying Droplets with Fine-Mesh Splatter Screens
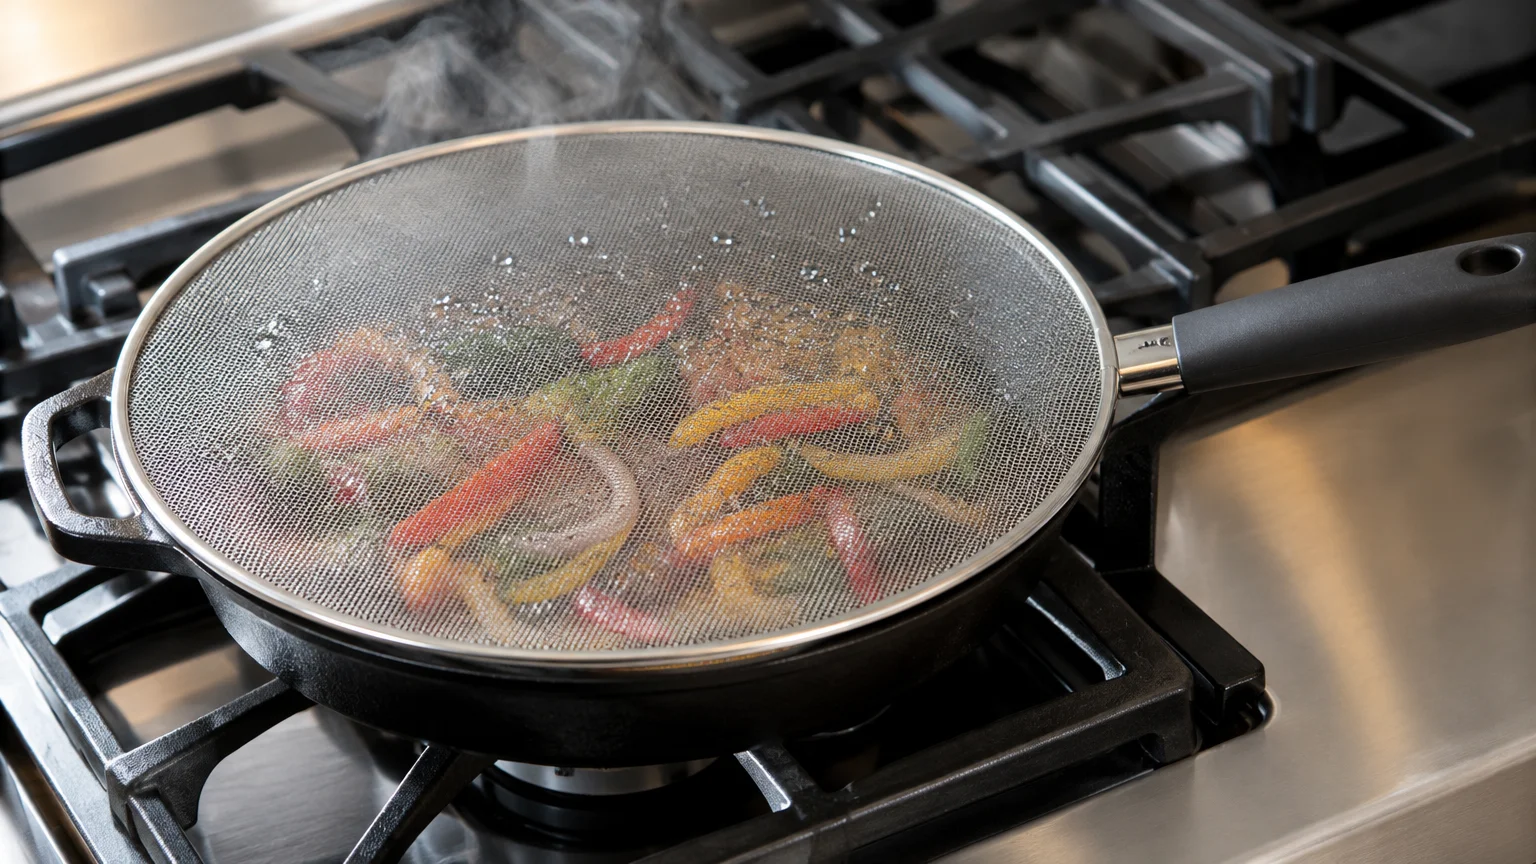
Searing meats and sautéing vegetables in shallow pans inevitably creates microscopic oil spray. A quality stainless steel splatter screen traps roughly ninety percent of those flying droplets.
Resting a screen over your skillet permits steam to escape freely while capturing oil beads. This prevents your food from getting soggy while keeping the cooktop immaculate.
Wash your splatter screen right after dinner in hot soapy water. A clogged mesh screen reduces airflow and forces oil to seep along the pan edge.
Choose a screen with heat-resistant silicone handles to protect your hands while checking food.
04 Match Your Degreasing Chemistry to the Range Material
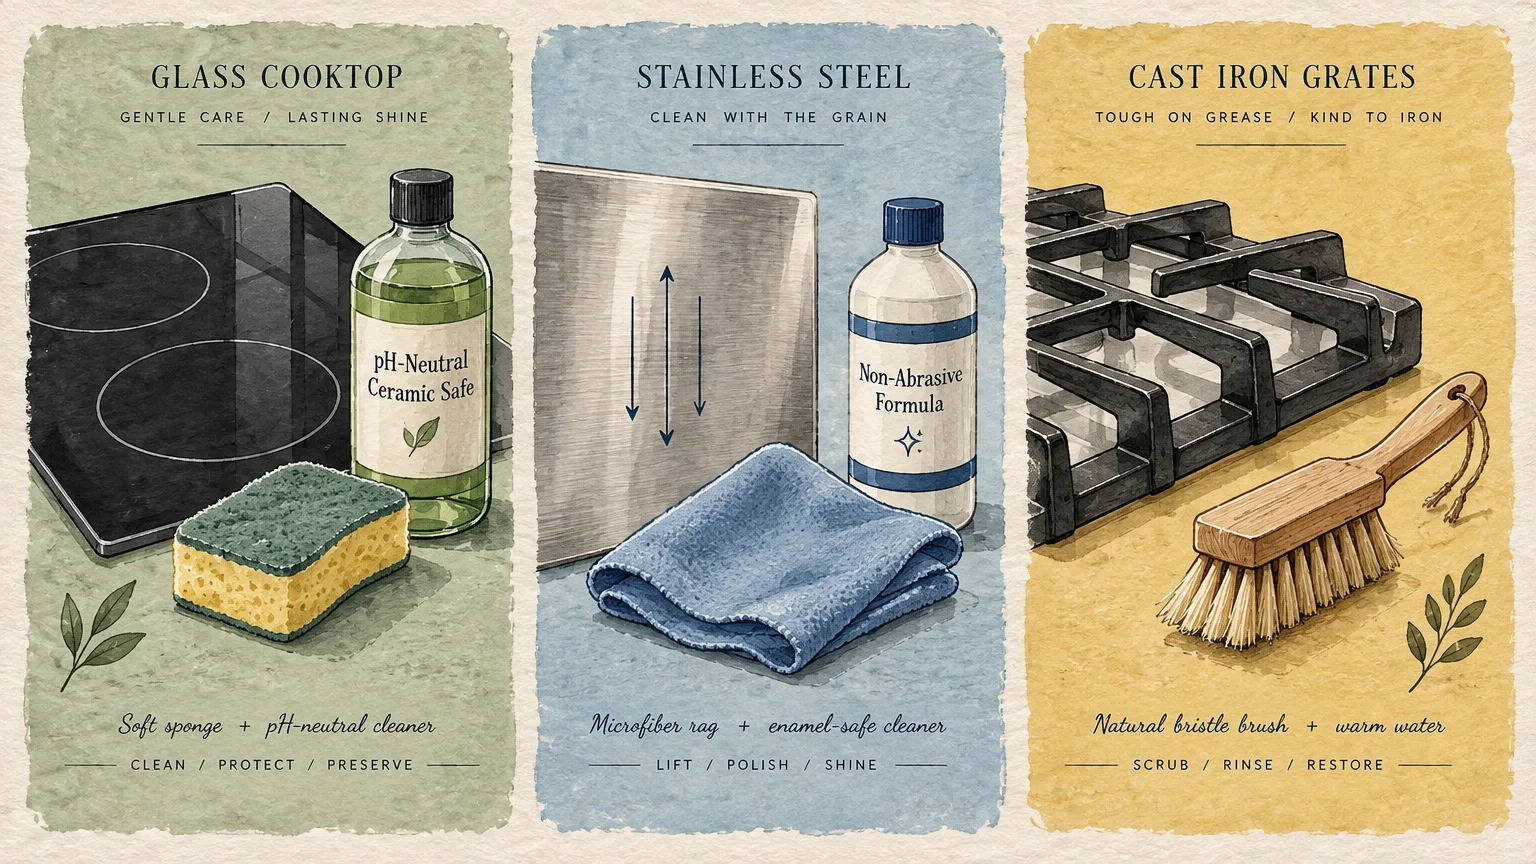
Using improper cleaning chemicals can etch glass cooktops, strip protective enamels, or discolor stainless steel. Matching the cleaner to your specific surface protects both appearance and performance.
For smooth ceramic glass, use dedicated pH-neutral or mild specialty cleaners and non-abrasive pads. Harsh scouring powders leave micro-scratches that trap grease and cause cloudiness over time.
Leading manufacturers like GE Appliances recommend avoiding chlorine bleach, ammonia, and steel wool on stainless steel surfaces. Instead, use a mild dish soap solution or specialized stainless steel cleaner applied along the grain.
Baking soda works wonders on porcelain enamel bowls and cast iron grates. Mix it with warm water into a thick paste to soften carbonized oils without scratching.
05 Degrease Range Hood Baffles and Filters Monthly
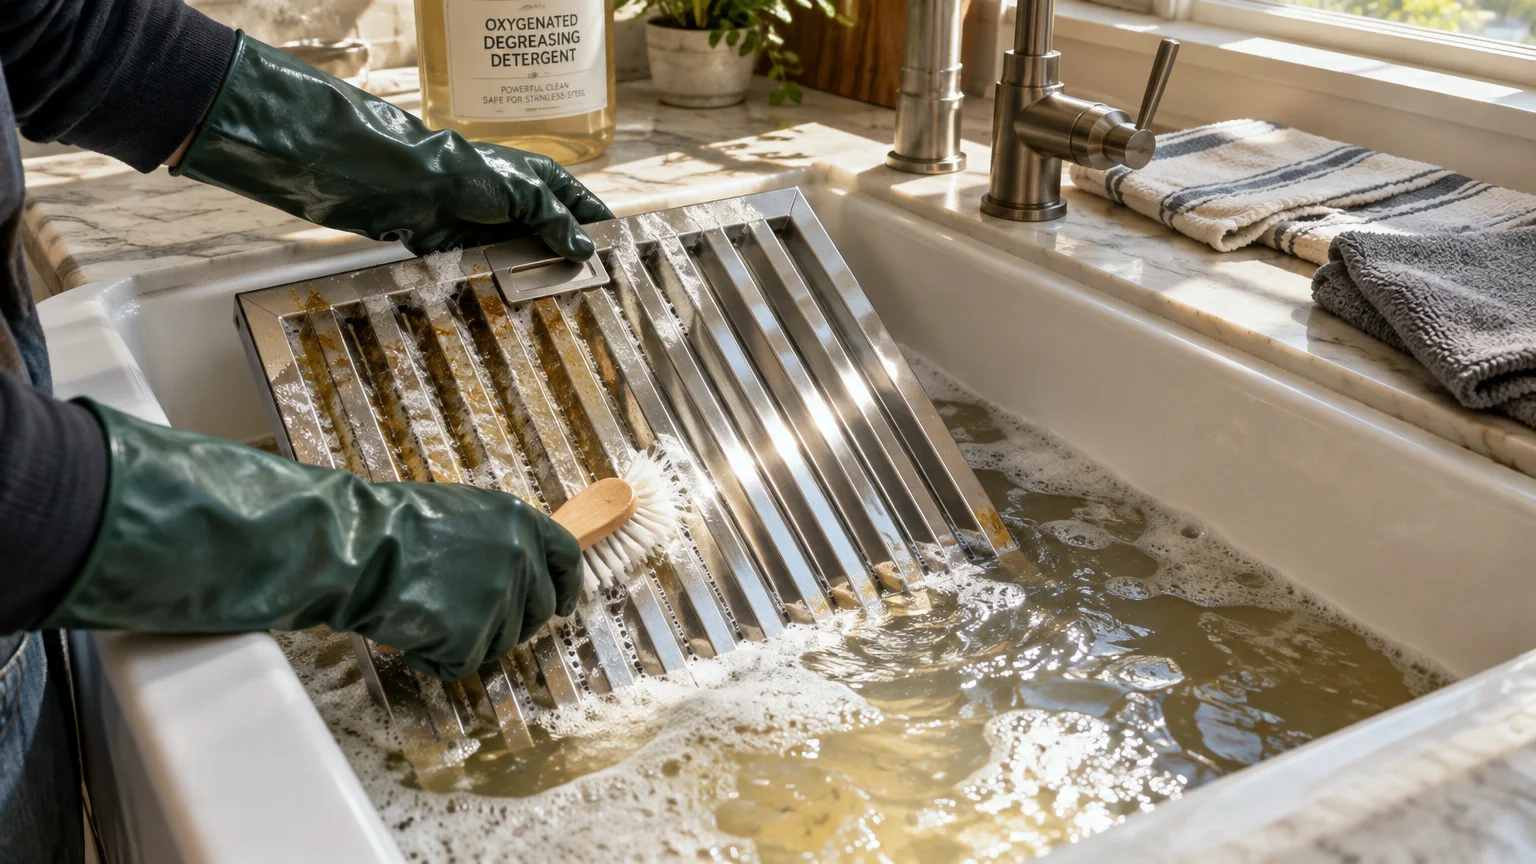
Your range hood filters act as grease magnets, trapping vaporized fats before they circulate. When these filters clog, grease condenses and drips straight back down onto your burners.
Soak metal mesh or baffle filters in boiling water mixed with baking soda and concentrated dish soap for twenty minutes. The alkaline solution dissolves dense grease cakes without manual scrubbing.
Rinse the filters thoroughly in clean hot water and let them air dry completely before reinstallation. Dry filters maintain maximum suction and airflow efficiency.
Set a recurring calendar reminder on the first weekend of every month to inspect and degrease these filters.
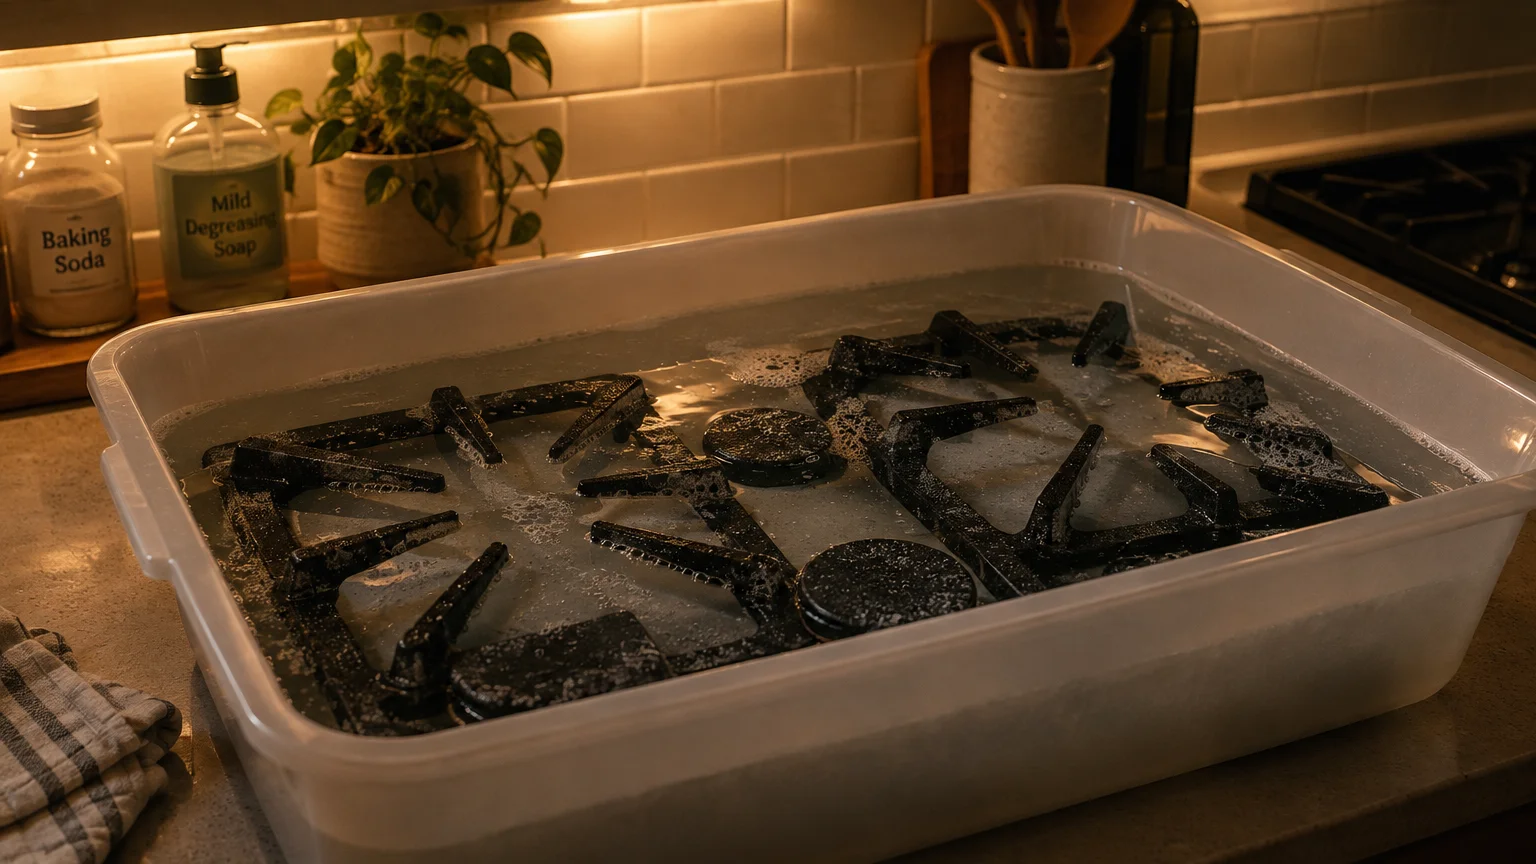
06 Give Burner Grates and Caps an Overnight Soak
Heavy cast-iron grates and burner caps absorb immense heat, making them prime targets for baked-on grease rings. Routine soaking prevents stubborn carbon deposits from hardening permanently onto burner parts.
Fill a basin or sink with hot water and add half a cup of washing soda or gentle degreaser. Submerge the cool cast iron components and allow them to soak for several hours.
Lightly scrub the remaining softened debris using a nylon brush, then dry each piece completely. Cast iron components require thorough drying to prevent surface rust and oxidation.
Wipe clean grates with a drop of food-grade mineral oil occasionally to preserve their protective seasoning.
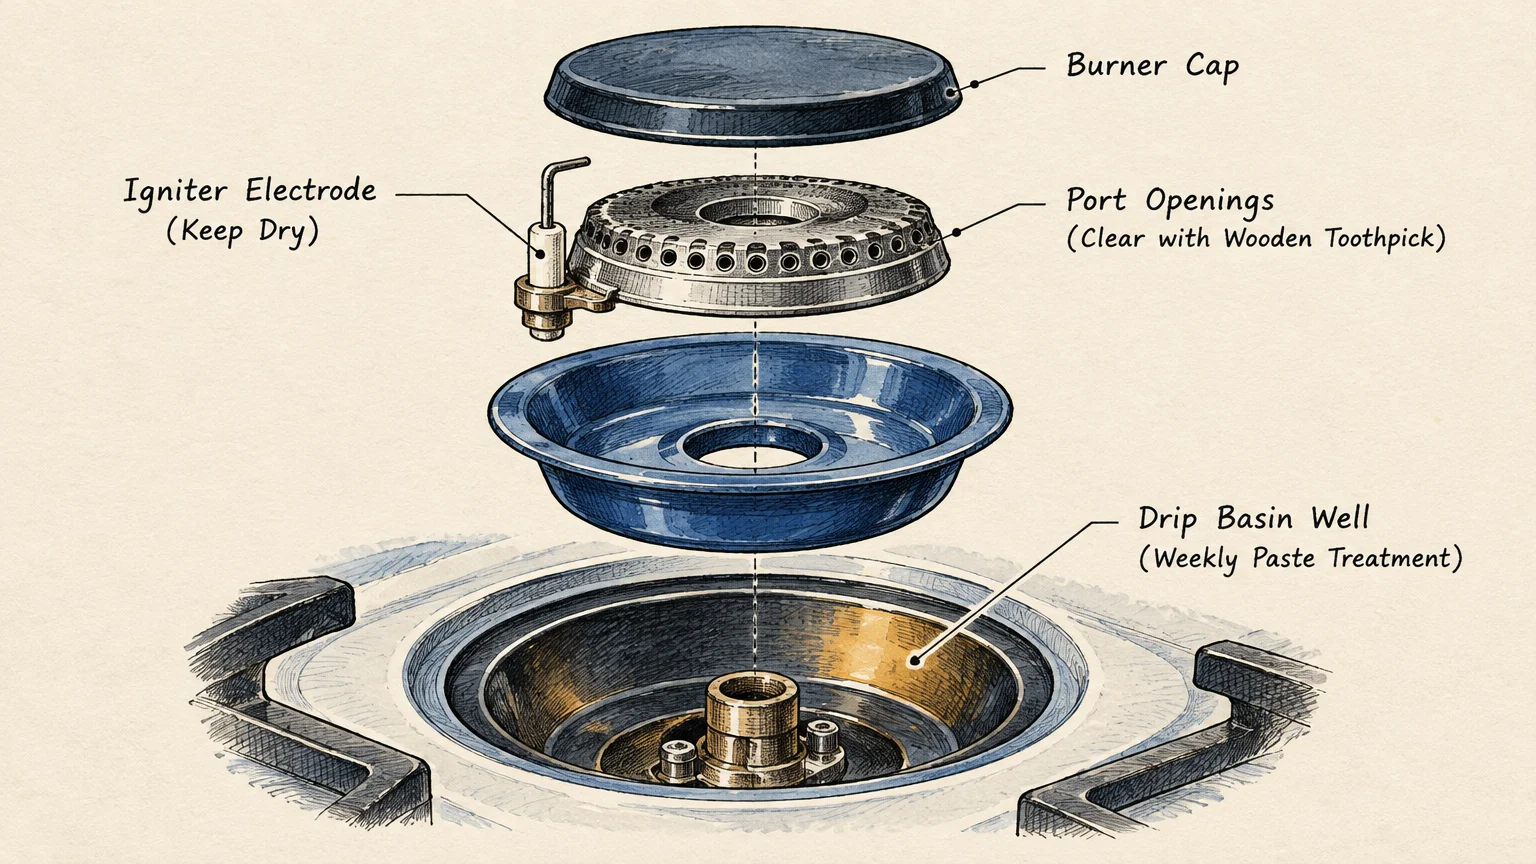
07 Treat Burner Wells and Drip Bowls Weekly
Drip bowls catch boiling liquids and hidden splatters that quickly bake under prolonged burner heat. Leaving spills inside these bowls creates foul smoke and permanent staining.
Remove the drip bowls weekly and wipe them with warm, soapy water before residue chars black. For existing burnt marks, soak the bowls in hot water with powdered oxygen bleach.
Avoid wrapping drip bowls in aluminum foil. Foil can disrupt electrical grounding on electric ranges, damage ceramic coatings, and create severe fire hazards.
Replace severely pitted or warped drip bowls every few years to keep your stove looking fresh.
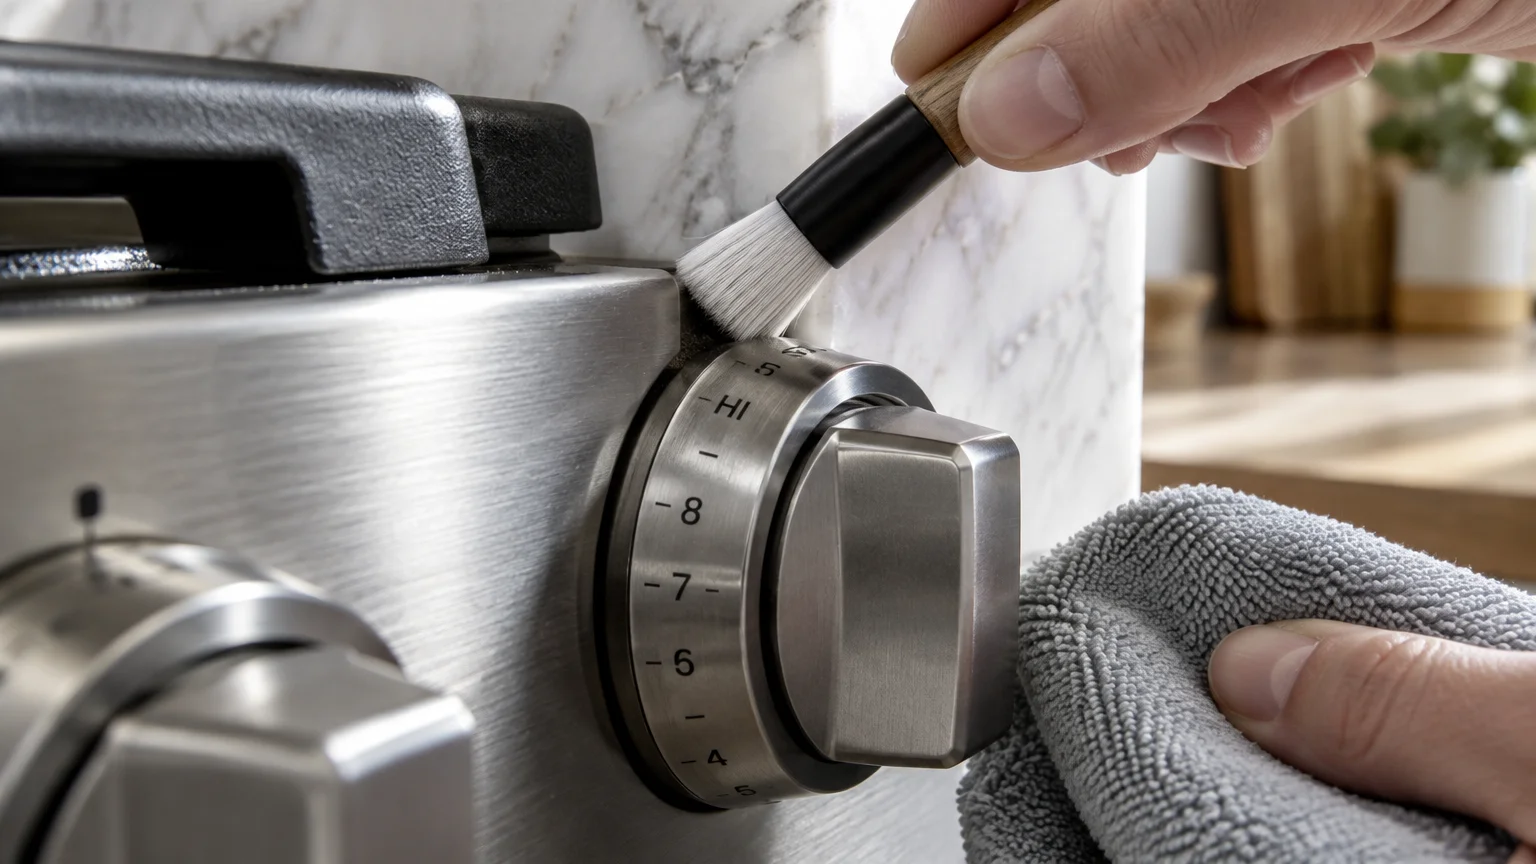
08 Detail Control Knobs and Backsplash Margins
Grease vapors naturally settle along seams, under burner knobs, and against the backsplash transition line. Over time, these neglected margins turn into sticky, yellowed grease reservoirs.
Pull burner knobs straight off their stems twice a month for dedicated washing. Clean behind them using a soft microfiber cloth wrapped around a wooden toothpick or cotton swab.
Wipe the backsplash immediately following greasy meal prep. Keeping vertical surfaces clean prevents oily residues from migrating down onto your cooktop perimeter.
Inspect the silicone bead between the counter and backsplash to ensure grease cannot seep into wall cavities.
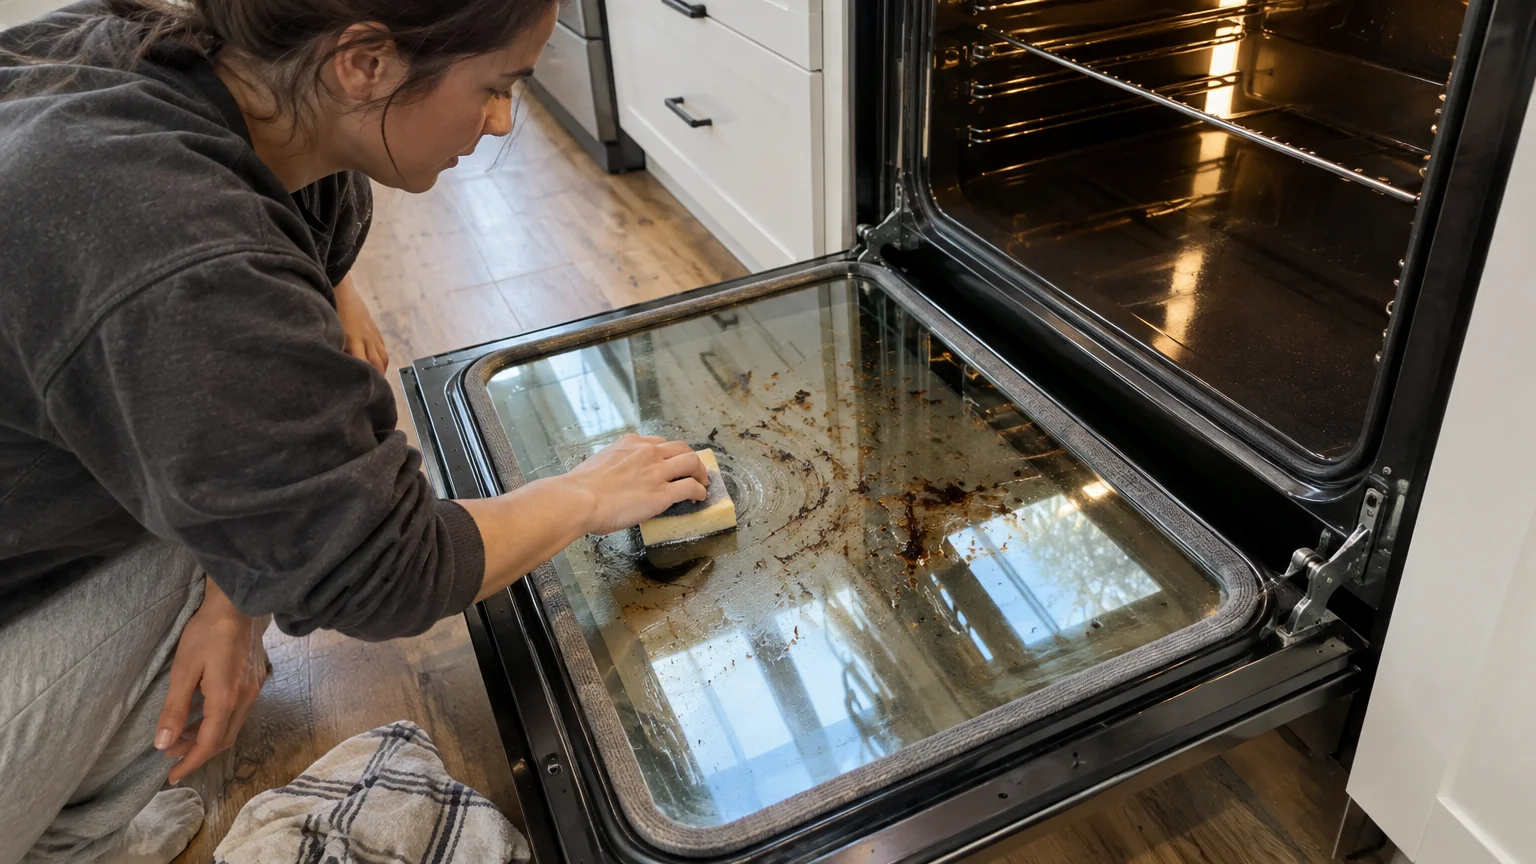
09 Clean Oven Glass and Door Gaskets Before Baking
Oven range cleaning involves more than just the top burners. Heat escaping through door edges and vents during baking bakes stray splatters directly into the glass and frame.
Clean the interior oven glass using a paste of baking soda and water applied with a damp non-abrasive sponge. Let it sit for fifteen minutes to dissolve browned drips safely.
Gently wipe the flexible rubber or fiberglass door gasket with a damp microfiber cloth. Removing grease from this seal preserves an airtight closure and maintains stable cooking temperatures.
According to appliance care guidelines from Whirlpool, aggressive chemical degreasers can dry out rubber door seals and degrade their heat retention properties.

10 Commit to a Sixty-Second Nightly Reset
The single most powerful habit for stovetop grease removal is a quick, automatic nightly wipe-down. Two minutes of simple daily maintenance eliminates the need for hours of aggressive weekend scrubbing.
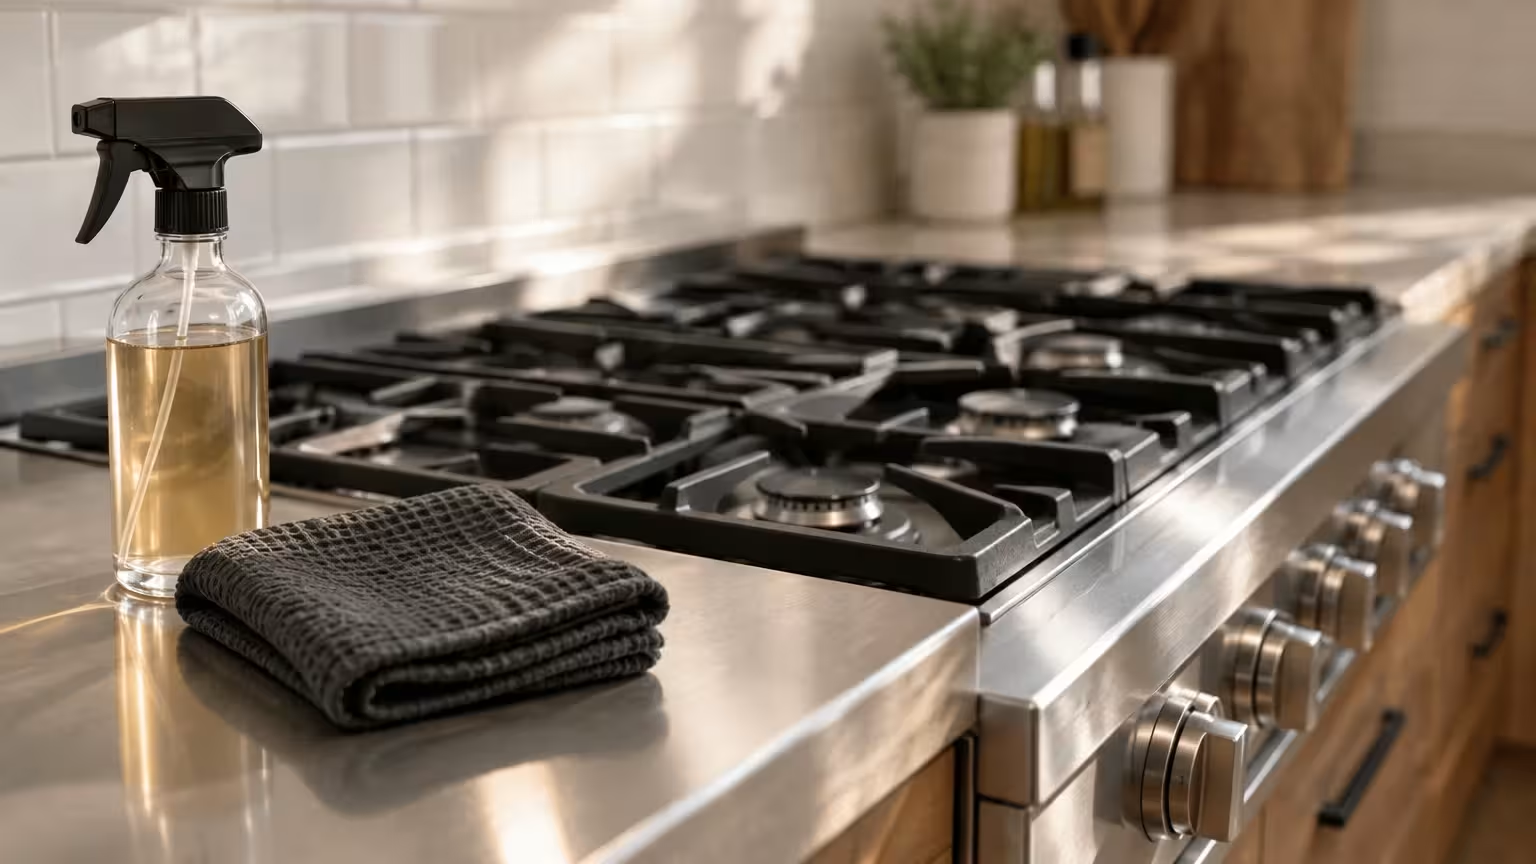
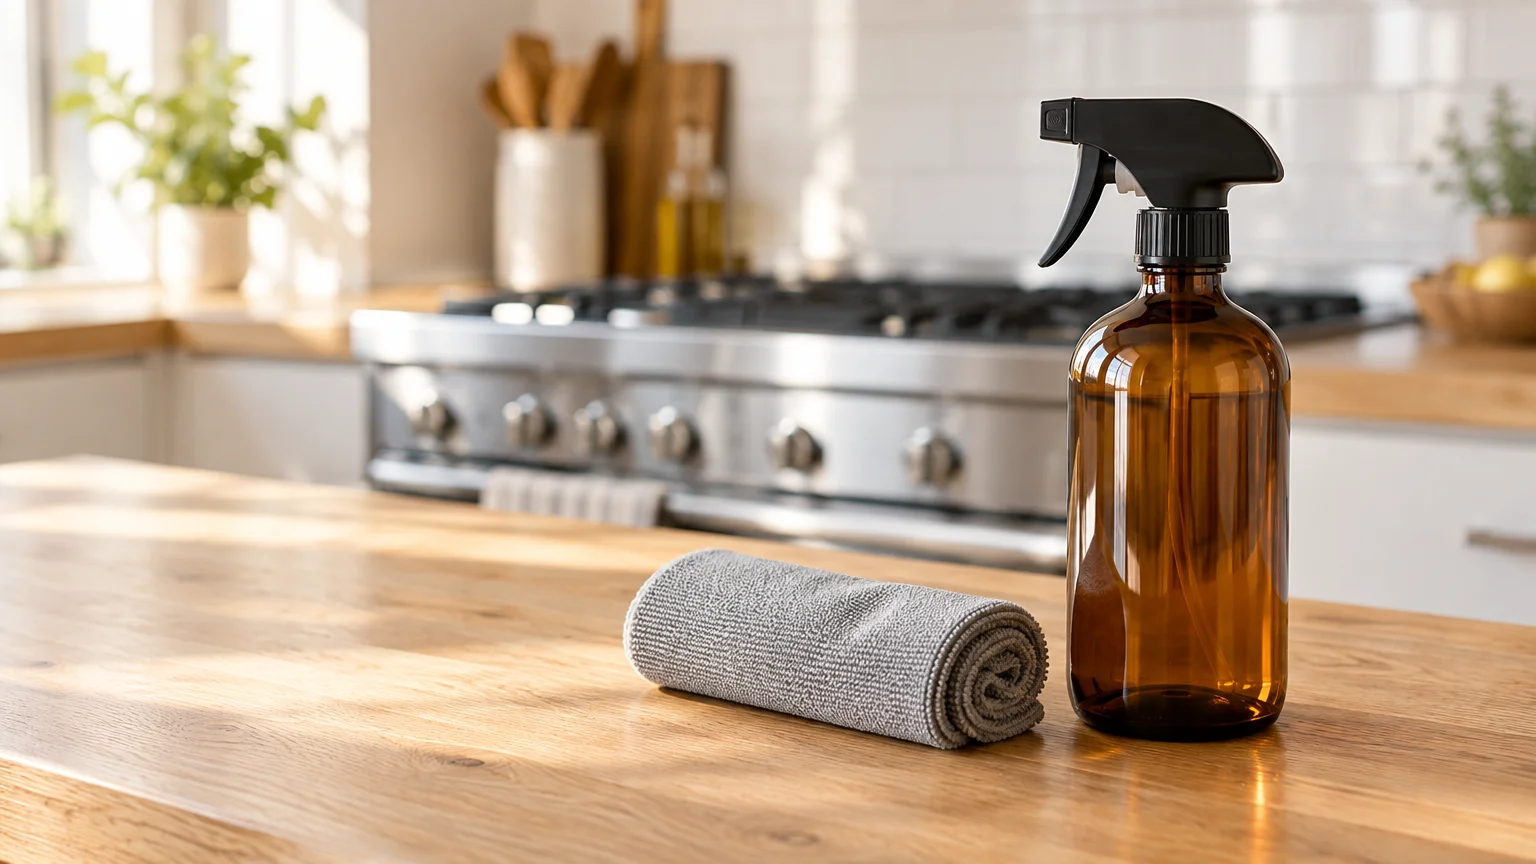
Keep a dedicated spray bottle filled with warm water and two drops of dish soap under your sink. Pair it with a fresh microfiber towel designated solely for cooktop care.
Once dinner dishes are cleared, give the cooled range a fast mist and gentle wipe. Consistent light attention stops sticky grease film from ever gaining a foothold.
Tossing the damp microfiber cloth directly into the laundry prevents grease cross-contamination on kitchen counters.

Stovetop Grease Removal: Comparing Cleaning Solutions
Selecting the correct cleaning agent prevents irreversible damage to your cooktop finish.
The comparison table below outlines the safest, most effective cleaning agents for different range surfaces and grease levels.
| Cleaning Agent | Best Range Surfaces | Grease Cutting Power | Safety & Usage Tips |
|---|---|---|---|
| Warm Water & Dish Soap | Glass, Stainless Steel, Porcelain, Enamel | Moderate (Fresh grease & daily films) | Safe for everyday use; leaves zero residue when rinsed with clean microfiber. |
| Baking Soda Paste (3:1 with water) | Enamel, Burner Caps, Oven Glass, Cast Iron | High (Softens cooked-on oils) | Mildly abrasive; do not use dry on polished glass or brushed stainless steel. |
| Washing Soda (Sodium Carbonate) | Cast Iron Grates, Range Hood Baffles | Very High (Heavy carbonized grease) | Highly alkaline; wear rubber gloves and avoid contact with bare aluminum. |
| Specialty Cooktop Cream Cleaner | Smooth Ceramic Glass Cooktops | High (Bonds and burnt-on mineral stains) | Formulated with micro-fine polishing agents that buff glass without scratching. |
| Distilled White Vinegar Spray | Glass, Outer Trim, Knobs (Light maintenance) | Low to Moderate (Cuts soap scum & fresh oil) | Never apply to unsealed cast iron or natural stone backsplashes due to acidity. |
Always test any new cleaning formula on a small, inconspicuous corner of your range before tackling visible surfaces.
Rinsing with clear water after cleaning removes alkaline residues that can bake into white streaks during future cooking sessions.
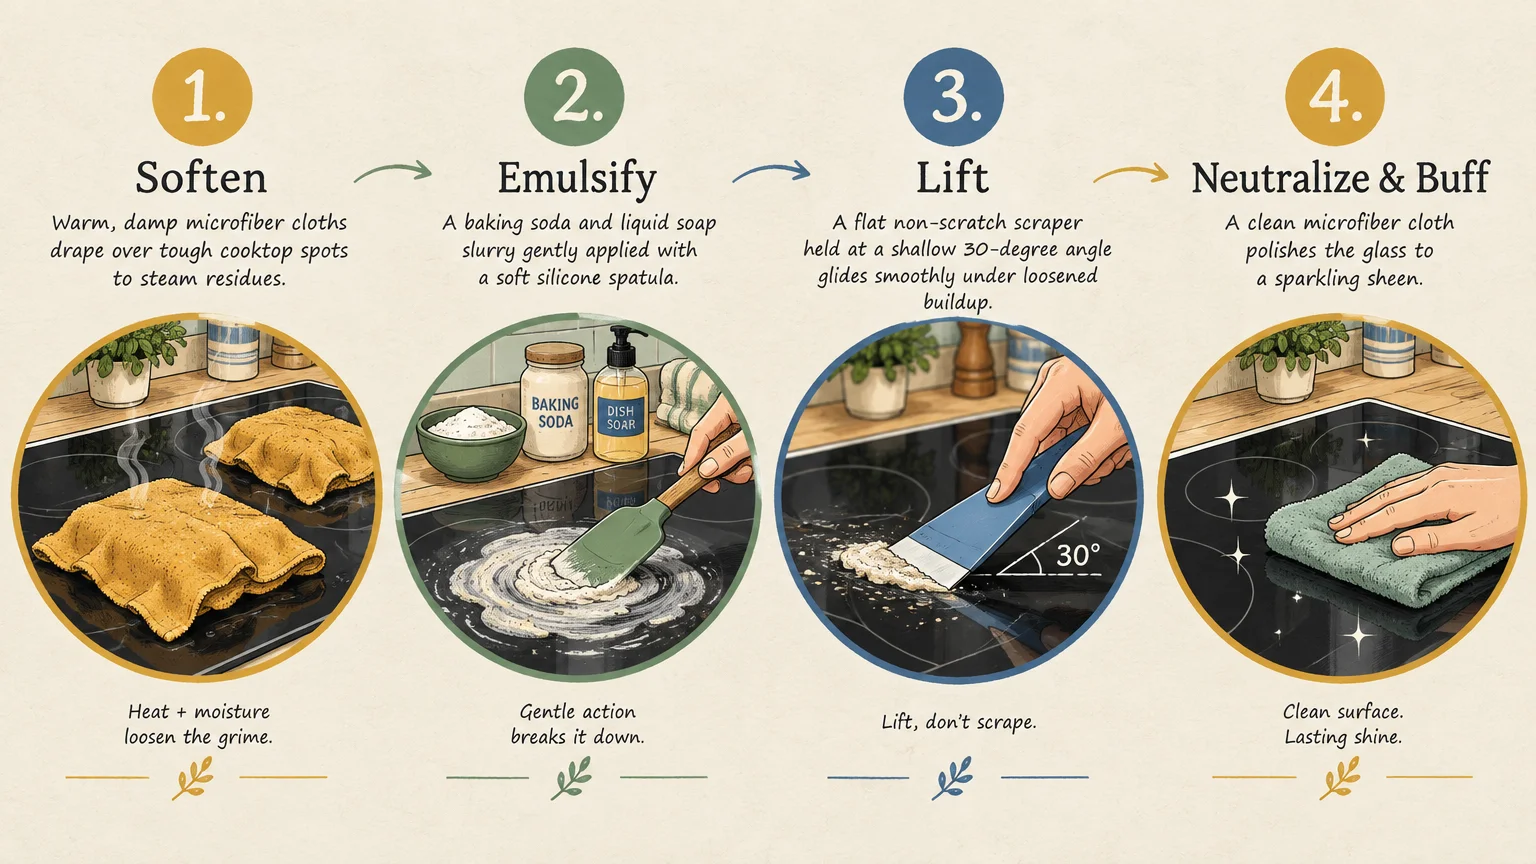
Step-by-Step Deep Degreasing Routine for Heavy Residue
When cooking oils have already baked into stubborn brown stains, follow this systematic routine to restore your cooktop.
This method breaks down hardened fats without scratching delicate surfaces or creating toxic chemical fumes in your home.
- Cut Power and Cool Surfaces: Ensure all heating elements are completely off and cool to the touch before applying liquids.
- Loosen Surface Grime: Lay a warm, damp microfiber towel across the stained area for ten minutes to soften crusty residues.
- Apply Alkaline Paste: Spread a thick paste of baking soda and warm water directly over the problem spots.
- Allow Contact Time: Let the paste sit undisturbed for twenty to thirty minutes so the alkalinity breaks grease bonds.
- Scrub with Non-Scratch Pad: Use circular motions with a silicone sponge or textured microfiber pad to lift softened residue.
- Wipe Clean and Polish: Remove residue with a damp cloth, then buff dry with a fresh microfiber towel to eliminate streaks.
Allowing cleaning agents adequate dwell time does the hard mechanical work for you, protecting your wrists and joints.
For glass cooktops with thick carbon rings, use a single-edge razor blade held flat at a thirty-degree angle while wet.
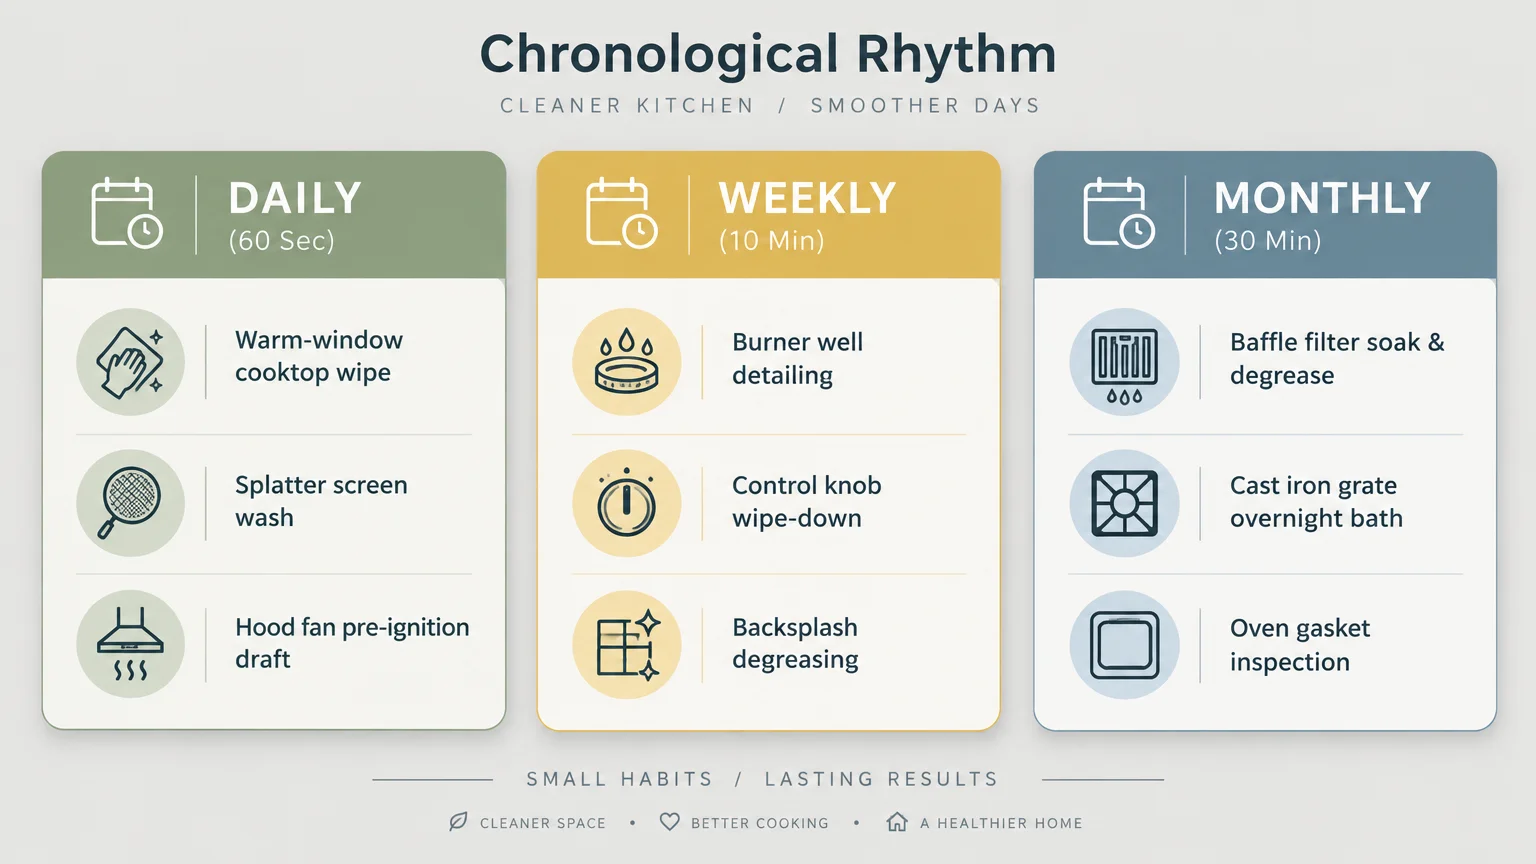
Daily, Weekly, and Monthly Kitchen Cleaning Habits
Consistency matters more than intensity when keeping an oven range spotless.
Organize your range maintenance into distinct intervals to keep kitchen chores manageable and stress-free.
- Daily Habits: Turn on range hood ventilation before heating pans, use splatter shields during sautéing, and execute a sixty-second warm wipe-down after dinner.
- Weekly Habits: Wipe burner control knobs, wash burner drip pans, and degrease the lower four inches of your backsplash tile.
- Monthly Habits: Soak range hood baffle filters in hot washing soda, inspect burner caps for carbon buildup, and wipe exterior oven gaskets.
- Quarterly Habits: Deep-clean the interior oven door glass and vacuum dust around lower range vents to support proper airflow.
Dividing cleaning duties into routine micro-tasks prevents grime from accumulating into overwhelming weekend chores.
Stock your cleaning caddy with microfiber cloths, non-scratch pads, and gentle cleaners right near your cooking station.
Your Next Practical Step
Tonight, take sixty seconds immediately after washing dinner plates to mist and wipe down your cooled range.
Place a splatter screen next to your sauté pans so it remains within arm reach for your next meal.