Keeping a home consistently clean does not require endless daily scrubbing when you pace out the heavy lifting. By scheduling specific deep-cleaning jobs just four times a year, you preserve your appliances, protect your indoor air quality, and keep your spaces feeling fresh without burnout. A seasonal routine shifts your focus from putting out fires to steady, predictable maintenance. Rather than waiting until the refrigerator struggles to stay cold or the washing machine smells sour, you can tackle these tasks proactively. This approach saves money on utility bills and expensive repairs, leaving you with a home that runs smoothly year-round. All it takes is a reliable system to help you remember what needs doing and when.
Vacuum the Refrigerator Condenser Coils
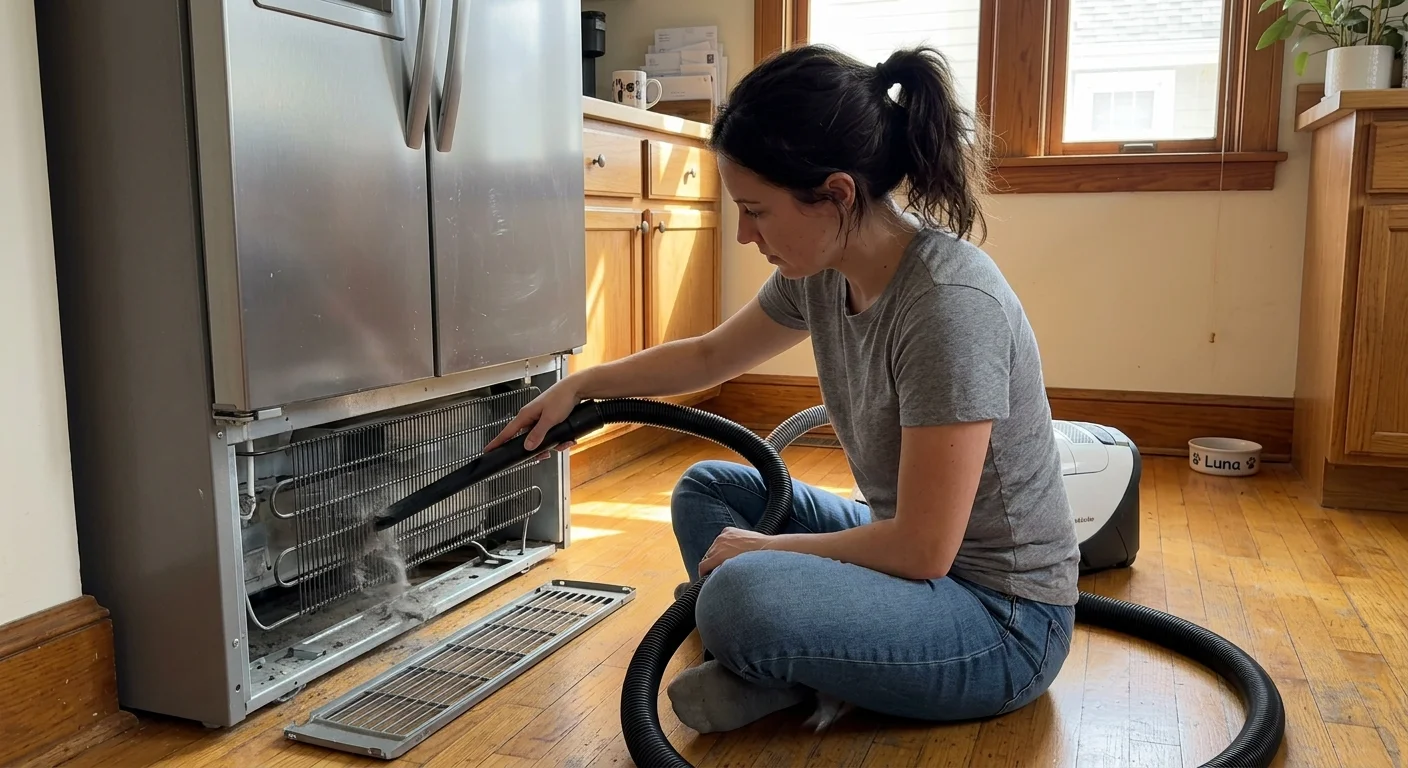
Dust, pet hair, and lint inevitably gather on the condenser coils located at the back or underneath your refrigerator. When this debris blankets the coils, the compressor works overtime to release heat. This strain not only shortens the appliance’s lifespan but also spikes your electricity costs. The U.S. Department of Energy notes that dirty coils force your refrigerator to use up to 35 percent more energy to maintain safe food temperatures.
Depending on your model, the condenser coils are either hidden behind a snap-off base grille at the bottom front of the unit, or they are mounted on the back exterior panel. Unplug the refrigerator before beginning any maintenance to ensure your safety. If the coils sit at the bottom, carefully pop off the front base grille. You will likely see a thick layer of gray fuzz. Use a specialized, long, flexible coil brush to gently loosen the compacted dust from deep within the narrow gaps. Follow up immediately with a vacuum hose crevice attachment to suck up the loosened debris before it floats across your kitchen floor.
If your coils are mounted on the back of the appliance, carefully pull the unit away from the wall. You can vacuum these exposed coils directly using a soft dusting brush attachment. Perform this quick task every three months to keep the refrigerator running silently and efficiently.
Degrease the Kitchen Exhaust Hood Filter
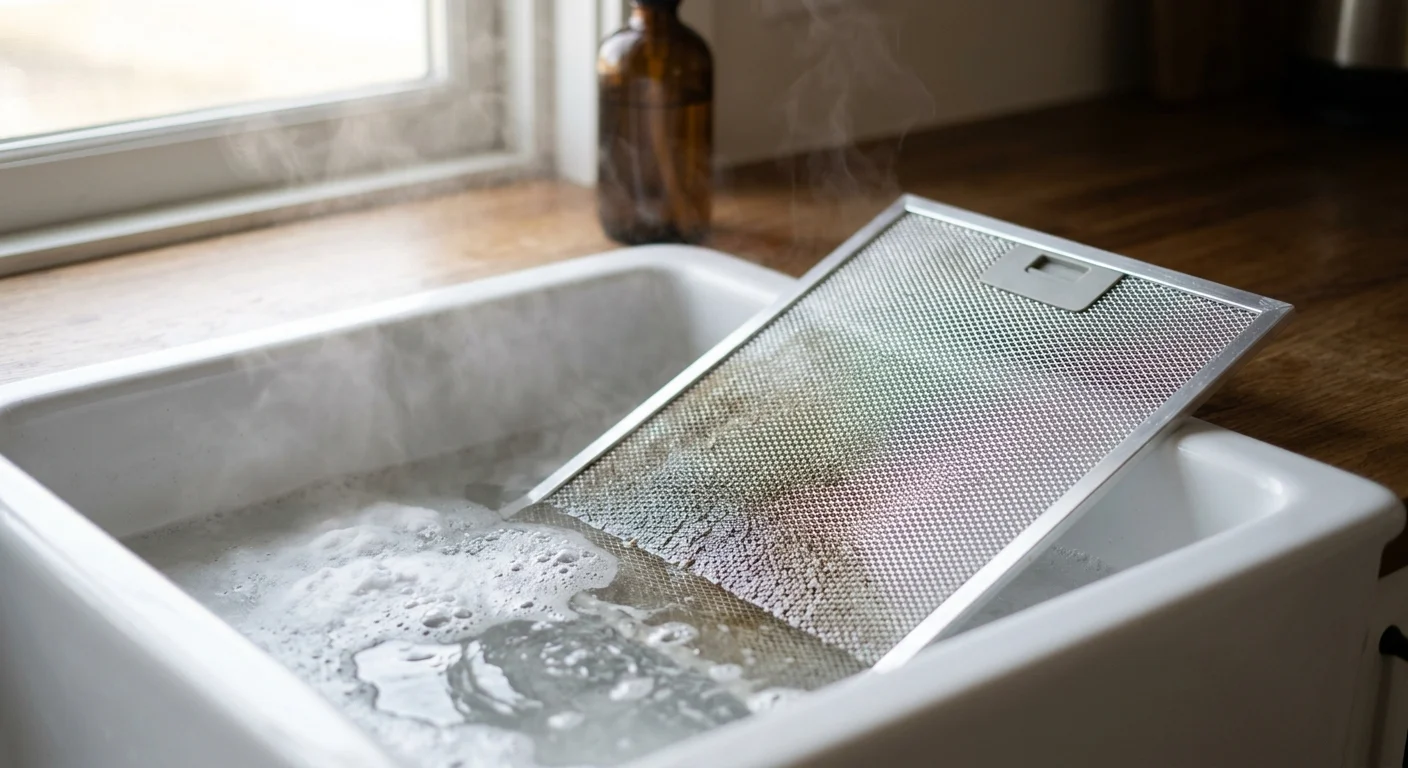
Your range hood captures cooking steam, smoke, and airborne grease. Over three months of regular cooking, that metal filter transforms into a sticky, clogged barrier. A blocked filter forces grease to settle on your surrounding cabinets and walls, but more importantly, it creates a severe safety risk. The Federal Emergency Management Agency (FEMA) warns that cooking equipment is the leading cause of home fires, and a grease-saturated hood filter acts as prime fuel if a stovetop flare-up occurs.
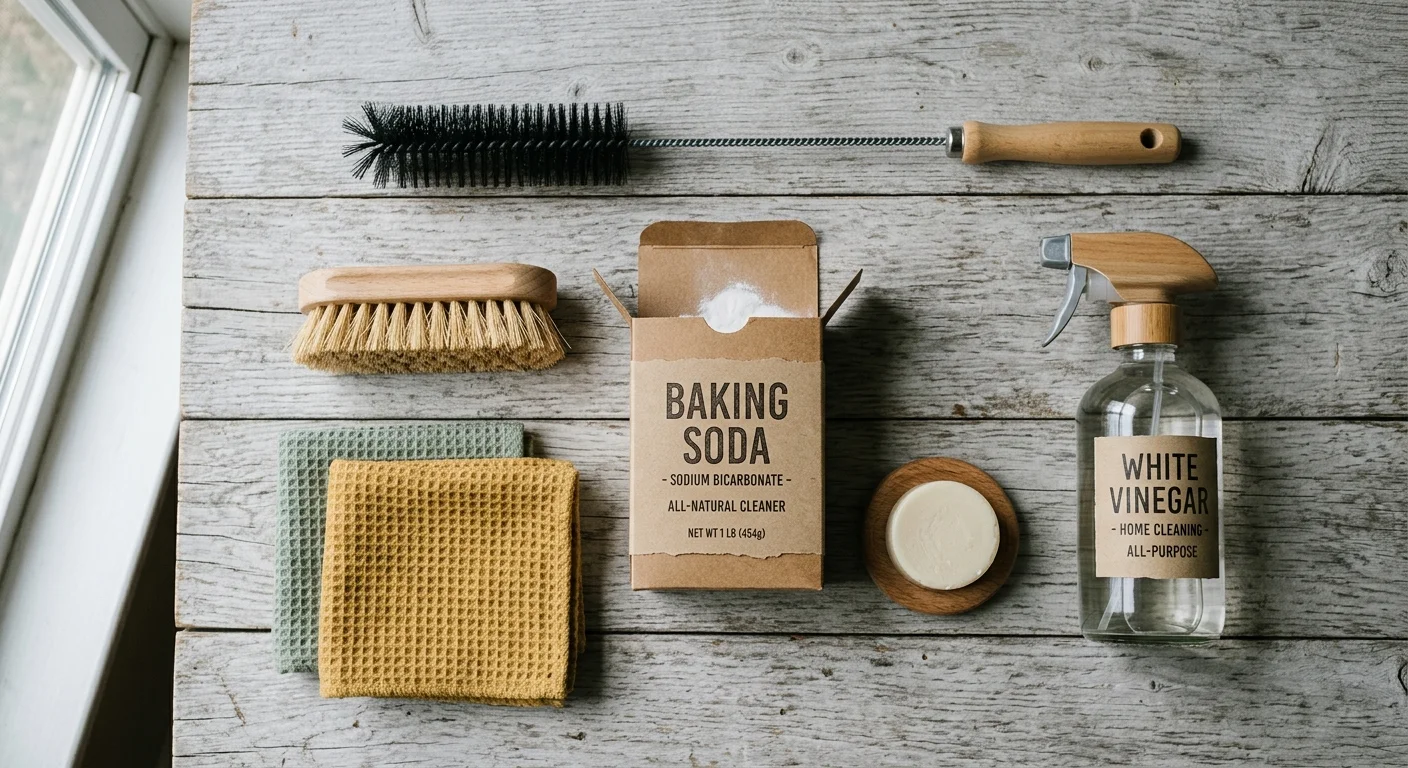
Remove the metal baffle or mesh filters from the underside of the hood. Fill your kitchen sink with boiling hot water, a generous squirt of grease-cutting dish soap, and a quarter-cup of baking soda. Submerge the filters and let them soak for fifteen minutes to dissolve the bonded grease. Use a soft-bristled brush to scrub away the remaining residue gently, rinse thoroughly with hot water, and let them air-dry completely before reinstalling.
If your kitchen features a ductless range hood that recirculates air rather than venting it outside, you will also have charcoal filters installed behind the metal grilles. While you can wash the metal mesh, charcoal filters cannot be cleaned. Swap these disposable filters out for fresh ones on this exact same seasonal schedule. Doing so ensures your kitchen smells like fresh air rather than last week’s dinner.
Descale the Washing Machine and Dishwasher
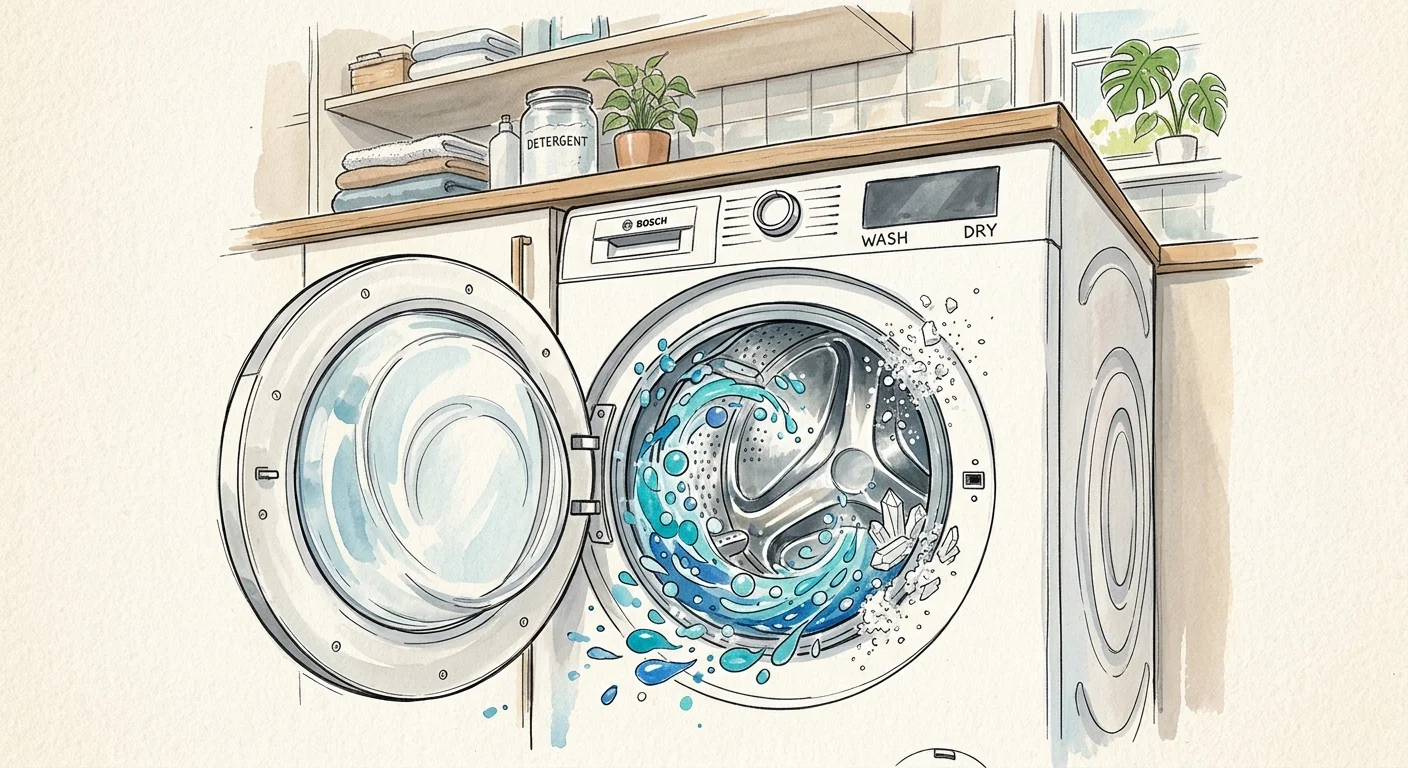
Hard water minerals, detergent residue, and trapped moisture create the perfect breeding ground for mold and foul odors inside your washing machine and dishwasher. Ignoring these hidden areas leads to dingy clothes and spotty dishes. Many homeowners try to run a cycle with white vinegar to solve the problem; however, Consumer Reports experts advise against using straight vinegar in your washing machine, as the high acidity can degrade internal rubber seals and hoses over time.
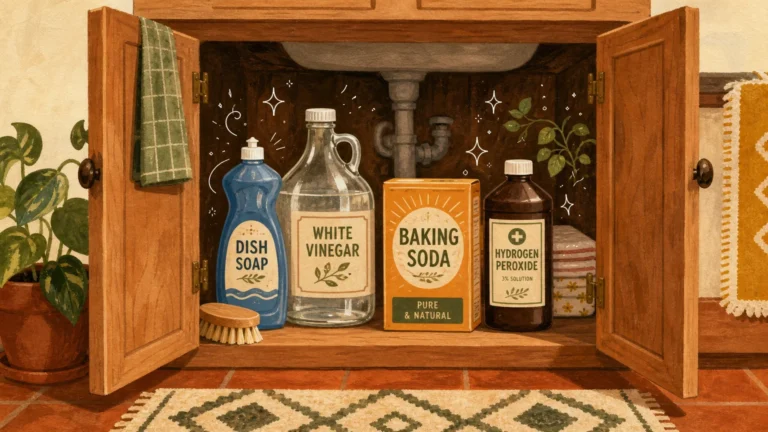
Instead, use a specialized descaling tablet formulated to break down mineral scale safely. Look for products featuring the EPA Safer Choice label to ensure the ingredients are effective yet safe for municipal water supplies and septic systems.
Front-loading washing machines require extra vigilance because their design relies on a thick rubber door gasket to prevent leaks. This gasket features deep folds where water, hair, and lint pool. Before running your descaling cycle, gently peel back the rubber seal and wipe out the trapped debris using a damp rag. Empty your washing machine completely, toss a descaling tablet directly into the drum, and run a hot water cycle. Repeat this process for your dishwasher by placing a tablet in the detergent dispenser and running a heavy-duty cycle without dishes.

Flip, Rotate, and Vacuum Your Mattresses
We spend a third of our lives in bed, shedding microscopic skin cells every night. These skin cells serve as a primary food source for dust mites. While you cannot entirely eliminate these pests, you can control their population through seasonal maintenance. The American Lung Association reports that dust mites are a major trigger for indoor allergies and asthma, and they thrive deep within warm, soft materials like your mattress.
Before you run the vacuum over the fabric, address any localized stains. Sweat and body oils can leave yellowing marks on the surface. Create a simple spot-cleaning solution using equal parts hydrogen peroxide, liquid dish soap, and baking soda. Dab the solution onto the stains with a clean cloth—never pour liquid directly onto the bed, as saturating the inner foam encourages mold growth. Let the mixture sit for twenty minutes, then wipe it away with a barely damp cloth.
Strip the bed completely and wash all bedding in hot water. Use your vacuum cleaner’s upholstery attachment to methodically vacuum the entire surface of the bare mattress. Pay special attention to the piping and seams where skin cells accumulate most heavily. Once vacuumed, rotate the mattress 180 degrees so the head becomes the foot. This rotation prevents permanent body impressions from forming and extends the structural integrity of the bed.

Wash Windows, Screens, and Window Treatments
Natural light transforms the feel of a room, but a gradual buildup of pollen, hard water spots, and atmospheric dirt dulls your windows. Cleaning the glass only solves half the problem. Dirty screens act like a neglected air filter; every time you open the window, the breeze pushes accumulated dust straight into your home.
Do not forget the window tracks. When you slide the window open, the lower track catches dead insects, dirt, and moisture, turning into a stubborn sludge. Before washing the glass, use your vacuum’s crevice tool to suck up the loose, dry debris from the tracks. Sprinkle a light layer of baking soda directly into the track, pour a splash of white vinegar over it, and let it fizz for a few minutes to loosen the caked-on dirt. Scrub the tight corners with an old toothbrush, then wipe the track clean with a microfiber rag.
Remove the screens and take them outside. Gently scrub them with a soft brush and soapy water, then rinse them clean with a hose. Choose an overcast day to wash the windows—direct sunlight dries the cleaning solution too quickly, leaving stubborn streaks behind. Use a squeegee rather than paper towels to wipe the glass clear; it saves time and prevents lint residue. Finally, pull down fabric curtains and run them through a gentle wash cycle.
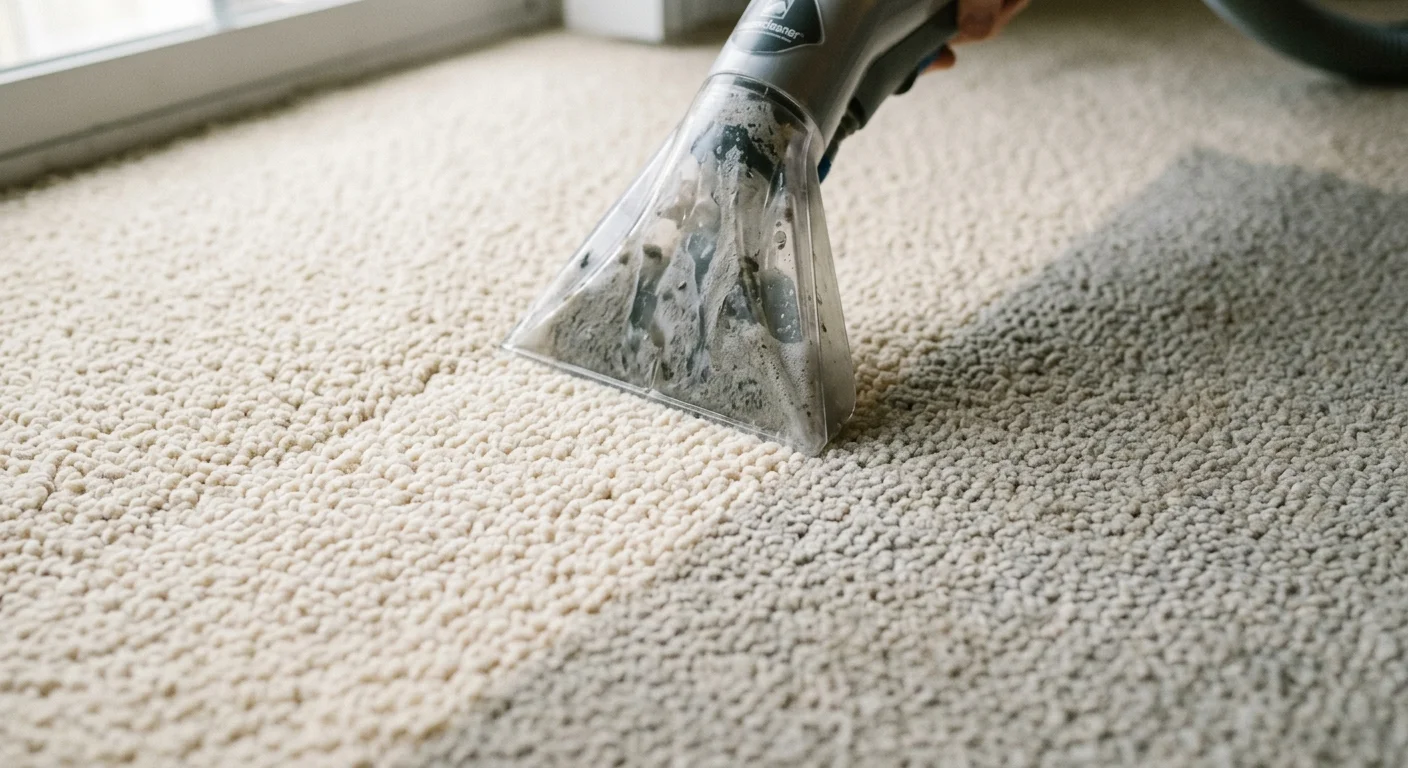
Deep-Clean Carpets and Upholstery
Daily vacuuming pulls up loose surface debris, but it cannot reach the abrasive dirt particles embedded near the backing of your carpet or the core of your sofa cushions. These hidden particles act like microscopic sandpaper, grinding against the fabric fibers every time you walk or sit. Over time, this friction causes premature wear, matting, and visible traffic lanes in your living spaces.
Rent a professional-grade carpet extractor or use a personal spot-cleaning machine to flush out this deep-seated grime. Pretreat heavily soiled areas and traffic lanes with an enzyme-based cleaner to break down organic proteins and oils. Pull the extractor wand slowly across the carpet to recover as much moisture as possible; leaving the carpet too wet encourages mildew growth. Set up floor fans to circulate the air and speed up the drying time.
When executing this seasonal deep clean, do not just clean around your couches and coffee tables. Enlist a partner to help you physically move the heavy furniture out of the room. This allows you to extract the dust that settles underneath and prevents permanent physical indentations from the furniture legs. Place plastic furniture sliders or small squares of aluminum foil under the legs when moving the pieces back; this prevents wood stain or rust from transferring onto the damp carpet fibers as they dry.

Dust High Fixtures and Air Vents
When tackling weekly chores, most people focus entirely on eye-level surfaces and floors. As a result, the highest points in your home quietly gather thick layers of dust. Ceiling fans, lighting fixtures, crown molding, and HVAC supply registers require deliberate attention every three months to stop this dust from raining down on your freshly cleaned rooms.
Attach a microfiber duster to an extension pole to reach these heights without balancing precariously on a step stool. For ceiling fans, slide an old, damp pillowcase over each individual blade and pull it back toward you. The pillowcase traps the dust inside the fabric, preventing it from floating through the air and settling onto your furniture. Take down any removable glass globes from your pendant lights or chandeliers and wash them in warm, soapy water to restore their brilliance.
Finally, vacuum the slatted covers of your air vents. Dust clogs these registers, forcing your heating and cooling systems to work harder to push air into the room. Keeping them clear maintains unobstructed airflow, which improves your indoor air quality and keeps your home at a comfortable temperature year-round.

Systematize the Process: How to Remember Your Schedule
Knowing what to clean matters very little if you forget to do it. Relying on your memory leads to missed tasks, turning a simple seasonal chore into a heavy burden of built-up grime. You need a frictionless system that triggers the right action at the right time.
Tie these chores to a specific, recurring event. For example, use the changing of the seasons or the start of a new fiscal quarter. If you prefer a digital approach, create a recurring event in your smartphone’s calendar app. Set the alert for a weekend morning when you actually have the energy and time to complete the work.
To make the process even smoother, group the tasks by the physical tools required. You can knock out the mattress vacuuming, high-fixture dusting, and refrigerator coil cleaning in one continuous flow because they all utilize different attachments on your vacuum cleaner.
Seasonal Cleaning Reference Guide
| Cleaning Task | Primary Tool Required | Estimated Time | Why It Matters |
|---|---|---|---|
| Refrigerator Coils | Flexible coil brush & vacuum | 15 minutes | Reduces utility bills and prevents compressor failure. |
| Exhaust Hood Filters | Degreasing dish soap & hot water | 20 minutes (plus soak time) | Removes fire hazards and traps airborne grease. |
| Descaling Appliances | EPA Safer Choice tablets | 10 minutes (active time) | Prevents mineral buildup and eliminates sour odors. |
| Mattress Maintenance | Vacuum upholstery attachment | 15 minutes | Reduces dust mite populations and prevents body impressions. |
| Windows and Tracks | Squeegee & old toothbrush | 45 minutes | Improves natural lighting and stops indoor dust blow-in. |
| Carpet Deep Extraction | Carpet cleaning machine | 60+ minutes | Pulls out abrasive dirt that degrades carpet fibers. |
| High Fixtures & Vents | Extension duster & pillowcase | 20 minutes | Stops accumulated dust from falling onto clean surfaces. |
The Quarterly Deep Clean Checklist
Complete this sequence over a single weekend every three months:
- Step 1: Prep and Wash. Strip the beds, remove the window curtains, and start running the laundry cycles. Toss your washing machine descaler into the drum once the fabrics are done.
- Step 2: Soak the Grease. Remove the kitchen exhaust filter and submerge it in hot, soapy water in the sink.
- Step 3: Dust the Heights. Use an extension pole to wipe down ceiling fans, crown molding, and HVAC registers.
- Step 4: Vacuum the Unseen. Pull out the refrigerator to vacuum the coils, then head to the bedroom to vacuum the bare mattress.
- Step 5: Rotate and Flip. Turn your mattress 180 degrees and put fresh bedding on.
- Step 6: Clear the Glass. Wash the windows and screens, re-hanging the clean curtains afterward.
- Step 7: Extract the Floors. Finish the weekend by deep-cleaning the carpets and upholstery, setting up fans to dry the rooms.
Ensure You Always Have the Right Supplies
A major roadblock to seasonal cleaning is discovering you lack the necessary supplies right when you find the motivation to start. You end up abandoning the task entirely rather than running out to the store.
Keep a dedicated caddy specifically for your quarterly deep-cleaning supplies. Stock it with your descaling tablets, a coil-cleaning brush, heavy-duty grease cutter, and fresh vacuum bags. When you finish your seasonal tasks, immediately replace any depleted items so the caddy is ready for the next round. This proactive step removes the friction of starting.
Take five minutes right now to open your smartphone’s calendar, navigate to the first Saturday of the upcoming new season, and block out two hours to execute your newly established quarterly deep clean.