Upgrading your bathroom vanity gives you the visual impact of a full remodel without the immense cost or weeks of dust. You interact with your bathroom sink every morning, making it the perfect starting point for practical improvements that streamline your routine. Small changes—like swapping out frustrating hardware, rolling on a fresh coat of low-emission paint, or installing an efficient faucet—radically shift how the room looks and functions. These specific modifications elevate the style of the space while improving accessibility, boosting indoor safety, and conserving resources. Whether you are aiming for a modern refresh or need to adapt your home for easier use, focus your energy on these five highly effective updates.

Paint the Cabinet Base to Anchor Your Bathroom Makeover
If your vanity cabinet structure remains solid, replacing it completely wastes money and sends good wood to the landfill. Painting the existing base is the most dramatic interior design shift you can execute in a single weekend. However, bathroom environments present unique challenges; humidity, fluctuating temperatures, and constant water splashes ruin standard wall paint within months. You must select durable products specifically engineered for cabinetry.
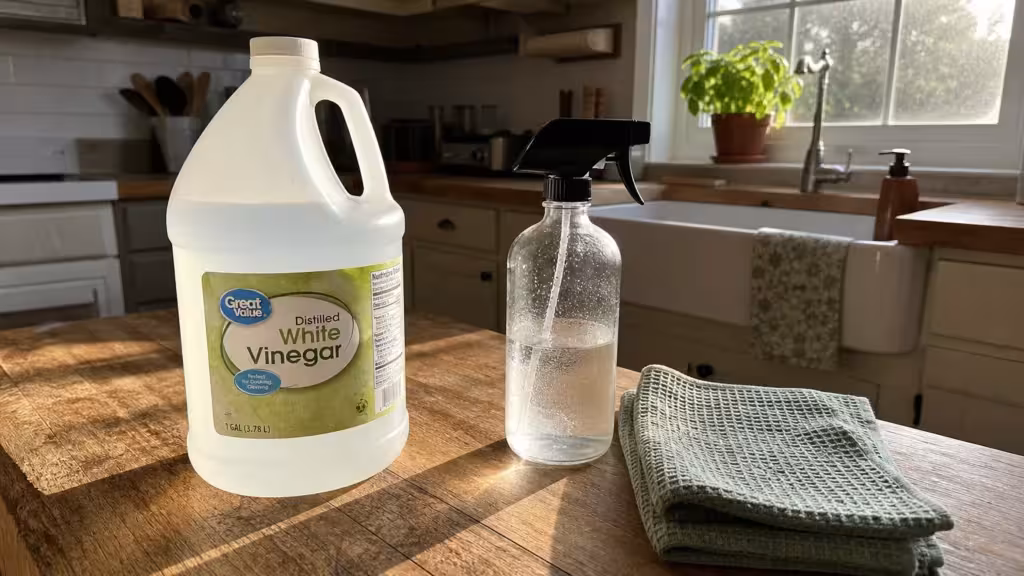
Urethane alkyd enamel represents the gold standard for painting bathroom vanities. This hybrid formula provides the smooth, hard finish of an oil-based paint but cleans up easily with water like an acrylic. It resists scuffs, chipping, and water damage far better than traditional latex paint. It also self-levels, meaning brush marks melt away as the paint dries, leaving a factory-like finish.
When selecting your paint, pay close attention to the formulation’s chemical emissions. Standard wall paints and cheap primers release chemical gases as they cure, significantly impacting your home’s air quality. The Environmental Protection Agency notes that indoor levels of volatile organic compounds (VOCs) frequently measure two to five times higher than outdoor levels. Because bathrooms typically lack expansive ventilation, using low-VOC or zero-VOC urethane enamels protects your respiratory health while providing a beautiful, durable finish.
Step-by-Step Cabinet Painting Process
- Remove doors and hardware: Take off all cabinet doors, drawers, and hinges. Label each piece with a strip of painter’s tape hidden inside the hinge hole so you know exactly where it goes during reassembly. Do not try to paint around attached hardware.
- Clean and degrease: Scrub every surface with a heavy-duty degreaser or a trisodium phosphate (TSP) substitute. Bathroom cabinets collect hairspray, lotion, and soap scum that prevent paint from adhering. Rinse thoroughly with a damp rag.
- Repair imperfections: If your old cabinet doors feature deep scratches or gouges, fill them with a high-quality wood filler before sanding. Press the filler into the crack with a putty knife, let it dry completely, and sand it flush with the surrounding wood.
- Scuff sand the surfaces: Lightly sand the wood or laminate with 120-grit sandpaper. You do not need to strip the old finish completely down to bare wood; you only need to remove the glossy sheen so the primer can grip the surface. Use a flexible sanding sponge to get into the grooves of paneled doors.
- Apply a bonding primer: Roll on a high-quality bonding primer using a high-density foam roller. If you are painting over a dark wood stain or slick laminate, an extreme-bond primer guarantees your topcoat will not peel. Allow the primer to dry completely according to the manufacturer’s instructions.
- Sand and paint: Lightly sand the dried primer with 220-grit sandpaper for a glass-smooth finish. Wipe away the dust with a tack cloth, then apply two thin coats of your chosen cabinet enamel. Wait at least four hours between coats, resisting the urge to touch up wet spots.
Upgrade to Lever-Style Hardware for Better Ergonomics
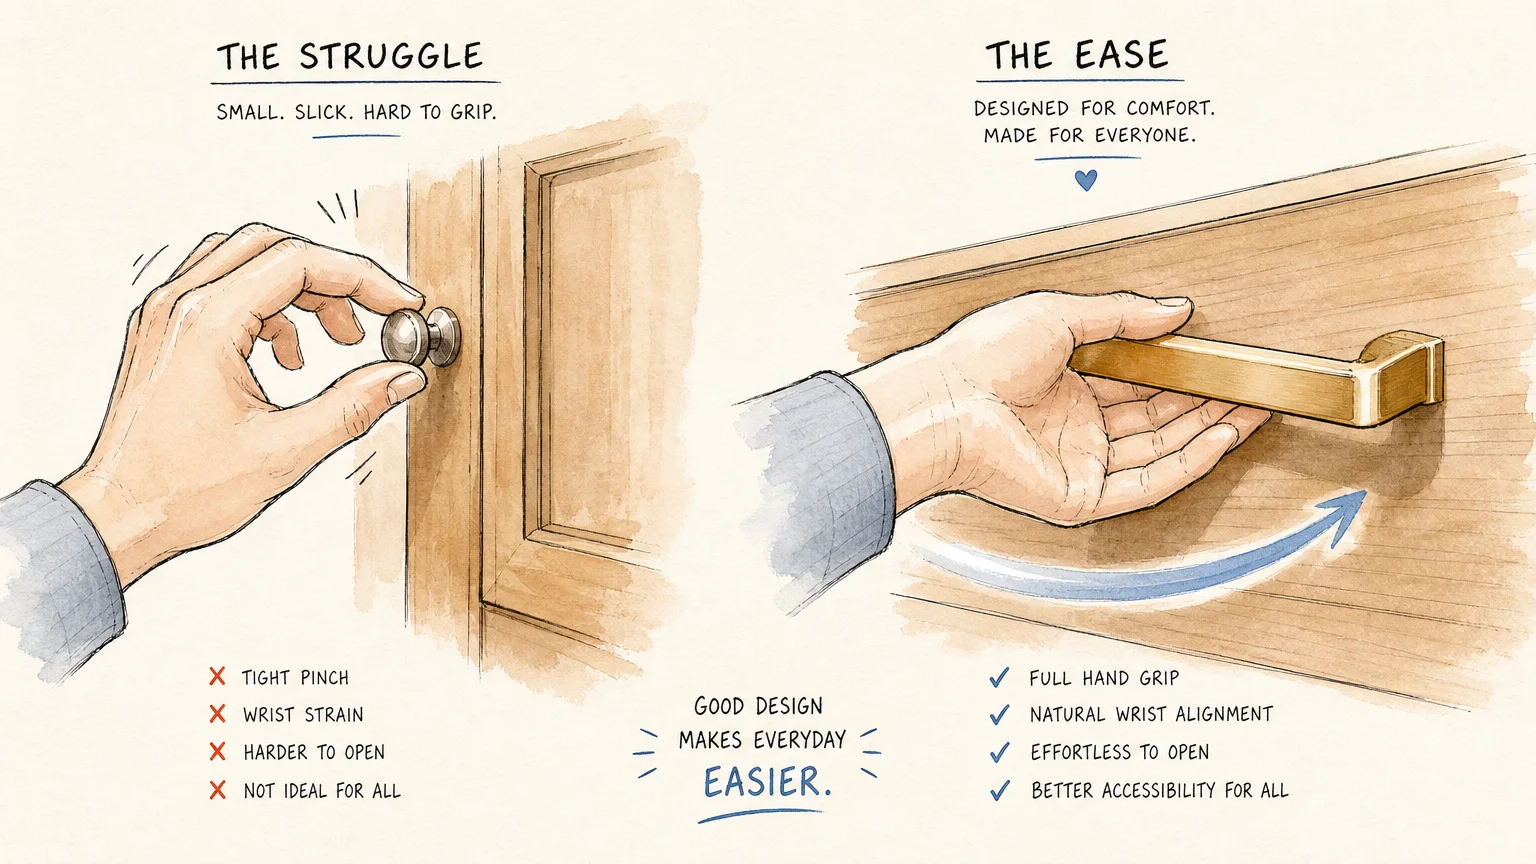
Doorknobs and small, spherical cabinet pulls look traditional, but they often fail when it comes to daily functionality. If you have wet hands, arthritis, or limited grip strength, turning a round knob becomes a frustrating and painful experience. Replacing your outdated bathroom vanity hardware with lever-style handles and elongated drawer pulls instantly modernizes the space and greatly enhances usability.
Ergonomic hardware design plays a major role in keeping older adults safe and independent in their own homes. The Americans with Disabilities Act (ADA) guidelines specifically require operable parts that do not necessitate tight grasping, pinching, or twisting of the wrist. A proper lever handle allows you to open a heavy cabinet door using just the side of your hand, your forearm, or a single finger. This universal design approach benefits everyone, from toddlers learning to wash their hands to adults rushing through their morning routines.
When shopping for new hardware, pay attention to the projection and clearance. You need enough space behind the pull to comfortably slide your fingers through without scraping your knuckles against the wood. Opt for pulls with at least one inch of clearance.
If you are changing from a single-hole knob to a wider bar pull, you will need to drill new holes. Use a plastic cabinet hardware template jig to ensure your drill holes are perfectly aligned. If you want to cover up old holes or scratches from previous hardware without breaking out wood filler and paint, look for hardware that includes backplates. Backplates rest behind the knob or lever, acting as a decorative shield that hides imperfections while adding an elegant architectural detail.
To ensure a cohesive bathroom remodel, match the finish of your new cabinet pulls to your plumbing fixtures and lighting. Matte black provides a stark, modern contrast against white or light gray cabinets, while brushed nickel and champagne bronze hide water spots and fingerprints beautifully.
| Hardware Type | Usability | Ergonomic Benefit | Best Application |
|---|---|---|---|
| Traditional Round Knobs | Requires firm grip and wrist rotation | Low; difficult for wet or painful hands | Lightly used decorative spaces |
| Bar Pulls | Requires simple hooking motion | High; allows full hand engagement | Heavy bottom drawers |
| Lever Handles (Doors) | Push or pull action | Very High; no grip strength required | Main vanity cabinet doors |
Install a Water-Efficient Faucet to Lower Utility Bills
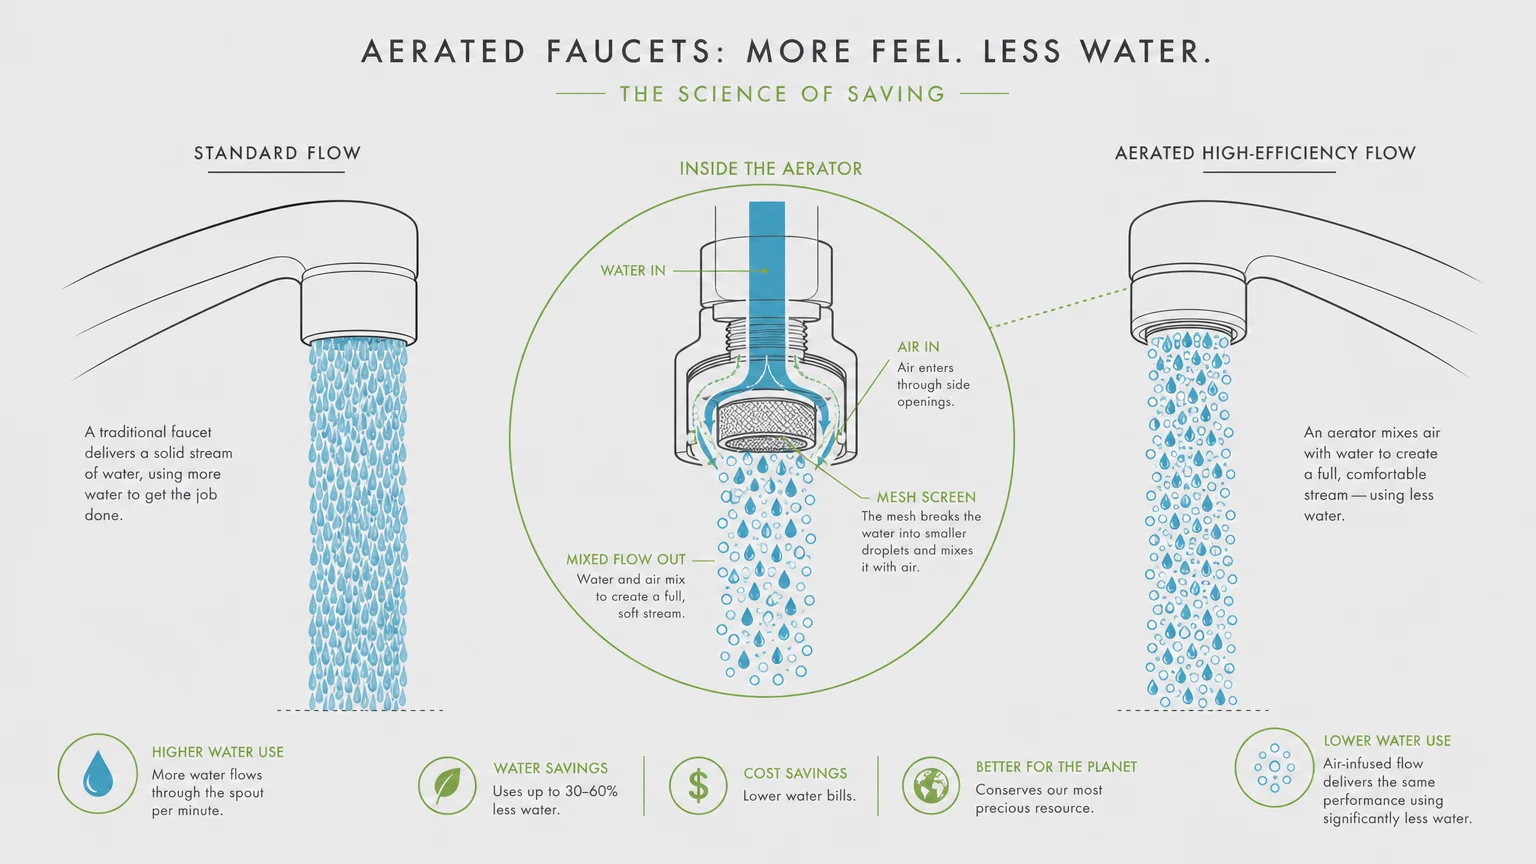
Your bathroom faucet runs multiple times a day for handwashing, toothbrushing, and face washing. If you live in an older home, your current fixture likely wastes gallons of water every single minute. Swapping out a leaky, outdated faucet for a modern, high-efficiency model transforms the look of your vanity deck while immediately reducing your monthly utility expenses.
Always check the flow rate before purchasing a new fixture. The EPA WaterSense program certifies bathroom sink faucets that use a maximum of 1.5 gallons per minute. By replacing an older 2.2-gallon-per-minute faucet with a WaterSense-labeled model, you decrease your sink’s water flow by 30 percent without sacrificing performance or water pressure. The internal aerators in these modern fixtures mix air into the water stream, creating a robust spray that feels identical to a high-flow faucet but uses a fraction of the resource.
Look for faucets featuring ceramic disc valves. Unlike older rubber washers that wear out and cause persistent dripping, ceramic discs form a watertight seal that lasts for decades without maintenance. You should also consider the configuration of your sink deck before making a purchase. If your countertop features a single hole, buy a single-handle faucet. Single-handle faucets offer superior functionality because you can control both the temperature and the flow rate with one hand—another excellent ergonomic upgrade. If your sink has three holes spaced four inches apart, you need a centerset faucet. For holes spaced eight inches apart, a widespread faucet is required.
Replacing a faucet is a straightforward home improvement task you can complete in a few hours. Here is how you tackle it:
- Turn off the water supply valves located inside the vanity cabinet. Turn on the old faucet to relieve any remaining pressure in the lines.
- Disconnect the old supply lines using an adjustable wrench and unscrew the mounting nuts holding the old faucet in place under the sink deck.
- Lift the old faucet out and clean the countertop thoroughly to remove years of hidden grime and hard water buildup.
- While the faucet is out, consider swapping out the sink’s pop-up drain and inspecting the P-trap beneath the sink for any clogs or leaks.
- Insert the new faucet through the mounting holes, secure the new nuts from below, and attach the fresh supply lines. Turn the water back on and check for drips.
Replace the Vanity Top and Sink for Superior Hygiene
A cracked, stained, or dated vanity top immediately drags down the aesthetic of your entire bathroom. Old grout lines on tile countertops harbor bacteria and mold, while cultured marble from previous decades often develops yellowing and micro-scratches. Replacing just the countertop and sink breathes new life into your bathroom remodel, upgrading both hygiene and visual appeal without the expense of a custom cabinet build.
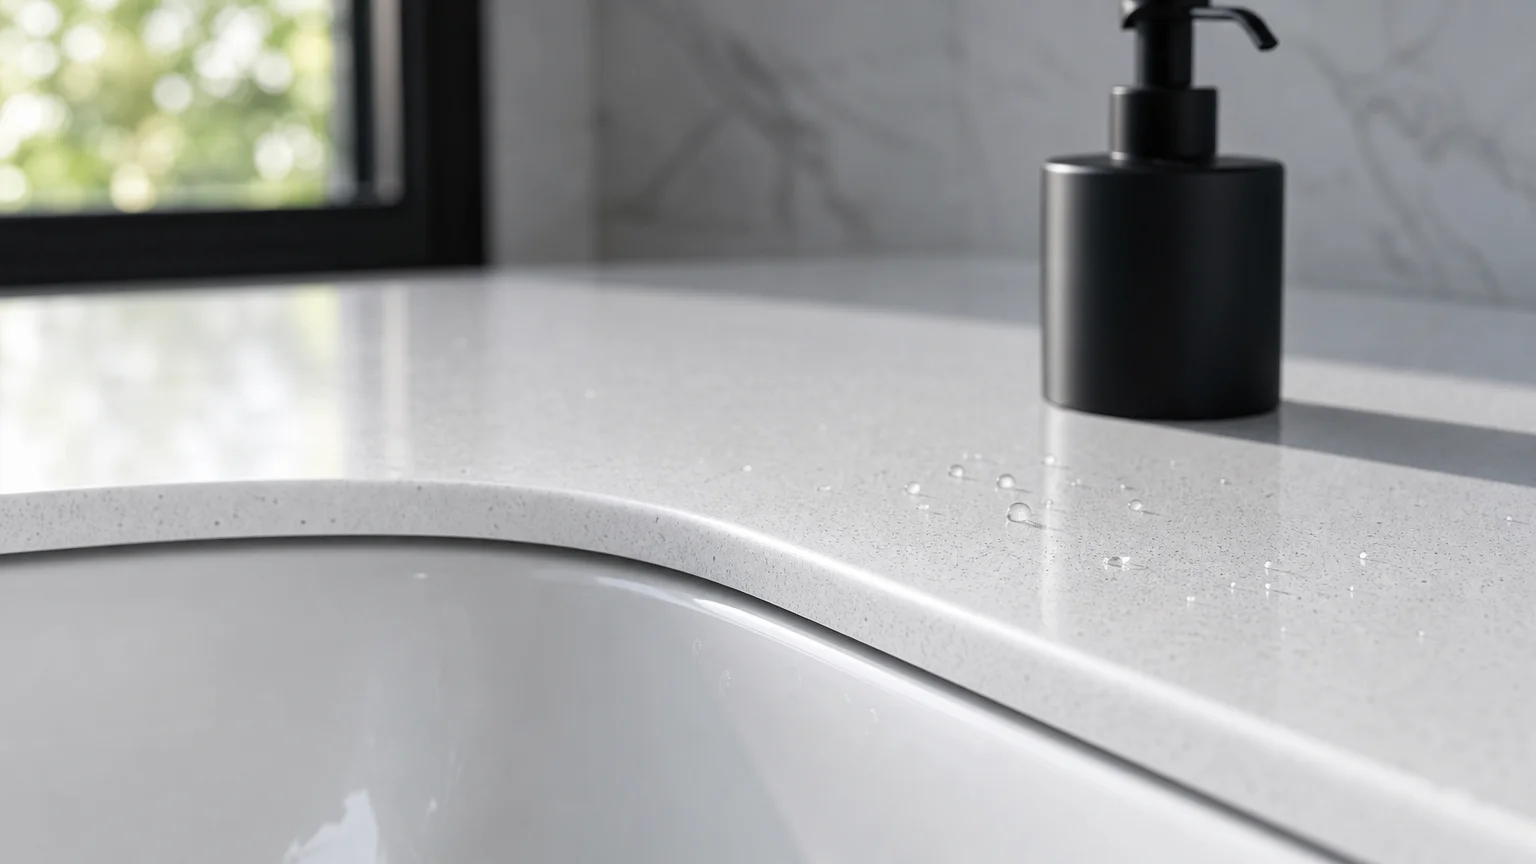
When selecting a new vanity top, prioritize non-porous materials. Quartz represents one of the best investments for a bathroom vanity. Because quartz is an engineered stone manufactured with resin, it never requires sealing. It completely resists water penetration, makeup stains, and bacterial growth. Solid surface materials offer similar non-porous benefits and allow for seamless, integrated sinks where the bowl and the counter consist of one continuous piece.
If you opt for a separate sink, always choose an undermount model rather than a drop-in basin. Drop-in sinks feature a raised lip that rests on top of the counter. This lip creates a physical barrier that traps water, toothpaste, and soap scum, making daily cleaning a chore. An undermount sink attaches beneath the countertop, allowing you to sweep water and debris directly into the bowl with a single swipe of a sponge.
Upgrading your vanity top also offers excellent financial returns. Buyers recognize the value of a clean, modern, and low-maintenance bathroom surface. When ordering a new top, measure your existing vanity base carefully. The countertop should overhang the base cabinet by about half an inch on the front and on any exposed sides. If your vanity sits flush against a side wall, you will also need to order a side splash piece to match your back splash, preventing water from seeping down the wall cavity.
Improve Vanity Lighting and Verify Electrical Safety
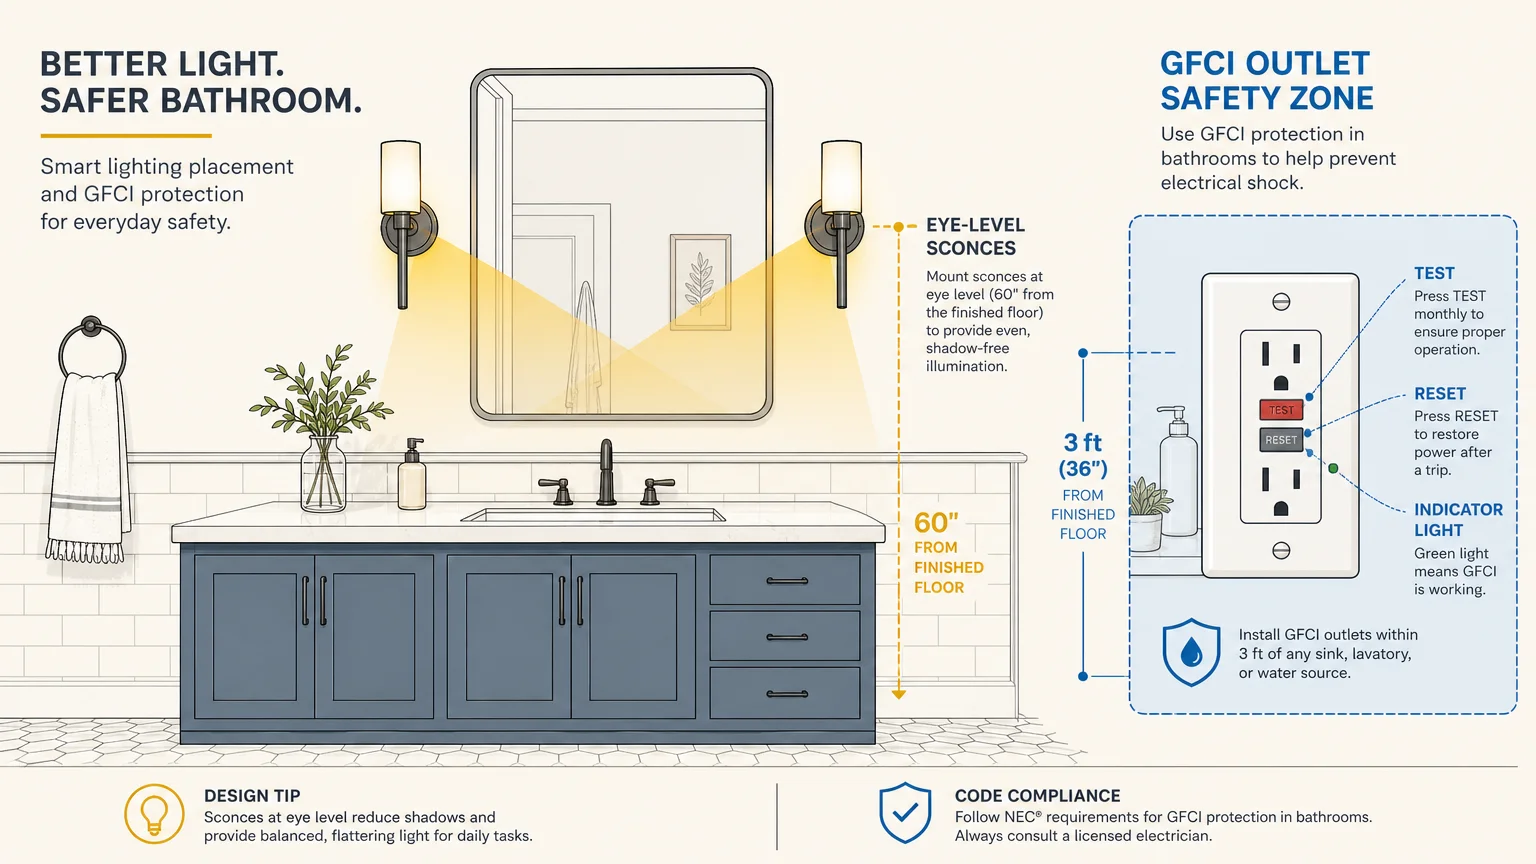
Lighting dictates how your bathroom looks and how effectively you can use the mirror. A beautiful vanity goes unnoticed if the room feels dark and shadowy. Most builder-grade bathrooms rely on a single, harsh light fixture mounted directly above the mirror. This top-down lighting casts heavy shadows under your eyes, nose, and chin, making shaving and makeup application incredibly difficult.
To achieve interior design perfection, you must layer your bathroom lighting. Instead of relying solely on an overhead fixture, install wall sconces on either side of your vanity mirror. Placing lights at eye level provides even, cross-directional illumination that eliminates unflattering facial shadows. If you do not have the wall space to add side sconces, select an overhead vanity light featuring frosted glass shades rather than clear glass. Frosted shades diffuse the light, softening the glare and creating a much more forgiving illumination pattern.
Choose LED bulbs with a color temperature between 3000K and 4000K. This range mimics natural daylight, ensuring that the colors you see in the mirror look accurate when you step outside. Adding a dimmer switch to your new vanity lighting acts as a brilliant functional upgrade. A dimmer allows you to turn the lights down low during middle-of-the-night bathroom trips, keeping your brain relaxed so you can fall right back asleep.
Electrical safety around the bathroom vanity requires strict attention. Because you use hair dryers, electric razors, and styling tools directly next to a water source, your vanity area presents a significant shock hazard. Open your vanity cabinet and look at the wall outlet. It must be a Ground Fault Circuit Interrupter (GFCI) receptacle.
GFCI outlets constantly monitor the electrical current flowing through a circuit. If the device detects even a tiny imbalance—such as electricity attempting to flow through water or a person—it cuts the power in a fraction of a second, preventing severe injury. If your vanity currently uses standard outlets, hire a licensed electrician to upgrade them immediately. Upgrading to GFCI protection is a non-negotiable safety update for any home improvement project involving plumbing and electricity. Ensure all new light fixtures are damp-rated or wet-rated, depending on how close they sit to the shower or tub.
Open your bathroom cabinet today and check the water shut-off valves. If they turn easily, you are ready to start your first plumbing upgrade this weekend. Choose one small update right now—like ordering new lever handles or purchasing a high-density paint roller—and take your first practical step toward a completely refreshed space.