Transforming the dark cavern beneath your bathroom sink into an accessible storage hub instantly makes your daily routines smoother and less stressful. You can reclaim this notoriously awkward space using specific strategies designed around intrusive plumbing pipes and deep cabinet corners. Cramped vanities often become dumping grounds for half-empty bottles and forgotten cleaning supplies, but calculated changes will maximize every square inch. Whether you deal with a tiny apartment vanity or inaccessible shelves, installing the right under sink organizers solves the problem. By implementing tiered systems, sliding drawers, and vertical solutions, you secure a functional bathroom storage setup that keeps daily essentials visible and within easy reach exactly when you need them.
1. The U-Shaped Slide-Out Drawer System
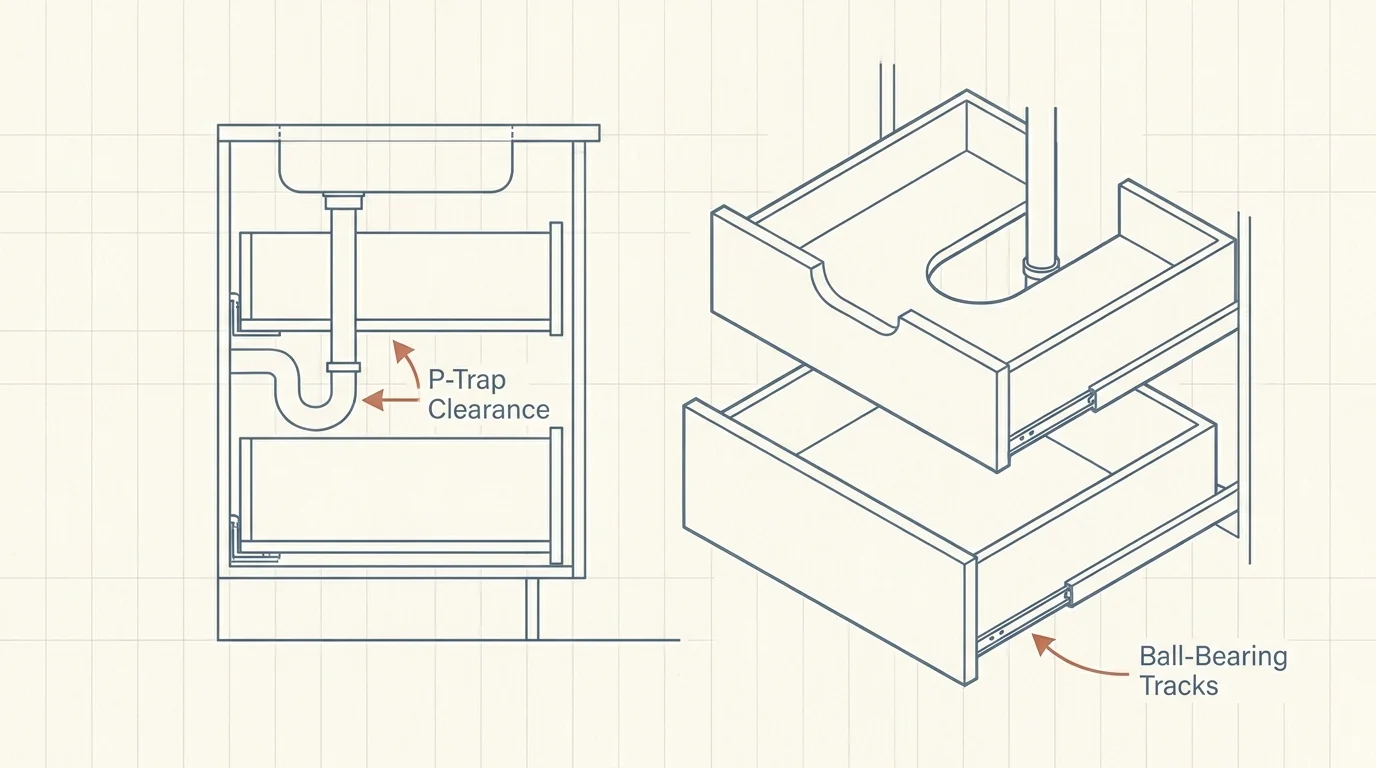
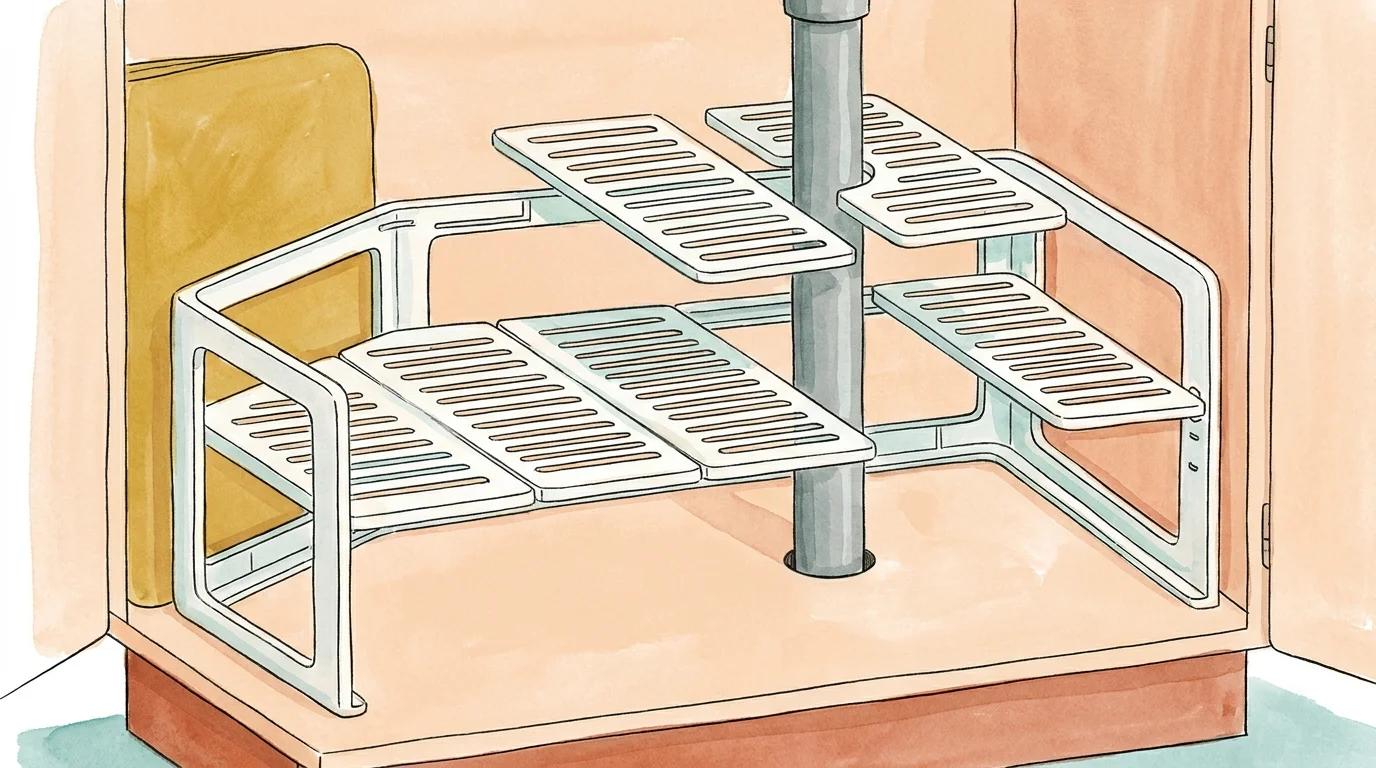
Most bathroom vanities share one incredibly frustrating architectural feature: a thick PVC drain pipe dropping right down the middle of the cabinet. Traditional, flat-box shelves completely block this pipe, forcing you to shove products awkwardly to the sides and leaving the center space entirely useless. When exploring small bathroom organization ideas, a U-shaped slide-out drawer system directly solves this layout problem by intelligently wrapping around the plumbing. These specialized organizers feature a deep, curved cutout in the top tier and a solid, full-width pull-out drawer on the bottom base.
Measure the exact distance from the floor of your cabinet to the lowest point of the P-trap—the curved, U-shaped part of the plumbing pipe—before purchasing any unit. You must ensure the bottom sliding drawer has enough vertical clearance to easily house your tallest, bulkiest items like large shampoo bottles, liter-sized body washes, and jumbo lotions without hitting the plumbing overhead.
When selecting a U-shaped organizer, pay close attention to the track mechanism. Look for smooth-gliding ball-bearing tracks rather than cheap plastic friction slides. If you rent your home and your landlord strictly prohibits drilling into the wooden cabinetry, install the metal base tracks using heavy-duty, double-sided mounting tape. Slide-out mechanisms fundamentally change how you interact with your bathroom storage; they eliminate the need to crouch on the floor and blindly dig for products. You simply pull the drawer handle, and your daily moisturizers, shaving creams, and hair serums glide effortlessly out to meet you.
2. Expandable Tiered Shelving Units
If your vanity houses multiple pipes, thick shut-off valves, or even a bulky garbage disposal—common in modern multi-use vanity spaces—rigid shelving structures simply will not fit. Expandable tiered shelving units offer the ultimate custom flexibility. These dynamic systems consist of an adjustable metal or plastic frame that extends horizontally, topped with individual, slotted plastic shelf panels that easily snap on and off the support bars.
Expand the horizontal frame to fit the precise inner width of your cramped vanity. As you assemble the unit, pay attention to where the pipes intersect the frame. When you hit an obstruction, simply remove the one or two small shelf panels that block it, allowing the pipe to pass straight through the unit. This clever design creates a completely custom-fitted shelving rack that maximizes every inch of your available vertical space without requiring power tools or custom carpentry.
Maximize this setup by intentionally placing your items based on weight and daily necessity. Use the top, easily reachable shelves for lightweight, frequently used necessities such as cotton swabs, facial rounds, makeup remover wipes, and daily contact lens solution. Place heavier, bulkier items—like economy-sized bottles of mouthwash, large tubs of body butter, and heavy hair masks—on the floor of the cabinet directly beneath the shelves. Grounding the heavy items ensures structural stability and prevents the expandable metal frame from bowing or collapsing under excess weight over time.
3. Stackable Clear Acrylic Drawers
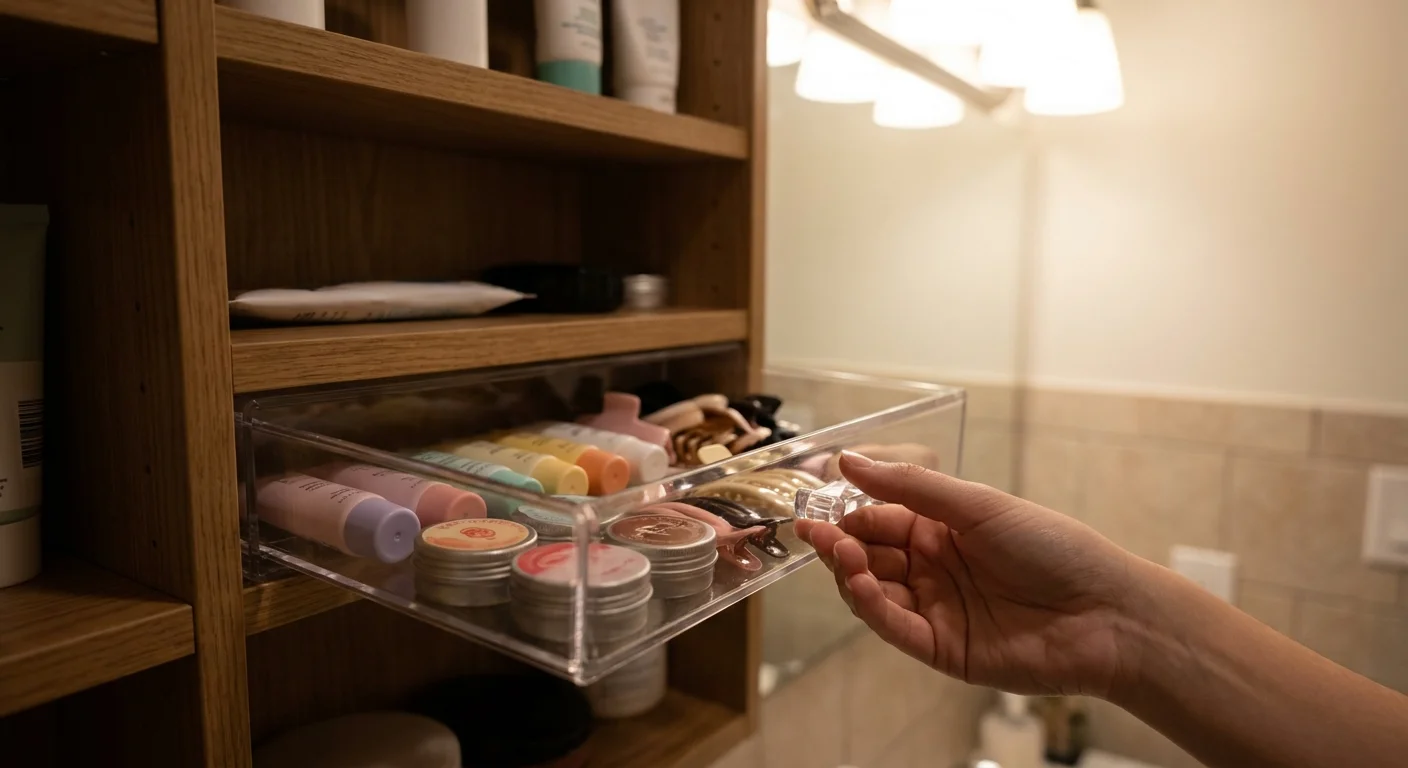
A cramped, poorly lit vanity quickly becomes visually overwhelming. When an assortment of tubes, jars, and boxes are shoved together in a dark space, finding a specific item feels impossible. Stackable clear acrylic drawers offer a highly polished, modular approach to bathroom organization. Because the material is transparent, you immediately see the contents of every drawer without opening it. Because the system is modular, you can securely stack the units as high as your plumbing clearance allows.
Group your hygiene items by specific routines. Dedicate one entire drawer strictly to nighttime skincare, another drawer solely to first aid supplies, and a third to dental care backups. This rigid categorization system prevents the frustrating cross-contamination of products and drastically speeds up your busy morning routine. You can further optimize these drawers by inserting small plastic dividers inside them, keeping tiny items like lip balms and tweezers perfectly upright.
When curating your first aid drawer, remember that the bathroom environment constantly fluctuates in temperature and generates high humidity levels, making it a terrible environment for prescription medications. The Centers for Disease Control and Prevention (CDC) strictly advises against keeping any medications in bathroom cabinets, recommending instead that they be kept “up and away and out of sight” in a cool, dry location. Use your acrylic bathroom drawers strictly for topical necessities like sterile bandages, gauze pads, and standard antibiotic ointments.
4. Tension Rod Hook Stations
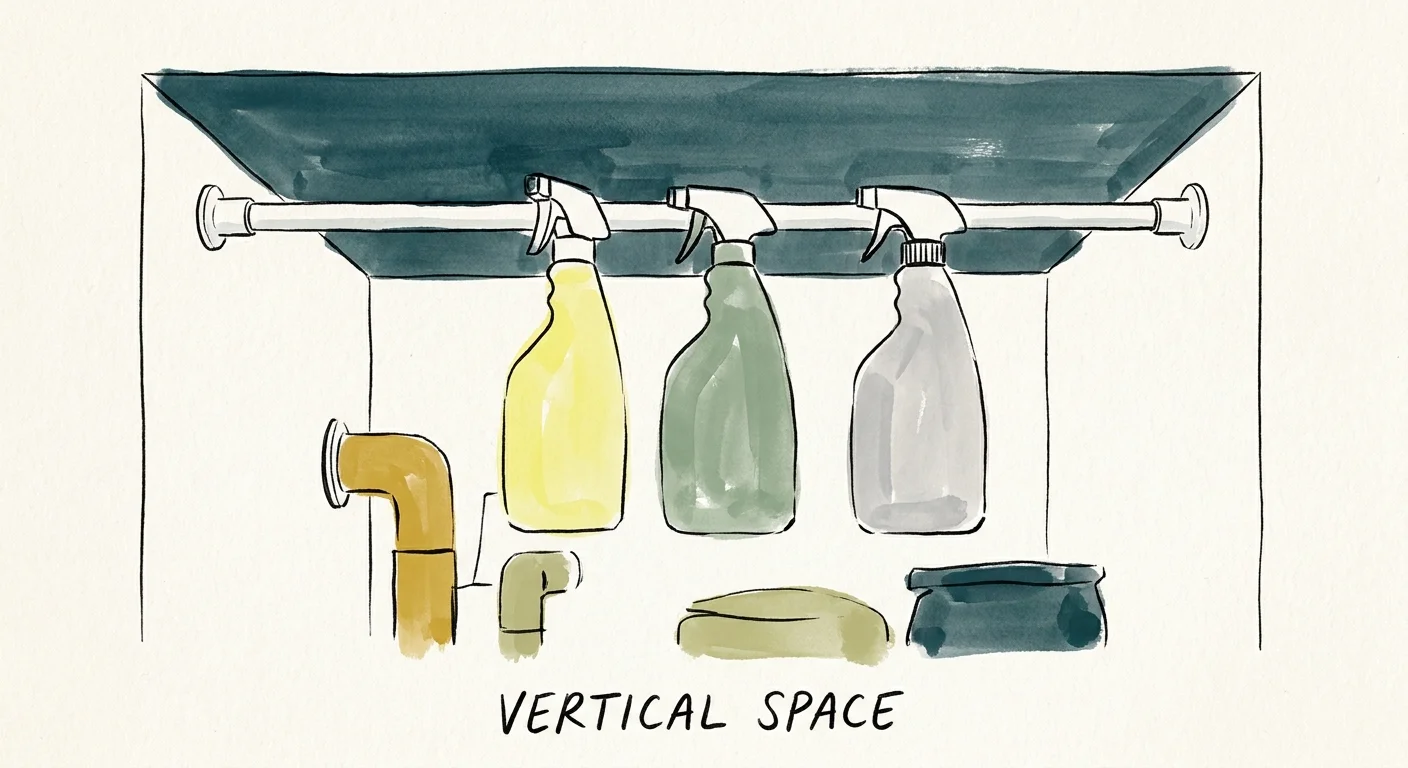
When floor space inside your vanity is practically non-existent, you must look upward. The upper interior area inside a bathroom cabinet is often pure, wasted air space. A simple, inexpensive spring-loaded tension rod completely transforms this empty void into a highly functional, vertical storage zone.
Install a heavy-duty tension rod—similar to a miniature shower curtain rod—across the width of the cabinet interior. Position the rod just below the door hinges and slightly in front of the hanging plumbing lines. You can then hang your bathroom cleaning sprays by their plastic triggers directly onto the rod. This clever technique keeps surface cleaners, glass sprays, and heavy-duty tub scrubs perfectly organized, visually accessible, and entirely off the cabinet floor. Suspending the bottles frees up the entire base of the cabinet for stacking bins, folded towels, or bulk toilet paper rolls. You can even add small metal binder clips to the rod to hang rubber cleaning gloves so they can drip dry.
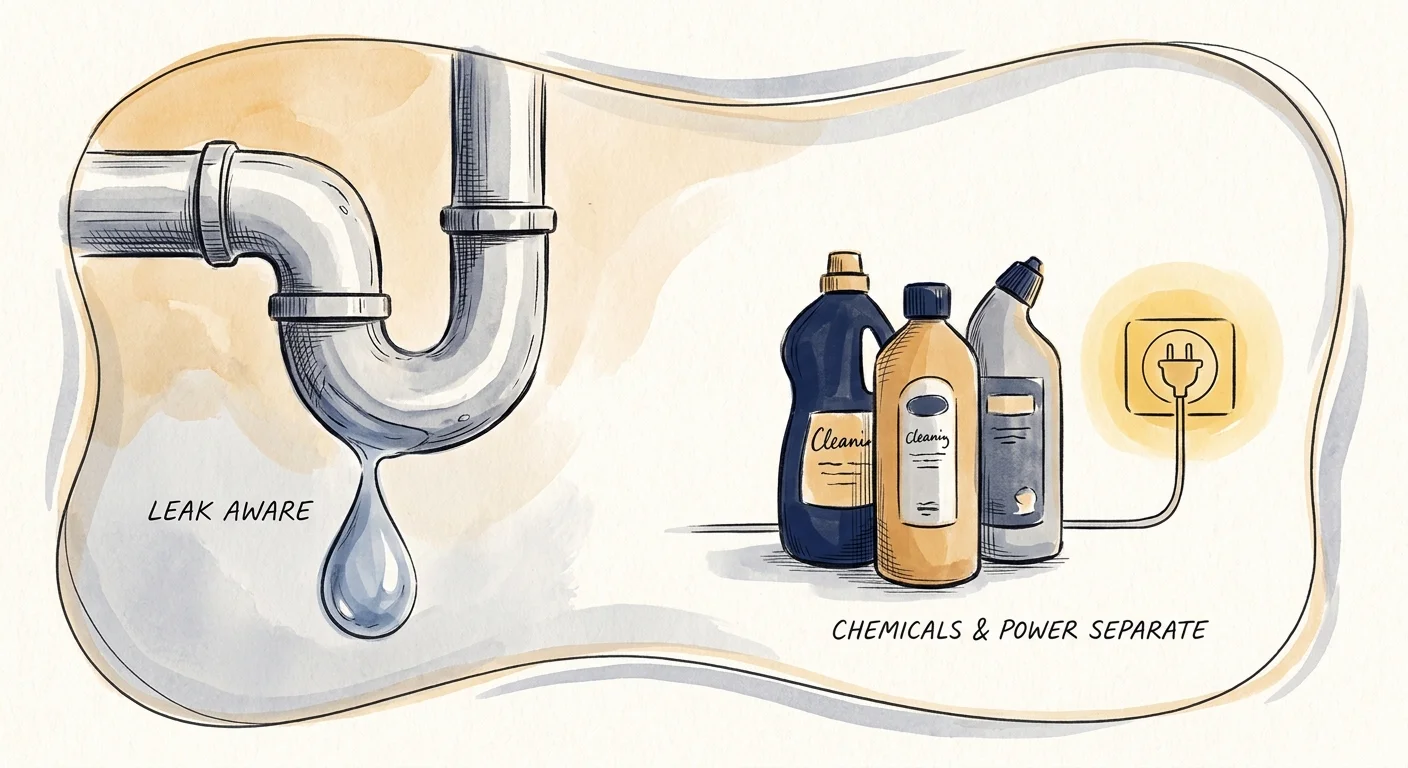
Always thoroughly test the tension rod before walking away. The Environmental Protection Agency (EPA) classifies many harsh chemical household cleaners as household hazardous waste. Dropping or spilling heavy bottles of bleach or ammonia-based cleaners inside a closed cabinet can cause dangerous chemical reactions or permanently destroy your wooden cabinetry. Give the installed rod a firm, downward tug to verify the internal spring mechanism can easily support the weight of multiple full liquid bottles.
5. Over-the-Cabinet-Door Caddies
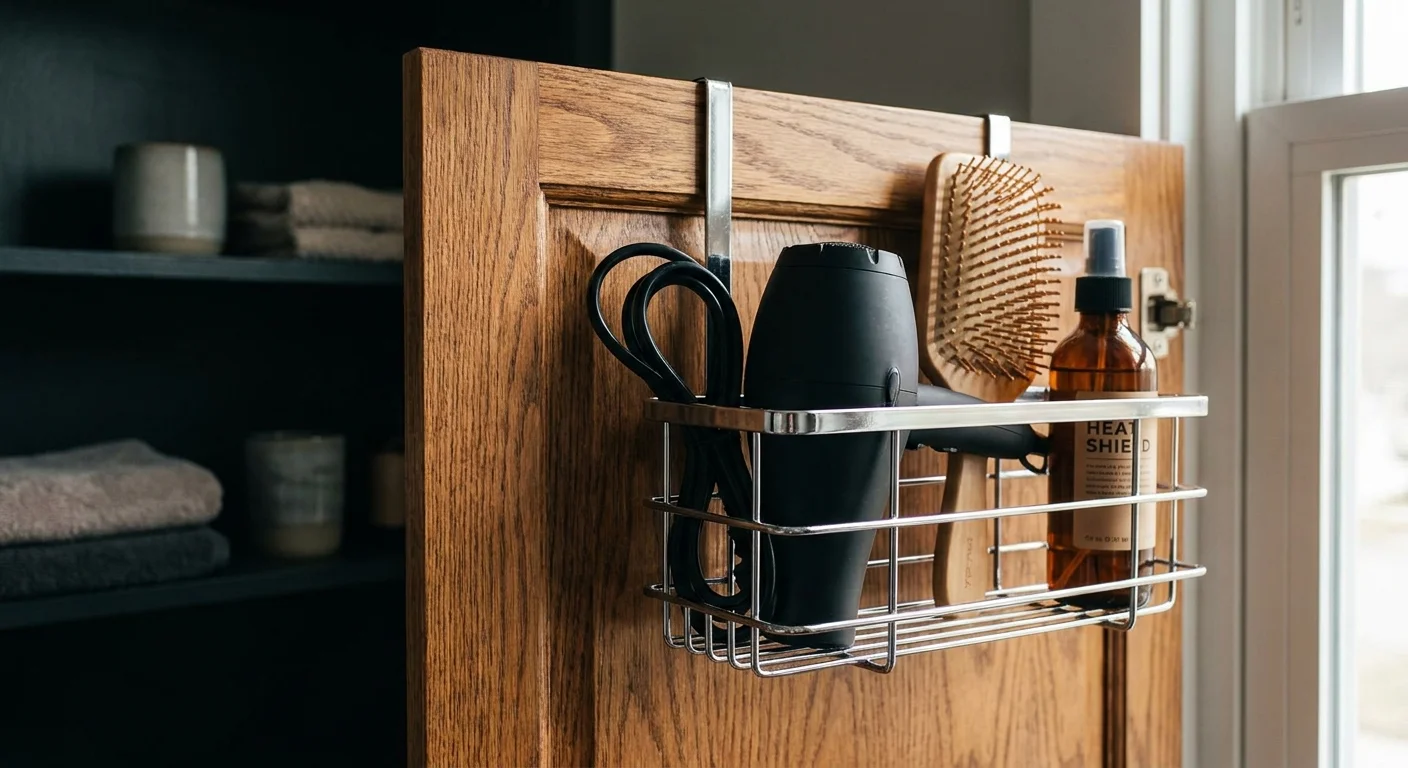
The back panels of your cabinet doors offer prime, highly accessible real estate for items you use every single day. Over-the-door metal or plastic caddies require absolutely zero tools to install and instantly provide deep storage pockets for bulky, awkwardly shaped bathroom items.
Dedicate your door caddy to housing your hot hair styling tools. Hairdryers, curling irons, and large straighteners take up an immense amount of horizontal shelf space, and their long electrical cords constantly tangle around smaller products. Storing them vertically in a wire door caddy keeps the cords securely contained and ensures the tools remain instantly accessible the moment you open the door.
To properly protect your vanity, pay attention to the metal hooks hanging over the top edge of the wood. To prevent the metal hooks from aggressively rattling against the wood every time you pull the door open or push it closed, attach a small strip of foam weather-stripping or a felt furniture pad to the back side of the hooks. This simple hack creates a snug, entirely silent fit and permanently protects your vanity’s painted or stained finish from deep scratches. Also, evaluate the strength of your door hinges; avoid overloading the caddy with heavy liquid bottles, as the excess weight can eventually pull the cabinet door off its hinges.

6. Divided Turntables
Deep, recessed cabinets featuring narrow doors create what organizers call “blind corners”—dark, cavernous recesses where expensive products easily get pushed to the back and forgotten. Reaching into these deep corners usually requires getting on your hands and knees and knocking over front-row items. A divided turntable, commonly known in the kitchen as a lazy Susan, eradicates this accessibility problem completely.
Choose a durable plastic turntable designed with high, clear sides—measuring at least three inches tall—rather than a completely flat tray. The high perimeter edges prevent tall, top-heavy items like aerosol hairspray, dry shampoo canisters, and shaving cream bottles from tipping over and jamming the spinning mechanism when rotated.
Place the loaded turntable in the absolute deepest, most inaccessible corner of the under-sink vanity. When you need a product tucked in the back, a simple, quick spin smoothly brings the rear of the cabinet right to the front. Seek out a model with removable plastic wedge dividers. These dividers allow you to easily separate hair care products from body care or separate your partner’s shaving supplies from your own, keeping the entire turntable meticulously organized even as it rotates daily. Ensure the turntable utilizes stainless steel ball bearings in its base so it glides smoothly despite the weight of heavy liquid products.
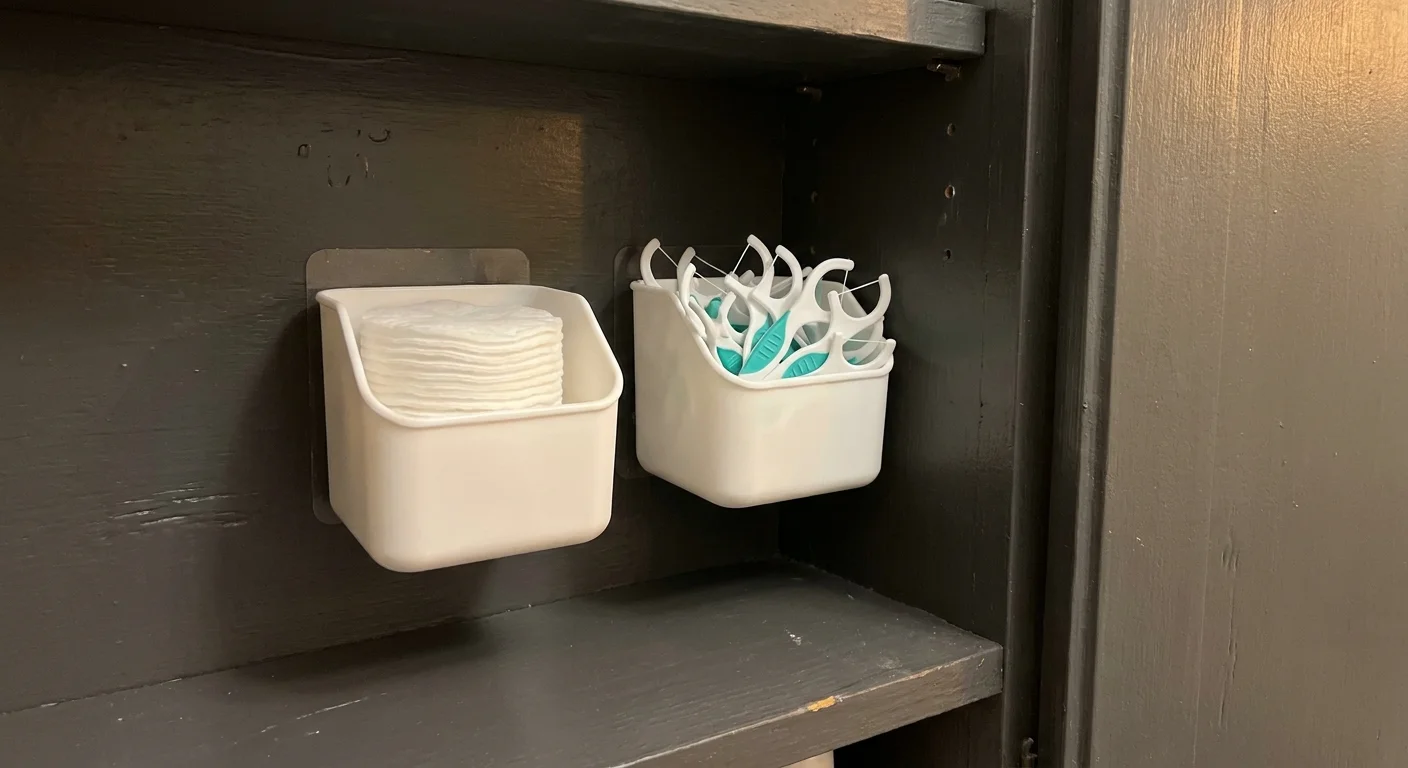
7. Adhesive Wall-Mounted Bins
If you manage a pedestal sink workaround, a floating wall-mounted sink, or a tiny, historical apartment vanity, you might only possess a few mere inches of horizontal clearance on either side of the plumbing. In these extreme, space-starved cases, adhesive wall-mounted bins serve as your absolute best storage option. These slim, lightweight acrylic or plastic containers adhere directly to the flat interior side walls of the cabinet, utilizing space that otherwise goes entirely ignored.
Use these low-profile wall bins to systematically corral the small, easily lost items that constantly clutter countertops, such as elastic hair ties, disposable razors, extra dental floss containers, and makeup blending sponges.
Preparation guarantees success when using adhesive strips in a humid bathroom. Before applying the adhesive backing, thoroughly wipe down the interior cabinet wood or melamine surface with standard rubbing alcohol and let it dry completely. This crucial step removes invisible dust, lingering moisture, and oily residue, ensuring the adhesive strips bond permanently to the surface. Mount the slim bins near the very top of the cabinet wall to keep these tiny daily items comfortably within arm’s reach, deliberately leaving the lower floor space completely open for your small bathroom trash can, toilet brush, or toilet paper overflow.
Your Step-by-Step Under-Sink Decluttering Checklist
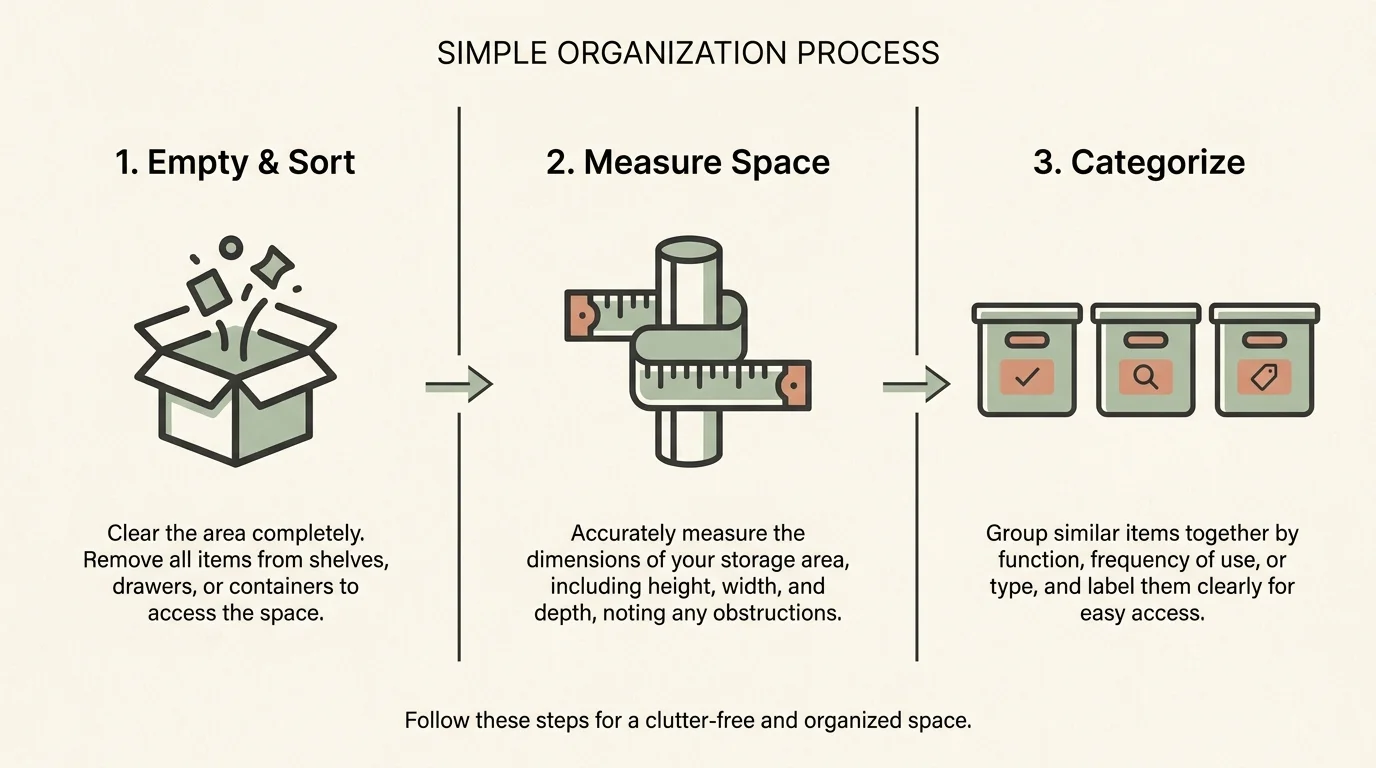
No high-end organizing system works effectively if you attempt to organize literal garbage. Before purchasing or installing any of the new setups listed above, you must systematically and aggressively declutter the space. Follow this streamlined, step-by-step process to properly prep your vanity:
- Empty the Space Entirely: Remove every single item from the cabinet. Do not attempt to organize around existing clutter. Seeing the completely empty space helps you accurately measure your true physical clearance.
- Toss the Obvious Trash: Discard empty shampoo bottles, crusty makeup sponges, frayed spare toothbrushes, and any lotion or cream that smells rancid or shows signs of separation.
- Check Every Expiration Date: Sunscreens, acne treatments, and active skincare serums actively lose their chemical efficacy over time. Toss anything visibly past its printed prime.
- Relocate Out-of-Place Items: Move stray medications to a secure linen closet or bedroom drawer. If you uncover leftover house paint or heavy chemical solvents, remove them immediately. The Environmental Protection Agency (EPA) heavily warns that improperly stored hazardous materials can easily leak or react dangerously in poorly ventilated spaces.
- Clean and Protect the Base: Vacuum up loose hair and dust bunnies, then aggressively wipe down the floor of the cabinet using a strong multi-purpose cleaner. Once dry, lay down a non-slip, waterproof, rubberized shelf liner to permanently protect the base wood from future plumbing drips or liquid product leaks.
- Group by Strict Category: Sort your remaining keep-pile into highly distinct groups: daily skincare, hair styling, oral care, first aid, and heavy cleaning supplies. You will design your new storage setups directly around these specific functional categories.
Crucial Safety and Maintenance Rules for Bathroom Storage
Achieving a beautifully organized vanity represents only half the battle; keeping it safe, clean, and highly functional requires mindful, ongoing habits. Bathrooms undergo constant, extreme temperature fluctuations and maintain high ambient moisture levels, which heavily impact how products behave and degrade over time.
First, strictly prioritize keeping original packaging for your chemical cleaning supplies. While pouring a colorful, minty mouthwash into a heavy glass decanter looks elegant and spa-like, attempting the same aesthetic transfer for bleach or heavy tile cleaner poses massive safety risks. The American Cleaning Institute strongly emphasizes that household cleaning products must remain securely stored inside their original, fully labeled containers. These original labels contain vital first-aid instructions, active chemical ingredient lists, and critical usage warnings. Transferring hazardous liquids into decorative, unlabeled jars drastically increases the risk of accidental chemical mixing or dangerous misuse—especially in a chaotic household with young children or pets.
Second, respect the laws of gravity and always keep heavier items low. The sturdy base floor of the vanity remains the absolute safest place for heavy gallon jugs of refill hand soap, large bottles of bleach, or bulky glass containers. Placing excessive weight on elevated, expandable shelves or tension rods can easily cause the plastic panels to warp, snap, or crash down unexpectedly.
Third, commit to conducting a rapid quarterly review. A cramped vanity naturally accumulates slow clutter over time. Set a recurring calendar reminder on your phone every three months to pull out your acrylic bins, wipe down the shelves with a damp cloth, and discard any newly empty bottles or dried-out wipes. This simple, five-minute seasonal maintenance routine effectively prevents the under-sink space from slowly reverting into a dark, chaotic cavern.

Your Next Practical Move
Grab a reliable tape measure right now and record the precise width, depth, and height of your under-sink cabinet, taking special care to note exactly where the plumbing drops down and how low the P-trap hangs. With those specific measurements in hand, choose just one of the seven organizational setups detailed above—such as the U-shaped slide-out drawer or the simple tension rod—and order the necessary components today to immediately begin reclaiming your bathroom storage space.