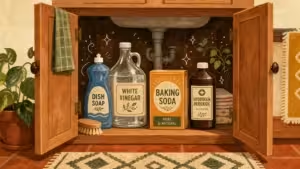
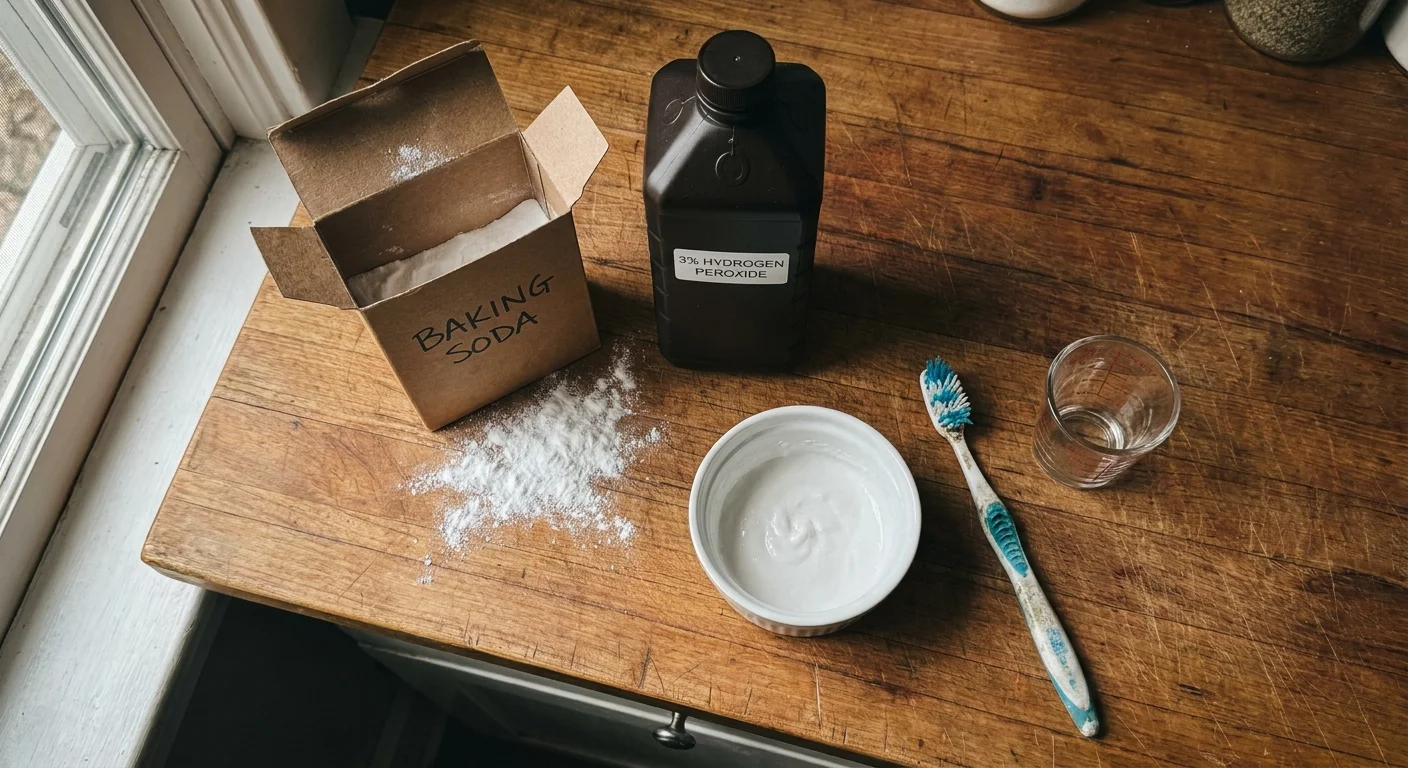
Dingy bathroom grout makes even the cleanest home feel neglected, but restoring those lines does not require expensive, harsh chemicals. By combining baking soda, 3-percent hydrogen peroxide, and a single squirt of liquid dish soap, you can create a highly effective DIY cleaning paste that costs pennies per application. This mixture relies on simple chemistry rather than heavy fumes; the peroxide oxidizes organic stains and mildew, while the baking soda provides a gentle abrasive texture to lift dirt without scratching your tile. You already have the ingredients sitting in your cabinets right now. Grab a small bowl and an old toothbrush, and you can instantly transform the grimiest corners of your shower into bright, fresh-looking grout lines today.
The Hidden Costs of Commercial Grout Cleaners
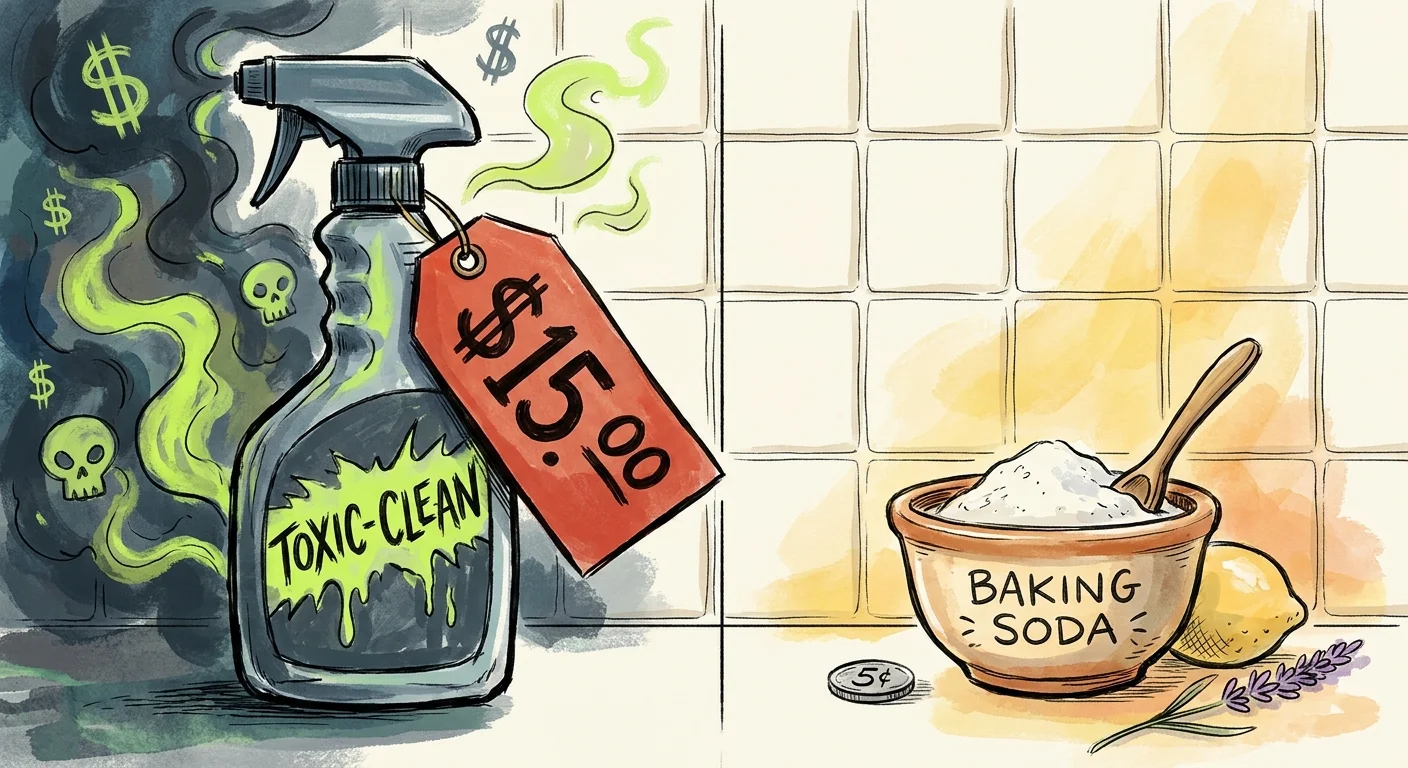
When you walk down the cleaning aisle at your local supermarket, you will find an endless array of specialized products promising to restore your bathroom tile. Manufacturers package these solutions in brightly colored spray bottles and charge premium prices, often ranging from six to fifteen dollars per quart. If you clean your bathroom on a weekly basis, continuously replacing those bottles quickly adds up to a noticeable annual household expense. However, when you look past the glossy marketing labels and read the fine print, the primary ingredients in these commercial products often consist of diluted bleach, harsh surfactants, and heavy synthetic fragrances that merely mask the underlying chemical odor.
These conventional cleaners come with hidden costs that extend far beyond your wallet. Heavy-duty commercial products frequently release volatile organic compounds into the air. When you spray them in a small, enclosed bathroom—especially one lacking an efficient exhaust fan—those strong fumes linger for hours. They can severely irritate your eyes, dry out your skin, and cause respiratory discomfort. Furthermore, many commercial grout cleaners rely heavily on chlorine bleach to achieve quick results. While bleach successfully lightens biological stains on the surface, it does not always penetrate the porous structure of the grout to remove the root cause of the mold and discoloration. Instead, repeated use of concentrated bleach strips the top protective layer and weakens the structural integrity of the cement-based grout over time, leaving it brittle, degraded, and far more susceptible to future staining.
By contrast, buying the raw ingredients for your DIY paste practically costs nothing. A standard box of baking soda is incredibly affordable, frequently costing around five cents per ounce. A standard opaque brown bottle of three-percent hydrogen peroxide sits at a similarly low price point. For less than a single dollar per deep cleaning session, you can bypass the chemical aisle entirely. Choosing this homemade route allows you to save money, significantly reduce the single-use plastic waste generated by empty spray bottles, and maintain total control over the substances introduced into your living environment.
Why This Specific Three-Ingredient Blend Works
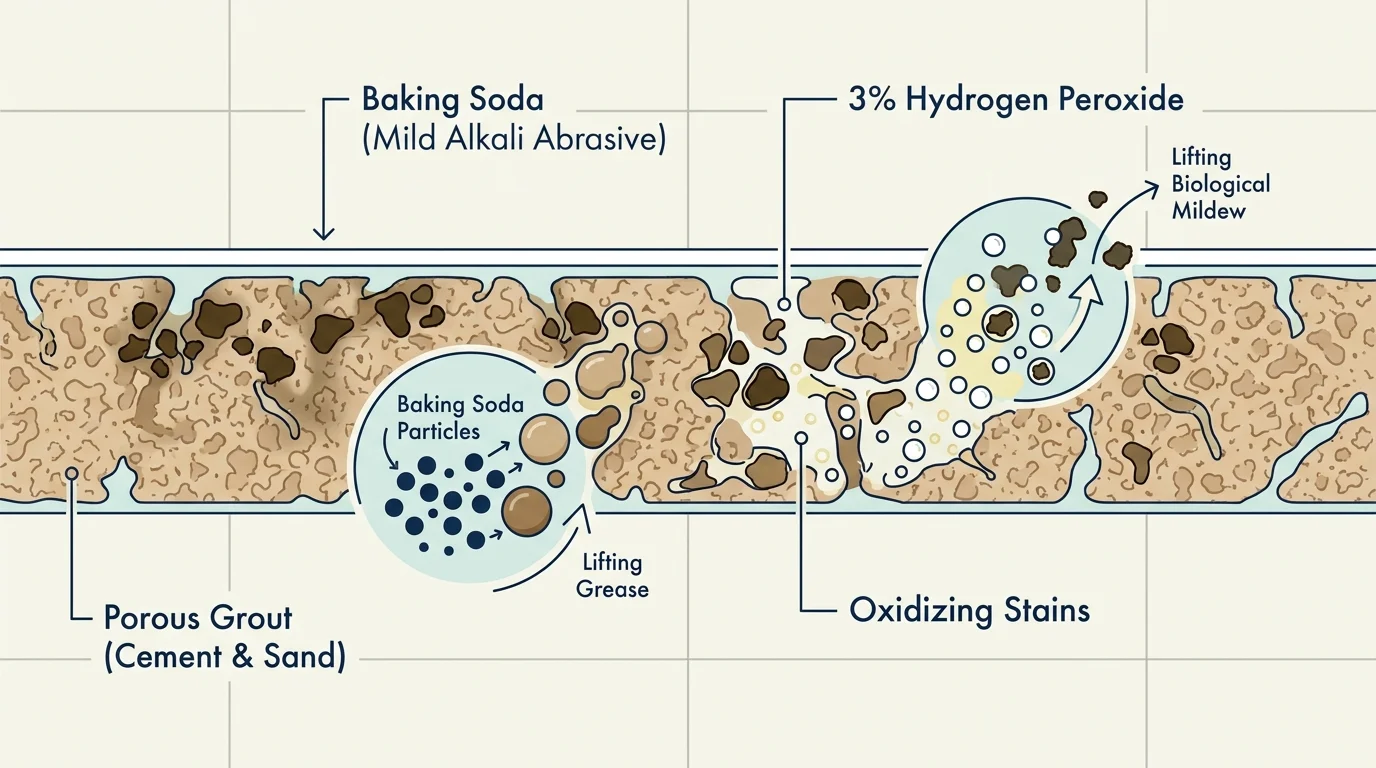
To understand why this simple homemade paste outperforms expensive commercial alternatives, you need to understand the structural nature of grout. Grout consists of a mixture of water, cement, and sand. Because it is highly porous, it acts like a rigid, microscopic sponge, absorbing water, soap scum, dissolved hard-water minerals, and body oils every single time you use the shower. Once those organic materials settle deeply into the microscopic pores, mold and mildew spores find a perfectly dark, damp environment to thrive.
Your DIY cleaner targets this exact problem using three highly complementary ingredients:
Baking Soda (Sodium Bicarbonate): Baking soda serves as a mild alkali that easily cuts through acidic grime like sweat and body oils. More importantly, it provides a gentle, reliable abrasive action. When you scrub the grout lines, the fine granules physically dislodge embedded dirt without scratching the protective glaze on the surrounding ceramic or porcelain tiles.
Hydrogen Peroxide: This liquid acts as the chemical powerhouse of the operation. Hydrogen peroxide is chemically similar to water, but it carries an extra oxygen molecule. As soon as you apply it to the grout, it begins to break down into pure water and oxygen. That rapid release of oxygen molecules creates an effervescent oxidizing effect, effectively lifting deep-set stains and breaking down the tough cellular walls of mold and mildew. The Environmental Protection Agency (EPA) regularly recognizes hydrogen peroxide as a safer alternative to harsh traditional biocides. Unlike chlorine bleach, hydrogen peroxide degrades cleanly without leaving behind toxic residue in your bathroom.
Liquid Dish Soap: Adding just a single squirt of dish soap introduces vital surfactants to the mix. Surfactants reduce the surface tension of the water inside the peroxide, allowing the paste to penetrate deeper into the porous grout rather than just sitting uselessly on the surface. The soap also acts as an aggressive degreaser to emulsify slippery soap scum and heavy hair products that have hardened over time, making it significantly easier for the peroxide to reach the underlying stains.
Crucial Safety Precautions and Chemical Combinations to Avoid
Many ambitious homeowners assume that if one household cleaner works well, mixing two together will work even better. This dangerous misconception frequently leads to toxic indoor air quality, especially in poorly ventilated spaces like guest bathrooms and shower stalls. Before you begin your deep cleaning project, you must understand exactly which chemicals are safe to combine and which ones you must rigidly keep separated.
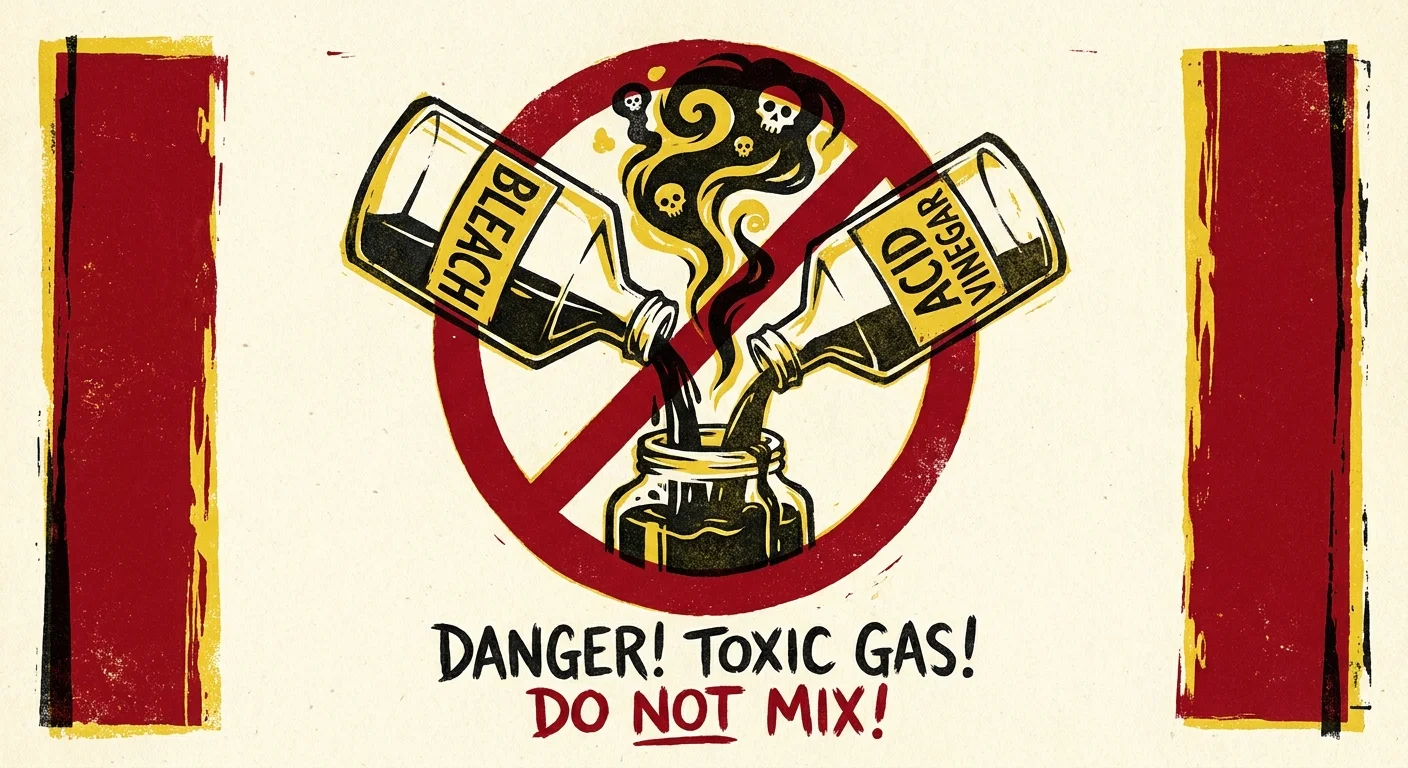
First, never mix hydrogen peroxide directly with vinegar. While both ingredients serve as excellent natural cleaners on their own, combining them in the same container creates an immediate chemical reaction that forms peracetic acid. According to the Centers for Disease Control and Prevention (CDC), peracetic acid is a highly corrosive substance that can severely irritate your eyes, burn your skin, and damage your upper respiratory tract. If you want to use both products during a single cleaning session, you must use them completely separately—cleaning the surface with one, rinsing the area thoroughly with water, and then applying the other. For cleaning grout effectively and safely, simply stick to the baking soda and hydrogen peroxide paste outlined in this guide.
Second, never mix chlorine bleach with ammonia or any acidic cleaner. Combining bleach and ammonia produces volatile chloramine gas, while mixing bleach with an acid generates toxic chlorine gas. The Agency for Toxic Substances and Disease Registry (ATSDR) notes that inhaling these gases causes acute respiratory distress, violent coughing, and severe nausea. Stick to the safe, bleach-free ingredients listed below to protect your lungs and your home.
Finally, remember that hydrogen peroxide degrades quickly when exposed to direct light. Keep the liquid safely stored in its original opaque brown bottle until the exact moment you are ready to mix your paste. If you attempt to mix a massive batch of your DIY grout cleaner and store it in a tightly sealed container for later use, the peroxide will continuously release oxygen gas as it breaks down, potentially causing the plastic container to expand rapidly and burst. Protect yourself and your cabinets by only mixing the exact amount of paste you need for a single cleaning session.
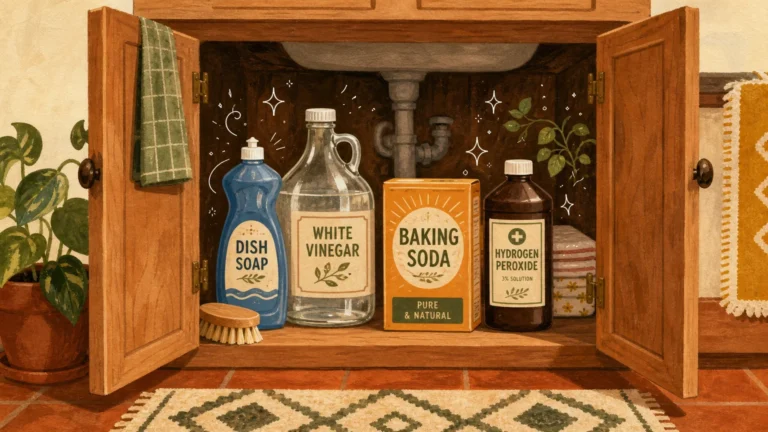
Gathering Your Supplies for the Deep Clean
Before tackling the shower walls or bathroom floor, gather all your materials in one place. Having everything within arm’s reach prevents you from tracking wet paste across the house while you search for a missing tool.
- Baking Soda: You will need about half a cup for a standard-sized shower, though you can easily adjust the volume based on the size of the room.
- Hydrogen Peroxide (3-Percent Concentration): This is the standard first-aid peroxide available at any pharmacy or grocery store.
- Liquid Dish Soap: A basic degreasing dish soap works best; avoid opaque formulas containing heavy lotions or hand softeners.
- A Small Mixing Bowl and Spoon: Glass or plastic bowls work perfectly for combining the ingredients.
- A Stiff-Bristled Brush: You can purchase a specialized grout brush with angled bristles, but an old, firm toothbrush is equally effective for scrubbing narrow lines. If you have arthritis or limited hand strength, consider purchasing an electric spin scrubber with a long, extendable handle to minimize the strain on your back and knees.
- Microfiber Cloths or Rags: You will use these to wipe away the excess paste and rinse the surface thoroughly.
- A Spray Bottle with Plain Water: Essential for the final rinsing stage to remove chalky residue.
Step-by-Step Guide to Restoring Your Tile Grout
With your supplies gathered and your bathroom fan turned on for ventilation, you are ready to restore your grout. Follow this specific sequence to maximize the chemical reaction and minimize your physical scrubbing effort.
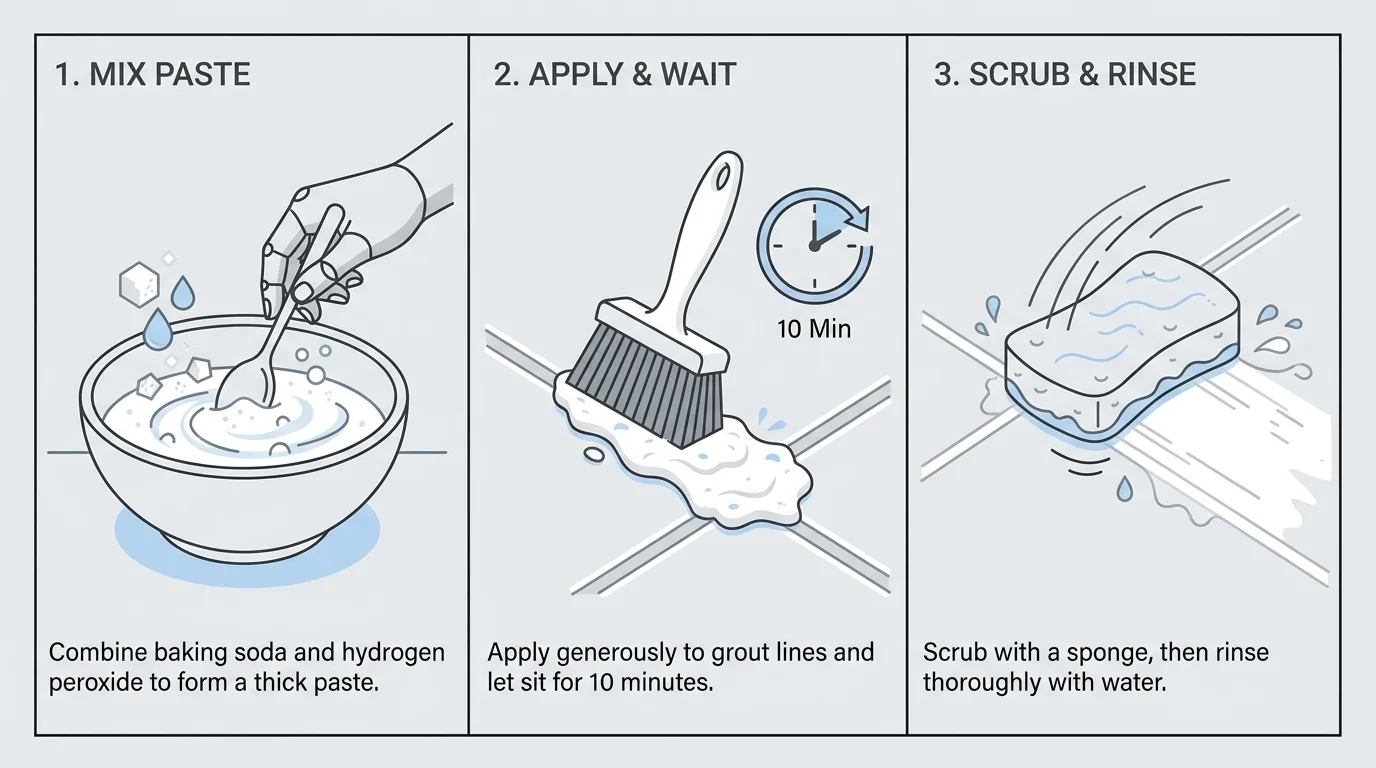
- Prep and Dry Wipe: Begin by removing all shampoo bottles, loofahs, and soap dishes from the area. Take a dry microfiber cloth and wipe down the tile and grout to remove loose dust, hair, and surface debris. Applying paste over loose dirt only creates a muddy mess, so starting with a dry, relatively clear surface ensures the peroxide can focus entirely on the embedded stains.
- Mixing the Paste: In your small bowl, pour half a cup of baking soda. Slowly add hydrogen peroxide while stirring until the mixture reaches the consistency of thick pancake batter or toothpaste. You want the paste wet enough to spread easily but thick enough that it will cling to vertical shower walls without dripping immediately down the drain. Once you achieve the right texture, stir in one small squirt of liquid dish soap.
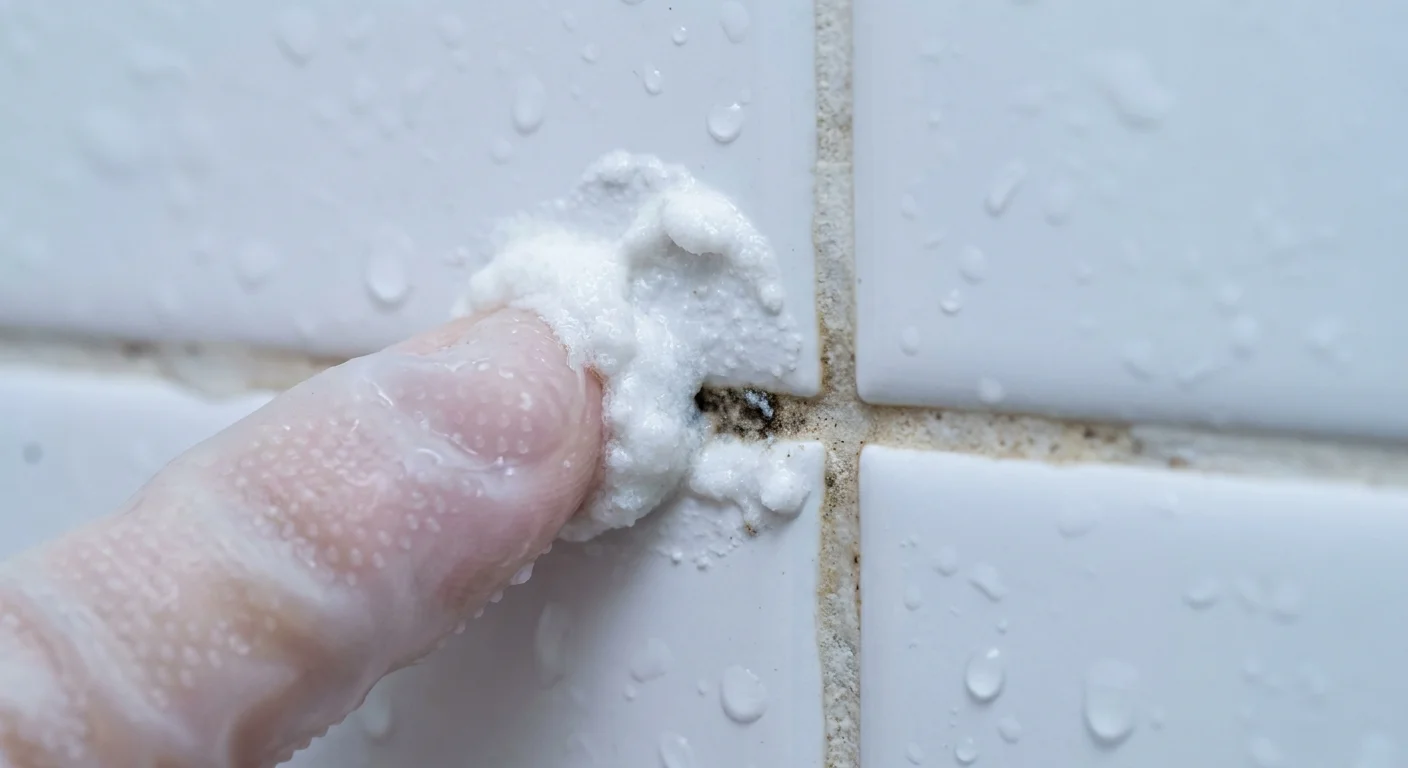
- Application Technique: Dip your stiff-bristled brush or toothbrush into the paste and apply it generously along the grout lines. Do not worry about getting it on the surrounding tiles, as the mixture is completely safe for ceramic, porcelain, and glass. Work in small sections—perhaps a three-foot by three-foot square—so you can manage the application without feeling overwhelmed.
- The Dwell Time: This step is non-negotiable if you want to avoid exhausting your arms. Let the paste sit undisturbed on the grout for 10 to 15 minutes. During this dwell time, the hydrogen peroxide undergoes an oxidation reaction, bubbling slightly as it breaks down the cellular structure of mold and lifts heavy discoloration. The dish soap simultaneously emulsifies the greasy layer of soap scum holding the dirt in place. If you rush this step, you will end up relying on physical force instead of chemical efficiency.
- Scrubbing Mechanics: After the paste has rested, take your brush and scrub the grout lines using firm, circular motions. The circular technique works the abrasive baking soda into the porous surface from multiple angles, dislodging stubborn particles that a simple up-and-down motion might miss. You should notice the grout brightening significantly as you work.
- The Final Rinse: Once you have scrubbed the entire section, use a wet microfiber cloth to wipe away the gritty residue. Baking soda tends to leave a faint white chalky haze if not completely removed, so you may need to rinse your cloth frequently in the sink. Alternatively, you can use a spray bottle filled with warm water to mist the walls and wipe them clean. Ensure you rinse the tiles completely before moving on to the next section.
Troubleshooting Stubborn Stains and Mildew
Even with the best DIY cleaner, you might encounter patches of grout that refuse to brighten. Areas located directly under the showerhead or in the bottom corners of the enclosure take the heaviest beating and may require a second application. When evaluating your tile lines, you should also note whether your bathroom features sanded or unsanded grout. Sanded grout, typically found on floor tiles with wider joints, holds onto dirt more aggressively because of its rough, textured surface. You might need a slightly stiffer brush and more elbow grease to pull the dirt out of the grit. Unsanded grout, commonly used on vertical shower walls with narrow joints, is smoother and often easier to wipe clean, but it is also more prone to cracking if scrubbed too violently with abrasive metal tools.
In cases where dark black spots stubbornly remain along the edges of the tub, take a closer look at the material. Homeowners frequently confuse grout with silicone caulk. Caulk is the rubbery sealant used at the seams where the tub meets the tile. Because silicone is flexible and completely waterproof, the paste cannot penetrate it. When mold grows behind or inside old, peeling silicone caulk, no amount of scrubbing will remove it. The only solution for deeply infested caulk is to strip it out completely, clean the underlying gap, and apply a fresh bead of high-quality bathroom sealant.
If your actual grout lines are permanently stained but structurally sound, you do not need to undertake a massive renovation. You can purchase a grout pen or colorant—a specialized epoxy paint designed to bond with the cement surface. Applying a colorant seals the porous material and instantly restores a uniform, bright color without the massive expense of scraping out the old grout.
Post-Cleaning Maintenance to Keep Lines Bright
After investing the time to deep clean your bathroom, implementing a few straightforward daily habits will keep your grout looking pristine for months. The primary enemy of clean grout is lingering moisture. Mildew cannot grow without water, so keeping the shower environment as dry as possible stops the problem before it starts.
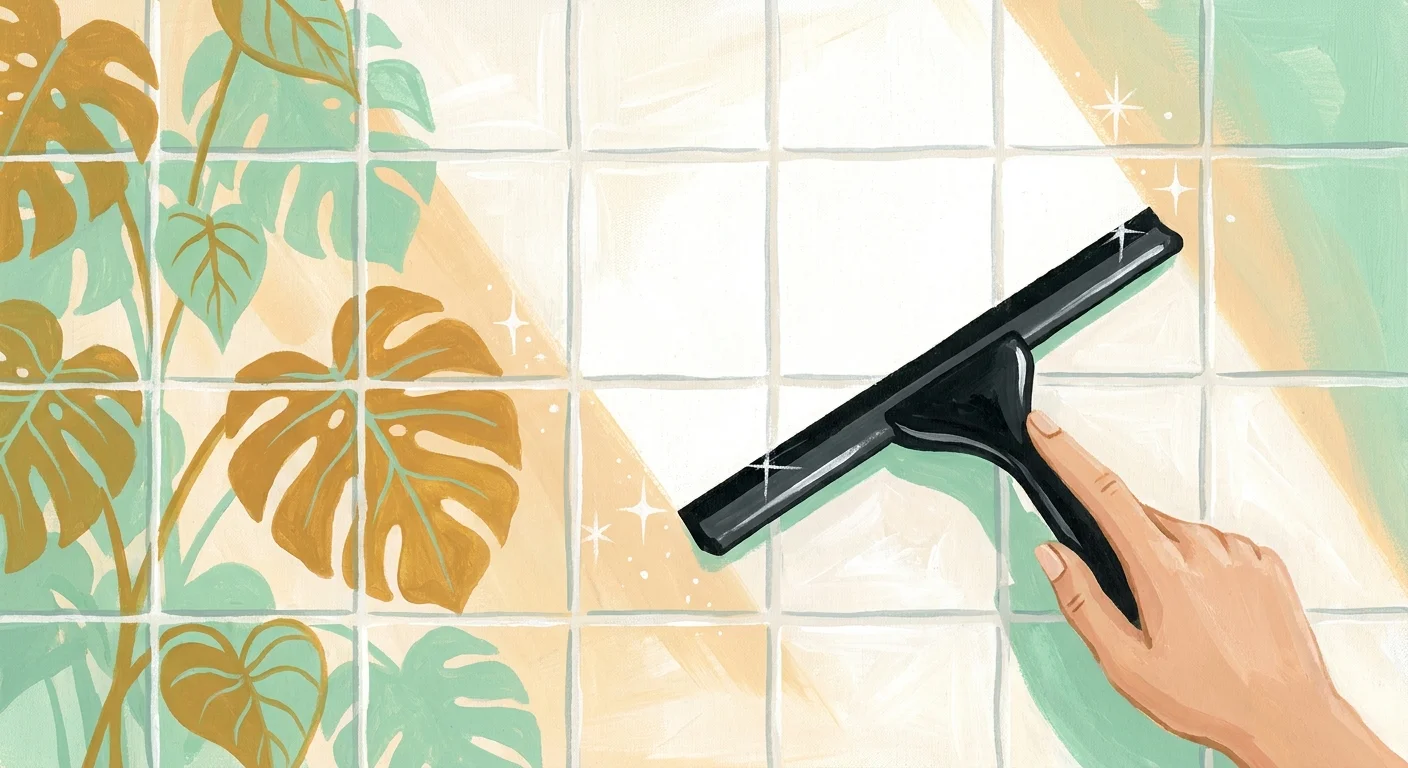
Purchase a small rubber squeegee and hang it inside the shower. After every use, take thirty seconds to squeegee the water off the walls and down the drain. This rapid action prevents hard water minerals and soap scum from settling onto the grout lines as the shower dries. To further extend the life of your clean lines, look closely at your bathroom ventilation. A weak or dusty exhaust fan cannot move enough humid air out of the room to prevent mildew from taking hold. Take a moment every few months to vacuum the dust out of your bathroom exhaust fan cover. If your bathroom does not have an exhaust fan, leave the door wide open and crack a window immediately after showering to allow the humid air to escape.
Finally, consider sealing your freshly cleaned grout. Because cement-based grout is naturally porous, a commercial penetrating sealer acts as a microscopic barrier, filling the pores and repelling water, shampoos, and body oils. Wait at least 24 to 48 hours after your deep cleaning session to ensure the grout lines are completely bone dry right down to the substrate. Apply a high-quality penetrating sealer using a small applicator brush or a sponge specifically designed for grout lines. You only need to perform this sealing process once a year, and it drastically reduces the physical effort required for your next deep cleaning session, keeping your bathroom looking pristine with minimal effort.
Next Step: Start small today by picking just one heavily stained corner of your shower. Mix a tiny test batch of baking soda and hydrogen peroxide, apply it to a single grout line, and watch the immediate transformation for yourself.