You can scrub your shower glass for twenty minutes, only to watch a cloudy haze reappear the moment the panels dry. This frustrating white film rarely stems from a lack of elbow grease or physical effort.
Instead, common shower cleaning mistakes bind dissolved tap water minerals and body oils directly to the microscopic pores of your glass panels.
Mastering proper shower door film cleaning protects your bathroom fixtures; it permanently banishes cloudy buildup and restores crystal clarity with minimal physical strain.
1. Letting Hard Water Evaporate on Unprotected Glass
Whenever you step out of the shower and let the doors dry naturally, you invite mineral deposits to bond with the glass. Water evaporates into the air, but the minerals dissolved inside it remain behind on the surface.
According to official USGS water hardness data, roughly 85 percent of American homes receive tap water loaded with high concentrations of calcium and magnesium.
As warm shower droplets evaporate, these dissolved minerals precipitate out of the liquid. They solidify into stubborn calcium carbonate crystals that latch tightly onto the glass face.
Over time, repeated evaporation cycles build microscopic layers of scale; what starts as faint water spots quickly turns into a dense, foggy crust.
You cannot rinse these deposits away with water alone. In fact, spraying more water and letting it air-dry only thickens the mineral blanket covering your glass.
2. Relying on Alkaline Cleaners for Mineral-Based Scum
Many homeowners reach for standard bleach sprays or ammonia-based blue window cleaners when shower doors appear cloudy. Unfortunately, these alkaline formulas target biological matter rather than mineral scale.
Household bleach carries a high pH around 11 to 13; this makes it fantastic for sanitizing, but completely ineffective against mineral deposits.
Dissolving inorganic calcium and magnesium requires an acidic chemistry with a pH between 2 and 4. Acidic solutions react with mineral salts to convert them back into soluble ions.
When you use alkaline sprays, you merely spread body oils across the underlying mineral matrix. Once the glass dries, the stubborn chalky haze emerges completely untouched.
You must pair your cleaning agent to the specific chemistry of the soil. Use surfactants for body oils, but reserve mild acids for mineral hard water stains and soap scum removal.
3. Scrubbing with Abrasive Powders and Stiff Scouring Pads
When cloudiness refuses to budge, you might feel tempted to grab heavy-duty scouring powders or abrasive green scouring pads. Doing so often inflicts permanent, irreversible damage on your shower door.
Standard annealed and tempered shower glass ranks around 5.5 to 6 on the Mohs hardness scale. Many scouring pads contain synthetic aluminum oxide, which registers at a punishing 9 on that same scale.
When you drag a harder mineral across softer glass, you carve microscopic gouges into the pane. These tiny abrasions create a permanent, frosted look known as surface etching.
Etched glass mimics the visual appearance of hard water stains, yet no chemical cleaner can wipe it clean. The scratches permanently scatter light and collect fresh grime even faster.
Always protect your glass panels by choosing non-abrasive tools. Soft microfiber cloths, natural sea sponges, and silicone scrapers clean thoroughly without cutting into the glass.
4. Mixing Incompatible Chemicals in Search of Extra Strength
Frustration often drives people to combine several household cleaners into a single potent cocktail. However, mixing bathroom cleaning products creates serious physical dangers and destroys protective glass finishes.
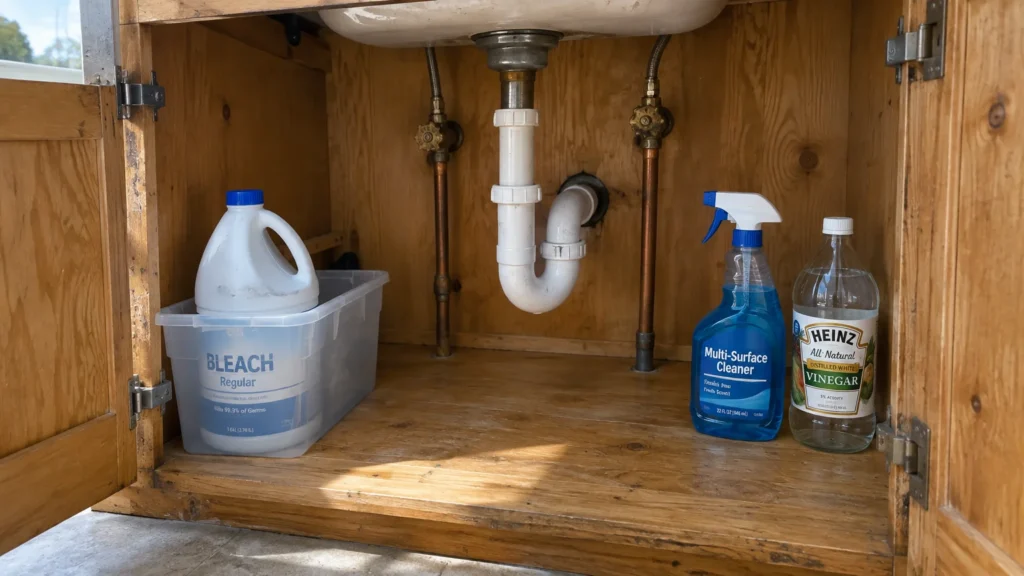
Never combine chlorine bleach with acidic descalers like vinegar, citric acid, or commercial limescale removers. This combination triggers an instant chemical reaction that releases toxic chlorine gas into your bathroom.
The CDC cleaning and disinfection safety protocols warn that inhaling these noxious fumes can cause severe respiratory damage, acute coughing, and chemical burns.
Similarly, mixing bleach with ammonia creates toxic chloramine vapors. Beyond the severe health hazards, these violent reactions strip factory coatings and corrode delicate aluminum hardware surrounding your shower door.
Stick to one dedicated product at a time. Always rinse the glass thoroughly with clean water before introducing a different cleaning solution to the surface.
5. Wiping Away Cleaners Without Adequate Dwell Time
Spraying a cleaner onto cloudy glass and immediately wiping it off produces disappointing results. Chemical solutions need contact time—known in the cleaning industry as dwell time—to break down tough bonds.
Mild acids like citric acid or diluted vinegar require at least ten to fifteen minutes to dissolve compacted calcium carbonate deposits.
If you wipe the solution away within seconds, the acid only loosens the outermost microscopic layer of scale. You then drag that partially dissolved slurry across the glass, drying it into a streaky film.
Because vertical glass doors cause liquid cleaners to run down quickly, the upper portions rarely receive adequate contact time. The solution drains into the track before performing its chemical work.
To combat rapid runoff, use a clinging gel formula or spray your acidic solution directly onto paper towels pressed against the glass. This holds the active ingredients firmly in place while they dissolve the buildup.
6. Neglecting a Protective Hydrophobic Coating
Even after you completely remove mineral buildup, raw glass remains vulnerable to fresh attacks. Although glass appears flawlessly smooth to the naked eye, its surface contains microscopic peaks and valleys.
Untreated silica glass is naturally hydrophilic, meaning water flattens out and clings to the surface rather than rolling off. This pooling water ensures minerals settle directly into the surface pores after every shower.
Applying a hydrophobic glass sealant creates a high contact angle that forces water into tight, round beads. These beads glide effortlessly down the door, carrying bathing residue directly toward the drain.
Many modern homeowners use specialized glass sealants or products certified under the EPA Safer Choice program to shield their surfaces without harsh fumes.
Adding this thin protective shield every few months reduces your weekly cleaning time by up to 80 percent; mineral scale cannot stick to a slick, non-stick surface.
7. Using Dirty Squeegees and Fabric-Softened Microfiber
Your tools can deposit a visible film on your shower door even when your technique is flawless. Old squeegees and improperly laundered microfiber cloths frequently spread secondary residues across clean glass.
Over time, squeegee rubber hardens, nicks, and warps from regular use. A degraded blade skips across the glass, leaving behind moisture tracks that dry into chalky vertical lines.
Laundering your microfiber cloths with commercial fabric softeners or dryer sheets creates an even worse problem. These laundry products coat fabric fibers with a waxy, lubricating layer of synthetic chemicals.
When you wipe clean glass with a softened towel, those wax residues transfer directly onto the panel. The glass appears clean initially, but the greasy film quickly grabs moisture and steam during your next shower.
Wash your cleaning microfiber separately using warm water and a fragrance-free detergent. Never add fabric softeners, and replace your squeegee blade the moment the rubber edge feels stiff or uneven.
Diagnosing Your Shower Door Film: Identification Guide
Identifying the exact type of cloudiness on your glass ensures you choose the correct corrective action. Review this diagnostic comparison to determine what is coating your shower panels.
| Film Type | Visual Appearance | Primary Cause | Simple Diagnostic Test | Correct Treatment |
|---|---|---|---|---|
| Hard Water Scale | Chalky, rough white spots or cloudy rings | Dissolved calcium and magnesium from tap water | Fingernail catches on rough mineral edges | Mild acid descaler (citric acid or warm white vinegar) |
| Soap Scum | Greasy, grayish-yellow dull haze | Animal fats in bar soaps reacting with minerals | Smudges when rubbed firmly with a dry thumb | Alkaline surfactant or degreasing dish soap followed by acid |
| Detergent Film | Rainbow streaks or oily smudges | Fabric softener residues from cleaning rags | Wipes away temporarily when buffed with a clean finger | Rubbing alcohol or warm water with stripping detergent |
| Surface Etching | Uniform frosted haze that never changes | Physical abrasives or prolonged chemical erosion | Glass feels completely smooth, but haze remains under direct light | Cerium oxide glass polish (cannot be cleaned chemically) |
If your glass feels completely smooth but retains a cloudy haze under bright light, you face chemical etching rather than surface grime. Etched glass requires specialized cerium oxide polishing compound rather than standard household cleaners.
Conversely, if your fingernail catches on rough patches, you are dealing with mineral scale or soap scum. Those deposits respond quickly to proper acidic descaling methods.
The Step-by-Step Restoration Protocol for Cloudy Glass
Restoring clear glass requires a two-phase attack that separates greasy organic oils from stubborn inorganic minerals. Follow this sequential protocol to clear accumulated buildup safely.
- Strip Surface Oils with a Mild Degreaser: Wash the entire door using warm water and two drops of grease-cutting liquid dish detergent applied with a soft microfiber cloth. This removes body oils, conditioner residue, and surface dirt that shield mineral deposits from acid cleaners.
- Rinse with Warm Water: Rinse the suds thoroughly with warm water from your handheld showerhead or a clean pitcher. Ensure no soapy lather remains on the glass face or in the bottom metal tracks.
- Apply an Acidic Descaler: Spray a generous layer of warm distilled white vinegar or a 10 percent citric acid solution across the glass. For extreme scale, press paper towels against the wet glass to create a poultice that holds the acid in place.
- Maintain Contact Time: Allow the acidic solution to rest undisturbed for twelve to fifteen minutes. The acid breaks the bonds holding insoluble calcium carbonate crystals together without harming the underlying silica glass.
- Agitate with a Non-Scratch Scrub Pad: Gently massage the surface in small circular patterns using a white, non-scratch scouring sponge or a melamine foam eraser. Avoid excessive pressure; let the softened mineral scale release naturally under the pad.
- Perform a Neutralizing Cold Water Rinse: Thoroughly flood the glass with cold water to wash away all loosened mineral salts and residual acidity. Cold water minimizes immediate post-rinse evaporation while you prepare your drying tools.
- Dry Completely with Clean Microfiber: Immediately wipe down the panels with an unsoftened, lint-free waffle-weave microfiber towel. Inspect the dry surface from an angle against a bright bathroom light to verify that all cloudy patches have disappeared.
- Apply a Hydrophobic Glass Protectant: Buff a liquid silica or silane-based glass repellent evenly across the dry panel using a clean microfiber pad. Once cured, this ultra-slick coating forces water droplets to roll directly into the drain instead of drying on the glass.
Always degrease the glass before applying acidic cleaners. Mineral deposits often hide beneath a protective sheath of body wash oils that repel water-based descalers.
Work in manageable two-foot sections if your shower enclosure covers a wide area. This prevents your descaling solution from drying on the upper glass before you complete agitation.
Use distilled water for your final rinse whenever possible. Rinsing with hard tap water introduces fresh dissolved minerals right back onto the freshly descaled surface.
A Daily 60-Second Routine to Prevent Future Film
Preventing film buildup requires far less physical energy than scrubbing away months of crystallized scale. A simple sixty-second post-shower habit keeps your glass pristine with zero heavy scrubbing.
Keep an ergonomic silicone squeegee hanging inside your shower enclosure at arm’s reach. Start at the top corner of the glass panel and pull downward in smooth, overlapping strokes.
Wipe your squeegee blade with a dry rag after every stroke to prevent water lines. Finish by quickly wiping the bottom metal track with a dedicated waffle-weave microfiber cloth.
This brief routine removes standing water before evaporation can deposit minerals onto the glass. It takes less than one minute, sparing you from exhausting weekend deep-cleaning sessions.
Simple Bathroom Adjustments That Reduce Grime
Small adjustments to your daily bathroom routine can significantly reduce the rate of film accumulation. Switching from traditional bar soap to liquid body wash produces an immediate, dramatic difference.
Traditional bar soaps contain saponified tallow and fatty acids that bind with calcium to produce insoluble talc scum. Liquid body washes utilize synthetic surfactants that rinse cleanly down the drain without leaving sticky residues.
Improving bathroom ventilation also accelerates moisture evacuation and curtails mineral spotting. Leave your exhaust fan running for twenty minutes after showering to draw out humid, mineral-rich air.
Regularly wiping down the chrome hinges and perimeter framing keeps trapped moisture from seeping back onto the glass panels. Clean framing prevents mold growth and preserves your watertight rubber sweep.
Your Practical Next Step
Take five minutes today to inspect your shower door under bright bathroom lighting. Run your fingernail across a cloudy patch near the bottom of the door to test for textured mineral scale.
Once you identify whether you are fighting scale or surface oils, mix a gentle 50/50 warm vinegar solution in a spray bottle. Test it on one small lower corner tonight to watch your glass clarity return.