The Seasonal Swap: A Low-Stress Playbook
The whole point of this system is to make the twice-yearly transition of your wardrobe a smooth and even enjoyable ritual. This is the “Maintain” part of our cycle, where you reap the rewards of your hard work. By following a simple playbook, you can swap your clothes in an afternoon without stress or mess.
Creating Your Seasonal Swap Station
Before you start, set yourself up for success. Designate a large, clean, flat surface as your command center. Your bed, covered with a clean sheet, is a perfect spot. Gather your tools: your stored off-season bins, a lint roller, a fabric steamer or iron, and a donation bag for any last-minute edits.
The Swap-Out Process: A Step-by-Step Guide
1. Retrieve and Unpack: Bring your neatly labeled bins from their storage location to your swap station. Open them up and take a moment to appreciate how fresh everything smells! Remove the clothes for the upcoming season and give them a gentle shake to air them out.
2. Refresh and Revive: After being folded for months, some items might have light creases. You can hang them in a steamy bathroom for an hour, use a handheld steamer, or give them a quick, no-heat fluff in the dryer with a damp cloth to release wrinkles and refresh the fabric.
3. Edit the Outgoing Season: Now, turn to your closet. As you remove the clothes from the season that just ended, do a quick “mini-edit.” As you handle each piece, ask yourself: Did I enjoy wearing this? Is it still in good shape? If you find something you consistently skipped over, now is the time to add it to your donation bag rather than packing it away again.
4. Clean and Prepare for Storage: Following our golden rule, wash or dry-clean every item you’re planning to store. Make sure everything is completely dry.
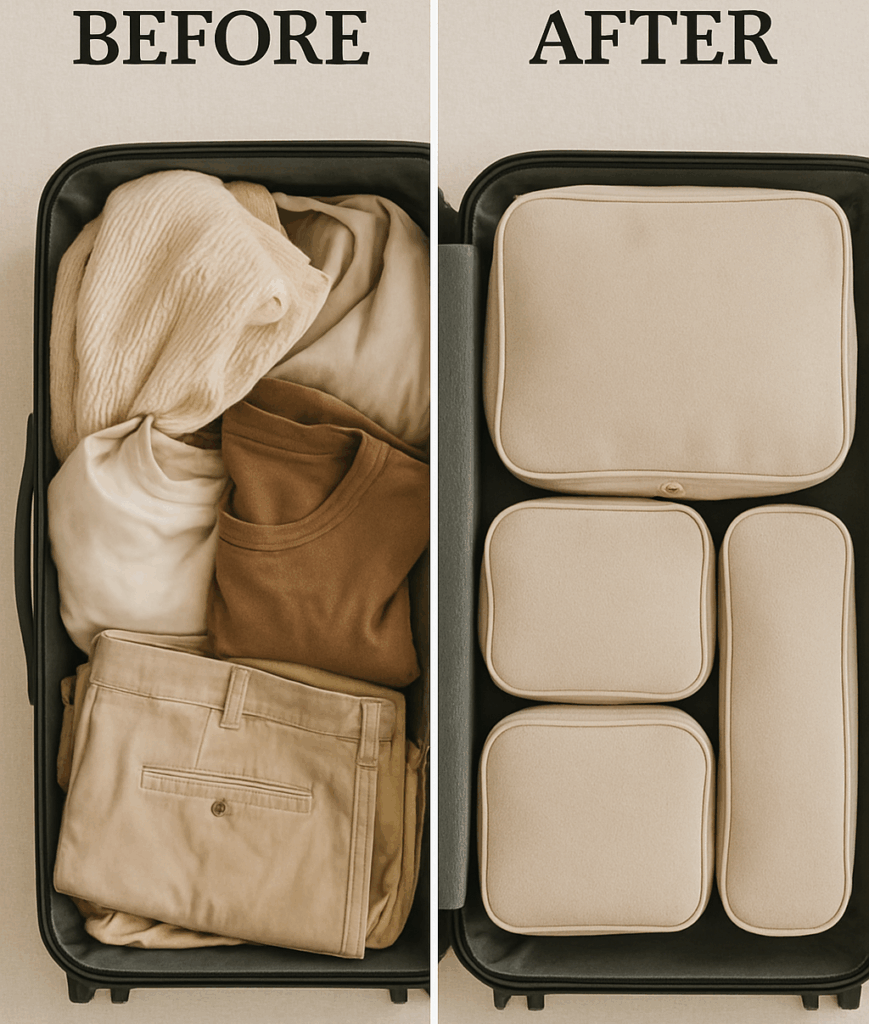
5. Pack and Relabel: Carefully pack the clean, outgoing clothes into the now-empty storage bins. Use the same smart folding and packing techniques. If you’re reusing bins, be sure to update the labels to reflect their new contents.
Worked Mini-Example #2: The Summer-to-Fall Transition
Let’s walk through a real-world swap. It’s the end of summer, and cooler weather is on its way.
Step 1: You retrieve two bins from the top shelf of your guest closet. The labels read: “FALL/WINTER – SWEATERS & KNITS” and “FALL/WINTER – PANTS & LONG SLEEVES.”
Step 2: You unpack your cozy sweaters and flannel shirts onto your bed, letting them air out.
Step 3: You go to your main closet and pull out all your summer items: shorts, sundresses, tank tops, and sandals.
Step 4: You do a quick sort. That one sundress you never wore? It goes in the donate bag. The t-shirt with the small stain that won’t come out? That goes in the textile recycling pile.
Step 5: You launder all the summer “keep” items. While they’re washing and drying, you hang your fall sweaters and pants in your now-spacious closet.
Step 6: Once the summer clothes are bone-dry, you fold them neatly into the empty bins. You put on fresh labels: “SUMMER – SHORTS & TOPS” and “SUMMER – DRESSES & SWIM.”
Step 7: The newly packed summer bins go back up to the guest closet shelf. Your seasonal swap is complete, and your closet is perfectly curated for fall.