You spend hours scrubbing and vacuuming, only to see a fresh layer of gray film settle on your coffee table the very next morning. If your house feels impossibly dusty right after you clean it, your routine is likely working against you. Simple missteps—like reaching for the wrong dusting tool or neglecting the filters hidden in your appliances—actually launch microscopic debris back into the air instead of removing it. Correcting these habits instantly transforms your workload, helping surfaces stay visibly cleaner for weeks. By swapping outdated techniques for smarter, trap-and-remove methods, you reduce allergens, breathe cleaner air, and reclaim your weekends. Stop fighting a losing battle against household dust by eliminating these daily errors.
1. Relying on Dry Feather Dusters and Cotton Rags
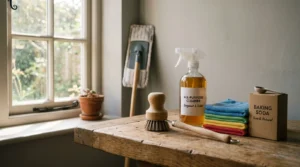
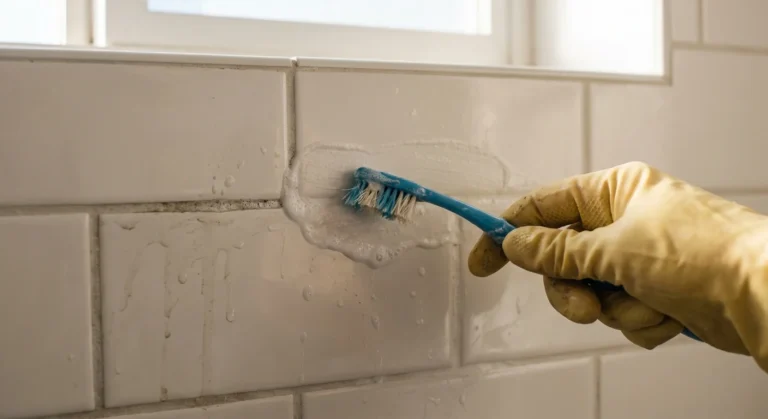
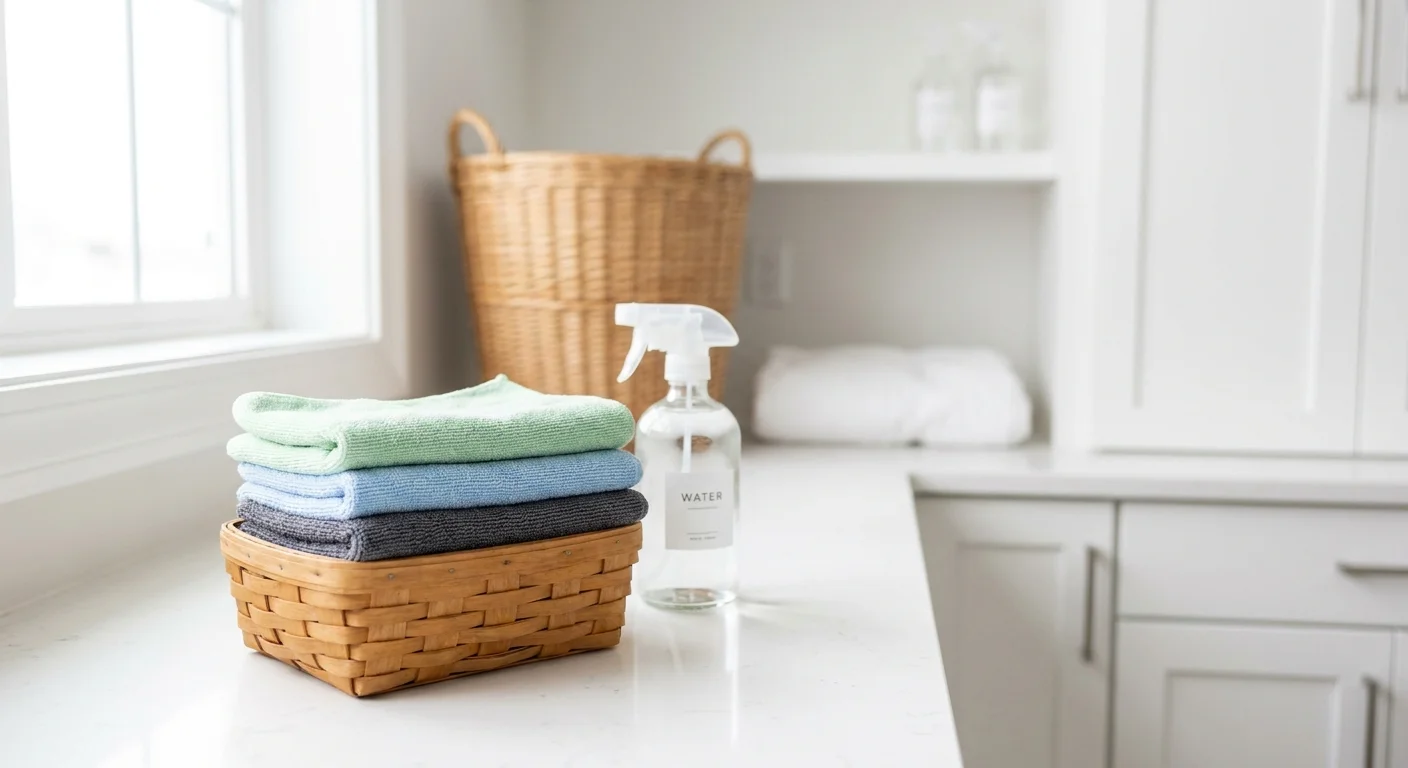
Many people tackle their weekend chores armed with a classic feather duster or an old cotton rag. While sweeping a dry duster over your expansive bookshelves feels incredibly productive, you are mostly just relocating the debris to another corner of the room. Dust consists of dead skin cells, pet dander, fabric fibers, and microscopic outdoor dirt particles. When you vigorously agitate these lightweight particles with a dry tool, they instantly become airborne. They float upward in the draft of your movements and eventually settle right back onto your furniture hours later. Furthermore, dry cotton simply pushes dust into small, messy piles without actually capturing it, while feather dusters flick the debris directly into your breathing zone.
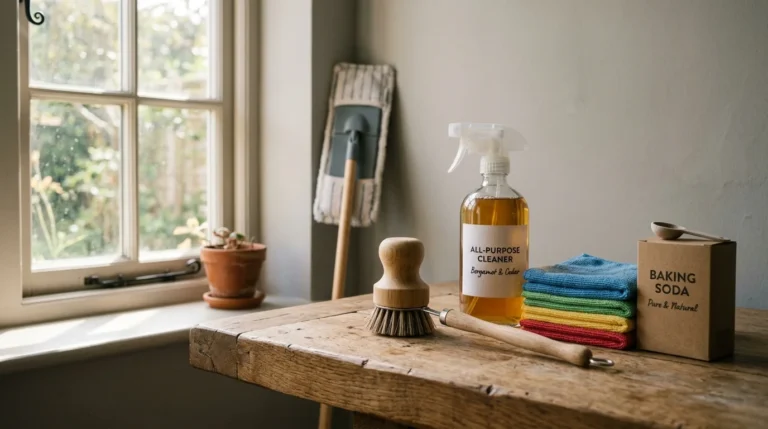
To actually remove dust from your home, you must trap it at the source. The Asthma and Allergy Foundation of America strongly recommends using a damp microfiber cloth for all surface cleaning tasks. Microfiber is uniquely constructed with millions of tiny, split fibers that create a net-like structure. These microscopic hooks physically grab and hold onto dust particles, while the slight dampness prevents anything from floating away into the room.
Follow this exact method to maximize your dusting efficiency:
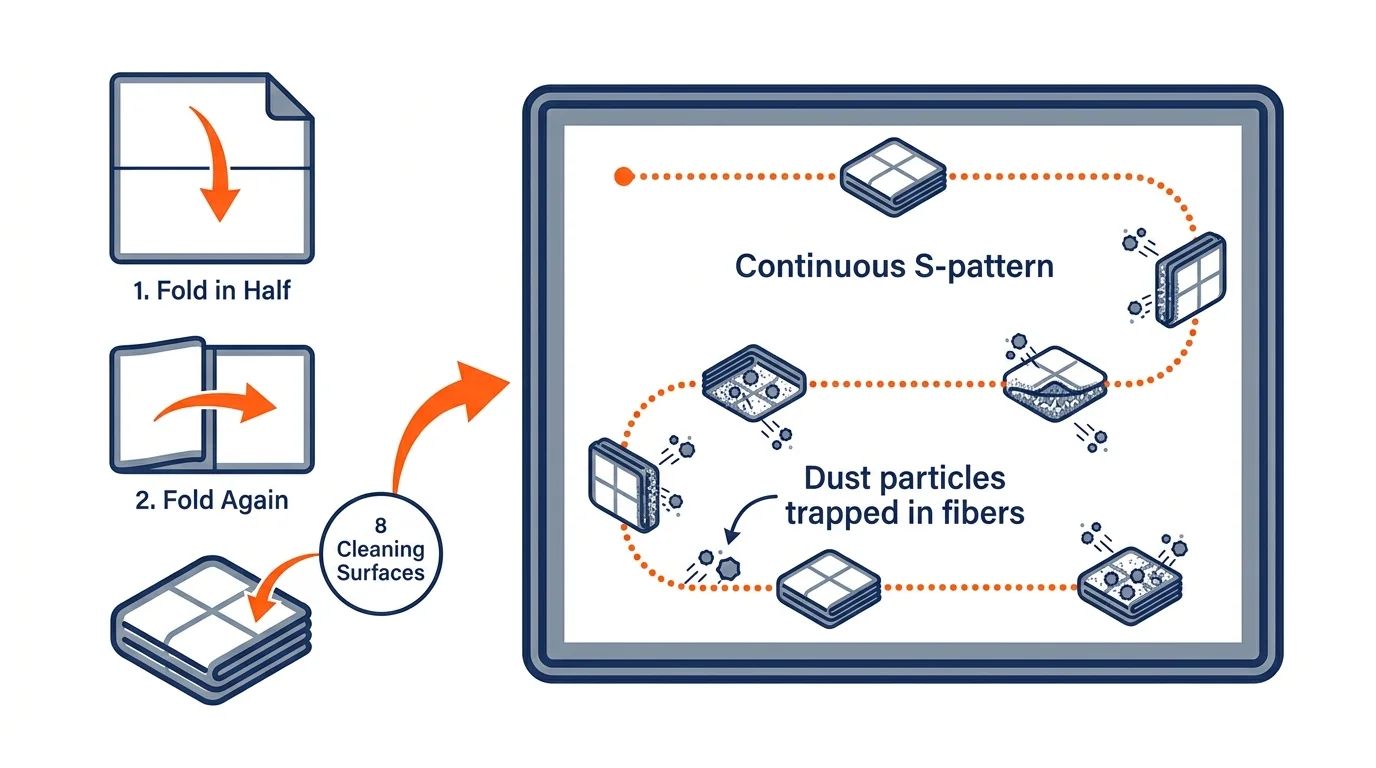
- Fold a clean microfiber cloth in half, then in half again, giving you eight distinct cleaning surfaces.
- Lightly mist the cloth with plain water or a mild all-purpose cleaner; do not soak it so heavily that it drips.
- Wipe the dusty surface in a single, continuous S-pattern to gather debris without pushing it off the edge of the furniture.
- Flip the cloth to a clean, unused section as soon as the current side turns a noticeable shade of gray.
- Toss the heavily soiled cloth directly into the laundry basket and grab a fresh one to avoid smearing the captured dirt.
Using this damp-wiping method ensures the dust leaves your house entirely instead of just moving from the lampshade to the side table.
2. Vacuuming with Clogged Filters or Non-HEPA Machines
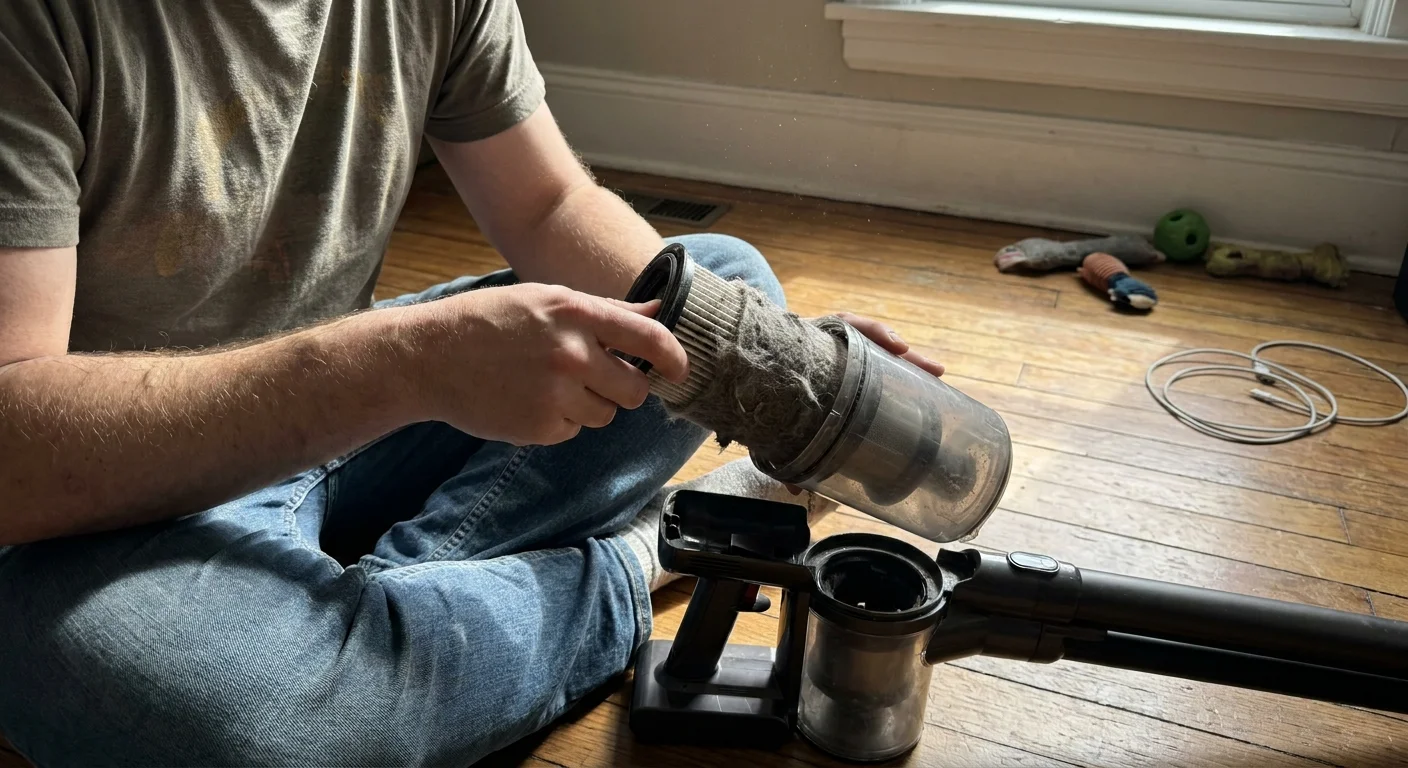
Your vacuum cleaner is explicitly designed to suck up heavy dirt, but it must also exhaust the massive volume of air it pulls in. If your vacuum lacks a proper, sealed filtration system, that exhaust port acts as a high-powered dust cannon, blasting microscopic allergens right back into the living space. Traditional, cheaper vacuums effortlessly capture large crumbs and heavy pet hair, but they easily allow fine particulate matter to pass straight through the collection bag or plastic canister.
If you notice a distinct, earthy, musty smell when you vacuum, or if you see a thick beam of dust particles illuminated in the sunlight behind your machine, your vacuum is making your house dirtier. The optimal solution is upgrading to a completely sealed system equipped with a High-Efficiency Particulate Air filter. According to the U.S. Environmental Protection Agency, true HEPA filters capture an impressive 99.97 percent of airborne particles as small as 0.3 microns. This traps the pet dander, pollen, and fine dust that standard machines leave behind in the deep carpet fibers.
However, even the absolute most expensive HEPA vacuum becomes entirely useless if you neglect its routine maintenance. A severely clogged filter restricts internal airflow, killing the suction power and forcing the internal motor to overheat. Check your vacuum’s pre-motor and post-motor filters monthly. Tap them gently against the inside of an outdoor trash can to dislodge heavy buildup without releasing it into your kitchen. Wash reusable foam filters with warm water and a single drop of dish soap, allowing them to air dry for a full 24 hours before reinstalling them. If your vacuum uses disposable paper HEPA cartridges, replace them every six to twelve months depending on your daily household traffic.
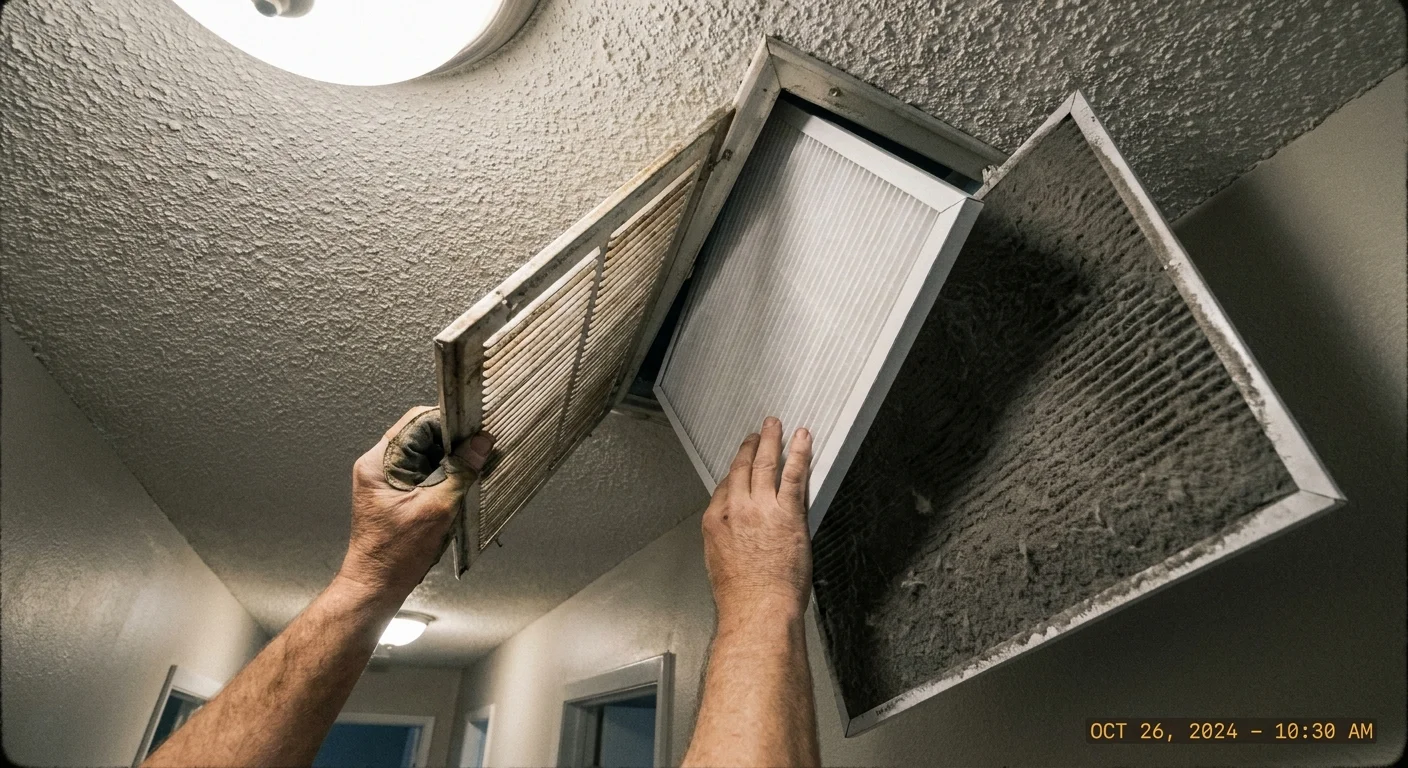
3. Neglecting Your Heating and Cooling Filters
Your home essentially functions like a giant set of mechanical lungs, breathing air in through the large return vents and forcefully pushing it out through the smaller supply registers. The only thing standing between the dust circulating in your rooms and the delicate mechanical parts of your heating and cooling system is your air filter. When homeowners consistently forget to check and change these hidden filters, the entire house suffers the consequences.
A heavily soiled filter restricts the necessary airflow, forcing your blower motor to work substantially harder and drastically increasing your monthly energy bills. More importantly, once the filter reaches its maximum capacity, it can no longer trap new debris. The dust bypasses the dense filter entirely, traveling freely through your expansive ductwork and blowing out over your freshly cleaned floors. The EPA provides clear, authoritative guidance on maintaining optimal indoor air quality, specifically noting that regular HVAC filter replacement is absolutely essential for controlling dangerous airborne particles.
Most standard one-inch fiberglass or pleated filters require a full replacement every 30 to 90 days. If you own shedding pets, live near a busy unpaved road, or prefer to keep your windows open frequently, you should rigorously inspect the filter every single month. Pull the filter out of the housing and hold it directly up to a bright light source. If you cannot see any light shining through the woven material, the filter is completely blocked and must go directly in the trash.
When purchasing replacements, carefully look at the Minimum Efficiency Reporting Value rating printed on the label. A MERV rating between 8 and 11 provides an excellent, safe balance for typical residential homes, efficiently capturing dust mites, pollen, and pet dander without severely restricting the airflow your furnace absolutely needs to operate safely. Keep a permanent marker near your filter stash and write the installation date directly on the cardboard frame; this simple, practical habit removes the guesswork from your maintenance schedule entirely.
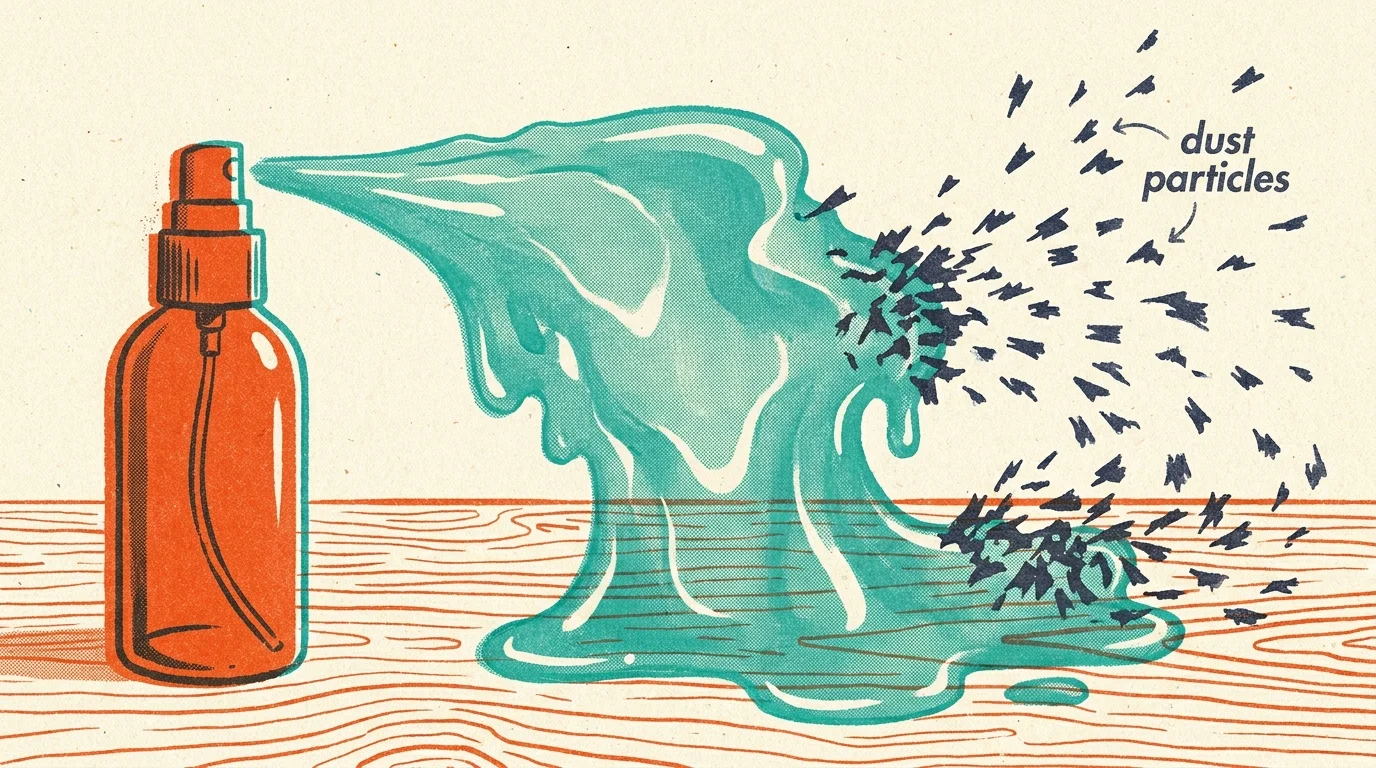
4. Over-Applying Furniture Polish and Chemical Sprays
A glossy, lemon-scented dining table might look perfectly pristine immediately after you polish it, but you are likely setting a massive trap for tomorrow’s dust. Commercial furniture polishes, particularly those dispensed rapidly from aerosol cans, often rely on heavy silicones and cheap oils to create that temporary, superficial shine. While these synthetic ingredients make the wood look hydrated and exceptionally healthy, they actually leave behind a sticky, invisible residue coating on the surface.
This waxy buildup acts exactly like a powerful magnet for all airborne debris. The precise moment a stray pet hair or tiny speck of dirt lands on a heavily polished dresser, it sticks fast. Over time, you end up with a dark, gummy layer of persistent grime that regular dry dusting simply cannot remove. You then instinctively spray even more polish to clean the grime, effectively trapping the old dust under a fresh, wet layer of synthetic oil.
Break this vicious cycle immediately by stepping away from the heavy chemical sprays. Modern finished wood furniture is deeply sealed with durable polyurethane or heavy lacquer; the wood itself cannot actually absorb the oils in your polish because the clear coat completely blocks it. A slightly damp microfiber cloth provides all the necessary cleaning power you need to easily lift away oily fingerprints and loose dust without leaving a tacky film behind.
If you encounter particularly stubborn, sticky spots from spilled drinks or dropped food, mix a single drop of mild liquid dish soap into a small bowl of warm water. Dip your cloth, wring it out forcefully until it is nearly completely dry, and wipe the affected area clean. Follow up immediately with a dry cloth to prevent any standing moisture from damaging the clear finish over time. Reserve rich conditioning oils strictly for genuine antique, unfinished, or specialty oil-rubbed wood pieces, and apply them incredibly sparingly just once or twice a year.
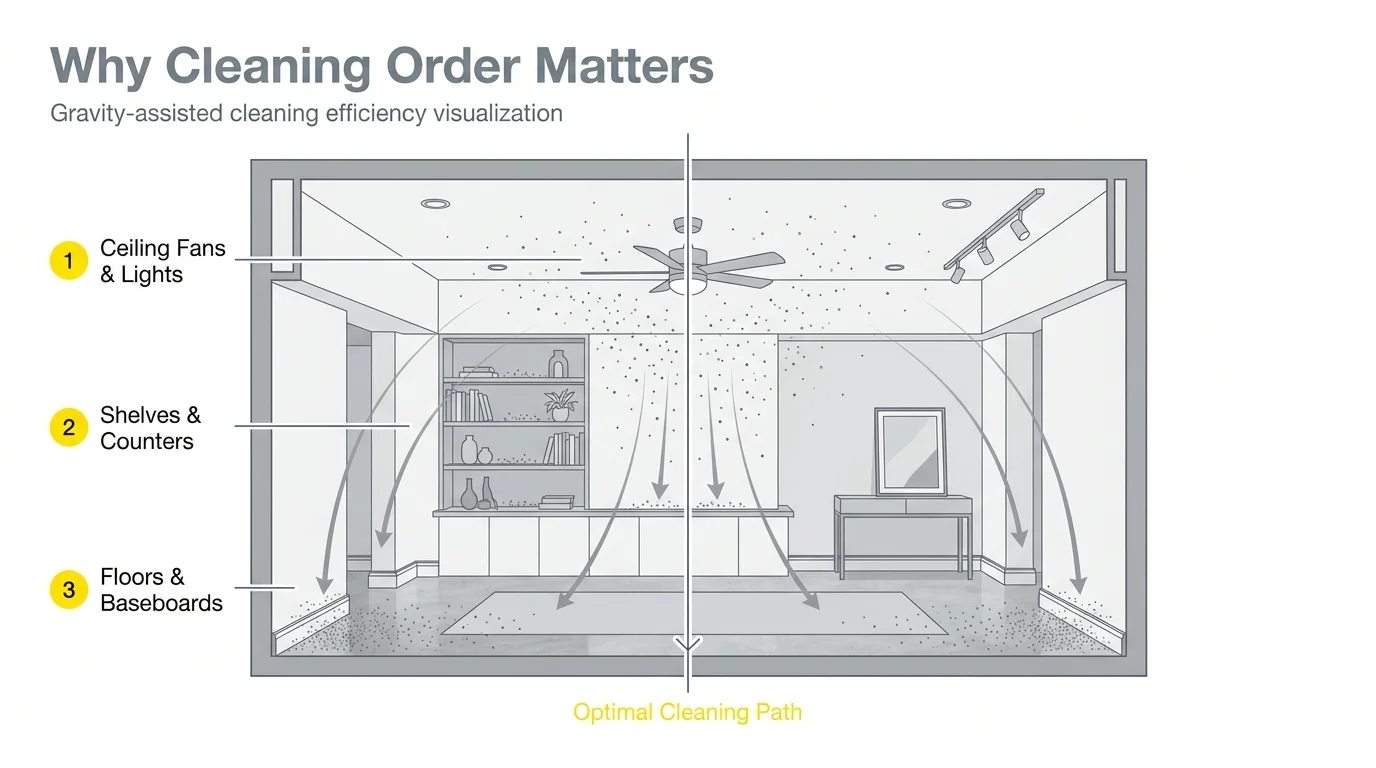
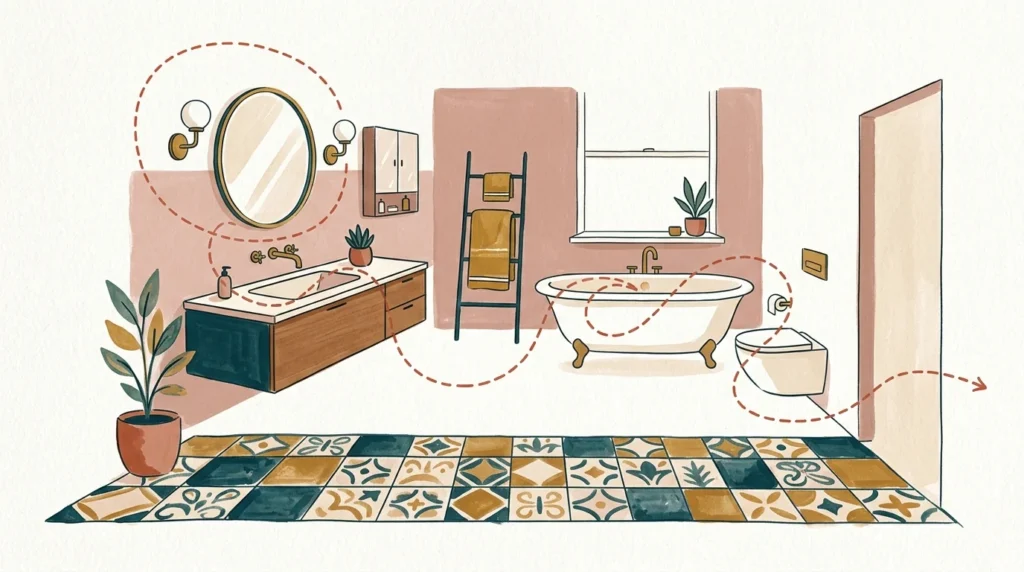
5. Cleaning Your Rooms from the Bottom to the Top
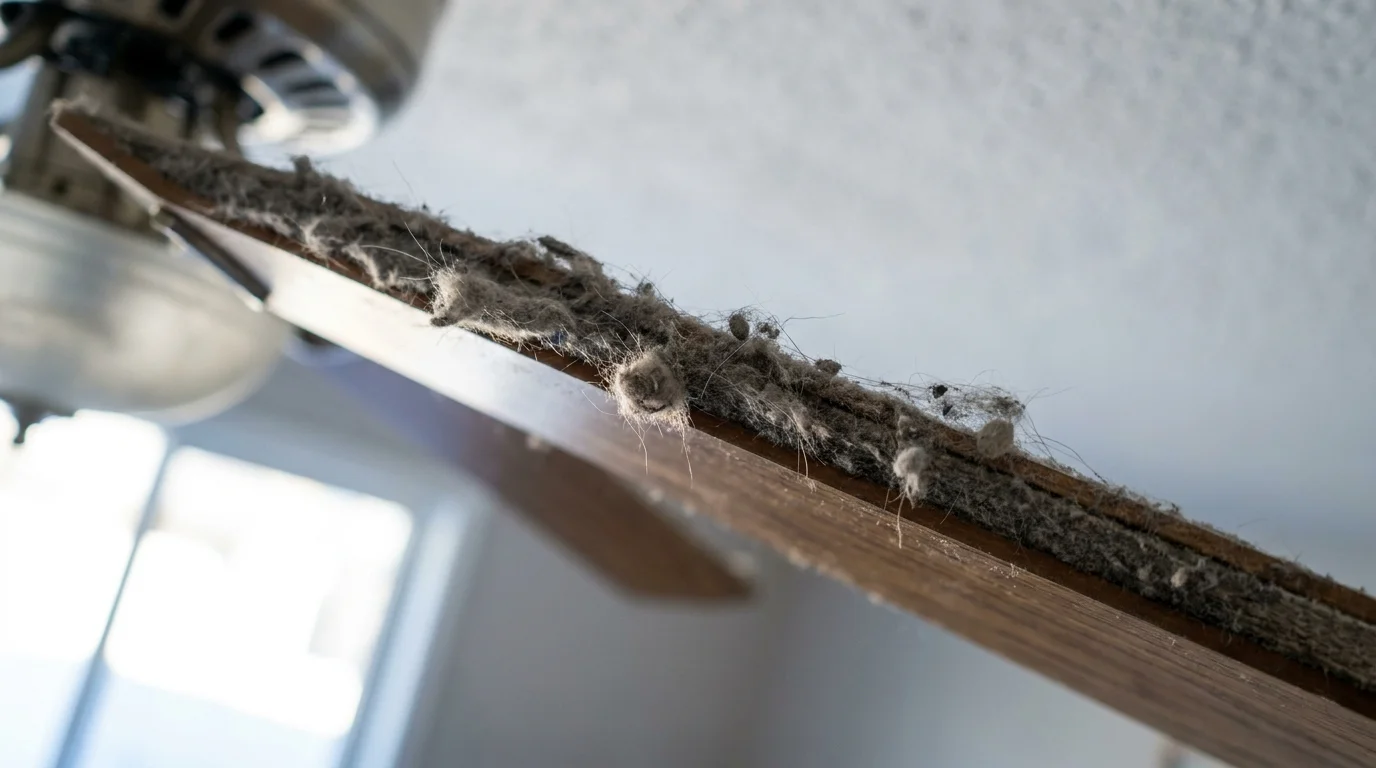
Cleaning a room requires smart strategy and ample patience. One of the most frustrating errors you can possibly make is working against the natural, inevitable pull of gravity. If you enthusiastically start your weekend chores by vacuuming the heavy area rugs and vigorously mopping the hardwood floors, you have just ruined your own hard work. The very moment you move on to wiping the high ceiling fan blades or dusting the tops of your tall bookshelves, heavy debris cascades directly downward, landing aggressively on your spotless floors.
To keep your house vastly cleaner for longer periods, you must fully embrace the top-to-bottom, left-to-right rule. By starting your routine at the absolute highest point in the room, you guarantee that any falling debris predictably lands on uncleaned surfaces. Moving systematically from left to right ensures you never accidentally smear fresh dirt over an area you just painstakingly wiped down.
| Cleaning Phase | Target Areas | Tools Required |
|---|---|---|
| Phase 1: High Level | Ceiling fans, crown molding, light fixtures, tops of kitchen cabinets, and high shelves | Extendable microfiber duster, sturdy step stool |
| Phase 2: Mid Level | Window blinds, picture frames, tabletops, dressers, and electronic screens | Damp microfiber cloths, glass cleaner, small detail brush |
| Phase 3: Upholstery | Sofas, armchairs, throw pillows, and heavy drapery | Vacuum cleaner with a clean upholstery brush attachment |
| Phase 4: Low Level | Baseboards, chair rails, lower cabinet doors, and floor vents | Damp cloths, detail brush |
| Phase 5: Floors | Hardwood floors, area rugs, carpeting, and under furniture | HEPA vacuum, damp mop |
Following this logical, systematic sequence guarantees you only have to physically handle the dust once. By the time you finally reach the floor, you vacuum up the standard daily floor dirt alongside absolutely everything that fell from the upper levels of the room during your upper-level chores.

6. Allowing Indoor Humidity to Fluctuate Wildly
Dust is not just an annoying aesthetic issue; it is a serious biological one. A incredibly significant portion of standard household dust actually consists of dust mites and their microscopic waste products. These invisible pests actively feed on the dead skin cells constantly shed by you and your pets. While you cannot explicitly see them marching across your pillows, their heavy presence heavily dictates how dusty your home feels and how severely your respiratory allergies flare up throughout the year.
Dust mites absolutely thrive in warm, damp environments. According to experts at the Asthma and Allergy Foundation of America, dust mites absorb vital moisture directly from the air and completely flourish when the indoor relative humidity steadily climbs above 50 percent. If your home regularly feels muggy during the summer, or if you consistently leave your bathroom doors wide open after taking long, steamy showers, you are actively cultivating a massive, thriving population of dust mites. Their shed exoskeletons and dense waste products rapidly accumulate, layering your soft furniture in a deeply irritating, gray film.
Conversely, bone-dry winter air creates a entirely different, equally frustrating set of problems. Extremely low humidity aggressively increases the static electricity levels in your home. This intense static charge causes airborne dust particles to cling stubbornly to vertical surfaces, television screens, and painted baseboards, making them incredibly difficult to wipe away with standard tools.
To maintain a truly clean home, carefully manage your indoor climate. Purchase an inexpensive digital hygrometer to monitor your indoor moisture levels accurately around the clock. Run bathroom exhaust fans for at least thirty full minutes after showering, and utilize your stove’s overhead range hood when boiling large pots of water. During humid, sticky summer months, deploy a standalone dehumidifier in notoriously damp spaces like finished basements. During the excessively dry winter season, use a humidifier sparingly to intentionally keep the air right around 40 to 50 percent humidity—the precise sweet spot where static cling is dramatically minimized but dust mites cannot survive.
7. Ignoring the Hidden Dust Traps
You can meticulously wipe down your hard surfaces daily, but if you consistently ignore the soft materials in your home, the dust will predictably always return. Textiles act as massive, highly absorbent sponges for floating particulate matter. Every single time you sit heavily on the living room sofa, flop backward onto your mattress, or forcefully pull the living room curtains closed, you compress these fabrics, puffing a thick cloud of deeply trapped dust back into the ambient air.
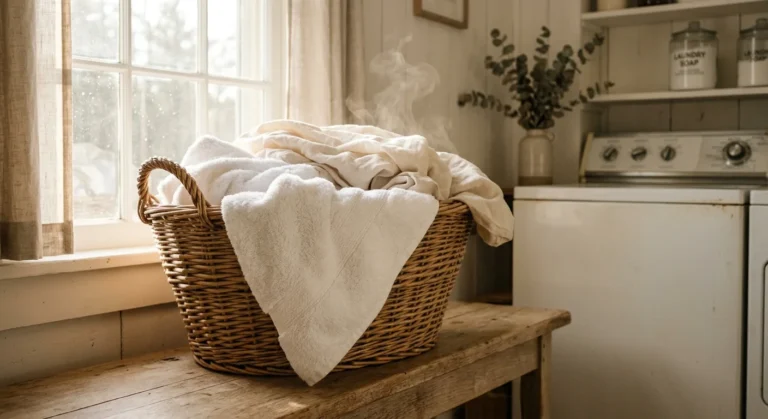
Your bedroom bedding is the absolute worst offender in the house. Since you spend roughly a third of your life in bed shedding microscopic skin cells and hair, your mattress and pillows harbor immense, staggering amounts of debris. If you only strip and wash your sheets every few weeks, the accumulated debris transfers quickly to your floors and nearby dressers. Strip your bed weekly and vigorously wash the sheets, pillowcases, and duvet covers in hot water to completely kill dust mites and thoroughly flush away the dirt. Vacuum your bare mattress once a month using a clean upholstery attachment.
Curtains and fabric window blinds also quietly collect floating dust day after day. Opt for simple, machine-washable window treatments, and take them down for a thorough laundering every single season. For heavy drapes that cannot easily fit in a standard residential washing machine, use your vacuum’s soft brush attachment to systematically sweep them from top to bottom every other week.
Finally, do not carelessly overlook your beloved pets. Dogs and cats constantly drop fine dander and relentlessly track outdoor dirt inside the house. If you vigorously brush your dog in the middle of the living room, you are instantly blanketing the entire space in a fine layer of dander. Move all pet grooming sessions entirely outdoors or into a sweeping garage, and bathe your pets regularly to definitively stop the dust before it ever crosses your threshold.
Take Action Today
A perpetually dusty home is rarely the direct result of a lazy lack of effort; it usually stems entirely from using the wrong tools or executing your cleaning tasks completely out of order. Changing just a few minor, practical habits dramatically reduces the overall volume of stubborn allergens in your air and dependably keeps your hard surfaces looking freshly polished for much longer stretches of time.
Your immediate practical next step is to grab your current vacuum cleaner, open the main canister or bag housing, and deeply inspect the internal filters. Tap out all the loose dirt into an outdoor trash bin, hand-wash any reusable foam pads with mild soap, and order fresh, high-quality replacements for any completely worn-out pleated filters so your machine is finally ready to actively trap dust the very next time you turn it on.