In the long run, you need to learn how to clean your microwave. When you do it properly, you might avoid odors and stuck-on food that could contaminate the food you heat up.
Besides, your microwave will work better, and it will be safer to use it. The buildup from various spills and splatters could ultimately lead to decreased efficiency or even void your warranty.
In some cases, it might even cause a fire. Luckily, cleaning a microwave and keeping it sparkling is easier than you think. You just need to know the right order! Follow these tips for cleaning it inside and out, including the microwave filter!
How Often Should You Clean Your Microwave?
You should try to clean your microwave every other month, just to make sure you clear out all the living bacteria inside of it. When you clean it, wipe down its exterior as well as the kitchen countertops.
You know how it is with sauces, lemons, and smoothies—you can never know where the splashes go! Generally, microwaves have a lifespan of 5 to 10 years, but it solely depends on the quality of care. Regular cleaning might help your microwave stay in the best working condition.
Here’s what you need to clean your microwave:
- spray bottle
- a safe bowl
- distilled white vinegar (lemon juice)
- essential oil
- toothpick or small wooden spoon
- potholders/oven mitts
- Microfiber cloth and scrubbing brush
- grease-cutting dish soap
- a good sponge
- lint-free dish towel
- all-purpose kitchen cleaner
Here’s what you’ll need to clean the filter:
- Large bowl
- Grease-cutting dish soap
- baking soda
- sponge
How do you clean your nuke using only vinegar?
If you’re feeling inspired to roll up those sleeves and dive into deep-cleaning it, here’s what you need to do:
Step 1: Spray stains and spills
If you try to heavily spray the grease spots, you will notice that it is actually helpful. Sometimes, stubborn stains and spills require stubborn action, and it’s similar to how you spot-clean garments before tossing them into the washing machine.
Moreover, we advise you to combine equal parts white vinegar and water in a spray bottle before spraying freely.
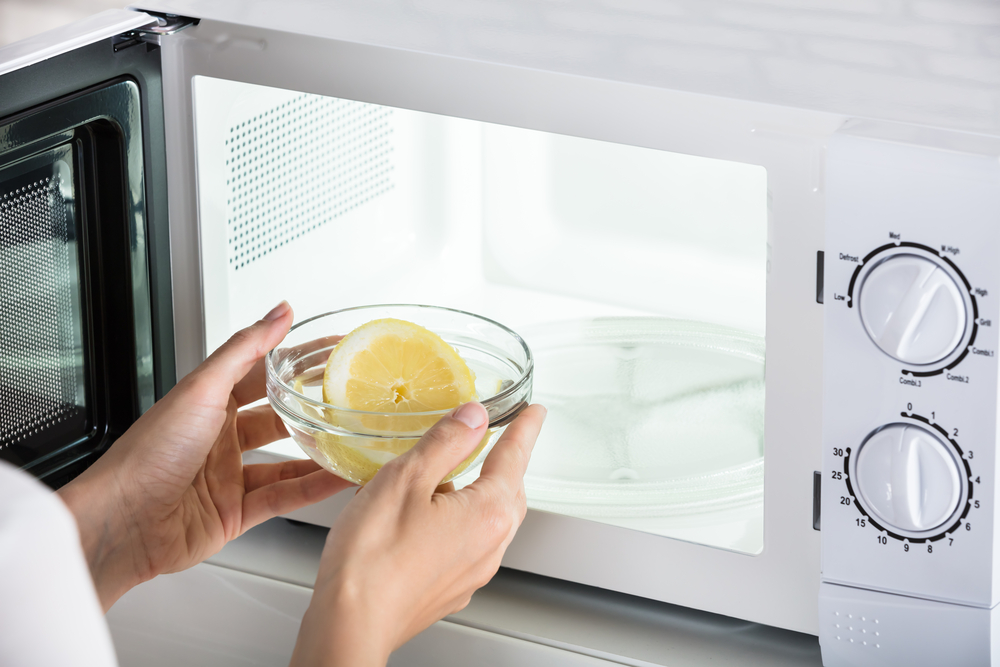
Step 2: Create a vinegar-cleaning mixture.
You can fill a microwave-safe bowl with two cups of water and add two tablespoons of vinegar. Alternatively, you can add one or two drops of essential oil for a more intense aromatherapy moment.
However, if you don’t have vinegar on hand, you could swap it with freshly squeezed lemon juice instead.
Extra tip: You can add a small wooden spoon to the bowl or even place a toothpick in the mixture. It will allow bubbles to form against the wood as the water slowly heats up, which will prevent the water from getting too heated and “exploding” into a boil.
Step 3: Put the mixture in the nuke.
After you’re done with the mixture, place it in the microwave and close the door. Set the microwave for three minutes on high. Then, wait 15 minutes to let everything set.
Don’t open the door. The waiting time will allow the nuke to get extra steamy, which will help break down stubborn stuck-on stains.
Step 4: Remove the mixture and turntable.
Use some potholders or an oven mitt to make sure you don’t burn your hands, and carefully remove the bowl from the microwave and set it aside for a couple of minutes. Don’t rush into pouring it out just yet. Also, make sure you remove the turntable tray to wash it in the sink.
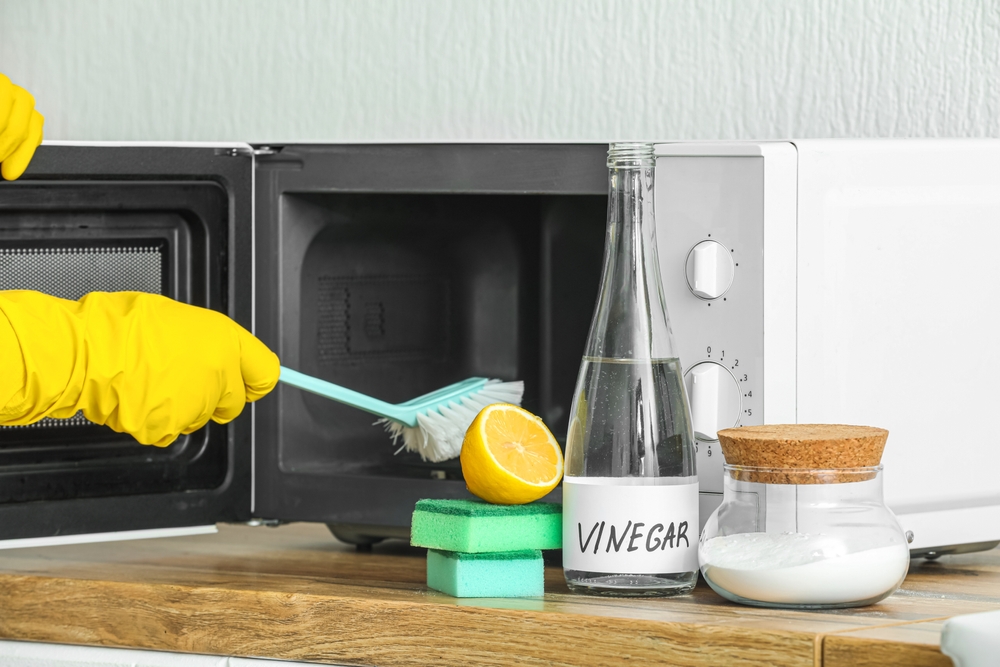
Step 5: Wipe the interior
Take a clean microfiber cloth and dampen it with the vinegar mixture. It doesn’t smell too good, right? Wipe down the interior of your microwave.
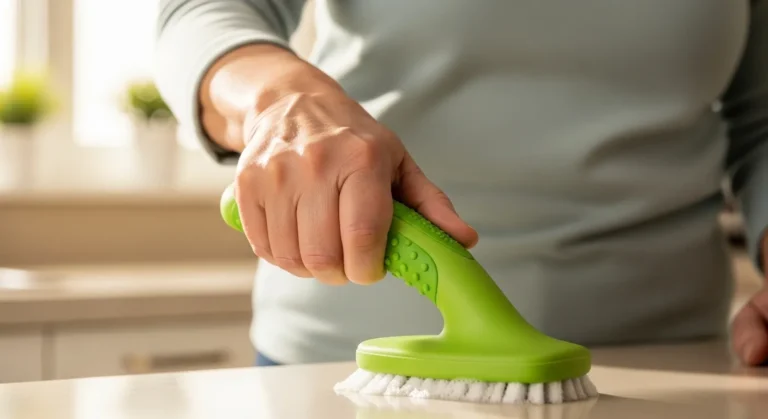
I know it might be unpleasant, but trust me, it’s working. You will soon see how most of the mess will slide off, but if you still see some stubborn spots or even hard-to-reach crevices, you might want to use a non-scratch scrubbing tool.
Step 6: Wash the turntable
Take the microwave turntable and wash it in your kitchen sink with dish soap, hot water, and a clean sponge. Then, dry it with a clean dish towel and place it back into the now-clean nuke.
Step 7: Clean the exterior.
Spray the all-purpose cleaner onto a fresh, clean cloth, and wipe down the exterior. Whatever you do, never spray directly onto the control panel.
Moreover, for stainless steel appliances, dip the cloth in water and some dishwashing liquid, wring it out, then wipe with the grain. Make sure you don’t forget to wipe the control panel, sides, top, and bottom.
How to clean the filters with dish soap
Your countertop microwaves might not have filters, but above-the-range microwaves will exhaust the fans as well. To be more specific, we’re talking about the vent you turn on when cooking on the stove to help with the smoke and the grease.
Microwave filters will have to be cleaned every couple of weeks. I mean, it depends on how often you use the microwave. If you only use it for popcorn, you could just clean it every six weeks.
Moreover, it’s worth mentioning that a dirty filter could also be a fire hazard, and it might prevent the microwave from working as it’s supposed to. Luckily, cleaning the microwave filter is super easy, and it doesn’t require any tools.
Step 1: Remove the filter.
If you’ve never done this before, I should start by saying that the filter is located underneath an above-the-range microwave, which means that it should pop out easily. Just remove it gently with your hands.
Step 2: Soak it
Place the filter in a bigger bowl of hot, sudsy water. If the filter is extremely greasy, just add 1/4 cup of baking soda to the mixture. Then, let the filter soak for 15 minutes to help break down the grease.
Step 3: Scrub off the grease.
Then, remove the filter from the hot water and brush it in the sink with a clean sponge. The grease should easily come off.
Step 4: Rinse and dry
Then, rinse the filter thoroughly and let it dry completely before you replace it in the microwave.
How do you keep the it clean for longer?
I know that having a sparkling microwave might ultimately feel like a significant accomplishment. You can keep it clean longer if you do these things:
Cover the food.
Prevention is very important. Before you turn the it on, you might want to place a microwave-safe food cover or paper towel over any food that might splatter.
Clean up the spills right away.
Fresh spills are way easier to clean up, especially compared to baked-on messes. When the spills occur, you can easily remove them with warm soap and water, or even with a cleaner formulated specifically for these types of ovens.
Use microwave-safe dishes.
You should always aim to use microwave-safe containers. Some materials can easily melt or spark, which might lead to bigger messes or even fires. The dish should have “microwave-safe” on the bottom, and it also shouldn’t get too hot when it’s used in the microwave.
Follow cooking times.
Probably one of the most common causes of microwave messes is overcooking your food. To prevent this, you need to follow the recommended cooking times. Lowering the power setting might also be recommended.
Clean it routinely.
Besides on-the-spot wiping and cleaning, you should try to make time for deep cleaning your microwave at least once a month.
If you found this article useful, we also recommend reading: 8 Household Items NOT to Clean With Baking Soda