
Phase 2: The Kitchen – The Heart of the Home
A well-organized kitchen makes meal preparation easier, reduces food waste, and turns a daily chore into a more pleasant experience. We will approach this vital room in three parts: the countertops, the cabinets and pantry, and the infamous “junk drawer.” Our goal is efficiency and accessibility.
Countertops and High-Use Zones
Kitchen counters are for preparation, not permanent storage. The more clear counter space you have, the easier it is to cook and clean. Identify the items you use every single day—the coffee maker, the toaster, a knife block. These can earn a spot on the counter. Everything else should have a home inside a cabinet or drawer.
Relocate small appliances you use weekly (like a blender) to an easily accessible cabinet. For items used monthly or less (like a stand mixer or waffle iron), find a home in a lower cabinet or the pantry. This decluttering step immediately makes the kitchen feel larger and more functional.
Cabinets and Pantry: The “First-Expiring, First-Out” System
The key to organized food storage is visibility. You can’t use what you can’t see. This is where we apply smart home organization techniques to prevent waste and save money.
The Action Plan:
1. One Shelf at a Time: Don’t empty the entire pantry at once. Start with a single shelf. Take everything off, wipe it down, and check expiration dates. Dispose of expired food properly.
2. Group Like with Like: As you put items back, create categories. All baking supplies go together. Canned goods, pastas and grains, snacks, and oils and vinegars should each have their own designated area.
3. Implement FEFO: This stands for “First-Expiring, First-Out.” It’s a system used in grocery stores that works perfectly at home. When you buy a new can of tomatoes, place it at the back of the shelf and pull the older cans forward. This ensures you use up food before it expires.
4. Consider Decanting: For dry goods like flour, sugar, and pasta, “decanting”—or moving them from their original packaging into clear, airtight containers—can be a great strategy. It keeps food fresher, protects against pests, and allows you to see at a glance how much you have left. Measure your shelf height and depth before buying. Standard 6-inch by 6-inch square containers often stack very efficiently.
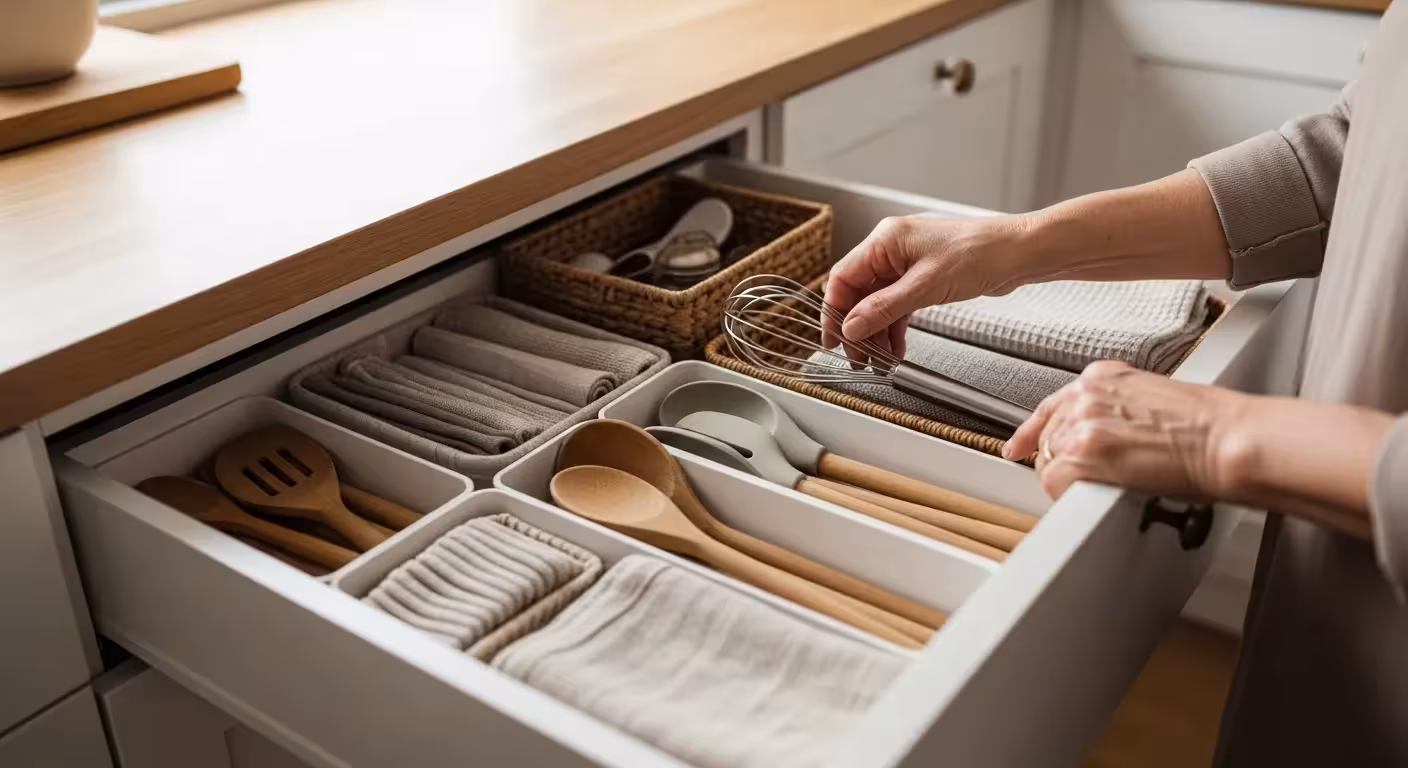
The Junk Drawer Transformed
Every home has one, but it doesn’t have to be a chaotic mess. A “utility drawer” is a far more useful concept. This is the perfect place for a micro-project that delivers a big win.
Worked Example: The Utility Drawer Makeover
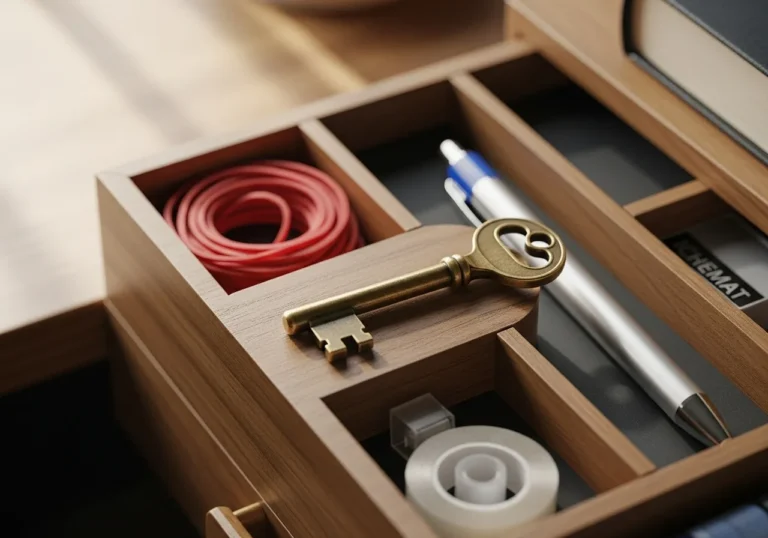
1. Empty and Edit: Dump the entire contents of the drawer onto a towel. You’ll likely find old rubber bands, dried-up pens, and mystery keys. Use your 4-pile method ruthlessly.
2. Measure and Contain: Measure the interior dimensions of your drawer (e.g., 15 inches wide, 20 inches deep, 3 inches high). Purchase an adjustable drawer divider or a set of small, modular trays. Look for a kit that has a mix of sizes, like 3×3-inch, 3×6-inch, and 6×9-inch trays.
3. Assign Homes: Arrange the trays within the drawer and give each one a specific job. A 3×3-inch tray is perfect for paper clips and stamps. A 3×6-inch tray can hold pens and a small notepad. A 6×9-inch tray can house scissors, tape, and a small flashlight. By giving every item a specific, contained home, the drawer stays organized.


12 Responses
I wish y’all had a free app I could put on my tablet to help me with the decluttering and cleaning up my home. I am a senior sometimes frustrated with the “ move something from one place to another place” just to get that one area cleaned
Moving things from one place to another – I do that to.
I am also a senior.. that seems to be the problem, doesn’t it? We all need to declutter BUT most have a fixed income and can’t afford the subscription to find out the best way to achieve this. Its a catch 22!
So true
The problem is, people like to collect “stuff”, thinking they will need it someday. It costs money to hang on to things; the storage cost, the handling cost over and over again. Now where did I put that? If I can’t find it, I’ll just have to buy it again! Oh, and then there’s that item I bought, but now that I want to use it, it has aged too much to be useful. What a waste! A waste of my efforts!!!
You know all those “trinkets” you bought because they are cute? Now, how much time does it take you to dust them off? Who has that kind of time?
It costs to throw things out. Spend less up front. You’ll be glad you did!
Part of my problem is EVERYTHING has a cost. If we have a strategy and we want to really help, why is there usually a subscription fee? Does subscribing and have to pay make us more accountable?
Very informative and inspiring!
Continue for more topics like :
How to handle a person who declutters your things/ get rid of things w/o permission!?
Your come-on is very enticing (if I can use that word). Promise of not sharing or distributing one’s email address; does anyone really abide by that?
I might have more meaningful comments AFTER your recommended process.
I am interested in any advice!!
Help decluttering
I downsized 10 years ago. My method was to have a friend with me. I gave 10 seconds to each item I handled – keep or discard. The friends role was not to allow me to dither or say I might need this sometime. Once the decision was made I moved on. I did keep things that I thought were important to me but now 10 years I am going through the process again. If I didn’t use it or touch it in those years out it goes. Lots of charity stores are happy to take my discards. My garbage is someone’s treasure. However, I feel having someone to keep me on track is essential.
I agree …. think that when we ‘purge’ things, especially us seniors, we need another person to work with us…and help us pack the ‘giveaway stuff’ (for me mainly clothes and help with decisions to either “keep or get rid of””..)…while we move on to the next item. I also think that for some of us seniors, as we get older, we get shorter…and don’t know about other seniors…but alterations..are too expensive!! Good luck to the ‘PURGERS’…”THAT’S A GOOD THING!”